Content Index
- What is a REST API?
- Server and Client
- What a REST API Can Do
- REST and its Rules
- HTTP and Methods
- APIs in General
- Status Codes (HTTP Status Codes)
- What exactly is JSON?
- API Installation
- Creating the API Controller
- Controllers and routes
- Explanation of the above code
- Handle exceptions
- How does this flow work?
- Implement custom methods
- Get All
- Consume by slug
- When to UNIFY Endpoints in Your REST API? (Real Optimization)
- Problem Identification: Multiple Redundant Requests
- Golden Rule for Endpoint Unification
- State Management and Initial Load Strategies
- Considerations for Version Control and Mobile Clients
- Strategies for Protecting a REST API in Laravel with HMAC Digital Signature and Timestamps
- Protection in Web Environments Using CORS
- Protection for Mobile Applications: HMAC and Timestamps
- 1. Theoretical Foundations: HMAC, Integrity, and Replay Attacks
- The Signing and Verification Flow
- HMAC Authentication Algorithm Flow
- 2. Creating the Validation Middleware in Laravel
- Step 1: Create the Middleware Class
- Step 2: Middleware Class Code
- 3. Configuration and Middleware Registration
- Registering Middleware in Laravel 11 / 12
- 4. Route Protection in routes/api.php
- 5. Client Implementation (Flutter / Dart)
- Step 1: Installing Dependencies
- Step 2: HMAC Signature Generation in Dart
- 6. Best Practices in Mobile Client Development
- 7. Additional Security Best Practices
- Conclusion
- Implementation of the Generator Service in Laravel: ClientFingerprintService
- Native Integration with Laravel Sanctum Without Modifying Database Schemas
- Modifying the Core Token Generator (Laravel Helper)
- Verification Middleware: VerifyClientFingerprint
- Web Client: Axios Centralization and Interceptors in Vue 3
- Mobile Client: Centralized Interceptor and Alerts in Flutter (Dart)
- Implementation of the Api Class and UI Handling with Global NavigatorKey
- Automated Testing and Validation with Pest PHP
- Conclusion
- Implementation of the Generator Service in Laravel: ClientFingerprintService
- Native Integration with Laravel Sanctum Without Modifying Database Schemas
- Modifying the Core Token Generator (Laravel Helper)
- Verification Middleware: VerifyClientFingerprint
- Web Client: Axios Centralization and Interceptors in Vue 3
- Mobile Client: Centralized Interceptor and Alerts in Flutter (Dart)
- Implementation of the Api Class and UI Handling with Global NavigatorKey
- Automated Testing and Validation with Pest PHP
- Conclusion
- Rate Limiting and Summary of Protection and Optimization Strategies for REST APIs
- What is Rate Limiting?
- Implementing Rate Limiting in Laravel
- Analyzing the Request Limit
- Specific Protection by Resource Type
- Strategy Summary
- Route Modularization for Middleware Application
- CORS Configuration and Token Expiration
- Cross-Origin Resource Sharing (CORS)
- JSON Web Token Expiration (JWT / Sanctum)
- Difference Between Application Rate Limiting and Server-Level Protection
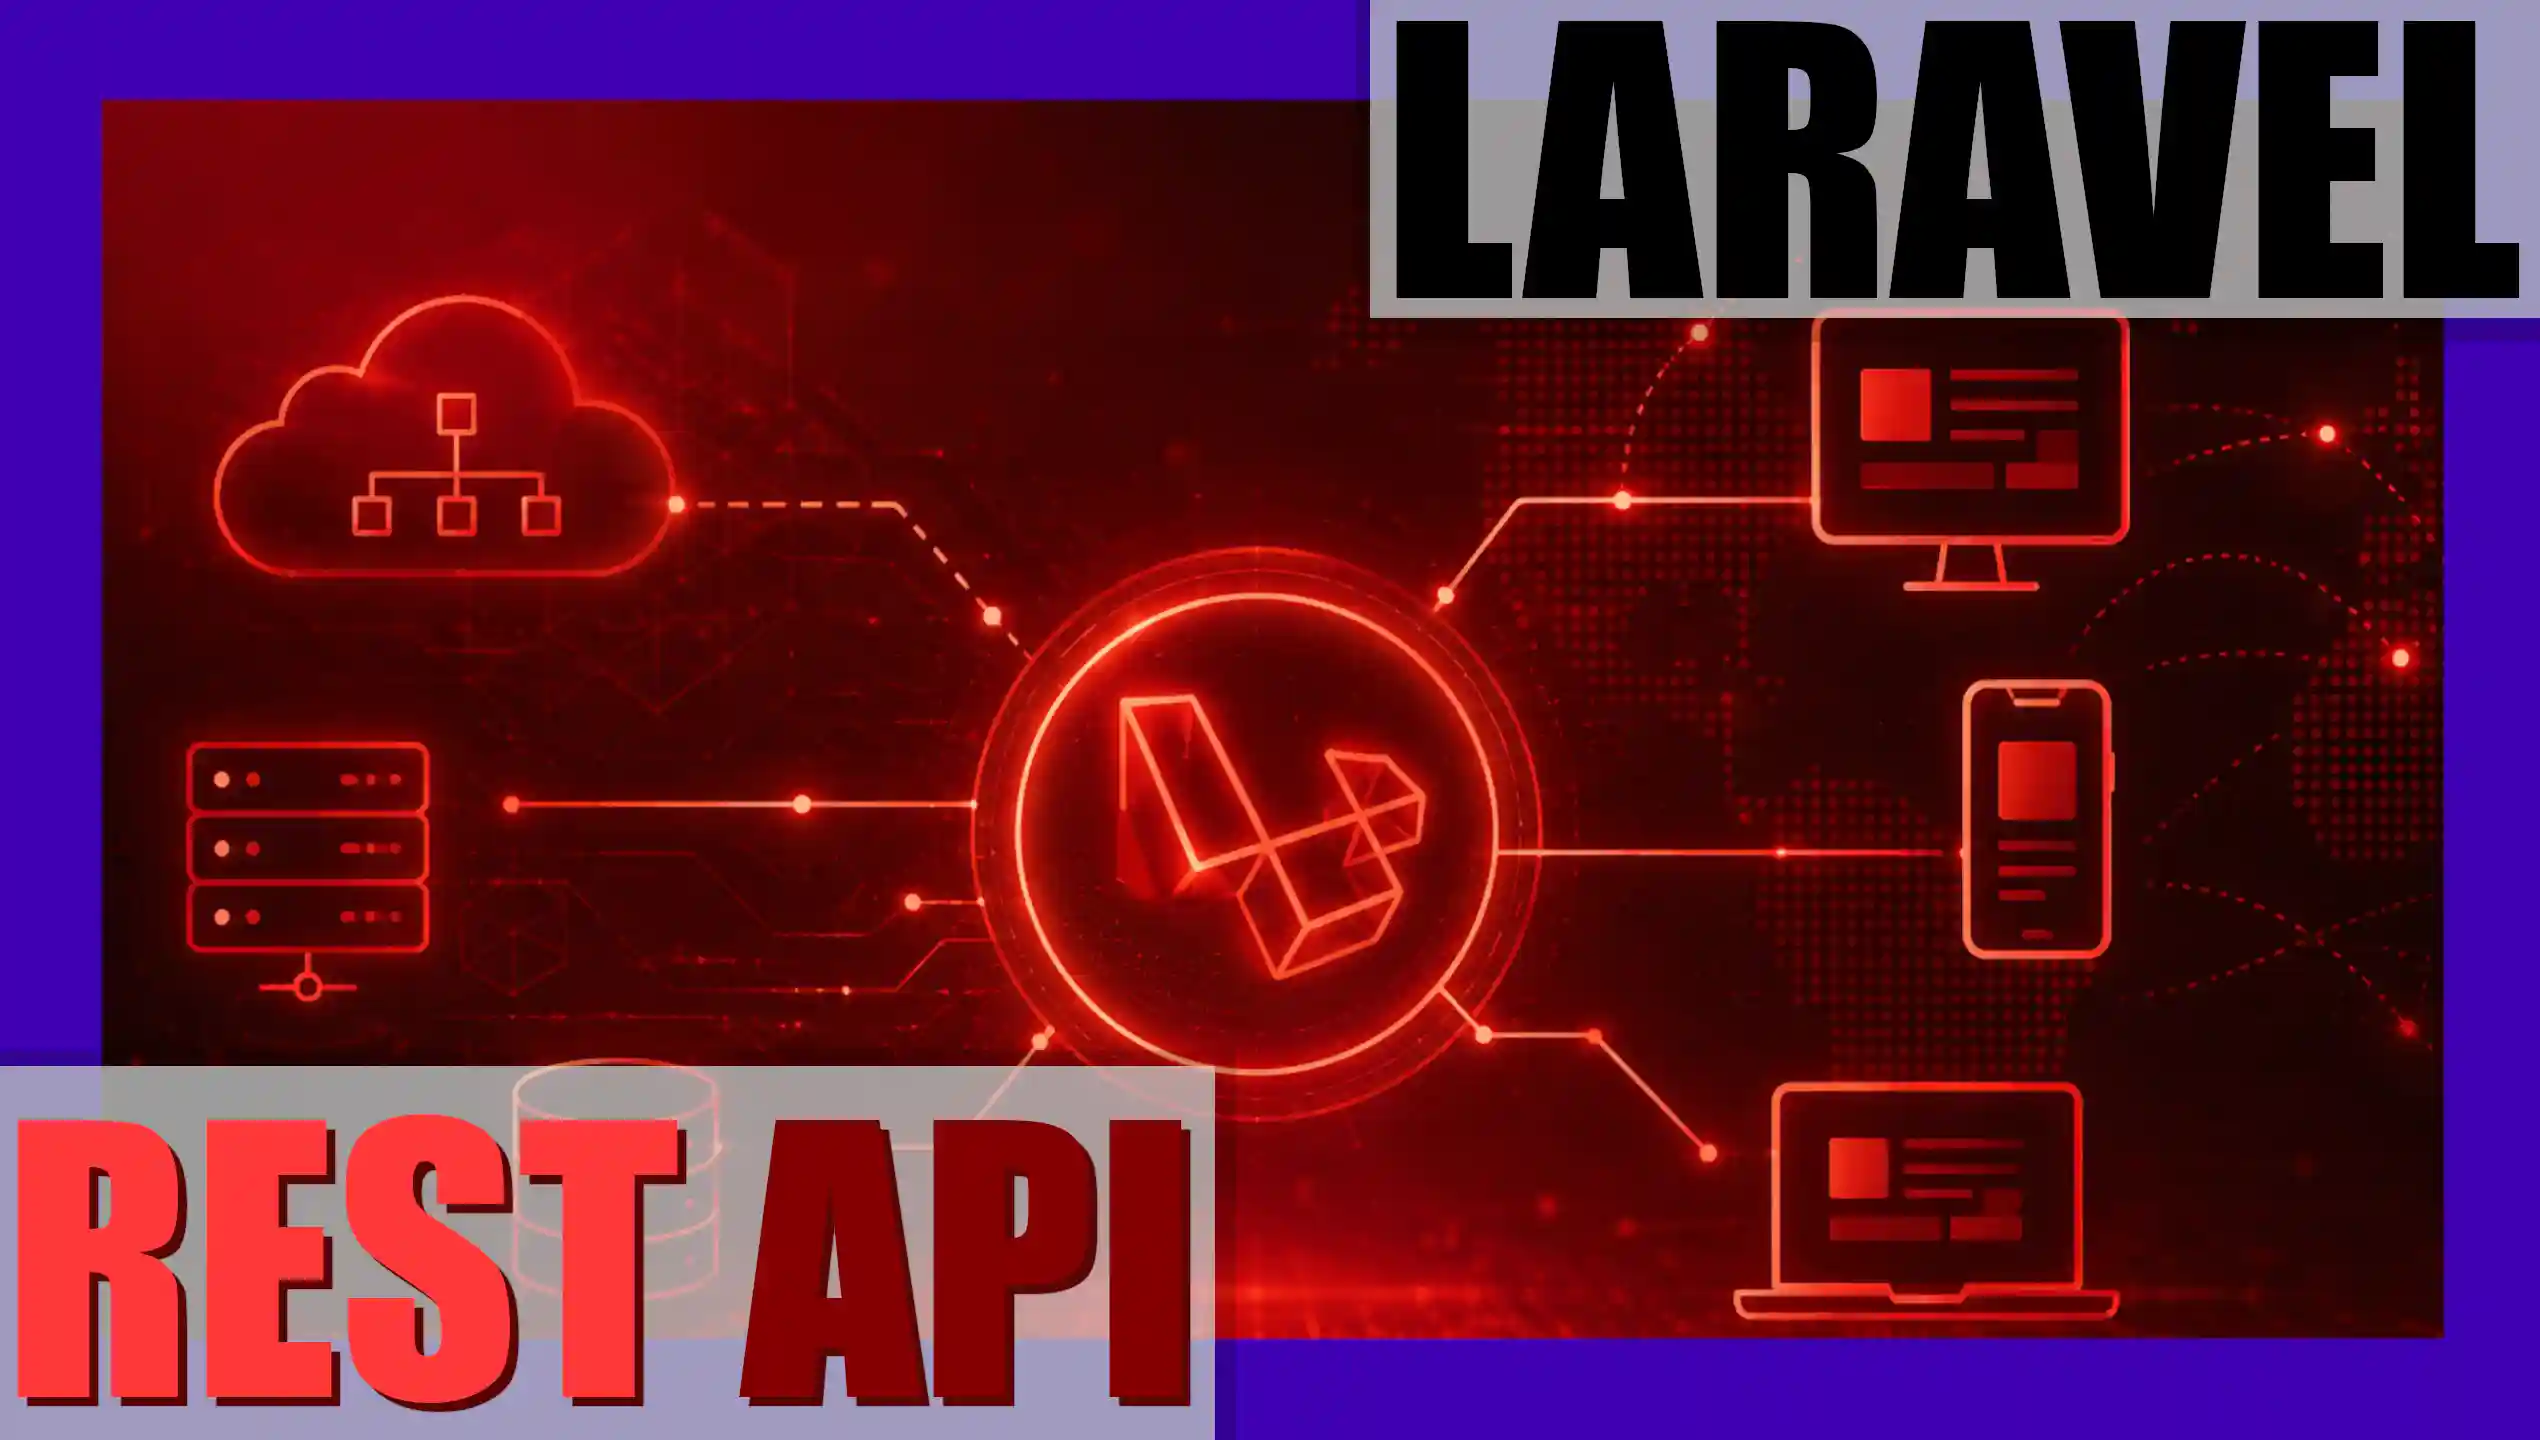
REST APIs provide a flexible and lightweight way to integrate applications; that is, in which we can communicate two or more applications.
Let's look at the key concepts:
An API is a set of rules that define how applications or devices can connect and communicate with each other.
A REST API is nothing more than an API that conforms to REST design principles and uses HTTP requests (GET, POST, PUT, PATCH, DELETE) to consume and manage this data.
The REST architecture is nothing more than a set of restrictions or limitations between the main ones, we have:
- Separation between client and server; that is, two separate applications.
- Stateless, that is, for best practices, we should not use sessions or similar mechanisms.
- Cacheable, to make it more efficient, we can cache the response to the same resource.
- A uniform interface both for its consumption in which each resource must have an established URI and responses returned in JSON or XML.
In practice, a Rest Api is nothing more than an application or module of the same, which has a set of implemented functions that can be consumed through a URL and they can perform CRUD operations to manage the data. The Rest Api is consumed through HTTP requests and they always return the same data type; JSON mainly.
We already know how to perform CRUD operations in Laravel with database models; now, let's take advantage of this knowledge to create a REST API.
What is a REST API?
I’m going to tell you a little “grandpa story.”
Let's assume we have our super application in Laravel. We already have our entities, we can create records, edit them, delete them.
Now, imagine we want to consume that information from another application, for example, an application made in Vue, React, Angular, Astro, or any of the 20 existing JavaScript frameworks.
But not only that. It could also be a mobile application:
- Android (Android Studio)
- React Native
- Flutter (my favorite)
- iOS with Swift or SwiftUI
Think, for example, of Gmail: you can view your emails from the browser, but also from your mobile. What is happening there is that the mobile application (the client) connects to a server, and that server exposes an API.
That is basically a REST API: A mechanism that allows different applications to communicate with each other.
Server and Client
In most cases, we have:
- A server, which in our case will be Django.
- A client, which can be a web application or a mobile app.
Although we usually connect server with client, you could also consume a REST API from another application in Django, or from Laravel, Flask, etc. In short: a REST API allows us to interconnect applications, regardless of the technology they use.
What a REST API Can Do
A REST API is not just for creating, reading, updating, or deleting data. It can also:
- Send emails
- Execute processes
- Automate tasks
- Expose services to third parties
Everything is programmable.
The key idea I want you to keep is this:
A REST API is a mechanism to connect different applications, usually a server with one or more clients.
REST and its Rules
A REST API is not just about “returning data.” It has rules.
For example:
- GET → query data
- POST → create records
- PUT / PATCH → update (fully or partially)
- DELETE → delete
Although you could technically use GET to create data or POST to query, it is not recommended, for security reasons and best practices.
REST is, basically, a set of rules that tell us how we should perform that communication.
HTTP and Methods
Here is something important:
HTML only understands GET and POST, but the HTTP protocol (the one we use when browsing the internet, with HTTP or HTTPS) supports many more methods:
- GET
- POST
- PUT
- PATCH
- DELETE
And precisely REST APIs are based on HTTP, not on HTML.
APIs in General
An API is an application programming interface. There are many types of APIs:
- SOAP
- GraphQL
- REST
They all serve to communicate applications, but each has its own rules, advantages, and disadvantages, just like when you compare Django with Laravel.
A Rest API is nothing more than an interface between systems that uses HTTP to get and send data or perform operations on that data in many formats such as XML and JSON.
To create a Rest Api, we can use exactly the same logic that we have used so far; the only difference is where our routes will be registered, which would no longer be in the web.php file but in the api.php file.
For this chapter, we are going to create a new project in Laravel although, you can use the same project that we have used until now, if you decide to create a new project, you must copy the migrations, request and Post and Category models.
Status Codes (HTTP Status Codes)
In an API, we no longer return a visual error page, but rather a numeric code that the client application (Vue, Flutter, etc.) must interpret:
- 200 OK: Everything went well.
- 201 Created: The record was created successfully.
- 400 / 422: Client error (incorrect data sent or validation failed).
- 401 Unauthorized: The user did not send a valid token.
- 404 Not Found: The resource does not exist.
- 500 Internal Server Error: Our Laravel server crashed due to a logic error.
What exactly is JSON?
If you've never looked at it in detail, it's simply a text format based on key-value pairs.
- If it's a single object, we use curly braces {}.
- If it's a list of data (like the index), we use square brackets [] to represent an array.
Example of what your new route returns:
[
{
"id": 1,
"title": "Laravel 11",
"slug": "laravel-11"
},
{
"id": 2,
"title": "Vue.js",
"slug": "vue-js"
}
]
API Installation
As of Laravel 11, the api.php file is not published, to publish it, we must execute the artisan commands:
$ php artisan install:apiThe api.php file contains the routes for creating a Rest Api; these routes are designed to be stateless, so requests entering the application through these routes must be authenticated using tokens and will not have access to the session state.
This will publish the api.php file:
routes\api.php
And Sanctum will be installed in the process which is a package to enable authentication which we will discuss later:
Installing dependencies from lock file (including require-dev)
Package operations: 1 install, 0 updates, 0 removals
  - Downloading laravel/sanctum (vX.X)
  - Installing laravel/sanctum (vX.X): Extracting archive
With this, to access the routes, we must enter the domain URL followed by the api prefix:
<DOMAIN>/api/<RESOURCE>For example:
http://larafirststeps.test/api/category
If you want to customize the routes to indicate a prefix other than the API:
use Illuminate\Support\Facades\Route;

->withRouting(
    web: __DIR__.'/../routes/web.php',
    commands: __DIR__.'/../routes/console.php',
    health: '/up',
    then: function () {
        Route::middleware('api')
            ->prefix('webhooks')
            ->name('webhooks.')
            ->group(base_path('routes/webhooks.php'));
    },
)
Remember to run the migrations if they exist:
$ php artisan migrateMore information in:
https://laravel.com/docs/master/routing#routing-customization
Creating the API Controller
In a REST API, we stop returning HTML (Blade views) and instead return JSON, which is the standard, lightweight, and machine-readable format. To keep things organized, we'll store these controllers in a specific folder:
app/Http/Controllers/Api
Controllers and routes
We created the controllers for the APIs:
$ php artisan make:controller Api/PostController -m PostAnd
$ php artisan make:controller Api/CategoryController -m CategoryWe created the routes in:
routes/api.php:
Route::resource('category', App\Http\Controllers\Api\CategoryController::class)->except(["create", "edit"]);
Route::resource('post', App\Http\Controllers\Api\PostController::class)->except(["create", "edit"]);
To avoid conflicts between the route names in the dashboard and the API route names, we will prefix the API route names:
routes/api.php:
Route::group(['as' => 'api.'], function () {
    Route::resource('category', CategoryController::class)->only(['index']);
    Route::resource('post', PostController::class)->only(['index']);
});
The controllers look like:
Api/CategoryController.php
<?php
namespace App\Http\Controllers\Api;
use App\Http\Controllers\Controller;
use App\Http\Requests\Category\PutRequest;
use App\Http\Requests\Category\StoreRequest;
use App\Models\Category;
use Illuminate\Http\JsonResponse;
class CategoryController extends Controller
{
    public function index(): JsonResponse
    {
        return response()->json(Category::paginate(10));
    }
    public function store(StoreRequest $request): JsonResponse
    {
        return response()->json(Category::create($request->validated()));
    }
    public function update(PutRequest $request, Category $category): JsonResponse
    {
        $category->update($request->validated());
        return response()->json($category);
    }
    public function destroy(Category $category): JsonResponse
    {
        $category->delete();
        return response()->json(['message' => 'Deleted'], 204);
    }
}
And for the post:
Api/PostController.php
<?php
namespace App\Http\Controllers\Api;
use App\Http\Controllers\Controller;
use App\Http\Requests\Post\PutRequest;
use App\Http\Requests\Post\StoreRequest;
use App\Models\Post;
use Illuminate\Http\JsonResponse;
class PostController extends Controller
{
    public function index(): JsonResponse
    {
        return response()->json(Post::paginate(10));
    }
    public function store(StoreRequest $request): JsonResponse
    {
        return response()->json(Post::create($request->validated()));
    }
    public function show(Post $post): JsonResponse
    {
        return response()->json($post);
    }
    public function update(PutRequest $request, Post $post): JsonResponse
    {
        $post->update($request->validated());
        return response()->json($post);
    }
    public function destroy(Post $post): JsonResponse
    {
        $post->delete();
        return response()->json(['message' => 'Deleted'], 204);
    }
}
Explanation of the above code
You can see that we left out some features like the edit and create forms; since, in a Rest Api, these intermediate views are not necessary to create the resources, let us remember that these are used to paint the form and nothing else, and in a Rest Api, this would not be necessary.
Finally, we always return a response in JSON format with: response()->json().
Which receives two parameters:
- The data.
- The status code.
To display the category with all the information and not just the identifier:
{
   "id": 1,
   "title": "Post 1",
   "slug": "post-1",
   "description": "test",
   "content": "test",
   "image": "test",
   "posted": "yes",
   "category_id": 1,
   "created_at": null,
   "updated_at": null,
   "category": {
     "id": 1,
      "title": "cate 1 new",
      "slug": "cate-1"
    }
}
We can indicate that it brings the relationship when pagination:
Api/PostController.php
public function index()
{
    return response()->json(Post::with('category')->paginate(10));
}
Although response()->json() returns a 200 (OK) status by default, best practices suggest being more specific:
- 201 (Created): Ideal for the store method, indicating that the resource was created successfully.
- 204 (No Content): This is the standard for the destroy method. It means the operation was successful but there is no content to display (because the record no longer exists).
Te recomiendo familiarizarte con los códigos de estado HTTP.
Handle exceptions
To handle exceptions, specifically those that occur when the records do not exist at the time of the search, for example:
"message": "No query results for model [App\\Models\\Category] cate-1asas",
    "exception": "Symfony\\Component\\HttpKernel\\Exception\\NotFoundHttpException",
If you change the APP_DEBUG variable to false in your .env file, Laravel will stop displaying those technical details and will show a generic error page. However, for an API, we want finer control.
Starting with Laravel 11, we have the management of global configurations in a single file:
bootstrap\app.php
So, from the method:
withExceptionsWe handle exceptions, from the aforementioned method we can capture the exceptions that we want to customize:
bootstrap\app.php
return Application::configure(basePath: dirname(__DIR__))
    ***
    ->withMiddleware(function (Middleware $middleware) {
        //
    })
    ->withExceptions(function (Exceptions $exceptions) {
        $exceptions->render(function (NotFoundHttpException $e, $request) {
            if($request->expectsJson()){ // or $request->wantsJson()
                return response()->json('Not found',404);
            }
        });
    })->create();
We specify specific exception handling for the exception that is occurring which is:
Symfony\\Component\\HttpKernel\\Exception\\NotFoundHttpExceptionAnd if you expect to receive a JSON response ($this->expectsJson()) which is the format that we are going to use from the Rest Api; and in this case, we generate a custom exception like the one we implemented above. From the file above, you can customize the behavior of any other exceptions you consider.
How does this flow work?
- Capture: The render method specifically detects the exception you define (you can Control-click on the class to see all the exceptions Laravel offers in the Vendor folder).
- Discrimination: We use $request->expectsJson(). This is vital because if the user is browsing the Dashboard (web) and something is missing, we want them to see the Blade 404 page, not JSON code.
- Response: If it's an API request (thanks to the Accept: application/json header we configured in Postman), we return our custom response.
Implement custom methods
In this section, we are going to create some specific methods for the consumption of posts or categories.
Get All
Now, let’s create a couple of methods to get all the records without pagination:
app\Http\Controllers\Api\PostController.php
public function all(): JsonResponse
{
    return response()->json(Post::get());
}
And
app\Http\Controllers\Api\CategoryController.php
public function all(): JsonResponse
{
    return response()->json(Category::get());
}
The routes:
routes\api.php
Route::get('post/all', [PostController::class, 'all']);
Route::get('category/all', [CategoryController::class, 'all']);
Consume by slug
To consume by slug, we can directly use the show command, but, varying the parameter in the URL, so that it is NOT the ID which is the default but the slug field:
And for URLs, something like the following:
routes\api.php
Route::get('post/slug/{post:slug}', [App\Http\Controllers\Api\PostController::class, 'show']);
Route::get('category/slug/{category:slug}', [App\Http\Controllers\Api\CategoryController::class, 'show']);
You can change the URL, but it is important that it does not conflict with an existing one, for example, the show route.
If we consume the above method, we will have something like the following:
// http://larafirststeps.test/api/post/slug/xgyxsfyabgyefiaubhog
{
    "id": 1,
  "title": "xGYxsFYABgyEFiAuBhOg",
  "slug": "xgyxsfyabgyefiaubhog",
  "description": "Lorem ipsum dolor sit amet consectetur, adipisicing elit. Vitae ",
  "content": "<p>Lorem ipsum dolor sit amet consectetur, adipisicing elit. Vitae aperiam culpa veritatis quasi laudantium mollitia quidem est blanditiis ullam illum cupiditate suscipit, quia, itaque quaerat? Iure debitis laudantium aliquam maxime!</p>",
  "image": null,
  "posted": "yes",
  "created_at": "2026-03-14T18:20:14.000000Z",
  "updated_at": "2026-03-14T18:20:14.000000Z",
  "category_id": 11,
  "category": {
    "id": 11,
    "title": "Categoria 10",
    "slug": "categoria-10",
    "created_at": "2026-03-14T18:20:14.000000Z",
    "updated_at": "2026-03-14T18:20:14.000000Z"
  }
}
If you want it to bring the associated category, you can use the scheme of:
$post = Post::with("category")->where("slug", $slug)->firstOrFail();Or
$post = Post::where("slug", $slug)->firstOrFail();
$post->category;
It is important to note the second case, Laravel works with a lazy loading scheme, which means that it will not bring the relationship data unless you request it; in the second case, we are consuming the category of the selected post and therefore, it queries the database and is registered in the post object.
The firstOrFail() method fetches a single record based on the condition (just like the first() method), if it doesn’t find it then it gives a 404 error.
Another variation for the previous case is to define the method as follows:
public function slug(Post $post): JsonResponse // $slug
  {
     //$post = Post::with("category")->where("slug", $slug)->firstOrFail();
     $post->category;
     return response()->json($post);
}
It is important to note that we now have the message injected into the method (that is, as a parameter, this is known as dependency injection) therefore, to tell Laravel that what it is going to receive is the slug and to do the mapping to post; we indicate this by the routes:
Route::get('post/slug/{post:slug}', [PostController::class, 'slug']);For the categories, we are going to carry out the same procedure:
public function slug(Category $category): JsonResponse
{
   return response()->json($category);
}
And the route:
Route::get('category/slug/{category:slug}', [CategoryController::class, 'slug']);When to UNIFY Endpoints in Your REST API? (Real Optimization)
In this section, I want to talk to you about how to take care of your REST API, some guidelines you must keep in mind so that your REST API does NOT get out of control and remains maintainable by unifying endpoints, or so you can take these recommendations into account when creating a new endpoint.
One of the fundamental optimizations when developing applications that consume a REST API is the efficient management of HTTP requests. As a platform evolves and adds new features, there is a tendency to create separate endpoints for each module. However, to maintain a clean and high-performance architecture, it is necessary to analyze the application as a unified whole.
Problem Identification: Multiple Redundant Requests
A common scenario in web applications is the dispersion of requests during the initial load. For example, when loading a user interface, it is common to find separate requests to:
- Get the user profile (subscription, account details, token).
- Query the list or counter of unread notifications.
- Get the current state of the shopping cart.
Although each UI component manages its logic with local variables or state managers, making multiple consecutive HTTP calls for data required in the same lifecycle creates unnecessary overhead on both the server and the client.
Golden Rule for Endpoint Unification
As a software architecture principle, the following rule should be applied: If a set of data always travels together in the same page initialization cycle, it should be unified into a single HTTP request.
Refactoring the API so that a single endpoint returns the user information along with their notifications and shopping cart reduces latency, consolidates calls, and simplifies client-side state initialization.
State Management and Initial Load Strategies
The problem with unifying endpoints is that, within the app, these endpoints are likely consumed from different modules. For example, notifications or the shopping cart are separate MODULES, but we are fetching unified data in a SINGLE endpoint. We then have to share this data with modules that previously resolved it on their own via an exclusive endpoint.
There are several alternatives to make basic information available before or during the execution of API requests:
- Injection into the Global Window (Window Object): Sharing an initial object rendered by the backend on the server allows immediate reading for read-only visual components.
- State Managers (Pinia / Vuex): Upon receiving the response from the unified endpoint, the data is distributed to the global store so that independent components (such as the header or sidebar) can consume it without making additional requests.
- Local Persistence and Cookies: Used to store session identifiers or quick settings, although with slower read access compared to global state memory.
Considerations for Version Control and Mobile Clients
When refactoring and consolidating endpoints in the REST API, it is crucial to evaluate the impact on other clients in the ecosystem, such as mobile applications built with Flutter or React Native.
If you decide to remove or modify an old endpoint, it should not be removed immediately in production. Mobile app users do not always update the application instantly; removing an endpoint abruptly will cause network errors (404) and crashes on installed versions. The correct strategy requires keeping the endpoint deprecated for a reasonable period before its permanent removal.
Let's see how to protect the REST API using Laravel Sanctum.
Strategies for Protecting a REST API in Laravel with HMAC Digital Signature and Timestamps
Once a REST API is implemented, the next fundamental step is to guarantee its security. Unless it is designed as a public service, the vast majority of APIs must be restricted to be consumed exclusively by our own applications, preventing unauthorized access, undue consumption of resources, or mass data extraction.
Protection in Web Environments Using CORS
In traditional web applications, the primary and mandatory protection mechanism is based on configuring CORS (Cross-Origin Resource Sharing) policies. This method explicitly defines which domains have prior authorization to make requests to the API.
If a request comes from an origin not included in the server's whitelist, the request is automatically rejected with an HTTP status code 403 Forbidden. However, although CORS works strictly in web browsers, it offers no protection against clients that do not respect these policies, such as mobile applications or HTTP testing tools.
In the case of Laravel, the file is config/cors.php
Protection for Mobile Applications: HMAC and Timestamps
Unlike the web environment, mobile applications (developed in Flutter, Kotlin, Swift, or similar frameworks) do not operate under the concept of an origin domain. To validate that requests come solely from a legitimate mobile application and that the data has not been altered in transit, a digital signature using HMAC (Hash-based Message Authentication Code) combined with a Timestamp must be implemented.
This security standard is based on three main pillars:
- Shared Secret Key: A confidential string stored only inside the mobile client and in the backend, which never explicitly travels across the network.
- Payload and URI: The request data (such as the requested endpoint and its parameters) used to calculate the signature. This prevents data tampering attacks, preventing an attacker from altering identifiers within the request.
- Timestamp and Expiration Tolerance: The current time (in Unix milliseconds) is included in the signature. The server validates that the request was generated within a specific tolerance range (for example, 30 to 300 seconds), blocking potential replay or denial attacks.
To guarantee complete, authentic, and unalterable communication, the industry standard is the implementation of HMAC-SHA256 digital signatures combined with timestamps. In this complete guide, you will learn the theory behind this security pattern and how to implement it step-by-step with a custom middleware in Laravel.
It is a dynamic digital signature (HMAC). Instead of sending a static "password" over the network that anyone can intercept and copy into Postman, what you do is sign the request envelope in real time.
HMAC (Hash-based Message Authentication Code) is a message authentication mechanism that combines a cryptographic hash function (such as SHA-256) with a shared secret key.
Its main goal is to guarantee two things in data transmission:
- Authenticity: Confirm that the message comes from who it claims to be (only someone who knows the secret key could have generated it).
- Integrity: Ensure that the data has not been altered or manipulated along the way.
1. Theoretical Foundations: HMAC, Integrity, and Replay Attacks
The HTTP request signing scheme relies on the Shared Secret technique. The client application (Flutter, Vue, React, etc.) and the backend server possess a secret key that never travels across the network in plain text.
This system provides three fundamental layers of defense:
- Data Integrity: Guarantees that the route or content has not been altered during transit.
- Origin Authenticity: Confirms that the request comes from a legitimate client possessing the secret key.
- Replay Attack Protection: The timestamp sets the request expiration, preventing captured requests from being re-executed minutes or days later.
The Signing and Verification Flow
- On the Client:
- Generates the current timestamp in milliseconds (
timestamp). - Constructs the base string or
payload(example:$timestamp . $formattedPath). - Calculates the encrypted hash using HMAC-SHA256 with the secret key.
- Attaches the signature and timestamp to the HTTP headers (
X-SignatureandX-Timestamp).
- Generates the current timestamp in milliseconds (
- On the Server (Middleware):
- Intercepts the request and extracts the headers.
- Validates that the time difference between the server and the received
timestampis within an acceptable window (e.g., 300 seconds). - Normalizes the incoming path and reconstructs the exact same
payload. - Calculates the HMAC signature locally and securely compares it against the received signature.
In summary:
Both Laravel and Flutter secretly share the same keyword (called $secret). When the Flutter app makes a request, it runs the following fast mathematical formula:
Signature = HMAC-SHA256(Date + Path + Data, $secret)
- The app calculates the signature at that instant and places it in the header (X-Signature).
- It sends the payload: The request travels with the date, path, and signature, but $secret is never transmitted.
- Laravel receives the payload: It runs the exact same calculation on its server using the data received.
- If the signature calculated by Laravel matches the one sent by Flutter → The request comes from your legitimate app.
- If a single character changes or the date differs by more than 30 seconds → It returns 403 Forbidden.
HMAC Authentication Algorithm Flow
- On the mobile client (e.g., Flutter):
- Obtains the current universal Timestamp.
- Constructs the base string (Payload) by joining the endpoint Path, Timestamp, and any additional parameters.
- Generates the signed Hash by applying a cryptographic algorithm (such as SHA-256) to the base string together with the secret key.
- Sends the calculated signature and Timestamp within the request HTTP Headers.
- On the backend server (e.g., Middleware in Laravel):
- The Middleware intercepts the incoming request and extracts the corresponding HTTP headers.
- Verifies that the Timestamp falls within the permitted tolerance margin.
- Reconstructs the Payload using the Path of the received request and the secret key stored in the server configuration.
- Calculates the Hash locally and compares it with the received signature. If they match, the request proceeds; otherwise, a
401 Unauthorizedauthentication error is returned.
2. Creating the Validation Middleware in Laravel
We will implement validation within a custom middleware that processes requests before they reach the controllers.
Step 1: Create the Middleware Class
Run the following command in your terminal to generate the structure:
php artisan make:middleware ValidateApiSignatureStep 2: Middleware Class Code
Open the file app/Http/Middleware/ValidateApiSignature.php and implement the following logic:
<?php

namespace App\Http\Middleware;

use Closure;
use Illuminate\Http\Request;
use Symfony\Component\HttpFoundation\Response;

class CheckAppSignature
{
    public function handle(Request $request, Closure $next): Response
    {
        // 1. Get request origin (sent by browser from Vue/Axios)
        $origin = $request->header('Origin') ?? $request->header('Referer');

        // Dynamically load 'allowed_origins' array defined in config/cors.php
        $allowedOrigins = config('cors.allowed_origins', []);

        // dd('/' . ltrim($request->path(), '/'));

        // 2. If request comes from an allowed Web origin, bypass HMAC signature
        if ($origin) {
            foreach ($allowedOrigins as $allowed) {
                if (str_starts_with($origin, $allowed)) {
                    return $next($request);
                }
            }
        }

        // 3. If NOT coming from Web (e.g., Flutter Mobile App), HMAC signature is REQUIRED
        $timestamp = $request->header('X-Timestamp');
        $signature = $request->header('X-Signature');
        $secret = config('app.mobile_app_secret');

        if (!$timestamp || !$signature) {
            return response()->json([
                'message' => 'Unauthorized access: Request outside ecosystem.'
            ], 403);
        }

        // Prevent Replay Attacks (30 seconds validity)
        if (abs(time() - (int) $timestamp) > 30) {
            return response()->json([
                'message' => 'Request expired.'
            ], 403);
        }

        // Reconstruct Payload and verify Signature
        $path = '/' . ltrim($request->path(), '/');
        $payload = $timestamp . $path;
        $expectedSignature = hash_hmac('sha256', $payload, $secret);

        if (!hash_equals($expectedSignature, $signature)) {
            return response()->json([
                'message' => 'Invalid application signature.'
            ], 403);
        }

        return $next($request);
    }
}
3. Configuration and Middleware Registration
Add the shared secret key to your environment variables file .env:
API_SECRET_KEY=your_super_secure_32_character_secret_keyThen, edit config/app.php to map the variable:
'api_secret_key' => env('API_SECRET_KEY'),Registering Middleware in Laravel 11 / 12
In modern Laravel structures, add your middleware alias inside the bootstrap/app.php file:
use App\Http\Middleware\ValidateApiSignature;

return Application::configure(basePath: dirname(__DIR__))
    ->withRouting(
        web: __DIR__.'/../routes/web.php',
        api: __DIR__.'/../routes/api.php',
        commands: __DIR__.'/../routes/console.php',
        health: '/up',
    )
    ->withMiddleware(function (Middleware $middleware) {
        $middleware->alias([
            'signed.api' => ValidateApiSignature::class,
        ]);
    })
    ->withExceptions(function (Exceptions $exceptions) {
        //
    })->create();
4. Route Protection in routes/api.php
To apply protection, simply assign the signed.api middleware to your endpoints. You can combine it with Sanctum to require both an authenticated user and a valid signature:
use App\Http\Controllers\Api\V1\VideoController;
use Illuminate\Support\Facades\Route;

Route::middleware(['auth:sanctum', 'signed.api'])->group(function () {
    Route::get('/v1/tutorial/video/protect/vimeo/{id}', [VideoController::class, 'getVimeoStreamUrl']);
});
5. Client Implementation (Flutter / Dart)
To digitally sign requests from our mobile app in Flutter, we will use Dart's official cryptography package.
Step 1: Installing Dependencies
Add the crypto package by running the following command in the root of your Flutter project:
flutter pub add cryptoStep 2: HMAC Signature Generation in Dart
Below is a helper class or method in Flutter to construct the payload, generate the HMAC-SHA256 hash, and perform the request sending the required headers:
import 'dart:convert';
import 'package:crypto/crypto.dart';
import 'package:http/http.dart' as http;

class ApiClient {
  static const String _secretKey = 'your_super_secure_32_character_secret_key';
  static const String _baseUrl = 'www.desarrollolibre.net';

  /// Generates the HMAC-SHA256 digital signature
  static String generateSignature(String payload) {
    final keyBytes = utf8.encode(_secretKey);
    final payloadBytes = utf8.encode(payload);
    final hmac = Hmac(sha256, keyBytes);
    final digest = hmac.convert(payloadBytes);
    return digest.toString();
  }

  /// Protected GET request example
  static Future<http.Response> getProtectedVideo(String videoId, String userToken) async {
    final String relativePath = 'api/v1/tutorial/video/protect/vimeo/$videoId';

    // 1. Get timestamp in milliseconds
    final String timestamp = DateTime.now().millisecondsSinceEpoch.toString();

    // 2. Normalize path (ensure leading '/' and remove trailing '/')
    final String formattedPath = (relativePath.startsWith('/') ? relativePath : '/$relativePath')
        .replaceAll(RegExp(r'/$'), '');

    // 3. Create payload to sign
    final String payload = '$timestamp$formattedPath';

    // 4. Calculate HMAC signature
    final String signature = generateSignature(payload);

    // 5. Build URI and perform request with security headers
    final Uri url = Uri.https(_baseUrl, relativePath);

    return await http.get(
      url,
      headers: {
        'Authorization': 'Bearer $userToken',
        'X-Timestamp': timestamp,
        'X-Signature': signature,
        'Accept': 'application/json',
      },
    );
  }
}
6. Best Practices in Mobile Client Development
To maintain code maintainability as the app grows and makes dozens of API requests, HMAC header generation logic should not be manually repeated in every HTTP call. Object-Oriented principles should be applied by creating a centralized HTTP client or wrapper:
- HTTP Client Centralization: Implement a base class responsible for managing standard methods (
GET,POST,PUT,DELETE). - Automatic Header Injection: A single private method within the base class should calculate the Timestamp, process the HMAC signature, and inject the required headers before dispatching any request.
- Encrypted Environment Variables: Store the secret key in protected configuration files or client environment variables to avoid exposing it directly in source code.
7. Additional Security Best Practices
- Strict HTTPS Usage: Encrypt the transport layer to prevent a sniffer from reading HTTP headers or session tokens.
- Mandatory use of
hash_equals(): Avoid using standard conditional operators (==or===). Thehash_equals()function compares strings in constant time, mitigating Timing Attacks vulnerabilities. - Key Rotation: Maintain a scheme to update the server secret key periodically.
Conclusion
The combination of CORS for the web layer and HMAC with Timestamps for mobile clients provides a robust, modular, and scalable security scheme. This architecture protects endpoints against origin spoofing, parameter tampering in transit, and replay attacks, ensuring full integrity of the REST API.
Implementing HMAC signatures combined with timestamps in Laravel creates a robust defense-in-depth scheme. With this solution, any modified or out-of-time request will be automatically discarded by the middleware, ensuring maximum security for your platform's REST services.
Implementation of the Generator Service in Laravel: ClientFingerprintService
The generation service processes the properties of the Request to construct a unique digital identity for the client. The metrics used include:
- The accepted languages header (
Accept-Language). - The user agent (
User-Agent). - The accepted content type (
Accept). - The client's IP address.
Note on IP addresses: In mobile applications, the client's IP can change frequently depending on the network (Wi-Fi or mobile data). It is advisable to evaluate whether the IP should be included in the hash generation or if it should be normalized using helper methods.
As with HMAC, the final result is a hash that binds the token to the specific request context. If an attacker intercepts the token, they will not be able to replicate requests successfully without knowing the exact combination of parameters used to sign it.
<?php
namespace App\Services;
use Illuminate\Http\Request;
class ClientFingerprintService
{
    /**
     * Generates a SHA-256 cryptographic hash based on client attributes.
     */
    public static function generate(Request $request): string
    {
        // 1. Exact signature of the client or browser
        $userAgent = $request->header('User-Agent', 'unknown');
        // 2. Content and localization headers
        $accept = $request->header('Accept', '');
        $acceptLanguage = $request->header('Accept-Language', '');
        // 3. IP subnet to tolerate minor changes within the same connection
        $ip = $request->ip() ?? '127.0.0.1';
        $ipSubnet = self::extractSubnet($ip);
        // Deterministic concatenation
        $rawFingerprint = "{$ipSubnet}|{$accept}|{$acceptLanguage}|DL|{$userAgent}";
        return hash('sha256', $rawFingerprint);
    }
    private static function extractSubnet(string $ip): string
    {
        if (str_contains($ip, ':')) {
            // IPv6: first 4 blocks
            $parts = explode(':', $ip);
            return implode(':', array_slice($parts, 0, 4));
        }
        // IPv4: first 3 octets (e.g., 192.168.1)
        $parts = explode('.', $ip);
        return implode('.', array_slice($parts, 0, 3));
    }
}
Native Integration with Laravel Sanctum Without Modifying Database Schemas
To store and validate this fingerprint without creating additional migrations or adding columns to the personal_access_tokens table, Sanctum's native abilities feature is leveraged. When issuing the token during the authentication flow, the ability is injected with the fingerprint:{hash} prefix.
Modifying the Core Token Generator (Laravel Helper)
When processing authentication endpoints (traditional login, single-use code login, or OAuth social authentication), token issuance captures the $request and associates the computed fingerprint:
use App\Services\ClientFingerprintService;
function getUserTokenAuth(string $token = 'myapptoken', ?User $user = null, ?Request $request = null): string
{
    if ($user === null) {
        $user = auth()->user() ?? auth('sanctum')->user();
    }
    if ($user !== null) {
        $request = $request ?? request();
        $userAgent = $request->header('User-Agent') ?? $request->userAgent() ?? 'Unknown Device';
        // Descriptive identification of the device
        $deviceName = 'Client Device';
        if (str_contains($userAgent, 'Dart')) {
            $deviceName = 'Mobile App (Flutter)';
        } elseif (str_contains($userAgent, 'Chrome')) {
            $deviceName = 'Chrome Browser';
        }
        // Unique fingerprint generation
        $fingerprint = ClientFingerprintService::generate($request);
        // Sanctum token creation linking the fingerprint in abilities
        return $user->createToken($deviceName, ["fingerprint:{$fingerprint}"])->plainTextToken;
    }
    return '';
}
Verification Middleware: VerifyClientFingerprint
To process incoming requests, a specialized Middleware for fingerprint verification is implemented. The validation flow operates under the following guidelines:
- Public routes: If the request does not require authentication and does not include a token, the middleware allows direct passage.
- Ability extraction: If a token exists, the
fingerprintproperty is looked up within its registered abilities. - In-memory comparison: The hash is regenerated using the data from the current
Requestand compared against the one stored in the token. If they do not match, access is denied immediately.
It is essential to optimize this process to avoid overloading the database with additional queries for every request. Upon authenticating the user, the token data is already loaded into memory, so hash validation executes at the software level with zero impact on the persistence layer.
The middleware acts as a perimeter guard at the HTTP layer. It must handle two primary scenarios:
- Public or unauthenticated routes: If the request does not include an
Authorization: Bearerheader, the request continues its normal flow without blocking, allowing anonymous navigation across open catalogs and resources. - Routes with token credentials: It locates the token record in the Sanctum database, extracts the fingerprint registered in its
abilities, and compares it against the hash recalculated in real time using the securehash_equalsfunction (protection against side-channel or timing attacks).
<?php
namespace App\Http\Middleware;
use App\Services\ClientFingerprintService;
use Closure;
use Illuminate\Http\Request;
use Laravel\Sanctum\PersonalAccessToken;
use Symfony\Component\HttpFoundation\Response;
class VerifyClientFingerprint
{
    public function handle(Request $request, Closure $next): Response
    {
        $bearerToken = $request->bearerToken();
        // 1. If no token in header, allow request (public routes)
        if (! $bearerToken) {
            return $next($request);
        }
        try {
            // 2. Get Sanctum token
            /** @var PersonalAccessToken|null $token */
            $token = $request->user('sanctum')?->currentAccessToken() ?? PersonalAccessToken::findToken($bearerToken);
            if (! $token) {
                return $next($request);
            }
            // 3. Extract registered fingerprint
            $expectedFingerprint = null;
            $abilities = $token->abilities ?? [];
            foreach ($abilities as $ability) {
                if (str_starts_with($ability, 'fingerprint:')) {
                    $expectedFingerprint = substr($ability, strlen('fingerprint:'));
                    break;
                }
            }
            // 4. Environment match validation
            if ($expectedFingerprint !== null) {
                $currentFingerprint = ClientFingerprintService::generate($request);
                if (! hash_equals($expectedFingerprint, $currentFingerprint)) {
                    return response()->json([
                        'error' => 'Access denied: Token was issued for another client or environment.',
                    ], 403);
                }
            }
        } catch (\Throwable $e) {
            return $next($request);
        }
        return $next($request);
    }
}
This middleware is registered in bootstrap/app.php via an alias and added to the route group in routes/api.php alongside the API's HMAC signing mechanisms.
Web Client: Axios Centralization and Interceptors in Vue 3
In the frontend built with Vue 3 and Pinia, all HTTP requests must be standardized. Upon validation failure due to fingerprint mismatch or expiration (status codes 401 and 403), local session credentials (cookies and stores) must be purged, redirecting the user to the login form while preventing infinite redirect loops.
Configuration in main.js
import axios from 'axios'
import VueCookies from 'vue-cookies'
import { createToaster } from '@meforma/vue-toaster'
import { API_URLS } from './config/api'
import { useAuthStore } from './store/auth'
// Default HTTP headers
axios.defaults.headers.common['Accept'] = 'application/json'
axios.defaults.headers.common['X-Requested-With'] = 'XMLHttpRequest'
axios.defaults.withCredentials = true
const toaster = createToaster({ position: 'bottom-right', duration: 3500 })
// Axios response interceptor
axios.interceptors.response.use(
    (response) => response,
    (error) => {
        if (error.response) {
            const status = error.response.status
            const url = error.config?.url || ''
            // 1. Handling expired sessions or invalid environments
            if (status === 401 || status === 403) {
                VueCookies.remove('windowLaravel')
                VueCookies.remove('token')
                delete axios.defaults.headers.common['Authorization']
                try {
                    const authStore = useAuthStore(pinia)
                    authStore.destroyTokenAuthCookie()
                } catch (e) {}
                const isLoginRequest = url.includes(API_URLS.login) || url.includes('/login')
                const isAlreadyOnLogin = window.location.pathname.endsWith('/login')
                if (!isLoginRequest && !isAlreadyOnLogin) {
                    if (status === 403) {
                        const customMsg = error.response.data?.error || 'Unauthorized access or mismatched environment.'
                        toaster.error(customMsg)
                    }
                    setTimeout(() => {
                        window.location.href = '/login?expired=1'
                    }, 1200)
                }
            }
            // 2. Validation and business logic errors (400)
            if (status === 400) {
                const msg = error.response.data?.message || error.response.data?.error
                if (msg && typeof msg === 'string') {
                    toaster.warning(msg)
                }
            }
            // 3. Internal server errors (500+)
            if (status >= 500) {
                toaster.error('A server error has occurred. Please try again.')
            }
        }
        return Promise.reject(error)
    }
)
Mobile Client: Centralized Interceptor and Alerts in Flutter (Dart)
In Flutter mobile applications, where HTTP calls are commonly made using packages like http, there is no native middleware pipeline like in Axios. To solve this consistently, a static Api class is implemented that encapsulates HTTP verbs (GET, POST, PUT, DELETE), injects standard headers (including Accept: application/json and X-Requested-With: XMLHttpRequest), and processes all responses through a centralized handler.
Implementation of the Api Class and UI Handling with Global NavigatorKey
To visually notify the user without having to pass BuildContext instances throughout the data layer and repositories, a GlobalKey<NavigatorState> configured in the root MaterialApp is used.
import 'dart:convert';
import 'package:flutter/material.dart';
import 'package:http/http.dart' as http;
import 'package:desarrollolibre/utils/user_preference.dart';
final GlobalKey<NavigatorState> navigatorKey = GlobalKey<NavigatorState>();
class Api {
  static Future<http.Response> get(String path, {String? token, Map<String, dynamic>? data}) async {
    final url = Uri.https(baseUrlAPI, "$pathApi$path", data);
    final response = await http.get(url, headers: getApiHeaders(token: token, isJson: false, path: path));
    return _handleResponse(response, path);
  }
  static Future<http.Response> post(String path, {dynamic body, String? token, bool isJson = true}) async {
    final url = Uri.https(baseUrlAPI, "$pathApi$path");
    final response = await http.post(
      url,
      headers: getApiHeaders(token: token, isJson: isJson, path: path),
      body: isJson ? jsonEncode(body) : body,
    );
    return _handleResponse(response, path);
  }
  static http.Response _handleResponse(http.Response response, String path) {
    final status = response.statusCode;
    // Handling credential revocation (401 and 403)
    if (status == 401 || status == 403) {
      final UserPreference userPreference = UserPreference();
      userPreference.token = '';
      userPreference.email = '';
      final bool isLoginEndpoint = path.contains('login') || path.contains('user/login');
      if (!isLoginEndpoint) {
        String errorMsg = 'Your session has expired or the environment does not match.';
        try {
          final data = jsonDecode(response.body);
          if (data is Map && (data['error'] != null || data['message'] != null)) {
            errorMsg = data['error'] ?? data['message'];
          }
        } catch (_) {}
        _showAlert(
          title: status == 403 ? 'Access Denied' : 'Session Expired',
          message: errorMsg,
          icon: Icons.lock_outline_rounded,
          iconColor: Colors.redAccent,
        );
      }
    }
    if (status == 400) {
      _showAlert(
        title: 'Attention',
        message: 'Invalid request or error in submitted data.',
        icon: Icons.warning_amber_rounded,
        iconColor: Colors.amber,
      );
    }
    if (status >= 500) {
      _showAlert(
        title: 'Server Error',
        message: 'A technical problem occurred. Please try again later.',
        icon: Icons.error_outline_rounded,
        iconColor: Colors.red,
      );
    }
    return response;
  }
  static void _showAlert({
    required String title,
    required String message,
    required IconData icon,
    required Color iconColor,
  }) {
    WidgetsBinding.instance.addPostFrameCallback((_) {
      final context = navigatorKey.currentContext;
      if (context == null) return;
      showDialog(
        context: context,
        builder: (ctx) => AlertDialog(
          shape: RoundedRectangleBorder(borderRadius: BorderRadius.circular(16)),
          title: Row(
            children: [
              Icon(icon, color: iconColor, size: 28),
              const SizedBox(width: 10),
              Expanded(child: Text(title, style: const TextStyle(fontWeight: FontWeight.bold))),
            ],
          ),
          content: Text(message),
          actions: [
            TextButton(
              onPressed: () => Navigator.of(ctx, rootNavigator: true).pop(),
              child: const Text('Understood', style: TextStyle(fontWeight: FontWeight.bold)),
            ],
          ],
        ),
      );
    });
  }
}
In summary:
To handle denied responses (HTTP codes 401 or 403) without duplicating code across every API call, logic should be centralized within the application's clients:
- Web Applications (Axios): A global response interceptor is configured. When the API returns a 403 or 401 status code, the interceptor captures the response, clears local storage (tokens, session), and redirects the user to the login flow.
- Mobile Applications (Flutter / HTTP): Centralized methods are defined for HTTP requests (GET, POST, PUT, DELETE). If the response contains an unauthorized status, a global handler invokes the logout method and resets the application state.
Automated Testing and Validation with Pest PHP
To guarantee that the system strictly responds to security policies and prevents regressions, integration tests were developed using Pest PHP covering the full matrix of use cases:
- Cryptographic determinism: Two requests with identical headers within the same IP subnet produce the exact same SHA-256 hash. A change in the
User-Agentor network segment alters the output hash. - Unauthenticated traffic: Open endpoints respond successfully with HTTP code
200when no authorization header is provided. - Legitimate usage: A request with a Bearer token issued under the same environment passes through the middleware and allows protected logic execution (HTTP
200). - Reuse attempt in mismatched environment: A token issued for Flutter but used from a web browser or desktop client is intercepted and immediately rejected with HTTP status code
403 Forbiddenand the message: "Access denied: Token was issued for another client or environment." - Corrupted or non-existent tokens: Tokens with invalid signatures are rejected with HTTP code
401 Unauthorized.
Conclusion
Combining Client Fingerprinting in Laravel Sanctum with reactive interceptors in the frontend (Vue 3) and mobile client (Flutter) significantly enhances the security posture of a REST API. By conditioning token validity to the originating HTTP context without requiring invasive hardware identifiers or altering the database schema, stolen token reuse is neutralized while providing a clear user experience during session expirations or revocations.
Implementation of the Generator Service in Laravel: ClientFingerprintService
The generation service processes the properties of the Request to construct a unique digital identity for the client. The metrics used include:
- The accepted languages header (
Accept-Language). - The user agent (
User-Agent). - The accepted content type (
Accept). - The client's IP address.
Note on IP addresses: In mobile applications, the client's IP can change frequently depending on the network (Wi-Fi or mobile data). It is advisable to evaluate whether the IP should be included in the hash generation or if it should be normalized using helper methods.
As with HMAC, the final result is a hash that binds the token to the specific request context. If an attacker intercepts the token, they will not be able to replicate requests successfully without knowing the exact combination of parameters used to sign it.
<?php
namespace App\Services;
use Illuminate\Http\Request;
class ClientFingerprintService
{
    /**
     * Generates a SHA-256 cryptographic hash based on client attributes.
     */
    public static function generate(Request $request): string
    {
        // 1. Exact signature of the client or browser
        $userAgent = $request->header('User-Agent', 'unknown');
        // 2. Content and localization headers
        $accept = $request->header('Accept', '');
        $acceptLanguage = $request->header('Accept-Language', '');
        // 3. IP subnet to tolerate minor changes within the same connection
        $ip = $request->ip() ?? '127.0.0.1';
        $ipSubnet = self::extractSubnet($ip);
        // Deterministic concatenation
        $rawFingerprint = "{$ipSubnet}|{$accept}|{$acceptLanguage}|DL|{$userAgent}";
        return hash('sha256', $rawFingerprint);
    }
    private static function extractSubnet(string $ip): string
    {
        if (str_contains($ip, ':')) {
            // IPv6: first 4 blocks
            $parts = explode(':', $ip);
            return implode(':', array_slice($parts, 0, 4));
        }
        // IPv4: first 3 octets (e.g., 192.168.1)
        $parts = explode('.', $ip);
        return implode('.', array_slice($parts, 0, 3));
    }
}
Native Integration with Laravel Sanctum Without Modifying Database Schemas
To store and validate this fingerprint without creating additional migrations or adding columns to the personal_access_tokens table, Sanctum's native abilities feature is leveraged. When issuing the token during the authentication flow, the ability is injected with the fingerprint:{hash} prefix.
Modifying the Core Token Generator (Laravel Helper)
When processing authentication endpoints (traditional login, single-use code login, or OAuth social authentication), token issuance captures the $request and associates the computed fingerprint:
use App\Services\ClientFingerprintService;
function getUserTokenAuth(string $token = 'myapptoken', ?User $user = null, ?Request $request = null): string
{
    if ($user === null) {
        $user = auth()->user() ?? auth('sanctum')->user();
    }
    if ($user !== null) {
        $request = $request ?? request();
        $userAgent = $request->header('User-Agent') ?? $request->userAgent() ?? 'Unknown Device';
        // Descriptive identification of the device
        $deviceName = 'Client Device';
        if (str_contains($userAgent, 'Dart')) {
            $deviceName = 'Mobile App (Flutter)';
        } elseif (str_contains($userAgent, 'Chrome')) {
            $deviceName = 'Chrome Browser';
        }
        // Unique fingerprint generation
        $fingerprint = ClientFingerprintService::generate($request);
        // Sanctum token creation linking the fingerprint in abilities
        return $user->createToken($deviceName, ["fingerprint:{$fingerprint}"])->plainTextToken;
    }
    return '';
}
Verification Middleware: VerifyClientFingerprint
To process incoming requests, a specialized Middleware for fingerprint verification is implemented. The validation flow operates under the following guidelines:
- Public routes: If the request does not require authentication and does not include a token, the middleware allows direct passage.
- Ability extraction: If a token exists, the
fingerprintproperty is looked up within its registered abilities. - In-memory comparison: The hash is regenerated using the data from the current
Requestand compared against the one stored in the token. If they do not match, access is denied immediately.
It is essential to optimize this process to avoid overloading the database with additional queries for every request. Upon authenticating the user, the token data is already loaded into memory, so hash validation executes at the software level with zero impact on the persistence layer.
The middleware acts as a perimeter guard at the HTTP layer. It must handle two primary scenarios:
- Public or unauthenticated routes: If the request does not include an
Authorization: Bearerheader, the request continues its normal flow without blocking, allowing anonymous navigation across open catalogs and resources. - Routes with token credentials: It locates the token record in the Sanctum database, extracts the fingerprint registered in its
abilities, and compares it against the hash recalculated in real time using the securehash_equalsfunction (protection against side-channel or timing attacks).
<?php
namespace App\Http\Middleware;
use App\Services\ClientFingerprintService;
use Closure;
use Illuminate\Http\Request;
use Laravel\Sanctum\PersonalAccessToken;
use Symfony\Component\HttpFoundation\Response;
class VerifyClientFingerprint
{
    public function handle(Request $request, Closure $next): Response
    {
        $bearerToken = $request->bearerToken();
        // 1. If no token in header, allow request (public routes)
        if (! $bearerToken) {
            return $next($request);
        }
        try {
            // 2. Get Sanctum token
            /** @var PersonalAccessToken|null $token */
            $token = $request->user('sanctum')?->currentAccessToken() ?? PersonalAccessToken::findToken($bearerToken);
            if (! $token) {
                return $next($request);
            }
            // 3. Extract registered fingerprint
            $expectedFingerprint = null;
            $abilities = $token->abilities ?? [];
            foreach ($abilities as $ability) {
                if (str_starts_with($ability, 'fingerprint:')) {
                    $expectedFingerprint = substr($ability, strlen('fingerprint:'));
                    break;
                }
            }
            // 4. Environment match validation
            if ($expectedFingerprint !== null) {
                $currentFingerprint = ClientFingerprintService::generate($request);
                if (! hash_equals($expectedFingerprint, $currentFingerprint)) {
                    return response()->json([
                        'error' => 'Access denied: Token was issued for another client or environment.',
                    ], 403);
                }
            }
        } catch (\Throwable $e) {
            return $next($request);
        }
        return $next($request);
    }
}
This middleware is registered in bootstrap/app.php via an alias and added to the route group in routes/api.php alongside the API's HMAC signing mechanisms.
Web Client: Axios Centralization and Interceptors in Vue 3
In the frontend built with Vue 3 and Pinia, all HTTP requests must be standardized. Upon validation failure due to fingerprint mismatch or expiration (status codes 401 and 403), local session credentials (cookies and stores) must be purged, redirecting the user to the login form while preventing infinite redirect loops.
Configuration in main.js
import axios from 'axios'
import VueCookies from 'vue-cookies'
import { createToaster } from '@meforma/vue-toaster'
import { API_URLS } from './config/api'
import { useAuthStore } from './store/auth'
// Default HTTP headers
axios.defaults.headers.common['Accept'] = 'application/json'
axios.defaults.headers.common['X-Requested-With'] = 'XMLHttpRequest'
axios.defaults.withCredentials = true
const toaster = createToaster({ position: 'bottom-right', duration: 3500 })
// Axios response interceptor
axios.interceptors.response.use(
    (response) => response,
    (error) => {
        if (error.response) {
            const status = error.response.status
            const url = error.config?.url || ''
            // 1. Handling expired sessions or invalid environments
            if (status === 401 || status === 403) {
                VueCookies.remove('windowLaravel')
                VueCookies.remove('token')
                delete axios.defaults.headers.common['Authorization']
                try {
                    const authStore = useAuthStore(pinia)
                    authStore.destroyTokenAuthCookie()
                } catch (e) {}
                const isLoginRequest = url.includes(API_URLS.login) || url.includes('/login')
                const isAlreadyOnLogin = window.location.pathname.endsWith('/login')
                if (!isLoginRequest && !isAlreadyOnLogin) {
                    if (status === 403) {
                        const customMsg = error.response.data?.error || 'Unauthorized access or mismatched environment.'
                        toaster.error(customMsg)
                    }
                    setTimeout(() => {
                        window.location.href = '/login?expired=1'
                    }, 1200)
                }
            }
            // 2. Validation and business logic errors (400)
            if (status === 400) {
                const msg = error.response.data?.message || error.response.data?.error
                if (msg && typeof msg === 'string') {
                    toaster.warning(msg)
                }
            }
            // 3. Internal server errors (500+)
            if (status >= 500) {
                toaster.error('A server error has occurred. Please try again.')
            }
        }
        return Promise.reject(error)
    }
)
Mobile Client: Centralized Interceptor and Alerts in Flutter (Dart)
In Flutter mobile applications, where HTTP calls are commonly made using packages like http, there is no native middleware pipeline like in Axios. To solve this consistently, a static Api class is implemented that encapsulates HTTP verbs (GET, POST, PUT, DELETE), injects standard headers (including Accept: application/json and X-Requested-With: XMLHttpRequest), and processes all responses through a centralized handler.
Implementation of the Api Class and UI Handling with Global NavigatorKey
To visually notify the user without having to pass BuildContext instances throughout the data layer and repositories, a GlobalKey<NavigatorState> configured in the root MaterialApp is used.
import 'dart:convert';
import 'package:flutter/material.dart';
import 'package:http/http.dart' as http;
import 'package:desarrollolibre/utils/user_preference.dart';
final GlobalKey<NavigatorState> navigatorKey = GlobalKey<NavigatorState>();
class Api {
  static Future<http.Response> get(String path, {String? token, Map<String, dynamic>? data}) async {
    final url = Uri.https(baseUrlAPI, "$pathApi$path", data);
    final response = await http.get(url, headers: getApiHeaders(token: token, isJson: false, path: path));
    return _handleResponse(response, path);
  }
  static Future<http.Response> post(String path, {dynamic body, String? token, bool isJson = true}) async {
    final url = Uri.https(baseUrlAPI, "$pathApi$path");
    final response = await http.post(
      url,
      headers: getApiHeaders(token: token, isJson: isJson, path: path),
      body: isJson ? jsonEncode(body) : body,
    );
    return _handleResponse(response, path);
  }
  static http.Response _handleResponse(http.Response response, String path) {
    final status = response.statusCode;
    // Handling credential revocation (401 and 403)
    if (status == 401 || status == 403) {
      final UserPreference userPreference = UserPreference();
      userPreference.token = '';
      userPreference.email = '';
      final bool isLoginEndpoint = path.contains('login') || path.contains('user/login');
      if (!isLoginEndpoint) {
        String errorMsg = 'Your session has expired or the environment does not match.';
        try {
          final data = jsonDecode(response.body);
          if (data is Map && (data['error'] != null || data['message'] != null)) {
            errorMsg = data['error'] ?? data['message'];
          }
        } catch (_) {}
        _showAlert(
          title: status == 403 ? 'Access Denied' : 'Session Expired',
          message: errorMsg,
          icon: Icons.lock_outline_rounded,
          iconColor: Colors.redAccent,
        );
      }
    }
    if (status == 400) {
      _showAlert(
        title: 'Attention',
        message: 'Invalid request or error in submitted data.',
        icon: Icons.warning_amber_rounded,
        iconColor: Colors.amber,
      );
    }
    if (status >= 500) {
      _showAlert(
        title: 'Server Error',
        message: 'A technical problem occurred. Please try again later.',
        icon: Icons.error_outline_rounded,
        iconColor: Colors.red,
      );
    }
    return response;
  }
  static void _showAlert({
    required String title,
    required String message,
    required IconData icon,
    required Color iconColor,
  }) {
    WidgetsBinding.instance.addPostFrameCallback((_) {
      final context = navigatorKey.currentContext;
      if (context == null) return;
      showDialog(
        context: context,
        builder: (ctx) => AlertDialog(
          shape: RoundedRectangleBorder(borderRadius: BorderRadius.circular(16)),
          title: Row(
            children: [
              Icon(icon, color: iconColor, size: 28),
              const SizedBox(width: 10),
              Expanded(child: Text(title, style: const TextStyle(fontWeight: FontWeight.bold))),
            ],
          ),
          content: Text(message),
          actions: [
            TextButton(
              onPressed: () => Navigator.of(ctx, rootNavigator: true).pop(),
              child: const Text('Understood', style: TextStyle(fontWeight: FontWeight.bold)),
            ],
          ],
        ),
      );
    });
  }
}
In summary:
To handle denied responses (HTTP codes 401 or 403) without duplicating code across every API call, logic should be centralized within the application's clients:
- Web Applications (Axios): A global response interceptor is configured. When the API returns a 403 or 401 status code, the interceptor captures the response, clears local storage (tokens, session), and redirects the user to the login flow.
- Mobile Applications (Flutter / HTTP): Centralized methods are defined for HTTP requests (GET, POST, PUT, DELETE). If the response contains an unauthorized status, a global handler invokes the logout method and resets the application state.
Automated Testing and Validation with Pest PHP
To guarantee that the system strictly responds to security policies and prevents regressions, integration tests were developed using Pest PHP covering the full matrix of use cases:
- Cryptographic determinism: Two requests with identical headers within the same IP subnet produce the exact same SHA-256 hash. A change in the
User-Agentor network segment alters the output hash. - Unauthenticated traffic: Open endpoints respond successfully with HTTP code
200when no authorization header is provided. - Legitimate usage: A request with a Bearer token issued under the same environment passes through the middleware and allows protected logic execution (HTTP
200). - Reuse attempt in mismatched environment: A token issued for Flutter but used from a web browser or desktop client is intercepted and immediately rejected with HTTP status code
403 Forbiddenand the message: "Access denied: Token was issued for another client or environment."- You can try making a cURL request with the token to a protected resource:
curl -X GET "http://***" \
       -H "Authorization: Bearer ID|token" \
       -H "Accept: application/json"
- Corrupted or non-existent tokens: Tokens with invalid signatures are rejected with HTTP code
401 Unauthorized.
Conclusion
Combining Client Fingerprinting in Laravel Sanctum with reactive interceptors in the frontend (Vue 3) and mobile client (Flutter) significantly enhances the security posture of a REST API. By conditioning token validity to the originating HTTP context without requiring invasive hardware identifiers or altering the database schema, stolen token reuse is neutralized while providing a clear user experience during session expirations or revocations.
Rate Limiting and Summary of Protection and Optimization Strategies for REST APIs
Previously, we analyzed various strategies to protect and optimize a REST API through architectural best practices, regardless of the backend technology you use. Among these measures, key highlights include unifying resources when they are required in the same query, using digital signatures (HMAC) for mobile applications (such as Flutter) outside the traditional web environment, and using digital fingerprints associated with JSON Web Tokens (JWT) to prevent them from being cloned across different browsers or devices.
Another fundamental strategy is request throttling or Rate Limiting, a mechanism that allows controlling the frequency of incoming requests to prevent misuse and protect application availability.
What is Rate Limiting?
Rate Limiting is a traffic control strategy that restricts the amount of HTTP requests a user or client can make to an API resource within a given period (for example, 60 requests per minute). Its goal is to prevent abuse, reduce the impact of brute-force attacks, and mitigate the unnecessary consumption of server resources.
Implementing Rate Limiting in Laravel
In Laravel, rate limiters are configured in the route service provider (AppServiceProvider or RouteServiceProvider) using the RateLimiter facade. Below is the definition of a general limiter based on the client's IP address:
use Illuminate\Cache\RateLimiting\Limit;
use Illuminate\Http\Request;
use Illuminate\Support\Facades\RateLimiter;

RateLimiter::for('general', function (Request $request) {
    return Limit::perMinute(150)->by($request->ip());
});
Analyzing the Request Limit
To determine the appropriate number of allowed requests per minute (for example, 150 requests/minute per IP), it is necessary to analyze the application's navigation dynamics:
- Multiple calls per screen: When loading a module in the client interface, the application usually makes several concurrent requests to the REST API (for example, to retrieve user data, notifications, categories, and main content). This reinforces the importance of resource unification described in the first strategy.
- Fluid navigation estimation: An actively browsing user can generate an average of 2 requests per second, which equals 120 requests per minute. Setting a margin of 150 requests per minute allows a smooth experience for legitimate users while blocking automated scripts performing dozens of requests per second.
- IP Identification vs. Authenticated User: If rate limiting is applied exclusively by IP address, multiple users browsing under the same shared network (NAT) will split the assigned quota. To avoid this conflict in corporate or institutional environments, the restriction criteria can alternate by combining the authenticated user identifier and the IP address.
Specific Protection by Resource Type
Not all endpoints require the same consumption quota. Critical resources or those prone to brute-force attacks should have stricter, independent limiters.
// Restrictive limiter for authentication endpoints or sensitive actions
RateLimiter::for('autenticacion', function (Request $request) {
    return Limit::perMinute(30)->by($request->ip());
});
Setting a maximum of 30 requests per minute on login or payment routes prevents an attacker from attempting to compromise credentials via brute force or overloading the processor by executing key derivation algorithms (such as Bcrypt or Argon2).
Strategy Summary
Route Modularization for Middleware Application
Maintaining a modular architecture facilitates assigning specific protection policies to route groups. An organized structure using dedicated files allows applying traffic limiters centrally:
// General routes protected with the "general" limiter (150 req/min)
Route::middleware(['throttle:general'])->group(function () {
    require __DIR__.'/api/notification.php';
    require __DIR__.'/api/poll.php';
    ***
});
CORS Configuration and Token Expiration
In addition to the request rate limiter, API security must be complemented by the following infrastructure configurations:
Cross-Origin Resource Sharing (CORS)
CORS policies (configured in Laravel within the config/cors.php file) restrict which browser domains can consume the API. It is important to remember that native mobile applications are not subject to browser restrictions, so they do not use the CORS mechanism; digital signature verifications (HMAC) must be implemented for these platforms.
JSON Web Token Expiration (JWT / Sanctum)
All authentication tokens must have a finite lifespan. In the config/sanctum.php file, the expiration time is specified in minutes. For example, to configure a 30-day validity period:
// 30 days * 24 hours * 60 minutes
'expiration' => 43200,
Setting an expiration time limit ensures that, if a token happens to be intercepted, it will automatically be invalidated once the configured period expires.
Difference Between Application Rate Limiting and Server-Level Protection
The Rate Limiting mechanism within the framework runs at the application level (PHP code layer). Although it blocks business logic execution and database access, the web server (Nginx or Apache) continues to process incoming HTTP requests.
To mitigate massive Distributed Denial of Service (DDoS) attacks, rate limiting must be configured at higher infrastructure layers, such as the web server (using limit_req in Nginx) or through a Web Application Firewall (WAF) like Cloudflare.
Let's see how to protect the REST API using Laravel Sanctum.
Section source code:
https://github.com/libredesarrollo/book-course-laravel-base-api-11/releases/tag/v0.1
Now, let's explore the inner workings of Laravel's template engine, Blade.