Content Index
- Why are they so important?
- Migrations
- Create a migration
- Run the migration
- Practical case: Creation of the Posts and Categories table
- Explanation of the code above
- Tips for your migrations
- How does Laravel know what's left to migrate?
- Migration flow
- Reverting migrations (rollback)
- How does Rollback work?
- Refreshing the database
- Optional: Synchronization with GitHub: Control and Backup
- Repository Configuration
- Uploading the code to the cloud
- Using Tags for book tracking
- FOREIGN_KEY_CHECKS for rolling back foreign key migrations in Laravel
- Resolution
- Optional
- FOREIGN_KEY_CHECKS for rolling back foreign key migrations in Laravel
- Resolution
- Optional:
- Why I DON'T use migrations to add columns
- Types of migrations in Laravel
- The bad practice that works for me
- My alternative
- Manual migrations with SQL
- How to view the SQL of migrations in Laravel with `php artisan migrate --pretend`
- Why you need to see the SQL of a Laravel migration
- Exactly what --pretend does
- What it DOES NOT do (and common mistakes)
- What is this for?
- With --pretend, everything is easier
- Real problems when using --pretend (and how to fix them)
- Strange characters in the console
- How to format SQL quickly
- Using migration SQL in environments without terminal access
- Alternatives to inspect migrations in Laravel
- Frequently Asked Questions about Laravel Migration SQL
- Conclusion
We already know how to work with controllers in a basic way and how to configure MySQL in our Laravel project, let's continue talking about the Laravel ecosystem., but we haven't been able to link them with models since the model is the entry point to the database, specifically a table. That is, in our model called Post (in singular), we need a table called posts (in plural). Using singular and plural names are simply good practices.
Initially in the book, we configured the database for our project, and now it's time to use it. We don't connect directly to the database tables. Creating tables directly is not recommended when working with the framework and practically any modern server-side web framework in PHP, Node, Python, and it's worth mentioning, they follow this same principle of preventing developers from interacting directly with the database, and this is great for two reasons:
- It allows us to work with the database as just another process.
- It allows for better performance when working in a team.
Before explaining the two points in detail, let's mention the tool used to achieve this feat... They are known as migrations, which are nothing more than a control system for tables.
In short, to start working with models, we need tables in the database, and to work with tables, we need migrations. Let's start with migrations.
Why are they so important?
- SQL Abstraction: Laravel supports multiple engines like MySQL, MariaDB, PostgreSQL, SQLite, and SQL Server. Migrations are "transparent": you write the code in PHP, and Laravel translates it to the specific SQL of the engine you are using.
- Version Control: The database is part of the project. If you lose the database, you don't want to "reverse engineer" it by reviewing controllers to rebuild it. With migrations, any developer can recreate the entire structure with a single command.
- Living Documentation: By reading a migration, you perfectly understand what fields a table has (if it's a varchar, if it's nullable, if it's unique, etc.).
Migrations
Migrations are a system that allows us to generate tables based on PHP files (classes), one class for each table in our database that we define. Through migrations (understood as classes), we can either create new tables or modify existing ones. A migration looks like the following:
<?php
use Illuminate\Database\Migrations\Migration;
use Illuminate\Database\Schema\Blueprint;
use Illuminate\Support\Facades\Schema;
return new class extends Migration
{
    /**
     * Run the migrations.
     *
     * @return void
     */
    public function up(): void
    {
        Schema::create('categories', function (Blueprint $table) {
            $table->id();
            $table->timestamps();
        });
    }
    /**
     * Reverse the migrations.
     *
     * @return void
     */
    public function down(): void
    {
        Schema::dropIfExists('categories');
    }
};
Explanation of the code above
The first thing we can notice is that we have a `new class` and we inherit from a `Migration` class, which is internal to the framework and allows this class to be used as a migration. As for `new class`, it is a PHP feature that allows us to create anonymous classes, which is particularly useful for avoiding conflicts between classes. We don't need a name for this class since we are not going to reference it anywhere; these classes are used internally to handle migrations and nothing more.
Migrations consist of two parts. On one hand, we have the up() method, where we apply the operations we want to perform on the database:
- Create a table.
- Modify an existing table by adding/removing columns and/or indexes.
There is also a method called down(), which is used to reverse the changes made in the up() method. That is, if in the up() method we create a table, in down() we remove it. If in up() we create one or more columns, in down() we remove that same column or columns. This is because the migration system allows us to both execute them and revert the previous operations.
You can see that in the up() method, we define the schema, which, given the table name, allows us to add/remove columns. By default, Laravel already defines a basic structure for us, in which:
- We have a column for the PK $table->id()
- We have columns for creation and update dates $table->timestamps()
Some operations to create columns are:
- id() to generate a column named id, auto-incrementing, bigInteger, and with a primary key relationship.
- string() to indicate a varchar type column; it receives two attributes, the name and the length.
- timestamps() creates two timestamp type columns, one for the record's creation date and the other for the update date.
- foreignId() this method allows us to create a foreign key; it receives one mandatory parameter, with which we indicate the field name. This method can receive more parameters to indicate the relevant relationships, but if we respect Laravel's naming conventions, it would not be necessary.
- text() allows creating a text type column; it receives one parameter, with which we indicate the column name.
- enum() allows creating an enum (selectable) type column and receives two parameters, the column name and the selectable values presented through an array.
- onDelete() indicates the behavior that records will have when deleted in a foreign relationship.
To which you can customize using modifiers; some of the most common are:
- unsigned() to indicate that it will be of UNSIGNED type.
- nullable() to indicate that they can be null.
- constrained() to create the constraint/reference to the table, usually used in conjunction with the foreignId() type column.
Here you have access to the official documentation for more details:
https://laravel.com/docs/master/migrations#creating-columns
In the end, migrations are nothing more than files that define a structure, which with a command, we reflect its structure in the database in a table. Therefore, one (or several) migrations define a table in the database.
For example, a migration looks like the following:
<?php
use Illuminate\Database\Migrations\Migration;
use Illuminate\Database\Schema\Blueprint;
use Illuminate\Support\Facades\Schema;
return new class extends Migration
{
    /**
     * Run the migrations.
     *
     * @return void
     */
    public function up(): void
    {
        Schema::create('categories', function (Blueprint $table) {
            $table->id();
            $table->string('title', 500);
            $table->string('slug', 500);
            $table->timestamps();
        });
    }
    /**
     * Reverse the migrations.
     *
     * @return void
     */
    public function down(): void
    {
        Schema::dropIfExists('categories');
    }
};
In which we indicate a column for the id, title, slug, and dates.
Create a migration
To create a migration, we have the following command:
$ php artisan make:migration <MigrationName>To which we can define a structure through a set of functions as we explained before.
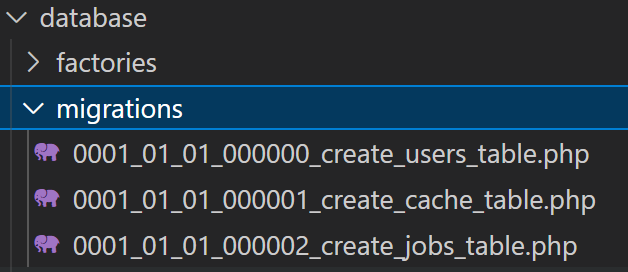
Migrations are located in the folder:
database/migrations
And it is important to note patterns like:
create_<table>_tableOr to modify an existing table:
add_<operation>_<table>_tableSince, if you respect these patterns when creating the migration, Laravel will autocomplete part of the code, such as the table name and the id and date columns. That is, if we do not indicate these patterns:
// *** php artisan make:migration little_table
<?php
return new class extends Migration
{
    public function up(): void
    {
        //
    }
    public function down(): void
    {
        //
    }
};
And if we indicate a pattern:
// *** php artisan make:migration createCategoriesTable
<?php
use Illuminate\Database\Migrations\Migration;
use Illuminate\Database\Schema\Blueprint;
use Illuminate\Support\Facades\Schema;
return new class extends Migration
{

    public function up(): void
    {
        Schema::create('categories', function (Blueprint $table) {
            $table->id();
            $table->timestamps();
        });
    }
    public function down(): void
    {
        Schema::dropIfExists('categories');
    }
};
Inside the file, you will find the methods we mentioned before:
- up(): Where we will define the fields of our table.
- down(): Where we will define how to undo those changes.
Run the migration
To have our tables, we need to run our migrations, so let's start working with them.
To run the migrations:
$ php artisan migratePractical case: Creation of the Posts and Categories table
Now, let's create a migration for the categories:
$ php artisan make:migration createCategoriesTable
With the following structure:
<?php
use Illuminate\Database\Migrations\Migration;
use Illuminate\Database\Schema\Blueprint;
use Illuminate\Support\Facades\Schema;
return new class extends Migration
{
    /**
     * Run the migrations.
     *
     * @return void
     */
    public function up(): void
    {
        Schema::create('categories', function (Blueprint $table) {
            $table->id();
            $table->string('title', 500);
            $table->string('slug', 500);
            $table->timestamps();
        });
    }
    /**
     * Reverse the migrations.
     *
     * @return void
     */
    public function down(): void
    {
        Schema::dropIfExists('categories');
    }
};
And for the posts:
$ php artisan make:migration createPostsTableWith the following structure:
<?php
use Illuminate\Database\Migrations\Migration;
use Illuminate\Database\Schema\Blueprint;
use Illuminate\Support\Facades\Schema;
return new class extends Migration
{
    /**
     * Run the migrations.
     *
     * @return void
     */
    public function up(): void
    {
        Schema::create('posts', function (Blueprint $table) {
            $table->id();
            $table->string('title', 500);
            $table->string('slug', 500);
            $table->string('description',150)->nullable();
            $table->text('content')->nullable();
            $table->string('image')->nullable();
            $table->enum('posted', ['yes', 'not'])->default('not');
            $table->timestamps();
            $table->foreignId('category_id')->constrained()
                ->onDelete('cascade');
        });
    }
    /**
     * Reverse the migrations.
     *
     * @return void
     */
    public function down(): void
    {
        Schema::dropIfExists('posts');
    }
};
Explanation of the code above
- description: A short excerpt (we use string).
- content: The body of the post. We use the text() type since a VARCHAR would be too small for long articles.
- image: We use string for the image path and add the nullable() attribute, indicating that this field can be empty.
- posted: We use an enum type with the values ['yes', 'no']. In addition, we use the default('no') decorator so that if we do not specify anything, the post is born as "not published".
In the posts migration, we create a column called category_id, which as you can guess, is used to handle the foreign key relationship with the categories. Laravel already knows automatically how to relate the category_id column with a table called categories (in plural), since we are using Laravel's naming convention. But, in case it is necessary, you can also indicate the table:
$table->foreignId('category_id')->constrained('categories');For the rest, we define a series of text type columns and one with an enum to handle the status.
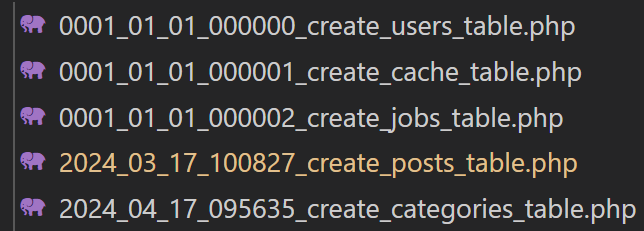
It is important to note that the order in which we define the migrations is fundamental, since the order in which they are found:
Is the order in which they will be executed. When executing the migrations:
$ php artisan migrateWe will see the created tables in our database.
Tips for your migrations
It will be the order in which they are defined. Therefore, it is common for migrations to have relationships between them, and if you try to run a migration that has a foreign relationship with another relationship that has not yet been executed, you will get an error. To exemplify this, suppose we have in our project's migrations folder:
Which is the reverse order that we originally presented in the previous section (the post and category migration). Assuming that we do not have tables in the project's database and if we try to execute the migrations with:
$ php artisan migrateYou will see that the error occurs precisely when Laravel tries to create the post migration:
***
Migrating: 2024_04_17_100827_create_posts_table
  SQLSTATE[HY000]: General error: 1215 Cannot add foreign key constraint (SQL: alter table `posts` add constraint `posts_category_id_foreign` foreign key (`category_id`) references `categories` (`id`) on delete cascade)
  at C:\laragon\www\larafirststeps\vendor\laravel\framework\src\Illuminate\Database\Connection.php:712
    711▕         catch (Exception $e) {
  ➜ 712▕             throw new QueryException(
    713▕                 $query, $this->prepareBindings($bindings), $e
    714▕             );
    715▕         }
    716▕     }
\vendor\laravel\framework\src\Illuminate\Database\Connection.php
PDOException::("SQLSTATE[HY000]: General error: 1215 Cannot add foreign key constraint")\vendor\laravel\framework\src\Illuminate\Database\Connection.php
PDOStatement::execute()Since, being defined before the categories one, you cannot create the foreign relationship.
How does Laravel know what's left to migrate?
If you try to run php artisan migrate again, you will see a message indicating that "there is nothing to migrate" (Nothing to migrate). How does the system know?
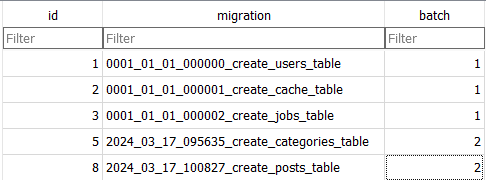
Laravel automatically creates an internal table called migrations (which you will not see in your migration files because it is from the system). In this table, a record of each executed file is saved:
- Batch: Indicates in which group the migration was executed. For example, the initial tables of the project usually have batch 1, while our categories table will have batch 2.
- Record: If the file name is already in that table, Laravel simply skips it.
Migration flow
In this section, we will see other useful commands and options for migrations:
Reverting migrations (rollback)
Many times we realize that we forgot to add a column, or we need to change its definition. In these cases, we have two possible scenarios:
- Create another migration to add these columns or change the existing ones.
- Do a rollback of the migrations and make the changes in the migration that defines the table we want to change and run the migrations again.
In short, we do a rollback when things don't go well and we have to make corrections. The command is:
migrate:rollbackAnd if you run it, you will see that the migrations you have executed are reverted. That is:
- If when we ran the migrate command, the migrations for categories and posts were executed, then when executing the rollback, both migrations were reverted.
- If when we ran the migrate command, only one of the migrations was executed, either for categories or posts, then when executing the rollback, the migration that was executed in the last migrate will have been reverted.
How does Rollback work?
Basically, this command looks for the last batch number in the migrations table and reverts all the files that belong to that group. When you run it:
- The down() method of the migration is triggered.
- The table is deleted from the database (in our case, the categories table disappears).
- The corresponding record is deleted from Laravel's internal control table.
Be very careful with this command. In development environments, there is no problem because we work with test data, but if you run a rollback in production, you will delete the entire table with all the real user data. Use it with caution!
All this depends on the batch number that is created when executing the migrations:
This number is incremental, as it happens when you are inserting new records in a table and the IDs/PKs are generated incrementally:
This table is taken into account by the framework to know which migrations it has executed and to have control of the flow based on the batch number.
It is important to note that if we have many migrations and they have already been executed, it is often not possible to do a rollback to reach the migration you want to edit. This is to avoid reverting all the migrations that precede it. Therefore, a common solution is to generate a new migration to indicate these changes.
For example, suppose we have the following migrations:
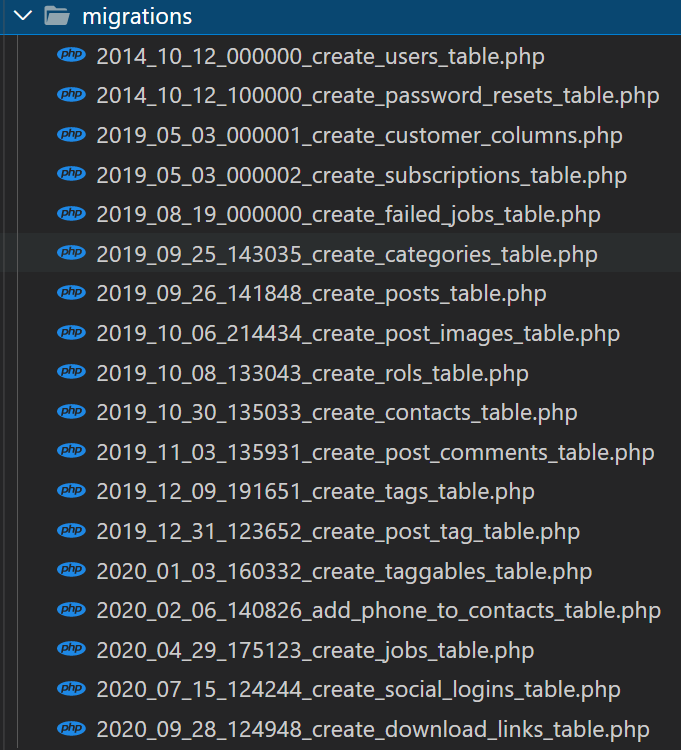
And we want to change the posts migration, which is one of the first as you can see in the image above. In these cases, it is very complicated to revert all your migrations to reach the posts one, to add the column or columns and then run all the migrations again. What we can do to avoid this is to create another migration like:
// add_extra_field_to_posts_table
<?php
use Illuminate\Database\Migrations\Migration;
use Illuminate\Database\Schema\Blueprint;
use Illuminate\Support\Facades\Schema;
return new class extends Migration
{
    /**
     * Run the migrations.
     *
     * @return void
     */
    public function up(): void
    {
        Schema::table('posts', function (Blueprint $table) {
            $table->string('extra_field', 255)->nullable();
        });
    }
    /**
     * Reverse the migrations.
     *
     * @return void
     */
    public function down(): void
    {
        Schema::table('posts', function (Blueprint $table) {
            $table->dropColumn('extra_field');
        });
    }
}
That applies the changes to posts and we run it to reflect the changes in the database.
Since, remember that we use migrations for two purposes: to create tables and to alter existing tables with new columns, indexes, or by removing them.
Refreshing the database
This command is a combination of rollback and migrate, since what Laravel does is a rollback of all migrations, to run them again:
$ php artisan migrate:refreshIf you try to run a:
$ php artisan migrateYou will see that, at this point, Laravel will not run the migrations again (it returns "Nothing to migrate."), since they have already been executed. But, if you want to do a fresh execution, we have the command:
$ php artisan migrate:refreshAnd you will see that it first does a rollback and then a migrate:
  2026_03_18_155116_create_categories_table  11.84ms DONE
  0001_01_01_000002_create_jobs_table  29.79ms DONE
  0001_01_01_000001_create_cache_table  19.75ms DONE
  0001_01_01_000000_create_users_table  29.64ms DONE
  0001_01_01_000002_create_jobs_table  55.35ms DONE
  2026_03_18_155116_create_categories_table  11.54ms DONE
  2026_03_18_160307_create_posts_table  14.34ms DONE
Optional: Synchronization with GitHub: Control and Backup
The next thing we will do for good practice is to synchronize our project with GitHub. Even if you work alone, this offers incredible advantages: it allows you to keep track of every change (know what you did and when) and share the code between different machines. As I will be alternating between Mac and Windows during the course, this ensures I have the exact same project in both environments.
GitHub is the most popular service, although there are others like GitLab. It is a tool that integrates with Git, the version control system that you must have installed on your computer.
If you use a Mac, Git usually comes pre-installed. On Windows, you can download it from the official page. Once installed, don't forget to configure your user and email globally.
Repository Configuration
To begin, you must create a new repository in your GitHub account. I will give it a descriptive name, like course-book-laravel-base-13. Once created, we will follow these steps in the terminal:
- git init: Initializes the local repository in your project folder.
- git add .: Adds all project files to the staging area for Git to start tracking them.
- git commit -m "First steps": Creates a "snapshot" or state of your project with a descriptive message.
Uploading the code to the cloud
Once you have your local changes, we must connect them with the remote repository on GitHub. We will use these commands (which GitHub provides when you create the repo):
- git remote add origin [URL-OF-YOUR-REPOSITORY]: Establishes the link with the server.
- git branch -M main: Renames the main branch to main (a modern convention).
- git push -u origin main: Uploads your local files to the cloud. At this point, if it's your first time, a window will open for you to authenticate.
Now, if you reload your GitHub page, you will see all your source code, including the database/migrations folder with the changes we made.
Using Tags for book tracking
So that you can have the code exactly as I leave it at the end of each section, I will use Tags instead of branches, as they function as a "mirror" or fixed checkpoint.
To create and upload a tag, the commands are:
- git tag -a v0.1 -m "Migrations completed": Creates the tag locally.
- git push origin --tags: Synchronizes all tags with the remote repository.
I will only explain this process in this section, although I will do these same steps at the end of each chapter.
If you need help configuring Git on your computer:
https://www.desarrollolibre.net/blog/programacion-basica/la-guia-de-git-que-nunca-tuve
FOREIGN_KEY_CHECKS for rolling back foreign key migrations in Laravel
We will see how we can solve a rather annoying error that can occur when you roll back migrations that have foreign key relationships in Laravel. The error in question looks like this:
SQLSTATE[HY000]: General error: 3730 Cannot drop table 'tutorials' referenced by a foreign key constraint 'inscribed_tutorial_id_foreign' on table 'inscribed'. (SQL: drop table if exists `tutorials`)
 at vendor/laravel/framework/src/Illuminate/Database/Connection.php:703
   699        // If an exception occurs when attempting to run a query, we'll format the error
   700    // message to include the bindings with SQL, which will make this exception a
   701      // lot more helpful to the developer instead of just the database's errors.
   702   catch (Exception $e) {
 703             throw new QueryException(
   704                $query, $this->prepareBindings($bindings), $e
   705            );
   706        }
   707    }
This is, at first analysis, an error with the foreign keys that we apply to our tables. Everything is great when we make this type of relationship, in which, for example, the `tutorials` table exists before the `inscribed_tutorial_id_foreign` table, and to the latter, we apply a FK or foreign relationship:
<?php
use Carbon\Carbon;
use Illuminate\Database\Migrations\Migration;
use Illuminate\Database\Schema\Blueprint;
use Illuminate\Support\Facades\DB;
use Illuminate\Support\Facades\Schema;
class CreateTutorialsTable extends Migration
{
   /**
    * Run the migrations.
    *
    * @return void
    */
   public function up()
   {
       Schema::create('tutorials', function (Blueprint $table) {
           ***
           $table->foreignId('user_id')->constrained()
           ->onDelete('cascade');
           ***
       });
   }
   public function down()
   {
       DB::statement('SET FOREIGN_KEY_CHECKS = 0');
       Schema::dropIfExists('tutorials');
       DB::statement('SET FOREIGN_KEY_CHECKS = 1');
   }
}
As you can see, the novelty is that when deleting a table that has relationships with another FK type table, we disable the check for foreign keys.

Resolution
To avoid this, we can disable the check for foreign keys in those tables that are used by others to store references (FKs).
Optional
In SQL it's something like this:
SET FOREIGN_KEY_CHECKS = 0;
DROP TABLE IF EXISTS table1;
SET FOREIGN_KEY_CHECKS = 1;
Always remember to re-enable the check after dropping the table.
FOREIGN_KEY_CHECKS for rolling back foreign key migrations in Laravel
We will see how we can solve a rather annoying error that can occur when you roll back migrations that have foreign key relationships in Laravel. The error in question looks like this:
SQLSTATE[HY000]: General error: 3730 Cannot drop table 'tutorials' referenced by a foreign key constraint 'inscribed_tutorial_id_foreign' on table 'inscribed'. (SQL: drop table if exists `tutorials`)
 at vendor/laravel/framework/src/Illuminate/Database/Connection.php:703
   699        // If an exception occurs when attempting to run a query, we'll format the error
   700    // message to include the bindings with SQL, which will make this exception a
   701      // lot more helpful to the developer instead of just the database's errors.
   702   catch (Exception $e) {
 703             throw new QueryException(
   704                $query, $this->prepareBindings($bindings), $e
   705            );
   706        }
   707    }
This is, at first analysis, an error with the foreign keys that we apply to our tables. Everything is great when we make this type of relationship, in which, for example, the `tutorials` table exists before the `inscribed_tutorial_id_foreign` table, and to the latter, we apply a FK or foreign relationship:
<?php
use Carbon\Carbon;
use Illuminate\Database\Migrations\Migration;
use Illuminate\Database\Schema\Blueprint;
use Illuminate\Support\Facades\DB;
use Illuminate\Support\Facades\Schema;
class CreateTutorialsTable extends Migration
{
   /**
    * Run the migrations.
    *
    * @return void
    */
   public function up()
   {
       Schema::create('tutorials', function (Blueprint $table) {
           ***
           $table->foreignId('user_id')->constrained()
           ->onDelete('cascade');
           ***
       });
   }
   public function down()
   {
       DB::statement('SET FOREIGN_KEY_CHECKS = 0');
       Schema::dropIfExists('tutorials');
       DB::statement('SET FOREIGN_KEY_CHECKS = 1');
   }
}
As you can see, the novelty is that when deleting a table that has relationships with another FK type table, we disable the check for foreign keys.
Resolution
To avoid this, we can disable the check for foreign keys in those tables that are used by others to store references (FKs).
Optional:
In SQL it's something like this:
SET FOREIGN_KEY_CHECKS = 0;
DROP TABLE IF EXISTS table1;
SET FOREIGN_KEY_CHECKS = 1;
Always remember to re-enable the check after dropping the table.
Why I DON'T use migrations to add columns

Here I want to talk about a topic that I think is interesting: migrations in Laravel.
Types of migrations in Laravel
Let's remember that there are two types of migrations to get a little context. There is the typical one:
$ php artisan migrateIt always starts like this. Then, create, you indicate what you want to create (for example, the name of the table: payments, books, etc. — we already have users). And with that, it is understood that you are going to create a table. You can see this here; for example, it was what we did for the payments part. If I can find it… here it is. So, a structure called payments will be created.
But what happens when you want, for example, to add a column and so on? There we have a slightly different syntax.
$ php artisan make:migration add_column_name_to_table_name_tableThis is a bit complicated. I speak from the perspective of being an independent developer. All the projects I do, I do them myself, either for third parties or directly for myself.
Therefore, when I want to talk to someone, I talk to myself. It's not a team project, so I have certain limitations… and I also adapt my way of programming to that.
For example, I always use Git. My machine can explode —I would regret it, of course— but I don't lose my work because I always have it synchronized. I synchronize it, so to speak, with myself.
I use Git, then I go to another machine, download the changes, continue developing… and so on. This is very different when you are developing in a team of 10 people on the same project. In those cases, at some point, files may overlap, there may be conflicts, and they have to be resolved with a merge. I don't have those problems because I work alone.
Nor am I going to turn on two machines to work in parallel. I work on one, synchronize, go to the other, do a pull, continue working, and that's it.
The bad practice that works for me
This also applies a bit to migrations. And this is where I recognize that I may be following a bad practice.
I hate having tables "scattered" across multiple migrations. Especially with entities as generic and flexible as payments. For example, at first, I had a product called "course". Then I also wanted to handle "books". Since my organization was not the best at the beginning, I have duplicate things.
That then affects other tables, like the users table. At first, I didn't sell anything, but when I started selling, I had to add more fields to users. Suppose users was not generated by Laravel, but by me. This applies to any entity.
What I want to conclude is that at some point you will surely want to modify the tables. Especially to add columns or use enumerated types. You will always want to add little things.
The "Laravel" way is to create a new migration and make the changes there. That would be the correct solution... or at least the most recommended one. But what happens? When you search for payments, for example, 20 migrations will appear for that table: one where you added a column, another where you removed an enum, another where you changed the name…
That seems horrible to me. I don't like it.
My alternative
In my case, I prefer to have the entire structure defined in a single migration and not in multiple ones. But this brings a problem: if you make a change, you have to delete the entire database for the migration to be applied again. That is not ideal because you would lose all the test data in development (and in production, it's out of the question: it can't be done).
Also, I work on a shared server. I don't have access to the terminal to run these commands. I have to provide the SQL directly. As far as I know, Laravel does not generate that SQL directly, but you already understand the problem.
How do I solve it?
What I do is not generate intermediate migrations. And that's why I don't remember the commands well. When I want to add a new field —for example, returned— I add it directly in the original migration. This happens a lot: sometimes you develop modules later, like one for cancellations or disputes, and you realize that you need new columns.
For example, at first, you have canceled, and then you realize that you also need a dispute field. Then you integrate MercadoPago. And all that would be five different migrations... for a single table!
It's a nightmare to read it like that. And if a new developer joins the team, they have to put the puzzle together in their head to understand how the table ended up.
So, what I do is modify the original migration directly. But of course, how do I replicate that in the already created database? What I do is use tools like DBgin, TablePlus, phpMyAdmin, or the one that comes with Laragon.
Manual migrations with SQL
These database management systems generate the SQL command behind the scenes. I make the change from the graphical interface (for example, adding an enum field) and then copy that SQL.
Then I run it manually on my other machines… and also on the production server (where I don't have access to the console). In total, I use about 4 machines, plus production:
ALTER TABLE `file_payments`
CHANGE `payments` `payments` enum('paypal','stripe','free','other', 'google', 'apple') NOT NULL DEFAULT 'paypal';
In this way, I have all my migrations organized. You read them, you open them, and you don't have to be putting puzzles together. Also, I avoid having so many migrations.
The bad thing is that it is a bad practice, because Laravel is designed for you to manage the database from the framework. But as I say, it has worked for me.
Although I recognize that it brings problems. For example, once I defined an enum with a space at the end of the value… and that caused problems. Here in the migration, it was well defined, but in the manually generated SQL, it was not. So, when you compare values, they don't match (null vs. empty, for example).
Those kinds of errors are subtle and difficult to detect. But well, these are things you learn over time.
How to view the SQL of migrations in Laravel with `php artisan migrate --pretend`
When you want to execute migrations, we have a very useful option: the --pretend command. This command allows us to obtain the SQL that Laravel would execute internally in the database. In other words, it doesn't apply the changes directly, but rather shows you the SQL statements that are going to be executed.
If you work with Laravel long enough, sooner or later you find yourself in this situation: you need to know the exact SQL a migration will run, but you cannot afford to run it directly. Whether it's because you're in production, in a shared staging environment, or simply because you want to review the changes thoroughly before touching the database.
That exactly happened to me. I had several migrations out of sync with the database and running a blind migrate was not an option. That’s where I discovered one of the most useful (and least exploited) Artisan options.
Why you need to see the SQL of a Laravel migration
Laravel abstracts the database very well, but that convenience comes at a price: many times you don't see the actual SQL being executed underneath.
Seeing that SQL is key when:
- You are working in shared environments.
- You don't have access to the server terminal.
- You need to validate delicate changes (alter tables, indexes, constraints).
- You want to execute the SQL manually from a manager like phpMyAdmin or DBeaver.
In my case, the problem was twofold: many accumulated migrations and zero margin for error. I needed to know exactly what was going to happen before it happened.
The php artisan migrate --pretend command explained with a real example
For example, as you can see on the screen, many migrations appear. This is because I have a bad synchronization between the migrations and the database, but well… that's another story.
$ php artisan migrate --pretendAs you can see, Laravel spits out all the SQL into the console. The only details are that:
- Some lines have strange characters (weird icons).
- It doesn't add semicolons at the end of each statement.
Exactly what --pretend does
- Iterates through all pending migrations.
- Translates the Schema Builder into actual SQL.
- Prints CREATE, ALTER, DROP statements, etc., to the console.
- Does not apply any changes to the database.
So, you have to give it a bit of formatting to make it more legible. If you want, you can ask ChatGPT to format it for you. But beyond that, the most important thing is that you already have the SQL ready to execute in your database.
What it DOES NOT do (and common mistakes)
It's worth making this clear:
- ❌ It does not execute migrations.
- ❌ It does not update the migrations table.
- ❌ It does not guarantee that the SQL is "production-ready" exactly as it comes out.
And here enters the part that almost nobody mentions.
What is this for?
You might be wondering: what can this be useful for?
As I have mentioned in other videos, this is especially valuable when you are working in shared environments, such as staging or production servers.
In these environments:
- You don't always have access to the terminal.
- Therefore, you cannot run php artisan migrate directly.
- But you can access the database manager (for example, phpMyAdmin or DBeaver).
So, if you need to create new tables or apply changes, you can copy this SQL and execute it directly.
Before I knew about this option, what I used to do was:
- Go to the database status manager.
- Export the newly created table.
- Take the resulting SQL.
- Then execute it in production.
A more cumbersome process, especially if you had to modify existing tables.
With --pretend, everything is easier
Now, with this --pretend option, everything is simplified:
- You can directly see the SQL, even if the migration modifies existing columns or adds constraints.
- You no longer depend on exporting from the visual manager.
- And you can easily copy/paste the SQL to execute it in other environments.
Real problems when using --pretend (and how to fix them)
The command works, but it isn't perfect.
SQL without semicolons
One of the first details I noticed is that many statements come out without a ; at the end. If you copy and paste that directly into a database manager, it might give you errors.
Solution:
A quick formatting (even asking Gemini to clean it up) and you're done.
Strange characters in the console
Depending on the system and the version, some lines appear with weird symbols or control characters. It's not serious, but it is annoying if you want to reuse the SQL.
In my case, it was enough to:
- Copy the output
- Clean it in an editor
- Adjust the format
The important thing is that the SQL content is there.
How to format SQL quickly
Quick options:
- Code editor + search/replace
- Online SQL formatter tools
- Or directly… ask ChatGPT
Beyond the format, the real value is that you already have the exact SQL that Laravel would execute.
Using migration SQL in environments without terminal access
This is where --pretend really shines.
In many staging or production environments:
- You cannot use php artisan.
- But you do have access to the database.
That means you can:
- Run migrate --pretend locally.
- Copy the SQL.
- Run it manually in:
- phpMyAdmin
- DBeaver
- MySQL Workbench
- The manager you use
I used to do something much more cumbersome: I would create the table locally, export it from the manager, and then execute 그 SQL in production. It worked… but it was slow and fragile, especially when modifying existing tables.
Alternatives to inspect migrations in Laravel
Although --pretend is my favorite option, it's not the only one.
Reviewing migration files
- Going into database/migrations and reading the up() and down() methods helps to understand the logic, although it's not always trivial to mentally translate that to SQL, especially in large migrations.
DB::statement and raw SQL
For more advanced cases (views, functions, triggers), many times you end up using pure SQL:
DB::statement("CREATE VIEW my_view AS SELECT ...");There's no mystery here: the SQL is explicit. But for that very reason, --pretend remains key when you use the Schema Builder.
Frequently Asked Questions about Laravel Migration SQL
- Does --pretend execute anything in the database?
- No. It only shows the SQL.
- Can I use that SQL directly in production?
- Yes, but review and format it first.
- Does it work for modifying existing tables?
- Yes, and in fact, it's one of its biggest benefits.
- Why doesn't Laravel include semicolons?
- Because the output is intended for reading, not as a final script.
Conclusion
If you ever need to see, review, or reuse the SQL of your Laravel migrations, php artisan migrate --pretend is an essential tool. Not only does it save you time, but it gives you real control in scenarios where running migrations directly is not an option.
Since I started using it, I left behind many unnecessary manual processes. It's not perfect, but used correctly, it's one of those little gems that let you work with much more peace of mind.
Discover the jewel of Laravel, the collections for data listings.