Content Index
- Printing HTML
- Control Structures and Conditionals
- @if and @switch Conditionals
- The @foreach Loop and the $loop Variable
- The Powerful @forelse
- Error Handling and Forms
- Environment Variables
- Frontend Integration (@verbatim)
- Using PHP inside Blade
- Advanced Directives: Scripts and Stacks
- 1. The @once Directive
- 2. @push and @stack
- Dynamic Classes and Attributes
- Security and HTML Data Escaping
- Printing HTML in Blade
- The @include Directive and its Variants
- Controlling Existence and Conditions
- @includeIsolated: Shielding Your View
- Rendering Collections with @each
- request()→routeIs('d-category-*') in Laravel
Discover how to boost your interface development with Laravel Blade, the most powerful and elegant templating engine in the PHP ecosystem.
In this practical guide, we will explore everything from basic control directives like @if and @foreach, to the advanced use of Components, Stacks, and Slots—essential tools for creating dynamic, reusable, and highly efficient views in your modern web projects.
You will learn to optimize your frontend performance using professional techniques such as single script loading with @once and smart stack management with @push. Whether you are taking your first steps or looking to refine your workflow with Inertia or Livewire, mastering custom directives and Blade's display logic will allow you to write much cleaner, safer, and easier-to-maintain code.
To take full advantage of Blade, you must learn Eloquent and be able to perform CRUD operations with the database.
Blade is not just about components; in fact, that part is further up in the documentation. Approximately one-third of the page covers key functionalities, demonstrating how important Blade is within Laravel.
Although it is not one of my favorite technologies within Laravel (especially compared to Livewire or Inertia), it remains fundamental to understand.
This is the controller we will use for the practice:
class CourseController extends Controller
{
    public function index(Request $request)
    {
        return view('pruebas.dashboard', [
            'user' => 'Andrés Cruz',
            'role' => 'admin',
            'status' => 2, // 1: Pendiente, 2: Activo, 3: Suspendido
            'courses' => [
                ['id' => 1, 'name' => 'Laravel 13', 'type' => 'Backend', 'premium' => true],
                ['id' => 2, 'name' => 'Vue.js 3', 'type' => 'Frontend', 'premium' => false],
                ['id' => 3, 'name' => 'AWS Cloud', 'type' => 'DevOps', 'premium' => true],
            ],
            'tags' => [], // Array vacío para probar @forelse
            'isSubscribed' => true,
        ]);
    }
}
Master template:
<!DOCTYPE html>
<html lang="es">
<head>
    <meta charset="UTF-8">
    <title>@yield('title', 'Plataforma Educativa')</title>
    <script src="https://cdn.tailwindcss.com"></script>
    @stack('styles')
</head>
<body class="bg-slate-50 p-10">
    <header class="mb-5 p-4 bg-white shadow">
        {{-- Directiva de Autenticación --}}
        @auth
            <p>Conectado como: <strong>@yield('user_name')</strong></p>
        @endauth
    </header>
    <main class="container mx-auto">
        @yield('content')
    </main>
    {{-- Directiva para inyectar scripts desde vistas hijas --}}
    @stack('scripts')
</body>
</html>
The characteristic feature is the @stack('scripts') which we explain later.
The view we will explore throughout the section:
@extends('pruebas.layout')
@section('title', 'Panel de Control - Blade 13')
@section('user_name', $user)
@section('content')
    <h1 class="text-2xl font-bold mb-6">Explorando Directivas de Blade</h1>
    {{-- 1. Condicionales If / Else --}}
    <section class="mb-8">
        <h2 class="text-lg font-semibold">Estado de la cuenta:</h2>
        @if($status === 1)
            <span class="text-yellow-600">Esperando verificación...</span>
        @elseif($status === 2)
            <span class="text-green-600">Cuenta verificada correctamente.</span>
        @else
            <span class="text-red-600">Cuenta restringida.</span>
        @endif
    </section>
    {{-- 2. Directiva Switch --}}
    <section class="mb-8">
        @switch($role)
            @case('admin')
                <div class="bg-blue-100 p-2 text-blue-800">Acceso total de administrador</div>
                @break
            @case('editor')
                <div class="bg-green-100 p-2 text-green-800">Acceso de edición</div>
                @break
            @default
                <div class="bg-gray-100 p-2">Acceso de lectura</div>
        @endswitch
    </section>
    {{-- 3. Bucles y la variable $loop --}}
    <section class="mb-8">
        <h2 class="text-xl font-bold mb-3">Listado de Cursos</h2>
        <ul class="space-y-2">
            @foreach($courses as $course)
                <li @class([
                    'p-3 rounded border',
                    'bg-yellow-50 border-yellow-200' => $course['premium'],
                    'bg-white border-gray-200' => !$course['premium']
                ])>
                    <strong>#{{ $loop->iteration }}</strong> - {{ $course['name'] }}
                    <span class="text-sm italic">({{ $course['type'] }})</span>
                    @if($loop->first) <b class="text-blue-500">[NUEVO]</b> @endif
                    @if($loop->last) <b class="text-gray-400">[FINAL]</b> @endif
                </li>
            @endforeach
        </ul>
    </section>
    {{-- 4. Forelse (Manejo de estados vacíos) --}}
    <section class="mb-8">
        <h2 class="text-lg font-semibold">Etiquetas del perfil:</h2>
        <div class="flex gap-2">
            @forelse($tags as $tag)
                <span class="bg-gray-200 px-2 py-1">{{ $tag }}</span>
            @empty
                <p class="text-gray-400 italic">No has definido etiquetas todavía.</p>
            @endforelse
        </div>
    </section>
    {{-- 5. Directivas de Sesión y Errores (Útiles en formularios) --}}
    <section class="mb-8 border-t pt-4">
        @error('email')
            <div class="text-red-500 font-bold">Error en el correo: {{ $message }}</div>
        @enderror
        {{-- Directiva de entorno --}}
        @env('local')
            <div class="text-xs text-orange-400 mt-4 italic">
                * Estás viendo esto porque el entorno es Local.
            </div>
        @endenv
    </section>
    {{-- 7. No toques nada de lo que hay aquí dentro, ignora las llaves {{ }} y déjalas tal cual --}}
    @verbatim
        <div id="app">
            <h1>Perfil de Usuario</h1>
            <p>Nombre: {{ user.name }}</p>
            <p>Email: {{ user.email }}</p>
            <p>Bio: {{ user.bio }}</p>
        </div>
    @endverbatim
            Hola, @{{ nombre_en_js }}.
            Tu edad es @{{ edad_en_js }}.
            Tu ciudad es @{{ ciudad_en_js }}.
    {{-- 8. PHP nativo (Solo cuando es estrictamente necesario) --}}
    @php
        $currentTime = now()->format('H:i');
    @endphp
    <p class="mt-10 text-xs">Generado a las: {{ $currentTime }}</p>
    @foreach($courses as $c)
        <div>
            <h3>{{ $c['name'] }}</h3>
            <canvas id="grafico-{{ $c['id'] }}"></canvas>
        </div>
        {{-- Usamos ONCE para que el script de la librería no se repita 100 veces --}}
        @once
            @push('scripts')
                <script src="https://cdn.jsdelivr.net/npm/chart.js"></script>
                <script>
                    console.log("La librería Chart.js se cargó solo una vez.");
                </script>
            @endpush
        @endonce
        {{-- Este PUSH no tiene ONCE porque cada gráfico sí necesita su propia inicialización --}}
        @push('scripts')
            <script>
                new Chart(document.getElementById('grafico-{{ $c["id"] }}'), { ... });
            </script>
        @endpush
    @endforeach
@endsection
@push('scripts')
    <script>
        console.log('Blade ha renderizado la vista correctamente.');
    </script>
@endpush
What I like most, beyond all this integration, is that Blade has also improved significantly.
Every time it feels more like Vue, which I love, obviously.
Printing HTML
Everything starts with simple data printing from the server, just like in Vue (I mention it because it's the framework I use most):
{{ $name }}Although Angular, React, Astro, etc., also work similarly in this basic part.
In addition to printing, Blade has conditionals, and what I like is that there are also specific conditionals, such as @auth or @guest, to verify if the user is authenticated or a guest.
Control Structures and Conditionals
Blade makes PHP much more expressive and cleaner in the HTML.
@if and @switch Conditionals
We can use the classic @if, @else, and @elseif.
    {{-- 1. Condicionales If / Else --}}
    <section class="mb-8">
        <h2 class="text-lg font-semibold">Estado de la cuenta:</h2>
        @if($status === 1)
            <span class="text-yellow-600">Esperando verificación...</span>
        @elseif($status === 2)
            <span class="text-green-600">Cuenta verificada correctamente.</span>
        @else
            <span class="text-red-600">Cuenta restringida.</span>
        @endif
    </section>
Remember that you can use the triple equals (===) to also compare by type, which is very useful in PHP as it is a loosely typed language (where a string can be compared to an integer).
@switch: It is ideal when you have multiple cases, such as user roles (admin, editor, reader).
    {{-- 2. Directiva Switch --}}
    <section class="mb-8">
        @switch($role)
            @case('admin')
                <div class="bg-blue-100 p-2 text-blue-800">Acceso total de administrador</div>
                @break
            @case('editor')
                <div class="bg-green-100 p-2 text-green-800">Acceso de edición</div>
                @break
            @default
                <div class="bg-gray-100 p-2">Acceso de lectura</div>
        @endswitch
    </section>
There are also directives like @empty, @isset, among others. These "helpers" make the code much cleaner and easier to read:
@isset($records)
    // $records is defined and is not null...
@endisset

@empty($records)
    // $records is "empty"...
@endempty
Of course, all this can be done with a classic if and PHP functions, but this is more elegant, especially when you are in Blade and need to show conditional content in a simple and readable way.
The @foreach Loop and the $loop Variable
In a @foreach, Laravel gives us the magic $loop variable. With it, you can know:
- $loop->first: If it's the first element (useful for adding labels like "[NEW]").
- $loop->last: If it's the last element.
- $loop->iteration: The current index of the traversal.
    {{-- 3. Bucles y la variable $loop --}}
    <section class="mb-8">
        <h2 class="text-xl font-bold mb-3">Listado de Cursos</h2>
        <ul class="space-y-2">
            @foreach($courses as $course)
                <li @class([
                    'p-3 rounded border',
                    'bg-yellow-50 border-yellow-200' => $course['premium'],
                    'bg-white border-gray-200' => !$course['premium']
                ])>
                    <strong>#{{ $loop->iteration }}</strong> - {{ $course['name'] }}
                    <span class="text-sm italic">({{ $course['type'] }})</span>
                    @if($loop->first) <b class="text-blue-500">[NUEVO]</b> @endif
                    @if($loop->last) <b class="text-gray-400">[FINAL]</b> @endif
                </li>
            @endforeach
        </ul>
    </section>
The Powerful @forelse
It is the perfect solution for lists. If the collection has data, it iterates through them; if it's empty, it executes the @empty block. This prevents the interface from looking bad or empty when there is no content.
  {{-- 4. Forelse (Manejo de estados vacíos) --}}
    <section class="mb-8">
        <h2 class="text-lg font-semibold">Etiquetas del perfil:</h2>
        <div class="flex gap-2">
            @forelse($tags as $tag)
                <span class="bg-gray-200 px-2 py-1">{{ $tag }}</span>
            @empty
                <p class="text-gray-400 italic">No has definido etiquetas todavía.</p>
            @endforelse
        </div>
    </section>
Error Handling and Forms
With the @error directive, you can display errors directly:
{{-- 5. Directivas de Sesión y Errores (Útiles en formularios) --}}
    <section class="mb-8 border-t pt-4">
        @error('email')
            <div class="text-red-500 font-bold">Error en el correo: {{ $message }}</div>
        @enderror
This greatly simplifies validation handling in forms.
Environment Variables
You can use @env to detect the environment:
 {{-- Environment directive --}}
 @env('local')
   <div class="text-xs text-orange-400 mt-4 italic">
      * Estás viendo esto porque el entorno es Local.
    </div>
@endenv
Frontend Integration (@verbatim)
When working with frameworks like Vue, you can use @verbatim to avoid conflicts with {{ }} braces.
This is very useful when rendering is handled by the frontend.
If you use frameworks like Vue or Alpine, you can use @verbatim so Blade ignores the {{ }} braces and allows the JavaScript framework to process them. You can also use @{{ }} to escape a single line.
    {{-- 7. No toques nada de lo que hay aquí dentro, ignora las llaves {{ }} y déjalas tal cual --}}
    @verbatim
        <div id="app">
            <h1>Perfil de Usuario</h1>
            <p>Nombre: {{ user.name }}</p>
            <p>Email: {{ user.email }}</p>
            <p>Bio: {{ user.bio }}</p>
        </div>
    @endverbatim
            Hola, @{{ nombre_en_js }}.
            Tu edad es @{{ edad_en_js }}.
            Tu ciudad es @{{ ciudad_en_js }}.
Using PHP inside Blade
You can use @php, though in moderation:
@php
   $currentTime = now()->format('H:i');
@endphp
Ideally, logic should be handled in the controller, but in specific cases, it can be useful.
Advanced Directives: Scripts and Stacks
The @once directive allows a block to be executed only once, even within loops.
This is key to avoid repeating scripts unnecessarily.
Together with @push and @stack, you can better organize your scripts:
- @push('scripts') adds content
- @stack('scripts') renders it in the layout
1. The @once Directive
This directive ensures that the internal code is rendered only once, regardless of how many times a loop repeats. It is extremely useful for loading JavaScript libraries (like Chart.js) only once, even if you have ten charts on the page.
2. @push and @stack
Unlike @yield, which is typically used for a single block, @stack works like a pile of books.
- In the master layout, you define the @stack('scripts').
- From any view or component in Laravel, you use @push('scripts').
Laravel will stack all the scripts at the end of the page, keeping everything organized.
{{-- In the Layout --}}
@stack('scripts') {{-- Anywhere in the view --}}
@push('scripts')
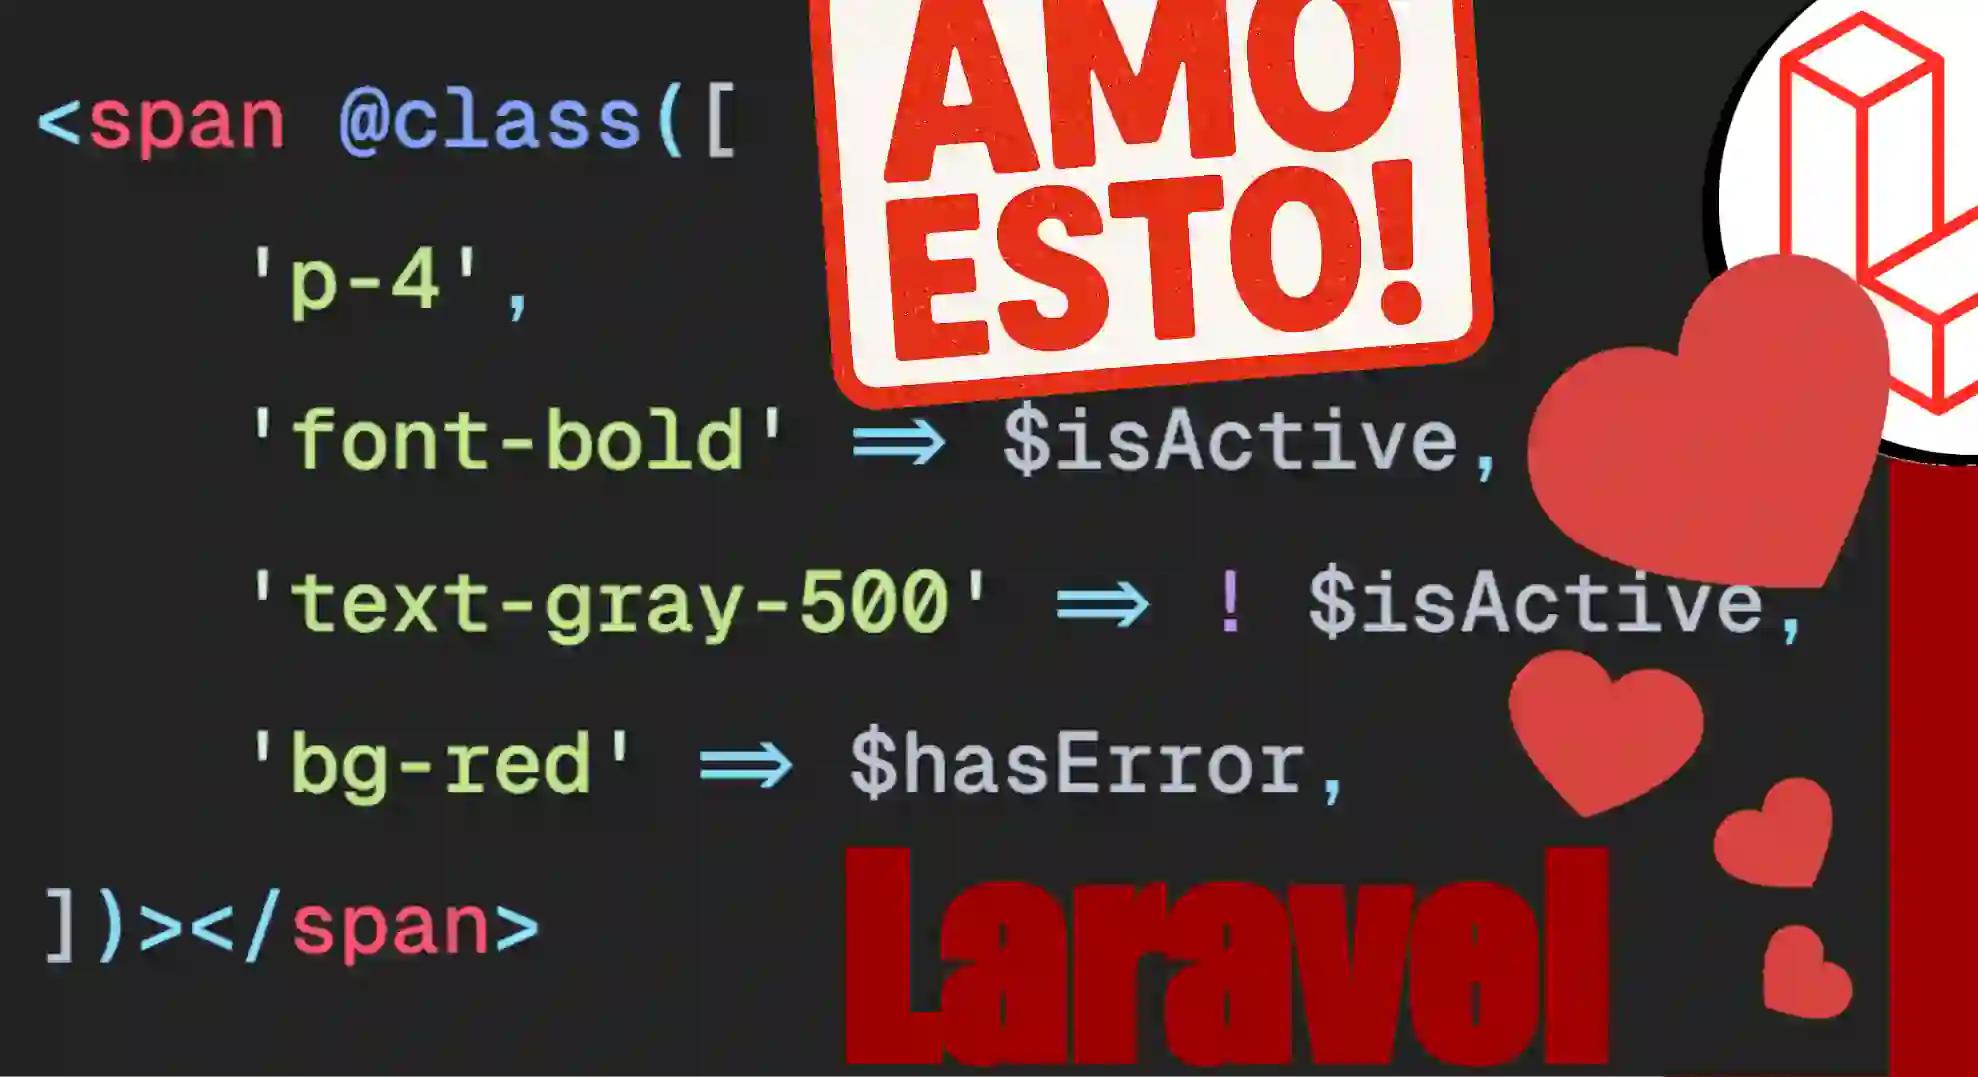
<script>console.log("This script is added to the stack");</script> @endpushDynamic Classes and Attributes
One of the best recent additions is the @class directive. It is much cleaner and more expressive than doing manual string concatenations inside a class="".
As I mentioned when I did a brief analysis of Laravel version 12, one of the things I like most about this new version is that I feel everything is a bit more integrated:
Laravel is NO LONGER *just* a PHP Framework
Now we don't just have, for example, Laravel, where if you want to use Vue you have to use a package with Jetstream, Inertia, and all those "dramas," but everything already feels like part of the same system.
And that “something more” is a quite interesting combination of several technologies, depending on what you want to use.
- If you want to use React, you already have a prepared scaffolding.
- If you want to use Vue, it's also ready. There are even community projects (a topic I also talked about in another video; if I did, I'll leave the card here) where you can use other frameworks like Svelte, among others.
- And obviously, there is also Alpine. I think I didn't mention it before, but React, Alpine, and Vue are the ones that come by default. And of course, pure Laravel, without any extras, or as I call it: Base Laravel.
<li @class([
   'p-3 rounded border',
   'bg-yellow-50 border-yellow-200' => $course['premium'],
   'bg-white border-gray-200' => !$course['premium']
])>
Or styles:
<span @style([
    'background-color: red',
    'font-weight: bold' => $isActive,
])></span>

<span style="background-color: red; font-weight: bold;"></span>
Attributes like checked, disabled, required, or readonly:
<input
    type="email"
    name="email"
    value="email@laravel.com"
    @readonly($user->isNotAdmin())
/>
<input
    type="checkbox"
    name="active"
    value="active"
    @checked(old('active', $user->active))
/>
<button type="submit" @disabled($errors->isNotEmpty())>Submit</button>
<input
    type="text"
    name="title"
    value="title"
    @required($user->isAdmin())
/>
Security and HTML Data Escaping
HTML (HyperText Markup Language) is a markup language used to create web pages and, of course, this includes web applications. It is a standard that provides a structure based on XML-based syntax to organize all the content of a web page. HTML uses different types of tags; HTML is NOT a programming language since no logic is implemented in HTML; instead, it is a markup language where what you place is what you get.
Printing HTML in Blade
Many times we want to show an HTML block directly in a Blade view file; which by default, with:
{{ $html }}To escape the HTML, we have:
{!! $html !!}And remember to pass the data from the controller:
class TestController extends Controller
{
    public function index()
    {
        return view("index",['name' => 'Andres Cruz','html' => '<h1>Titulo</h1>']);
    }
}
Never use this with content that comes from users (like comments).
The @include Directive and its Variants
The most basic form is @include on its own. By default, the view you bring in will "inherit" all the variables you already have on the main page, but you can also pass extra data if needed.
{{-- We include an error view and pass an additional piece of data --}} <div>
   @include('shared.errors', ['tipo' => 'critico'])
   <form>
       </form>
</div>
Controlling Existence and Conditions
Sometimes we are not sure if a view exists (for example, if you allow custom themes) or we want to show it only if something is met. For that, we have these gems:
- @includeIf: If the view does not exist, Laravel simply does nothing instead of throwing a 500 error in your face.
- @includeWhen: Included only if the condition is true.
- @includeUnless: The opposite; included only if the condition is false.
- @includeFirst: You pass an array of views and Laravel will render the first one it finds. Great for customizations!
{{-- Only if the user is an admin, we include the control panel --}}
@includeWhen($user->isAdmin(), 'admin.panel', ['status' => 'complete']) {{-- Tries to load the custom design; if not, uses the default one --}}
@includeFirst(['custom.header', 'defaults.header'], ['status' => 'complete'])
@includeIsolated: Shielding Your View
This is new and very powerful. If you want the view you are including to know nothing about what's happening in the parent view (to avoid side effects or variable mixing), use @includeIsolated. It will only see what you explicitly pass to it.
{{-- This view will NOT see the controller variables, only $user --}}
@includeIsolated('view.name', ['user' => $user])
Rendering Collections with @each
If you have a list (like the courses or posts we saw earlier), instead of doing a @foreach and an @include inside, you can do it all in a single line with @each.
It is super efficient and even allows you to define a view for when the list is empty (like the @empty in @forelse).
{{-- 1. View to render, 2. Collection, 3. Variable in the view, 4. Empty view --}}
@each('partials.job_card', $jobs, 'job', 'partials.no_jobs')
request()→routeIs('d-category-*') in Laravel
Tired of constantly asking if you are defined in this route or that other route just to indicate your current route and writing:
<flux:navlist.item icon="wrench-screwdriver" :href="route('d-category-index')" :current="request()->routeIs('d-category-index') || request()->routeIs('d-category-create') || request()->routeIs('d-category-create')" wire:navigate>{{ __('Category') }}</flux:navlist.item>We can use an *:
d-categoryThis is simply the prefix:
<flux:navlist.item icon="wrench-screwdriver" :href="route('d-category-index')" :current="request()->routeIs('d-category-*')" wire:navigate>{{ __('Category') }}</flux:navlist.item>It will always capture it, and from here on, you can put whatever you want. Therefore, if you follow a good naming convention for your routes:
Route::get('/', App\Livewire\Dashboard\Category\Index::class)->name("d-category-index"); Route::get('/create', App\Livewire\Dashboard\Category\Save::class)->name("d-category-create"); Route::get('/edit/{id}', App\Livewire\Dashboard\Category\Save::class)->name("d-category-edit");Surely, in this case, for these routes that I have, you can see that they all share the same category prefix, and only the operation varies—so to speak—index, create, or edit. Therefore, this asterisk will work for index, as well as for create or edit. So you can see that, with this single rule here, I've already covered all pages starting with category, regardless of what comes after; everything will stay marked without any problem.
Beyond that, there isn't much mystery. We are simply placing the request and asking, through an existing method, if the route is exactly the one we have defined. This method returns a boolean thanks to the function called routeIs.
In this case, again, it is a Livewire component, and it works like this: you could place your class, some conditional... whatever you feel like, depending on the style you are using. But here, being a Flux component, what we are indicating with "current" is a boolean that activates the border you see here if it's true; if it's false, it simply doesn't activate.
The important thing here is the condition; the styling part depends entirely on what you are using in your project.