
Content Index
- Routes and views
- Case study
- Parameter passing
- Controllers
- Routes
- Routes in practice
- Routes of a Laravel project
- Types of routes
- Set a view for the previous route
- Pass data dynamically to the view
- Passing data from the route to the view
- Conclusions
- Extra: Modularize Routes using functions Laravel
- What do I mean by modularize?
- 1 Within the same file
- 2. Separate files
- Conclusion
- Extra: When to Use Controller Class Properties in Laravel
- 1. Simple Case: The $baseURL Property
- 2. Complex Case: Unifying Payment Responses
- Action Pattern - Centralizing Business Logic
- The Problem of Bloated Controllers
- Architectural Advantages of Actions:
- Practical Implementation and Dependency Injection
- The Structure of a Transactional Action
Once you have your Laravel Herd and project created, I want to present a Hello World in Laravel, so that you understand the key concepts of the framework and you can see something on the screen; let's start by defining the key concepts.
The views are part of our MVC and it is the presentation layer, to show the content already generated to our user; this is usually an HTML page, but can be a document such as a PDF, an image, a video, etc; ignoring references to documents and the like, which would be special cases.
Views in Laravel are nothing more than PHP files that the framework translates into an HTML page that is presented to the final user through the browser that initially request, as we saw earlier with the case of routes.
In Laravel, views are special since they are usually not common PHP views, but instead have a template engine that is nothing more than a mechanism that allows us to do the same thing we do in PHP (print, values, call functions, mix PHP with HTML, etc) but in a cleaner, more maintainable and simpler way than using PHP directly; in order to use the template engine, we have to add the .blade extension before placing the .php; for example:
welcome.blade.php
If we didn’t want to use the blade engine:
welcome.php
Simply remove the .blade from the name.
We usually always use blade, since there is no reason not to use it.
Routes and views
In this chapter, we are going to present the simplest way to display a view (that is, we can see something on the browser screen) and this is by using the routes in combination with the views that are part of our MVC. As we commented at the beginning of the course; Laravel is not a pure MVC framework, if not, it has additions or variants in which there are several ways to do the same thing; and this is one of these variants.
Case study
Let’s create a new route:
Route::get('/contact', function () {
    return view('contact');
})->name('contact');
If we go to the browser:
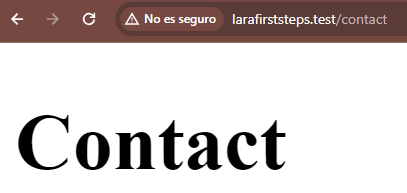
You’ll see the message we printed earlier; you can do the exact same thing by using echo instead of return. Let’s create an associated view:
resources\views\contact.blade.php
<!DOCTYPE html>
<html lang="en">
<head>
    <meta charset="UTF-8">
    <meta name="viewport" content="width=device-width, initial-scale=1.0">
    <meta http-equiv="X-UA-Compatible" content="ie=edge">
    <title>Document</title>
</head>
<body>
    <h1>Contact</h1>
</body>
</html>
We reference it in the route:
Route::get('/escribeme', function () {
    return view("contacto");
});
And if we go to the browser:
You will see the representation of the above code.
Parameter passing
To pass parameters to the view; it is enough to indicate to the view() function a second parameter that must be an array in which we place the pair of key and value of the same:
Route::get('/contact', function () {
    $name = 'Andres'
    return view('contact',['name'=>$name]);
})->name('contact');- The array key will be used by Laravel internally to build a variable, which is the one we can use in the view.
- The value of the array will be the value that the previously generated variable will have assigned.
So, to consume the above variable, we have:
<!DOCTYPE html>
<html lang="en">
<head>
    <meta charset="UTF-8">
    <meta name="viewport" content="width=device-width, initial-scale=1.0">
    <meta http-equiv="X-UA-Compatible" content="ie=edge">
    <title>Document</title>
</head>
<body>
    <h1>Contact</h1>
    <p>{{$name}}</p>
</body>
</html>
Or
***
<p><?= $name ?></p>
***
The above PHP code is basic PHP, but what about blade; in blade, to print values, we can use the following syntax:
***
<p>{{$name}}</p>
***
Of course, it is much cleaner and simpler than the previous one. If you need to pass more variables, you put it as one more element in your data array:
***
return view("web/contact", ["name" => $name,"var2" => $other,...]);
***
In general, you can pass anything you can store in a variable like strings, numbers, objects, etc.
Controllers
In Laravel, a controller is a component that is responsible for handling the HTTP requests that the application receives. That is, the controllers are the intermediary between the routes and the views
Controllers in Laravel are one of the mechanisms that we have when developing applications in Laravel to group functionalities; that is, if we want to create a post, we create a controller, just like if we want to have a list or delete a post; Controllers are classes, which group a set of related functions with which we can manage our resources.
For good practices, the controllers must have a simple, clean and scalable structure; In the controllers we can do all kinds of operations such as validation, connecting to models, other services, using help functions... and finally returning a view, a text, a json, among others.
In short, a controller in Laravel is a class that bundles the logic of related HTTP requests and is responsible for handling requests to return a response.
In Laravel, a controller is a component that is responsible for handling the HTTP requests that the application receives. In other words, a controller is the intermediary between the application's routes and the views that are displayed on the screen.
Routes
As we mentioned before, routes are the first layer that is executed when making a project request in Laravel; this is where the application inputs are configured; for example, if we want a route to display the posts for our blog, we configure it here:
blog/
Or
blog/listado
Or similar, the same, for any other route.
In the routes, apart from defining the access, it is also configured which controller resolves the specified route and the type of method, that is, of the GET, POST, PUT, PATH or DELETE type; only the first two are those that can be resolved directly by the browser, the rest can be resolved using HTTP requests of another type, such as fetch requests, axios in JavaScript or with any other technology you use, such as Flutter, Vue...
In Laravel, routes are defined in the file called routes/web.php. For example, a route defined in Laravel might look something like this:
Route::get('/ejemplo', 'ControladorEjemplo@metodoEjemplo');In this example, a route is defined for a GET request to the URL "/example". When a request matching this route is received, the "exampleMethod" method in the "ExampleController" controller will be executed to handle the request.
Routes in practice
With our ecosystem to work in Laravel installed and our project created, the next thing we are going to do is see how we can create something interesting to see through our browser.
We are going to create a route for that we are going to go to the file:
laratest\routes\web.php
In our case laratest is the name of our project
Routes of a Laravel project
And we are going to see how it is formed itself, as you can see, we already have some routes configured, which is what our application is using:
Route::get('/', function () {
    return view('welcome');
});
And this one that we are going to evaluate a little:
Route::get('/home', 'HomeController@index')->name('home');
As you can see, the structure of one is made up of 3 main elements:
- The URI
- The controller
- The function inside the controller, which is the one that will be in charge of doing the process
So, nothing prevents us from creating our own routes; but the routes also have a very interesting functionality that is what allows us to define logic, in other words implement the functionality that we want to do; this obviously breaks with our MVC and is only recommended if we want to use it to do something simple like do a few steps or render a view and that view receives little or no data.
Types of routes
In Laravel, we have as many types of routes as http methods, which would be for get, post, put, patch, or delete type methods, we have routes with the same name in Laravel:
Route::get($uri, $callback);
Route::post($uri, $callback);
Route::put($uri, $callback);
Route::patch($uri, $callback);
Route::delete($uri, $callback);
Route::options($uri, $callback);
Therefore, if we want to create one so that we can consult when accessing it from the browser, it would be of type get:
Route::get('/', function () {
});
And in it we can define some body, for example an impression of a plain text:
Route::get('/', function () {
    return "Hola mundo";
});
And if we go to our browser we will see:
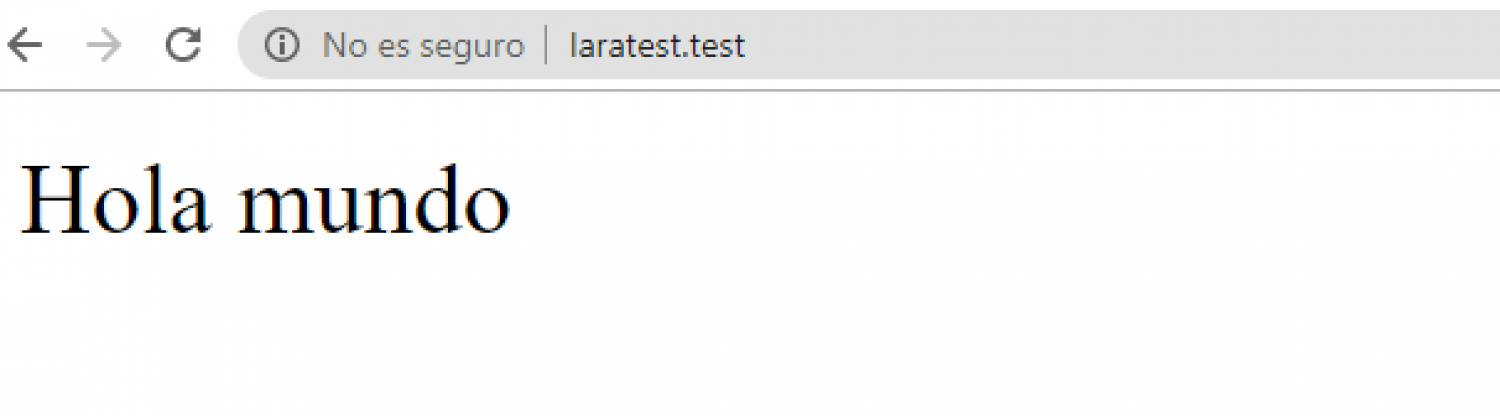
Which is a representation of the text that we defined previously.
Set a view for the previous route
Now, of course, showing only a text is not the most interesting thing in the world, we can do something more elaborate like indicating a view in Laravel; for that we have to create a view that would be a file with a .php extension in the location of:
laratest\resources\views\For example, we already have a list that is used by default by our framework, as you can see, it is called welcome.blade.php and if we see the route that it loads:
Route::get('/', function () {
    return view('welcome');
});
There is a one-to-one relationship between the name of the view and the reference we use via the helper function called view, so there is nothing stopping us from creating a view called home.php or home.blade.php and linking to it as follows:
Route::get('/', function () {
    return view('home');
});
Here we have a couple of variations to deal with view files, which would be to include the .blade suffix to the view file name; generally, we want our views to be able to support the template engine that Laravel offers us, known as Blade, in order to be able to use the Blade syntax in our file; which means that if you don't suffix it with .blade, you will NOT be able to use the Blade syntax.
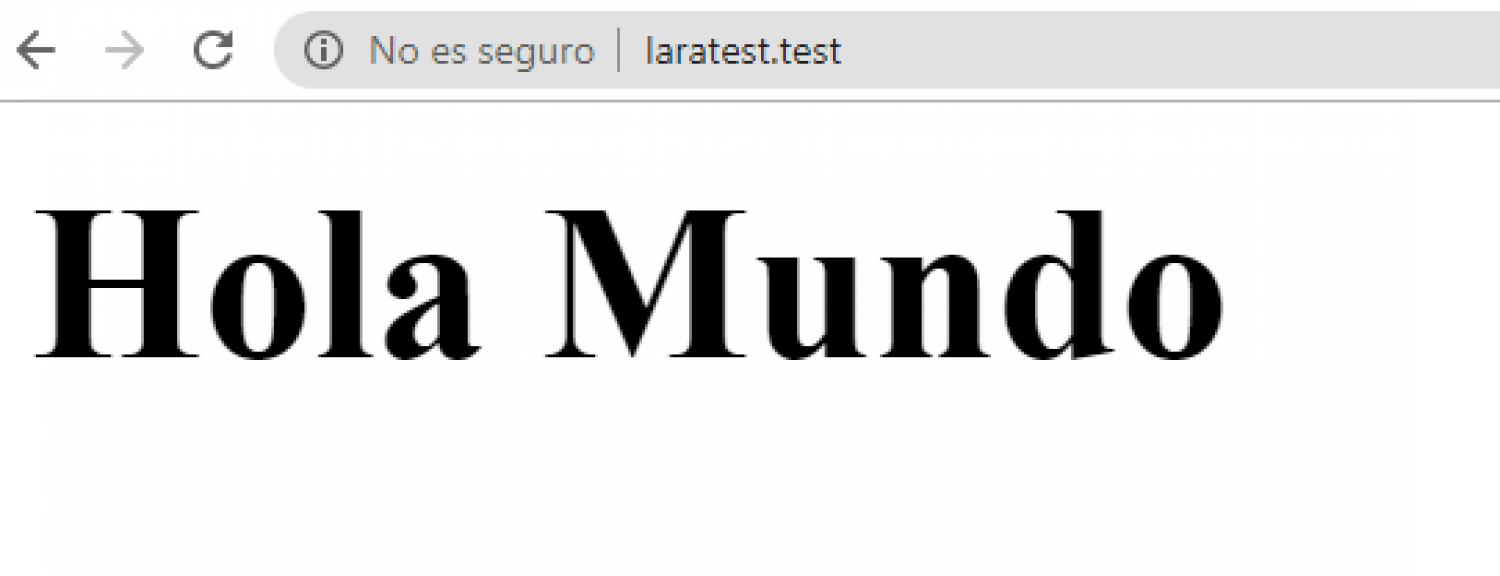
And in the welcome view, we can place any HTML content for example:
<h1>Hola Mundo</h1>But as you can see, it is a static content, and since we are using PHP through a framework it is more than clear that we can pass data dynamically, and these can go from a database, connection to another API, etc: for Example, to pass data to this view; for now, let's create a simple view called home:
laratest\resources\views\home.blade.php:
With the following content:
<h1>Hola Mundo</h1>And if we define our route as:
Route::get('/', function () {
    return view('home');
});
And we go to the browser:
buala! We will see the content that we defined earlier.
Pass data dynamically to the view
We can access the value that we are passing and print it; we haven't worked with Blade yet; but to print a variable we can do it as follows:
<h1>Hola {{name}}</h1>That internally Laravel will translate it to the following:
<h1>Hola <?php echo e($name); ?></h1>Which, as you can see, is just plain HTML; these view translations can be found in storage/framework/views.
And if we go to our browser we will see the following:
Passing data from the route to the view
Now we are going to adapt our route, and we are going to pass it a static text; For this reason, we can define it as the following parameter, in which the data that we are going to pass must be defined within an array since we can pass more than a simple data to the view if not as much as we need, but for now we are only going to pass a single data:
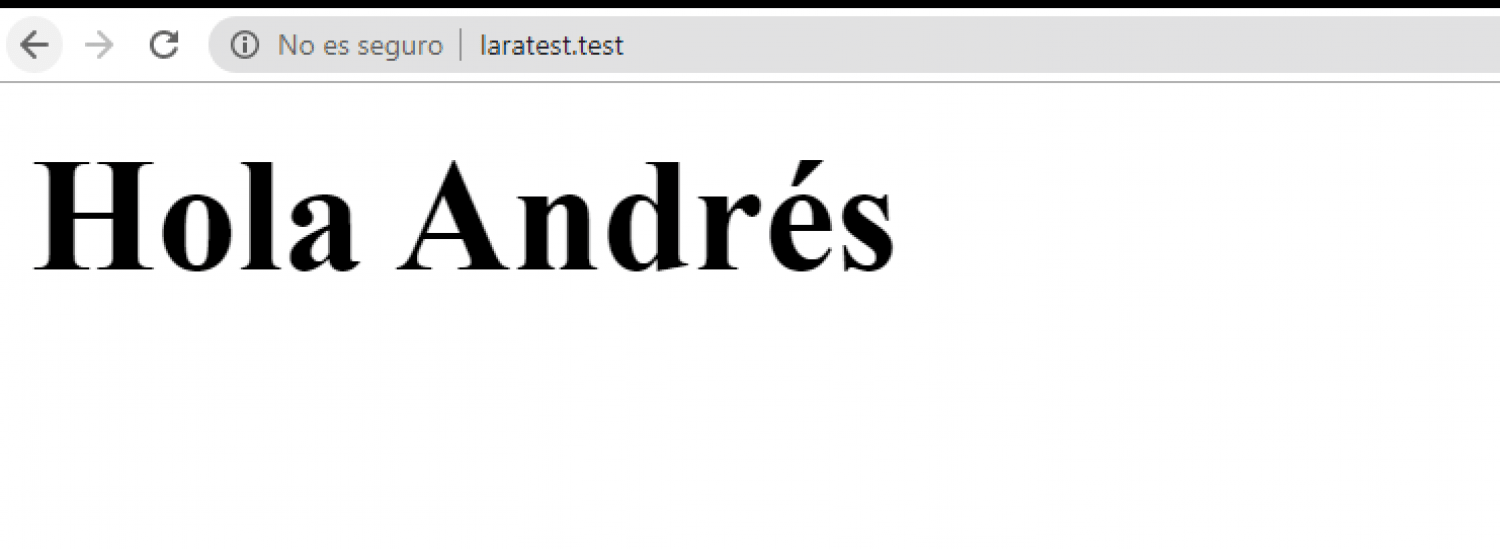
Route::get('/', function () {
    return view('home',['name'=>'Andrés']);
});
And in our view we are going to make the following change:
<h1>Hola <?php echo e($name); ?></h1>Now if we go to our browser:
We will see that it prints the value that we defined in the route; with this you can get an idea of what is interesting about all this and how the controllers work.
Conclusions
As you can see, it also works perfectly to simply print a text; now you have a clearer idea of what this is all about and why we need to use controllers to make operations more interesting; since suppose you need a module to, for example, make a CRUD of some relationship such as people, therefore, how many routes do you think you need; at least about 7:
GET|HEAD  | dashboard/category                 | category.index
POST      | dashboard/category                 | category.store
GET|HEAD  | dashboard/category/create          | category.create
DELETE    | dashboard/category/{category}      | category.destroy
PUT|PATCH | dashboard/category/{category}      | category.update
GET|HEAD  | dashboard/category/{category}      | category.show
GET|HEAD  | dashboard/category/{category}/edit | category.edit
Extra: Modularize Routes using functions Laravel

I want to talk to you a little bit about how you can modularize your routes. The routes we presented earlier, when you start creating controllers, can grow uncontrollably, since one of the "problems," in quotes, that we can have in Laravel are the blessed routes, and let's see how you can create them from an early stage in an organized way.
Usually, they're all defined at the same level, or the grouping part isn't part of a clear organization as such, but rather responds to a specific need, depending on how you want to present a module.
For example:
- If a module is protected, then you add certain routes.
- If it starts with a certain pattern, you add other routes.
- If you want to run middleware, you add another set of routes.
But again: this is not part of real modularization.
What do I mean by modularize?
I'm referring to placing routes directly in separate modules. For example, in my academic application (the academic website you're looking at here), I manage some routes, although practically nothing, because it's a Vue application, so everything is handled by Vue.
I have the blog and the management part, which would be like three modules. So, that's where I say, "We could group the routes."
Ways to modularize routes
We have a couple of ways to modularize:
1 Within the same file
This is the simplest way and the one that would work for the vast majority. You simply define functions within the routes file. This is sometimes overlooked, but remember, we're in PHP, so you can use anything PHP has to offer: functions, classes, etc.
Although using classes for this seems a bit more complicated to me, it already works quite well with functions.
So what do I do? I define functions like routesDashboard(), group them there; routesBlog(), group them there too, and then define where they'll be used, for example in an if condition.
if (condición) {
   rutasDashboard();
}
Or through subdomains:
if (app()->environment('production')) {
   // Uso el subdominio
   Route::domain('dashboard.miapp.com')->group(function () {
       rutasDashboard();
   });
} else {
   // Uso un prefijo en el path
   Route::prefix('dashboard')->group(function () {
       rutasDashboard();
   });
}
2. Separate files
You can also create separate files, for example:
- routes_dashboard.php
- routes_academy.php
- routes_blog.php
There you define your routes and then import them into your main file.
This option is useful if you have a lot of routes and it becomes difficult to read or maintain everything in a single file.
Conclusion
So, to recap:
- You can modularize routes using functions within the same file.
- If you have many, you can use separate files.
- You can use conditions to distinguish between production and local.
- And you can avoid duplication and clutter by grouping routes neatly.
Extra: When to Use Controller Class Properties in Laravel
This is a bit more advanced, but it's important that you understand when you can use properties in controller classes in Laravel. Here is my opinion.
In Laravel, the methods defined to respond to a request (the so-called "controller functions") often abandon the foundations of Object-Oriented Programming (OOP). It's crucial to remember that a controller is, first and foremost, a Class, which allows us to leverage inheritance and, more importantly, the use of class properties.
The use of properties can simplify the management of data common to multiple methods and helps us modularize the application.
1. Simple Case: The $baseURL Property
A basic and useful example is the centralization of URLs used in various parts of the class:
class BasePaymentController extends Controller
{
   // ...
   protected $baseURL = 'https://api-m.paypal.com';
   public function __construct()
   {
       // Se inicializa el valor en el constructor.
       $this->baseURL = config('app')['env'] == 'local' ? 'https://api-m.sandbox.paypal.com' : 'https://api-m.paypal.com';
       // ...
   }
}
Usage: The $baseURL property is initialized in the constructor. The constructor acts as a middleware that executes before any controller method, allowing key values (such as Client ID, Secret, and Base URL) to be initialized.
Benefit: This way, any method that needs the PayPal URL (to generate the token, verify, or capture the payment) simply accesses $this->baseURL, ensuring the correct sandbox or production URL.
2. Complex Case: Unifying Payment Responses
The use of properties becomes essential when handling multiple payment platforms (PayPal and Stripe) that offer heterogeneous responses. The goal is to unify the key payment information and make it transparently accessible to other methods.
class BasePaymentController extends Controller
{
   protected int|float $price = 0;
   protected string $status = '';
   protected string $idAPI = ''; // ID de la orden o sesión
   protected array|object $responseAPI;
   protected string $payment = 'paypal';
  protected function sendRequestAPI(string $orderId)
  {
      // ... Lógica para verificar si es Stripe o PayPal ...

      if ($orderId == 'stripe') {
          // ... Lógica específica de Stripe ...
          $this->status = 'COMPLETED'; // Estatus Unificado
          $this->idAPI = request("stripe_session_id");
          $this->price = intdiv($this->responseAPI->amount_total, 100);
          $this->payment = 'stripe';
      } else {
          // ... Lógica específica de PayPal ...
          $this->status = 'COMPLETED'; // Estatus Unificado
          $this->idAPI = $this->responseAPI['id'];
          $this->price = $this->responseAPI['purchase_units'][0]['payments']['captures'][0]['amount']['value'];
      }
  }
}
There are several elements that are common to any payment:
- Property Required Data Unification Example
- $responseAPI The complete trace of the API response. All information from the PayPal/Stripe payload is stored for disputes.
- $status Transaction Status. The native API status (e.g., paid in Stripe or 'COMPLETED' in PayPal) is converted to the unified internal status (COMPLETED).
- $price The actual amount charged. The conversion is performed (e.g., dividing by 100 if the API returns the value in cents) to store the actual amount.
- $idAPI The reference ID. The orderId (PayPal) or session_id (Stripe) is assigned to a single property.
- $payment The platform used. Set to paypal or stripe for logging.
In summary, many times we will need to implement properties that we use in different controller methods and whose value or initialization does not depend on the user's request, or when we use inheritance or traits and these classes implement properties that we can then use from the controllers.
Action Pattern - Centralizing Business Logic
An Action is a class designed under the single responsibility principle. Its goal is to encapsulate a specific use case or a complex business rule that requires multiple operational steps.
By convention, these classes are named using a verb that denotes the action to be performed, followed by the resource it operates on (for example: ProcessPayment, CreateUser, UpdateCourse).
The Problem of Bloated Controllers
When a complex operation is processed, such as registering a payment on an educational platform, the system must execute a transactional sequence:
- Verify the user's account status.
- Connect to an external payment gateway.
- Register the transaction in the local database.
- Deduct stock or update access to the course.
- Trigger system events and send notification emails.
Placing all this logic inside the store method of a controller bloats the class and makes it difficult to maintain. The Action pattern solves this by allowing that operational load to be extracted in order to keep controllers thin (thin controllers).
Architectural Advantages of Actions:
- Context Agnosticism: An Action does not depend on an HTTP request. It can be invoked from a REST API controller, a hybrid web application (with Vue or Inertia), an Artisan console command, a queued Job, or a Service Provider.
- Ease of Unit Testing: Being isolated from the web infrastructure, the business logic becomes highly testable through pure unit tests, requiring fewer mocks of requests or sessions.
Practical Implementation and Dependency Injection
Thanks to Laravel's service container, Action classes can be injected directly as dependencies into controller methods, benefiting from automatic resolution.
namespace App\Http\Controllers\Api;

use App\Http\Controllers\Controller;
use App\Actions\ProcessCoursePayment;
use Illuminate\Http\Request;

class PaymentController extends Controller
{
    /**
     * Registers a payment by injecting the corresponding Action.
     */
    public function store(Request $request, ProcessCoursePayment $processPayment)
    {
        $request->validate([
            'amount' => 'required|numeric',
            'course_id' => 'required|integer',
        ]);

        // Execution of the use case passing the sanitized data
        $payment = $processPayment->handle($request->all(), $request->user());

        return response()->json([ // or Resources Class
            'success' => true,
            'data' => $payment
        ], 201);
    }
}
The Structure of a Transactional Action
Within the Action, logic is commonly executed inside a database transaction to ensure system integrity against any failure in the sequence of operations:
namespace App\Actions;

use App\Models\User;
use App\Models\Payment;
use Illuminate\Support\Facades\DB;
use App\Events\PaymentProcessedSuccessfully;

class ProcessCoursePayment
{
    /**
     * Executes the logical processing of the payment.
     */
    public function handle(array $data, ?User $user): Payment
    {
        // A transaction is used to ensure that all steps are consolidated
        return DB::transaction(function () use ($data, $user) {

            // 1. Persistence of the main entity
            $payment = Payment::create([
                'user_id' => $user?->id,
                'amount' => $data['amount'],
                'course_id' => $data['course_id'],
                'status' => 'completed',
            ]);

            // 2. Trigger system events (Handling notifications, emails, etc.)
            event(new PaymentProcessedSuccessfully($payment));

            return $payment;
        });
    }
}
Delimitation of Responsibilities: Logic purely linked to the ORM (such as local relationships or mutators) must remain within the Eloquent model. However, transactional operations involving multiple models, managing integration events, or sending emails must be completely delegated to the Action class.
And if you now need to create two more CRUDs, or maybe 5... defining all this in a path file is not recommended; we will have a better organization and more control if we define all this logic in a layer -controller- to create a specific CRUD for each operation that we are going to carry out; but we deal with this in the next entry, manage forms in Laravel.