Content Index
We already know how to process user data through forms; now, we need to persist that data in a database. By default, SQLite is used, which is excellent, but if we want something more professional, we can use MySQL or MariaDB.
MySQL is the database management system par excellence and widely used today to develop all kinds of applications; It is a relational database (RDBMS) that uses the SQL language (Structured Query Language) to make queries to it and to be able to perform operations on our records; you can install it for the most common Operating Systems such as Windows, MacOS and Linux.
A database is a collection of data that is kept organized on the basis of files; with a database you can access, manage and update efficiently by consulting it. This organization is done through a database management system (DBMS) that allows users to create, read, update, and delete data in a controlled manner using SQL queries.
Databases are used in all kinds of applications and in web applications it is not the difference; from them, we can make all kinds of collections to manage the organization of our data.
Relational databases store data in tables, which are made up of columns and rows; You can see these tables as a spreadsheet to which we manage the data using SQL.
In this post we will see how we can connect a project in Laravel 10 to a database, for example MySQL; although we can connect to other Database Management Systems such as SQL Server, PostgreSQL, etc; in this entry we are going to do it to a MySQL database or its free version MariaDB.
How to create a database in Laragon
The first thing you have to do would be to open your Laragon and create a database according to the steps that we narrate here, and from here we are starting from the fact that you already have your database installed and as well as the recommended but not mandatory database management system data; in my case I use the one provided by Laragon called HeidiSQL:
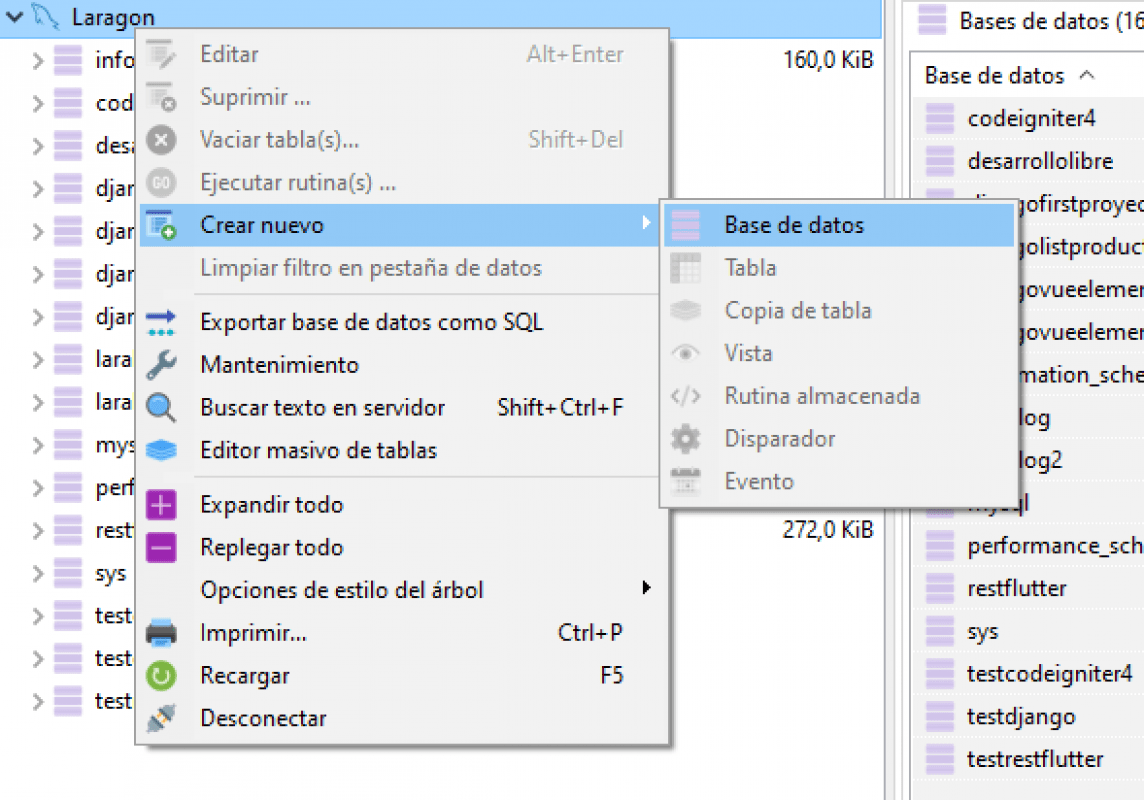
Then, indicate the name of the database and we are ready:
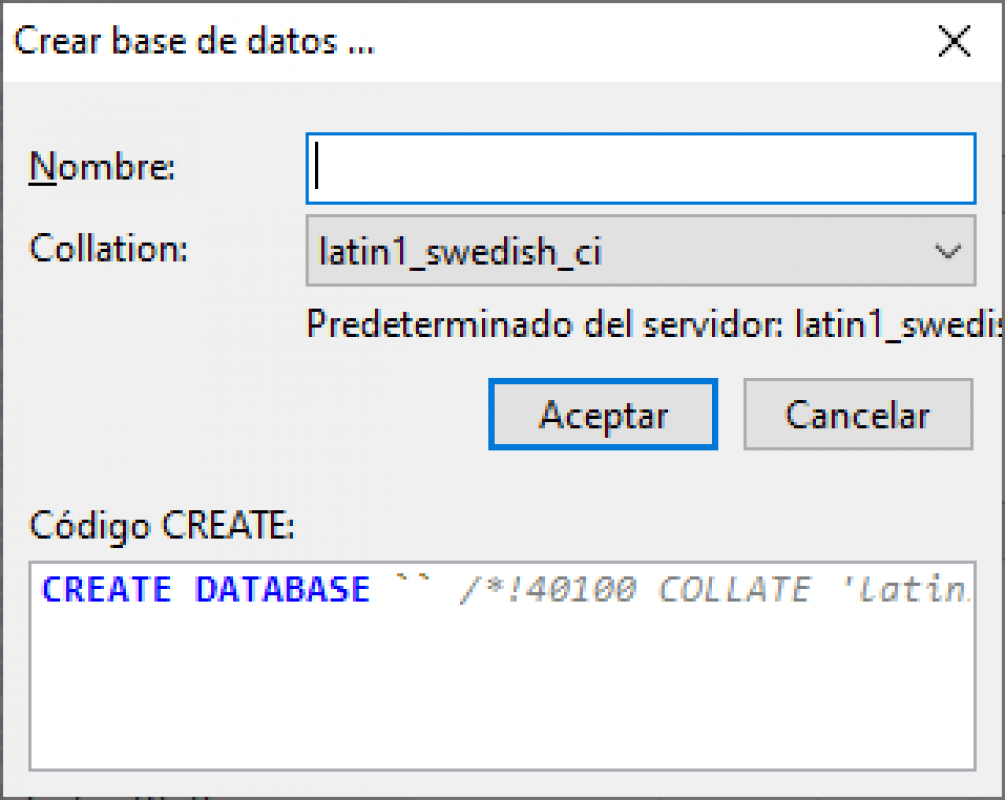
With this we have the database ready and created.
Connect database in Laravel project
Now, we simply have to go to the file called config/database, and look for the configurations for our database, in our case MySQL:
      'mysql' => [
            'driver' => 'mysql',
            'url' => env('DATABASE_URL'),
            'host' => env('DB_HOST', '127.0.0.1'),
            'port' => env('DB_PORT', '3306'),
            'database' => env('DB_DATABASE', 'forge'),
            'username' => env('DB_USERNAME', 'forge'),
            'password' => env('DB_PASSWORD', ''),
            'unix_socket' => env('DB_SOCKET', ''),
            'charset' => 'utf8mb4',
            'collation' => 'utf8mb4_unicode_ci',
            'prefix' => '',
            'prefix_indexes' => true,
            'strict' => true,
            'engine' => NULL,
            'options' => extension_loaded('pdo_mysql') ? array_filter([
                PDO::MYSQL_ATTR_SSL_CA => env('MYSQL_ATTR_SSL_CA'),
            ]) : [],
        ],
Here we can establish the connection with our database; but if you look, we have a file called .env in the root of the project, which is the one we can use in the development environment to make the configurations, feel free to review the database configuration file as well as any other within the folder config file, but in most cases you will find that for each time a configuration is set we have a call to an env function, which as you might guess matches the file I mentioned a few moments ago.
The env file and function
The env file is the one that we have to use when we are in the development environment, therefore the configurations that we add in it are configurations in this environment.
On the other hand, when we go to the production environment, we must do without the .env file and Laravel automatically uses all the configurations that are inside the config folder.
The env function is simply a helper function provided by Laravel and allows us to search for the configuration established in the .env file given the key or its key as a parameter.
Connection to the database in Laravel in development environment (.env file)
In this section we are going to configure the database. Depending on the operating system you use, the steps will be different.
It is also important to note that these steps should only be realized if you created the project using the Laravel installer and selected MySQL as the database or if you updated the project to use MySQL.
If you did not choose MySQL, from the env file you will see:
.env
DB_CONNECTION=sqlite
# DB_HOST=127.0.0.1
# DB_PORT=3306
# DB_DATABASE=laravel
# DB_USERNAME=root
# DB_PASSWORD=
That is, we are using SQLite, the database in Laravel is located in:
database\database.sqlite
To view it, you can use a VSC extension or install drivers such as:
If you want to switch to MySQL, you must manually create a MySQL database and configure the parameters:
.env
DB_CONNECTION=mysql
DB_HOST=127.0.0.1
DB_PORT=3306
DB_DATABASE=larafirststeps
DB_USERNAME=root
DB_PASSWORD=
And this would be all, of course, you have to go to your MySQL and through the graphical interface or from the console create the database that you are specifying in the project configurations.
Now, you need to know how to create tables in the database using the migration system in Laravel.