
Content Index
- Modeling a Chessboard
- 1. Base Geometry Preparation
- 2. Using the Array Modifier
- 3. Assigning Materials (Black and White)
- 4. Building the Full Board
- 5. Finalization: Joining Objects
- Step by Step
- ♟️ How to create a chess pawn in Blender
- 1. Preparation and Primitives
- 2. Shaping: Extrusion and Scale
- 3. Smoothing with Subdivision Surface
- 4. Controlling Geometry: Loop Cuts
- 5. Final Touches: Materials and Scale
- Step by Step
Finally, let's do something interesting. We already know how to take the first steps with Blender, so let's model a simple chessboard. This is an updated version of a video I recorded a while ago. The great thing about working with these tools is that, even if the Blender interface changes or new systems like nodes are added, the basic math doesn't change; if something was done correctly years ago, it's still valid today.
In this session, we will use what we learned previously and add three key concepts:
- X-Ray Mode (X-Ray/Wireframe): To see through the geometry.
- Modifiers (specifically the Array): To duplicate geometry procedurally.
- Basic Materials: To give color to our pieces.
Each of these videos requires practice. 3D navigation, editing tools, and metric transformations are skills that depend on your consistency. I give you the direction, but the practice is up to you.
Modeling a Chessboard
1. Base Geometry Preparation
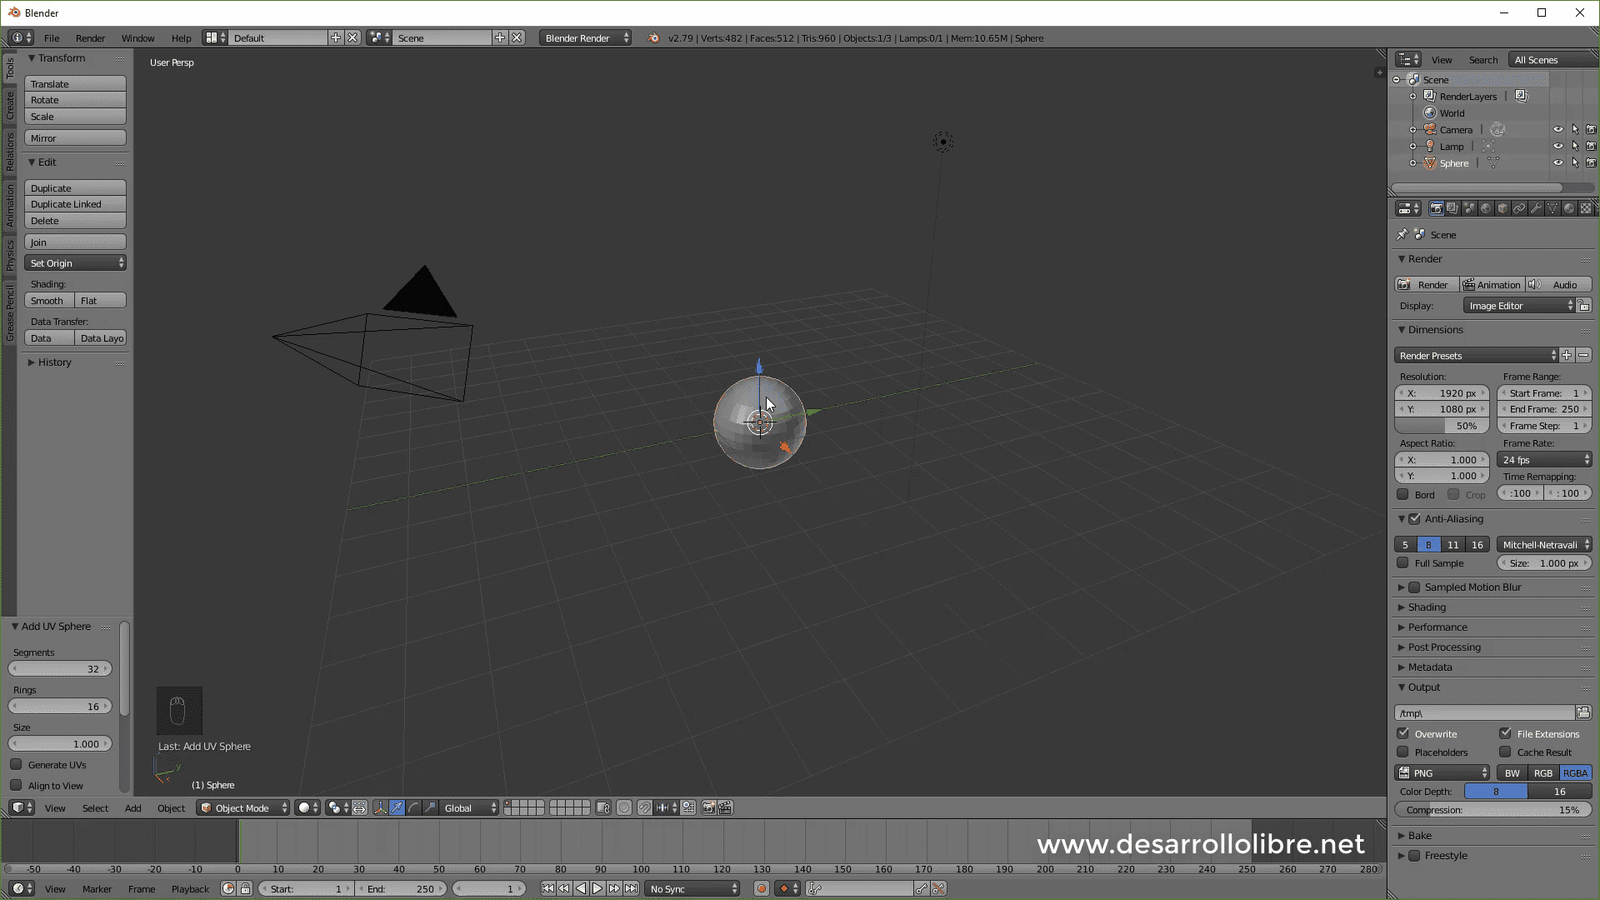
We will start from our initial cube. Follow these steps:
- Press 1 to position yourself in the front view.
- Press Tab to enter Edit Mode.
- X-Ray Mode: The problem with working in solid mode is that we don't see the back vertices. Enable X-ray with Alt + Z (or press Z and select Wireframe). This way, when selecting the front vertices, you will also pick up the ones at the back.
- Scaling: Select the top vertices, press G (Move), then Z (Z-Axis) and lower them until the cube has the thickness of a tile. You can be precise by typing numerical values.
2. Using the Array Modifier
Once we have one square, we are going to duplicate it without doing it manually. Go back to Object Mode (Tab) and go to the Modifiers tab (the wrench icon).
- Look for the Array modifier. You will see the cube duplicate.
- An Array is basically a list of repeated elements. For now, it is "non-destructive": you can change the count from 1 to 2 or more, and the original geometry doesn't change until you hit Apply.
- Apply the modifier using the small arrow in the menu. Now, when returning to Edit Mode, you will see that you already have two real squares to work with separately.
3. Assigning Materials (Black and White)
To make it look like a board, we need colors. Go to the Materials tab (the red circle):
- Create a new material called "Black" and lower the Base Color to darkness.
- Create another material called "White" with the color at maximum.
- In Edit Mode, select the first square and, with the black material selected, click Assign. Repeat the process with the second square and the white material.
(Make sure you are in "Material Preview" mode at the top right to see the colors).
4. Building the Full Board
Now comes the challenge:
- Use the Array modifier again on the two-square object to reach 8 on one axis (count at 4). Apply the modifier.
- Duplicate the object (Shift + D), move it on the side axis and rotate it on the Z axis 180 degrees (R, Z, 180). This will automatically interleave the colors.
- Repeat the duplicating and moving process (using G and the axes) until all 64 squares are completed.
5. Finalization: Joining Objects
To finish, select all the rows you have created by holding Shift and press Control + J (Join). This will join all the pieces into a single object called "Board".
Congratulations! You have modeled your first complex object using a professional workflow. Remember to save your file with Control + S or use incremental saving to keep versions of your progress.
Step by Step
Below, I leave you the step-by-step modeling:
Immediately after, we are going to position ourselves in the side view with 1, then 5 to switch to Orthographic view, then Z to activate wireframe, and then Tab to switch to edit mode, where we can alter the object's mesh from vertices, segments, or faces as you should already know:

Then with our view positioned to one side (by clicking 1 on the numeric keypad) we select the upper part of the cube, which thanks to the wireframe we activated with Z we can select even the vertices from the back:

And we lower the selected vertices on the Z axis:

The next thing we do is scale our cube a bit with S on all axes:

This way we give a little more style to our Chessboard and create something like a spacing between the chessboard positions. With this, we have the first position of our chessboard; we switch to object view and position our 3D object on top of the grid axis:

Then we are going to add an array modifier that will allow us to create copies of the object to which said modifier is applied on any of the axes; this is the configuration you should use and then we apply it:

Then we switch to the top view with 7, then switch to the edit view with Tab and select one of the squares; the one on the right using the box selector with B:

And we add a material and set it to a dark black, then we select the other part and change it to a white:

Always remember to press Assign when specifying the material.
Then we switch to object Mode and again add the array modifier with the following configuration and apply it:

We place our object and position it correctly on the grid; for that we press G and then X and move:

Then we have to duplicate the object with Shift + D, then click to leave it right there, then press G then Y then two to move it two Blender units:

Then we have to rotate the cloned object, for that we press R, then Z and then 180 to move the object 180 degrees on the Z axis; after this we press the G key then X and finally 14 to move 14 Blender units:

Finally, we select the two objects and join them by pressing Ctrl + J; this way the original object and the one we cloned become one; next step we apply the array modifier with the following configuration:

And we apply; we position it over the grid:

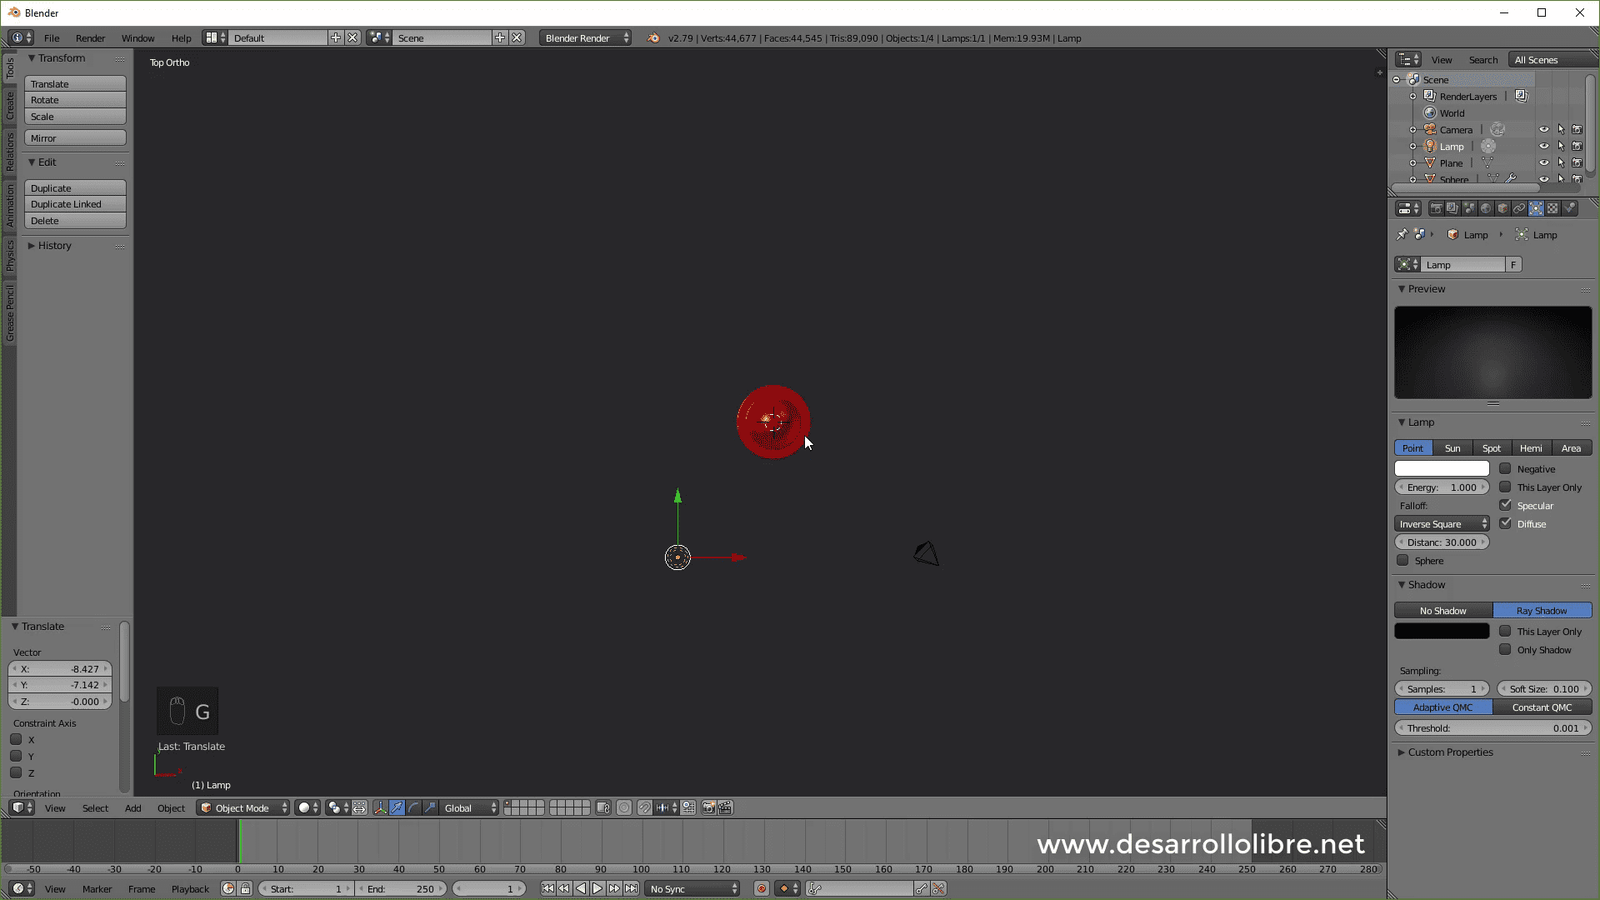
With this we are almost there, let's go to the top view with 7 and position the light in the middle and set it as Sun:

Finally we select the camera, press zero and enable "Lock Camera to View".
We position the camera wherever we want and finally press F12 and our board will be ready, we will have a Render like the one shown in the promotional image of this entry.

♟️ How to create a chess pawn in Blender
We reached the fourth day! Today we are going to create a pawn so that our board doesn't feel alone. In the previous session we implemented the board; remember that your task was to practice with materials, assign colors and experiment with modifiers, as well as reinforce 3D navigation.
For this pawn, we will base ourselves on a simple workflow. We will no longer use a cube, but will start from a primitive that best suits a rounded shape: the sphere. We will learn to extrude, to shape and, most importantly, to use the Subdivision Surface modifier so that the model goes from looking "square" to having a professional finish.
1. Preparation and Primitives
First, we are going to hide the board so it doesn't get in our way. You can do it from the Outliner (the panel on the right) by clicking on the eye icon.
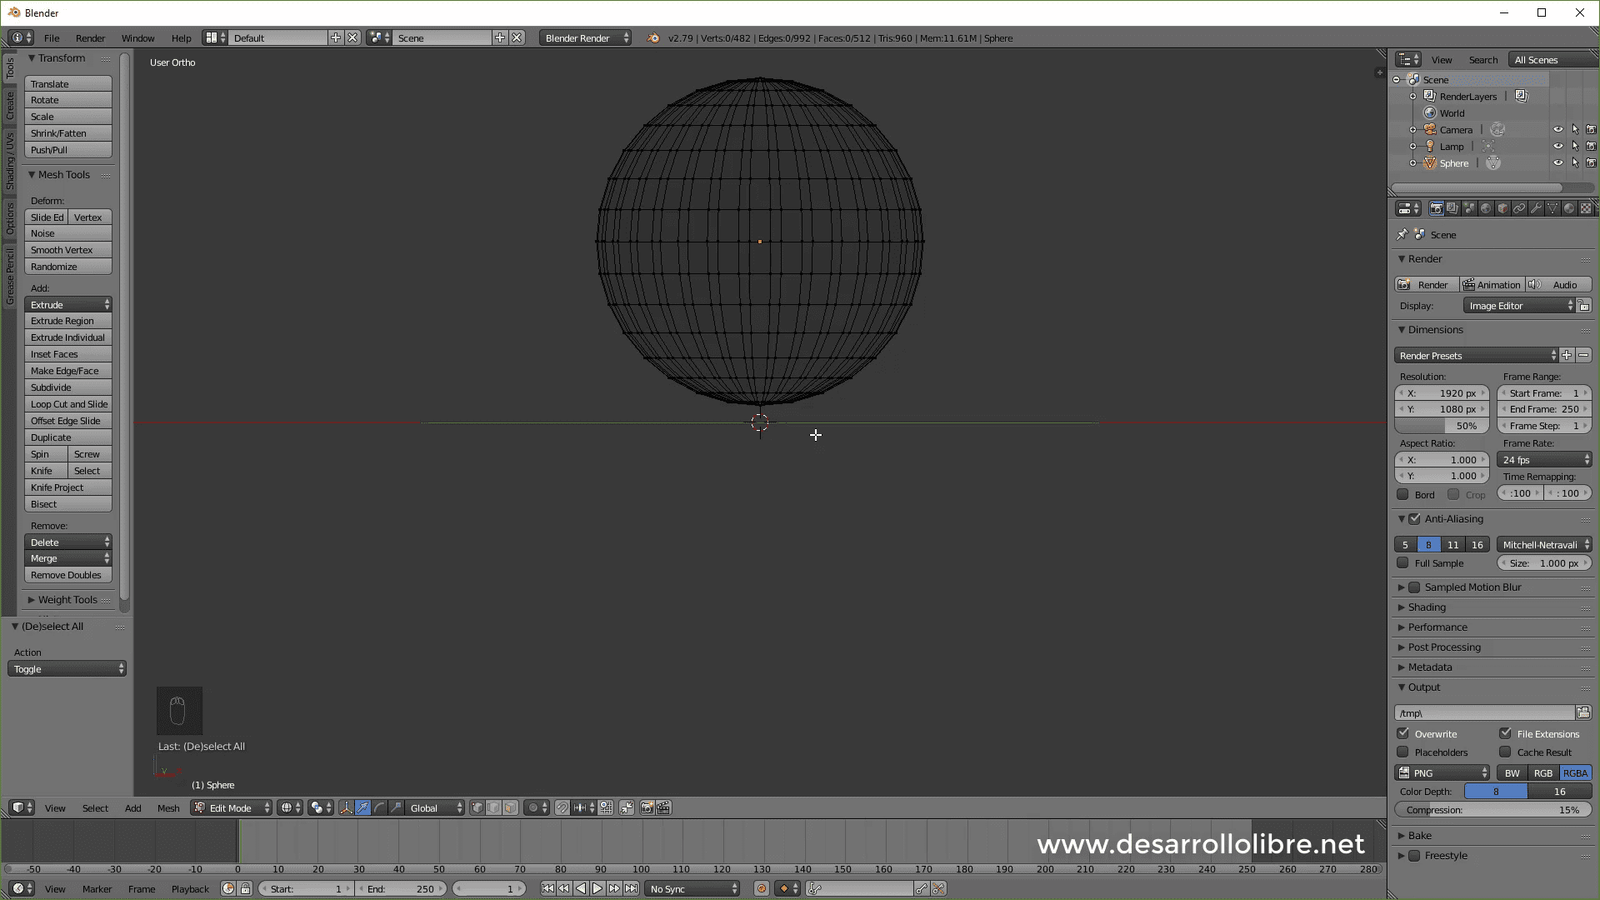
- In Object Mode, press Shift + A (or go to the Add menu) and select Mesh > UV Sphere.
- Press 1 on the numeric keypad for a perfect front view.
- Enter Edit Mode with Tab.
Tip: Always make sure you are aligned with the numeric keypad (1, 3 or 7) before modeling. If you do it by eye, the figure could end up tilted or "crooked" when extruding.
2. Shaping: Extrusion and Scale
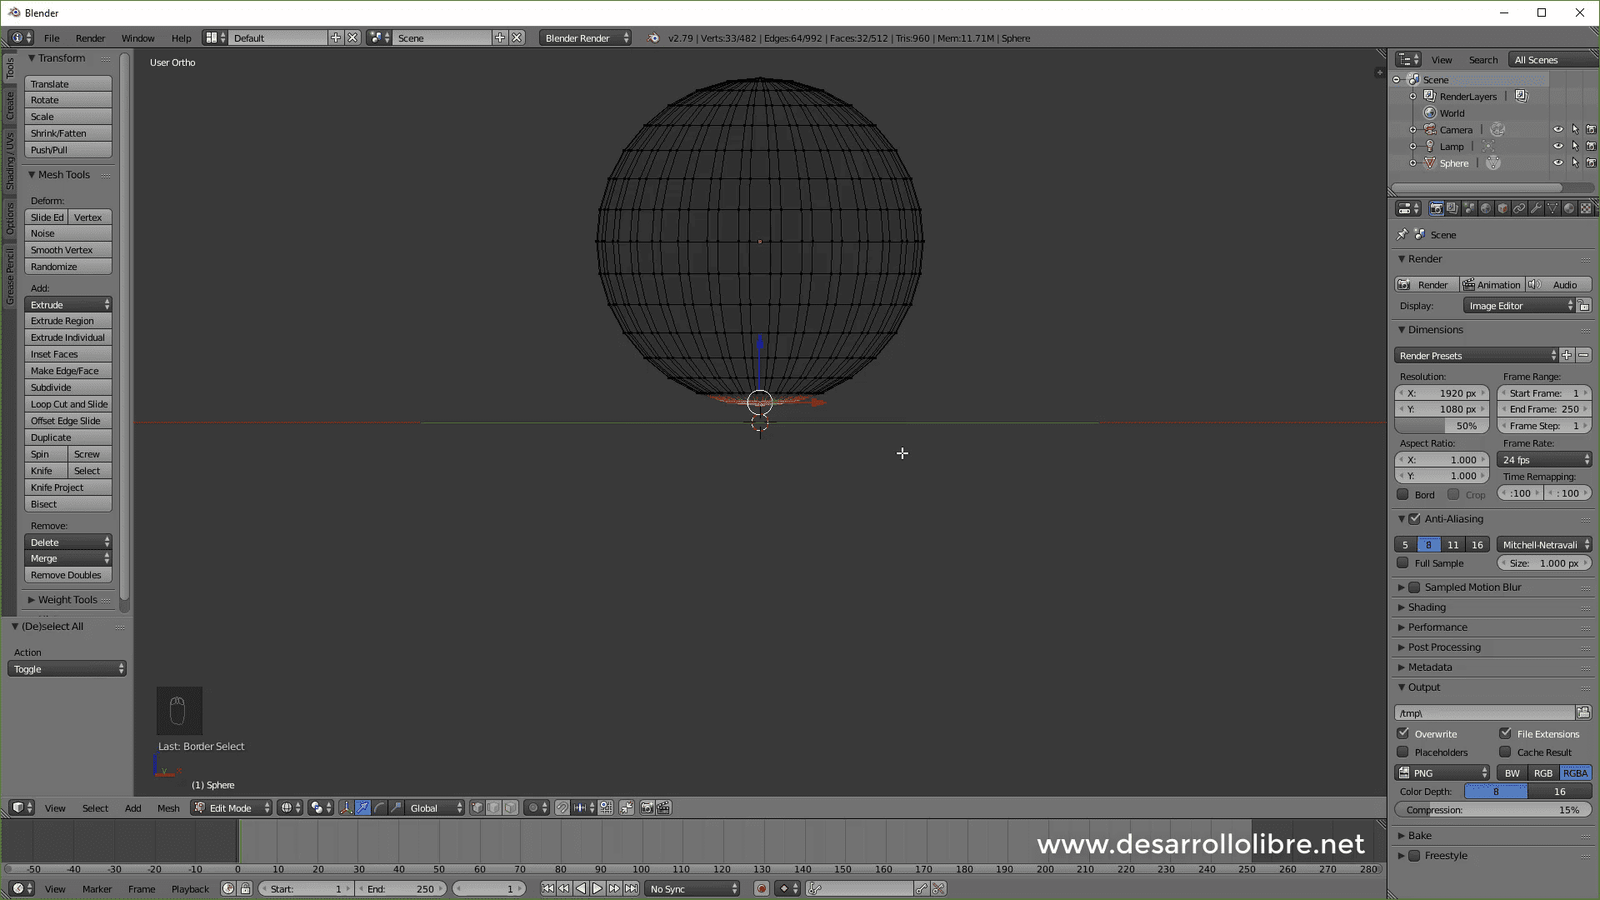
We will activate X-Ray mode with Alt + Z (or the button in the top corner) to select both the front and back vertices.
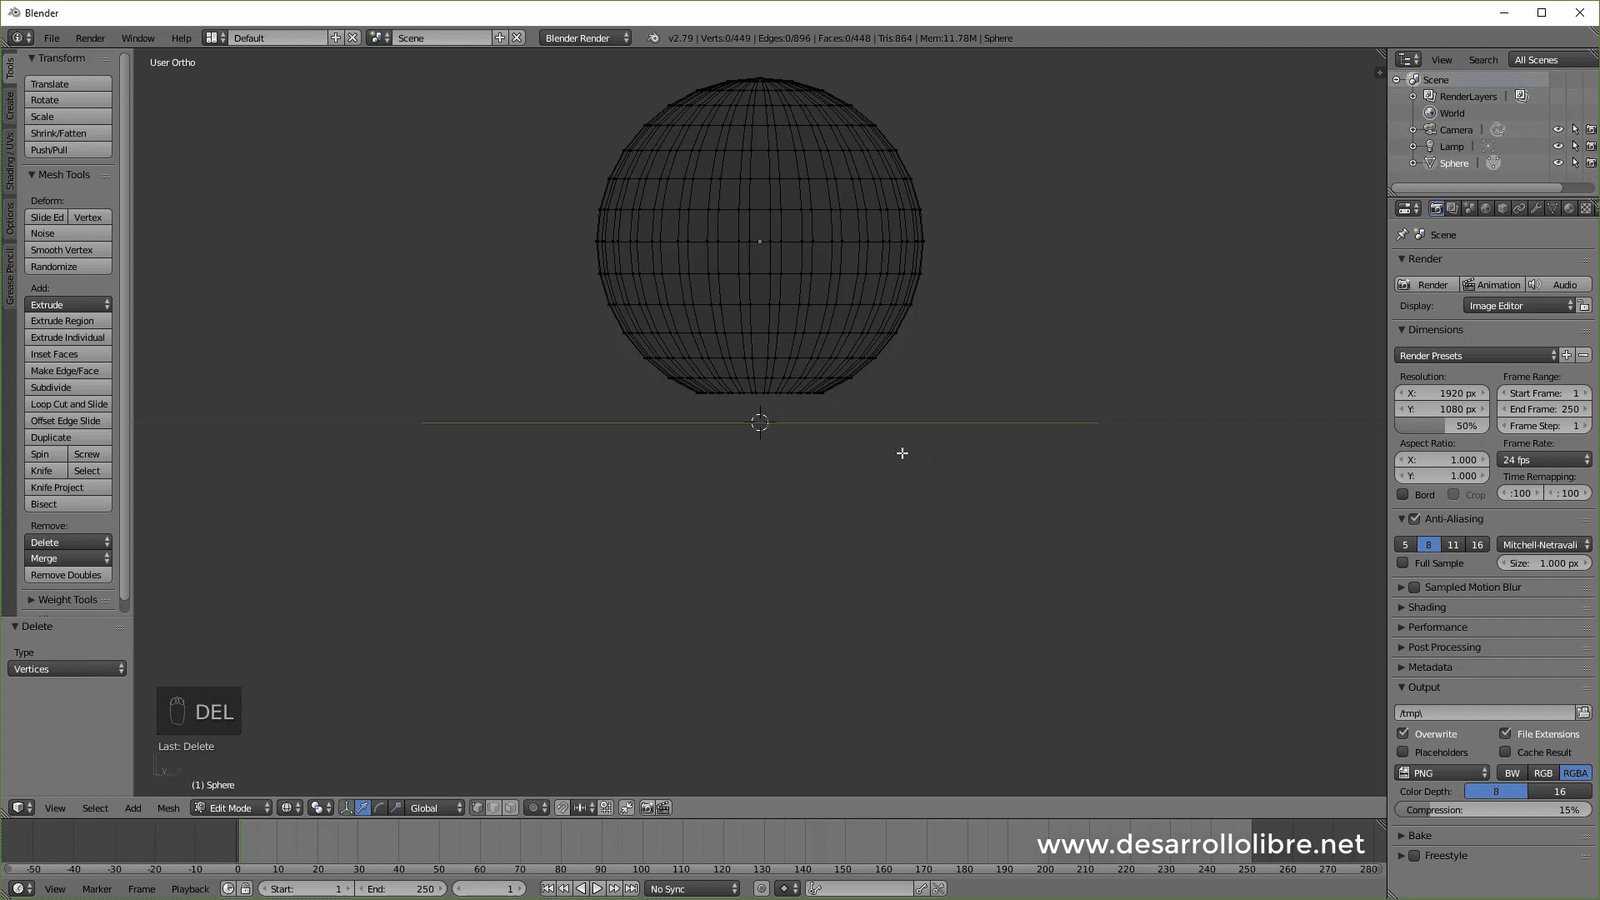
- Delete the base: Select the bottom half of the sphere, press X and choose Vertices.
- Extrude the skirt: Select the bottom ring of vertices. Press E to extrude and Z to lock movement downwards.
- Scale: Press S to widen the base and create the pawn's characteristic "skirt".
Closing the figure: For the flat base, press E (extrude), then S (scale) and type 0 on the keyboard. This will collapse all vertices in the center, closing the object perfectly.
3. Smoothing with Subdivision Surface
If you return to Object Mode, you will see that the pawn looks faceted (very polygonal). To fix it, we will use Blender's star modifier:
- Go to the Modifiers panel (wrench icon) and add one called Subdivision Surface.
- Increase the levels in the Viewport to 2. You will see that the object smoothes drastically, although it may become "too rounded" or lose its original shape.
4. Controlling Geometry: Loop Cuts
To prevent the pawn from looking like jelly and regain its defined edges, we will use Loop Cuts:
- Return to Edit Mode.
- Press Ctrl + R and slide the mouse near the edges (like the base or the neck).
- By clicking, you will be able to move the new cut. If you bring it very close to an existing edge, the subdivision modifier will "tighten," making the edge look squarer and more defined.
- Repeat this at the base and at the joints to give it that classic turned wood aesthetic.
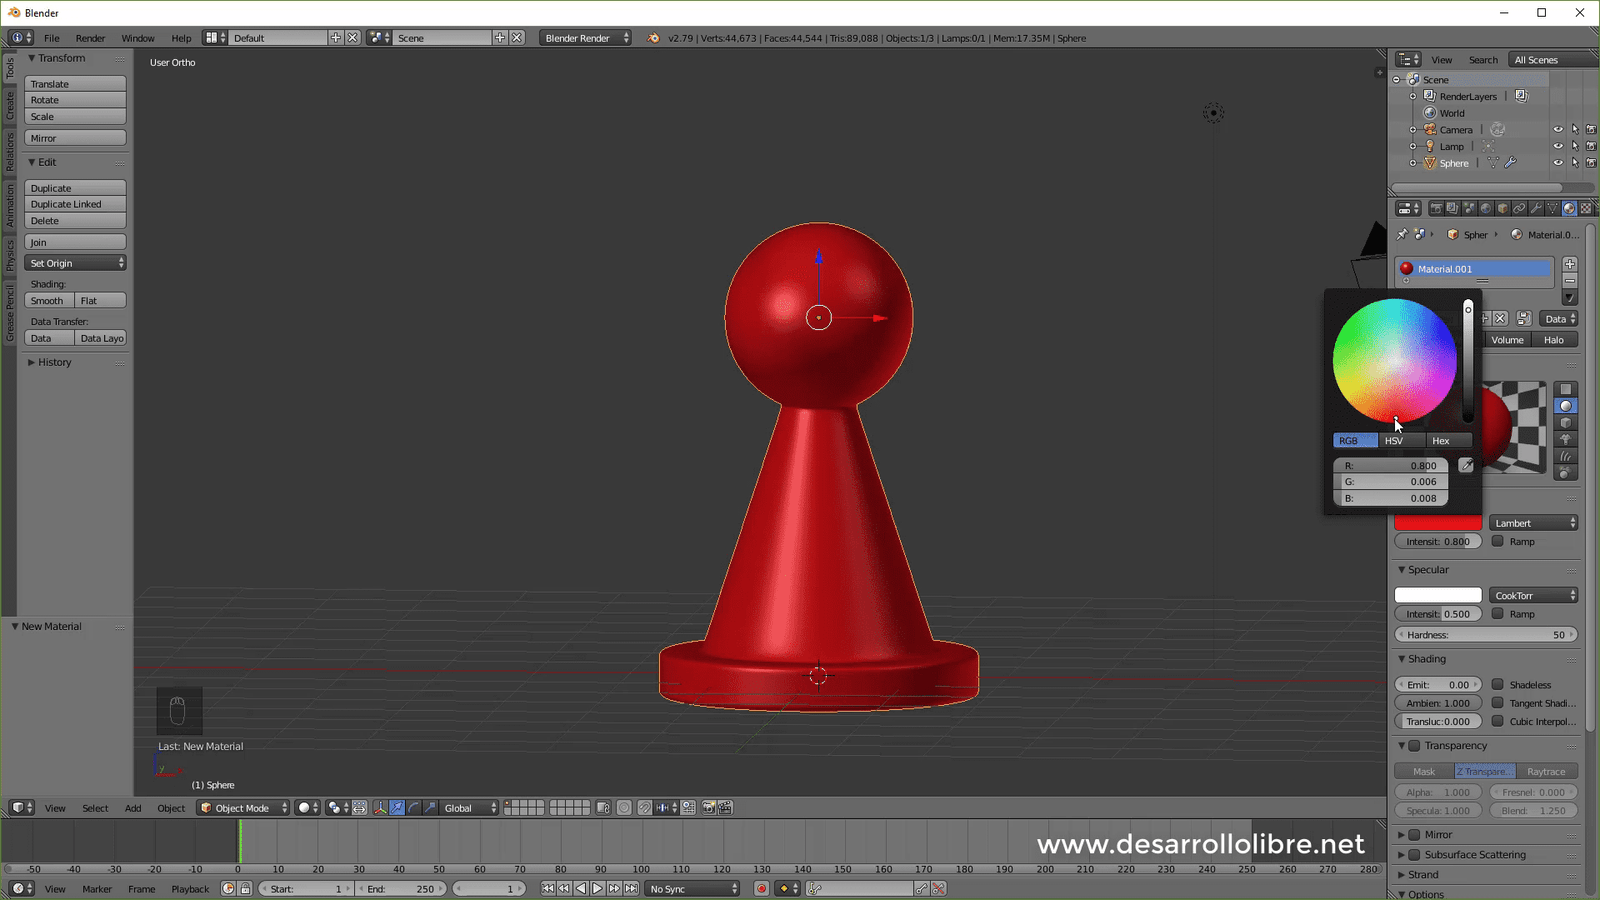
5. Final Touches: Materials and Scale
To finish our second experiment:
- Go to the Materials tab, create a new one called "Pawn_Red" and choose a striking color.
- Return to Object Mode and show the board again from the Outliner.
- Use G to move it and S to scale it until it is the appropriate size relative to the squares.
You already have your first pawn! It will look a bit dark if you don't have lights in the scene, but it already works correctly. In the next few days we will learn about lighting, cameras and our first animations.
Step by Step
I show you the modeling more step-by-step.
In this section, we will see how to model a chess pawn with Blender; for this we are going to use a sphere instead of the default cube, so we select the cube and then X to delete; once this is done we press shift A and then add a UV sphere:
The next step we are going to perform will be to switch to orthogonal view with 5, then 6 to position ourselves from one of the sides of the sphere; finally we press TAB to switch to Edit view and the Z key on the keyboard to activate the wireframe:
We select the lower vertices with the box selection tool (B key):
And we delete the selected vertices:
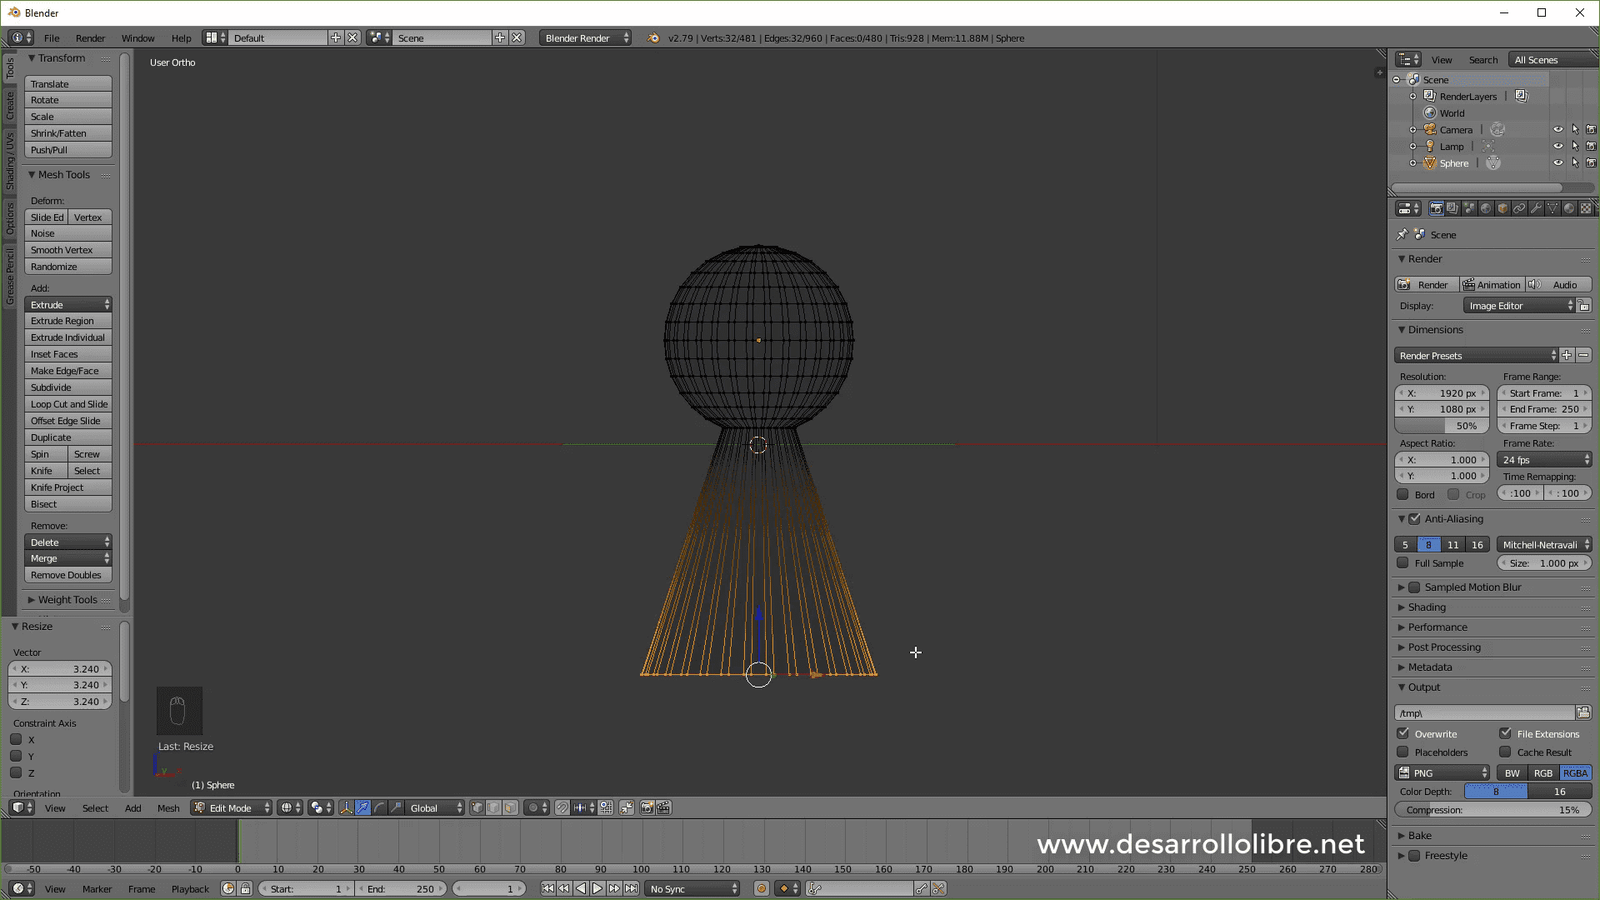
The next step is to select the bottom vertices of the sphere with the box selection, with the B key and press E to extrude, then Z to extrude on the Z axis only and keeping other vertices fixed we go down as shown in the following image:

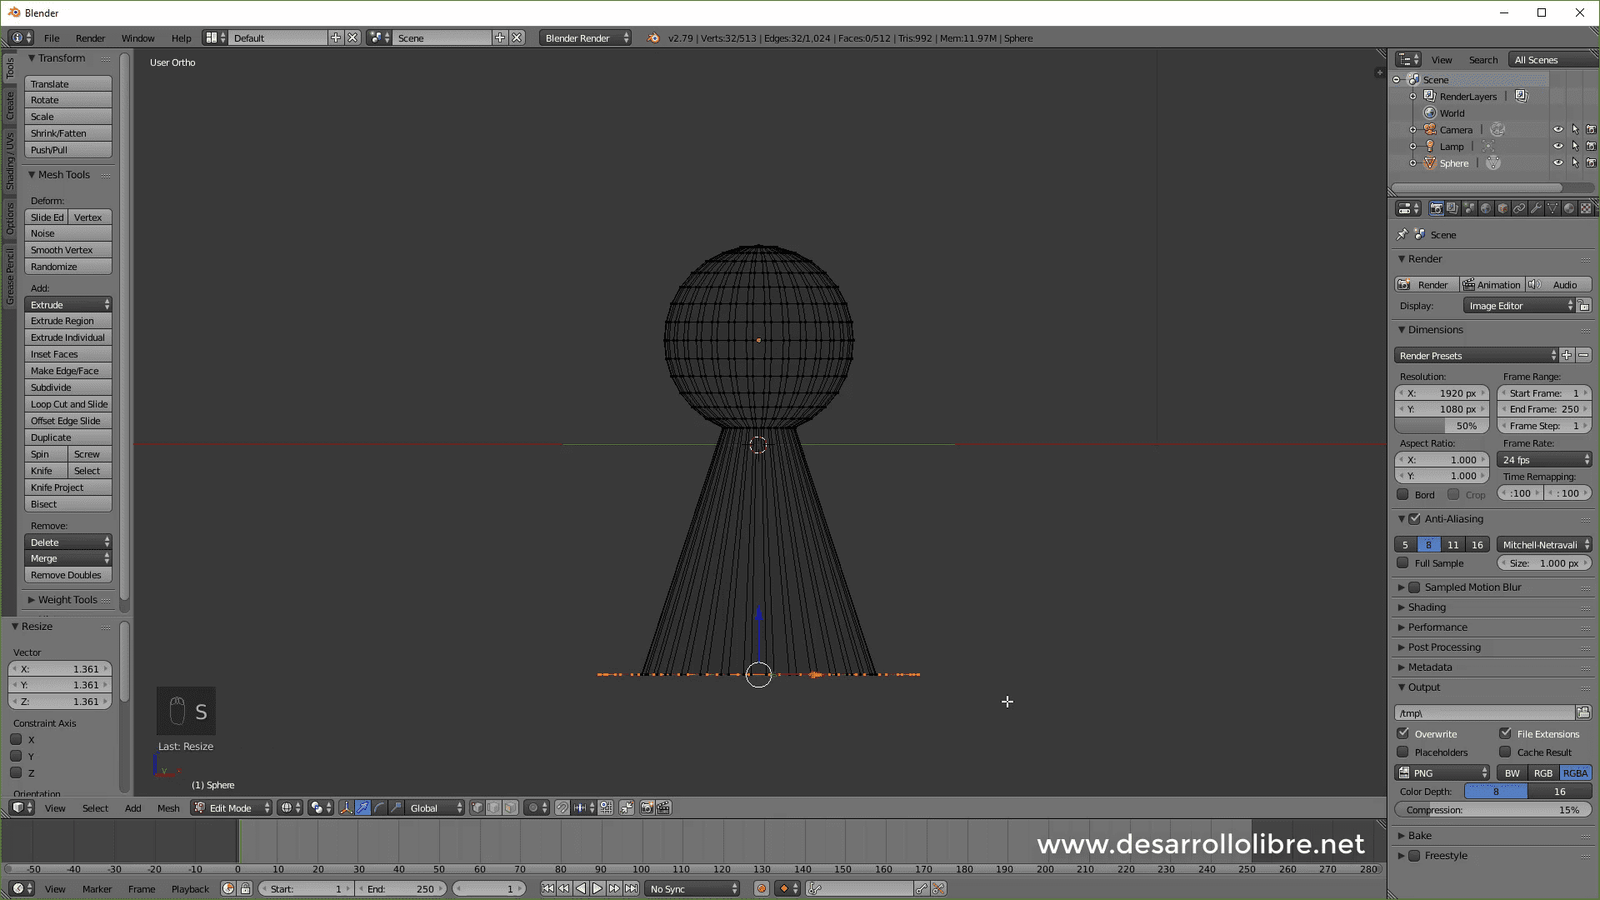
Next step, we scale by pressing the S key:
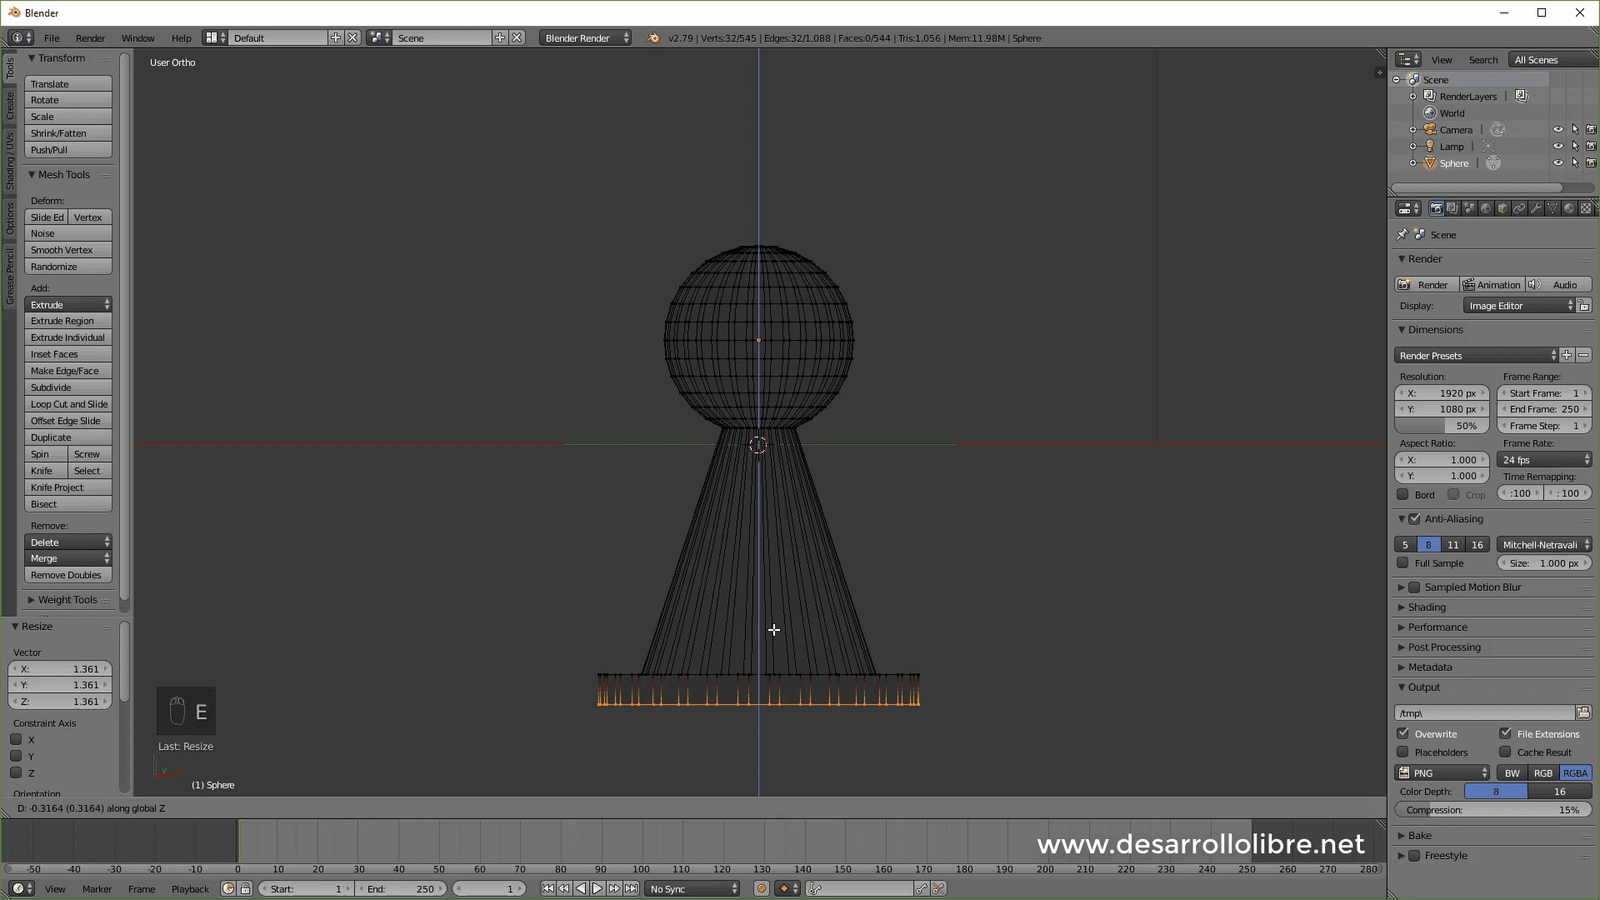
And then we extrude again with E and followed by a click to leave the new vertices in the same place; with this we scale outwards:
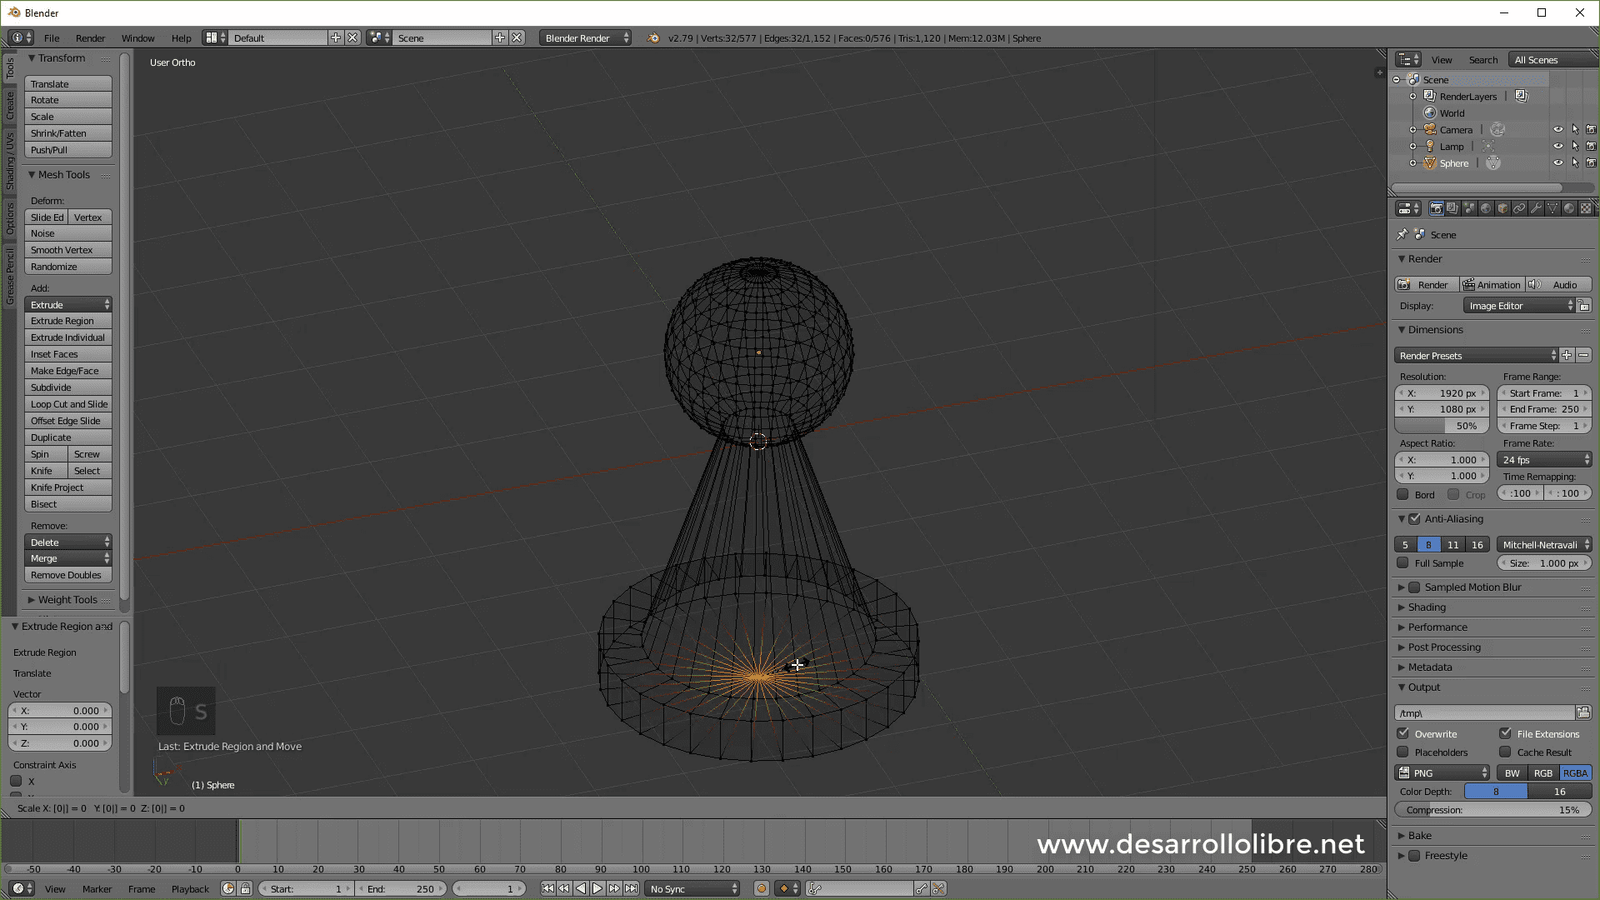
Then we extrude with E and press Z and lower the vertices a bit:
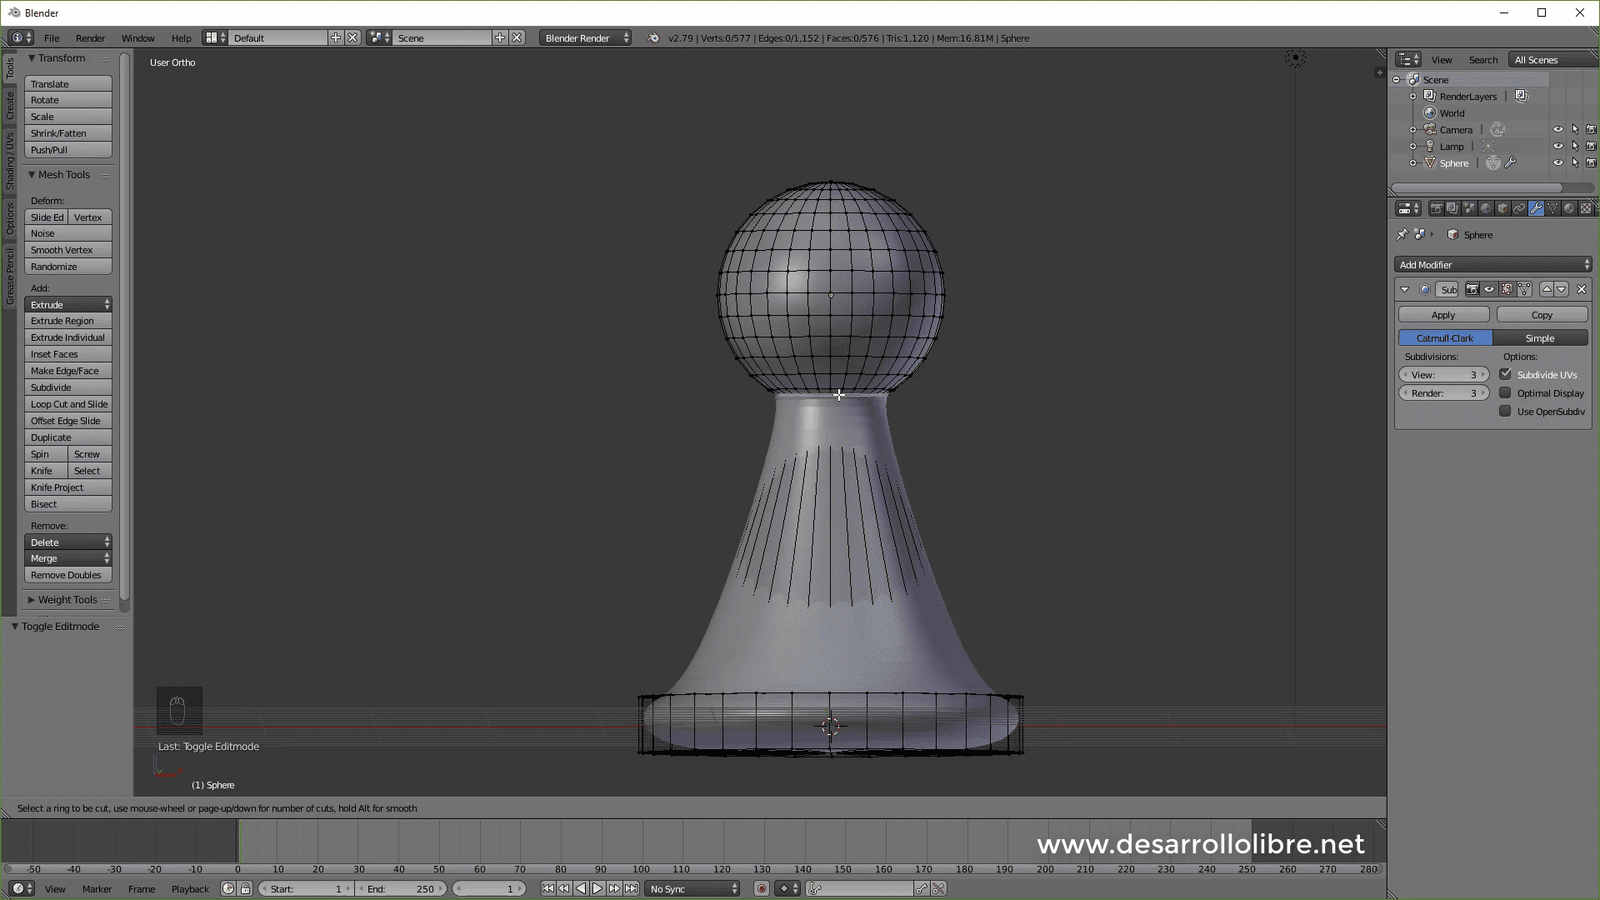
Again we extrude with E and click immediately after extruding, then we press Z and then 0 and with this we have finished the model or base mesh:
Now we switch to object view with TAB and we are going to add a Subdivision Surface in Blender so that it doesn't look so square; for this we click on the wrench icon, look for the modifier and configure it as follows:

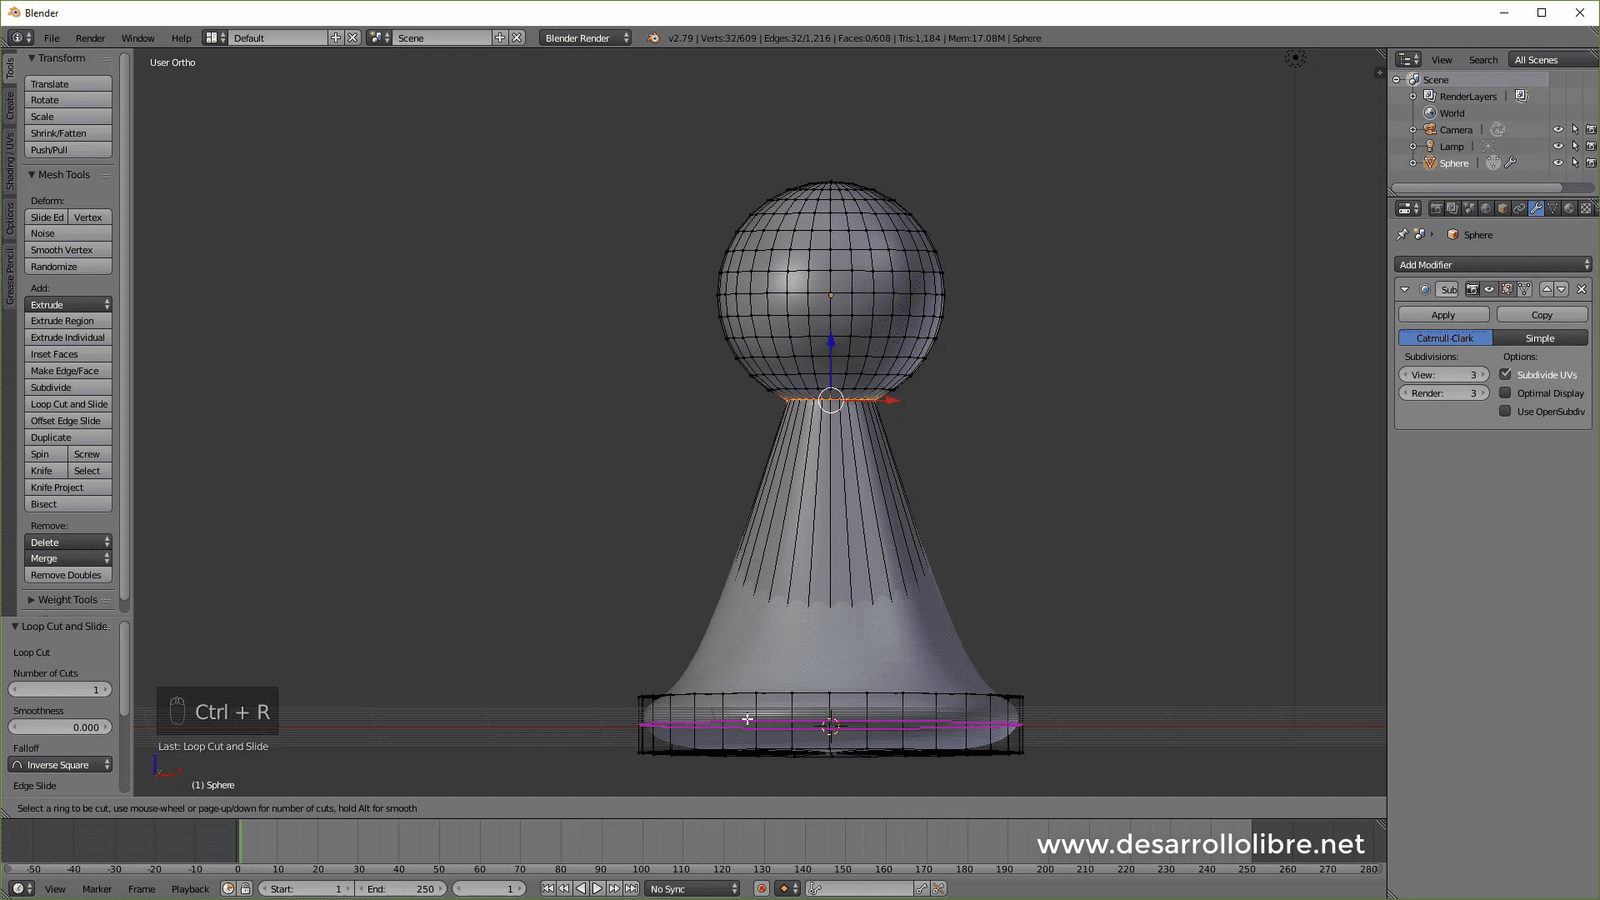
Our figure or pawn is very rounded all around, we have to add some cuts to avoid this; to do this we switch to Edit view with TAB and add a cut in the neck of the figure:
We are going to apply another cut at the base of our figure and we are going to move it up but NOT all the way so that we have a slight rounding at the base:
And we do the same with the bottom part; that is, we don't take it all the way so that a slight rounding remains:
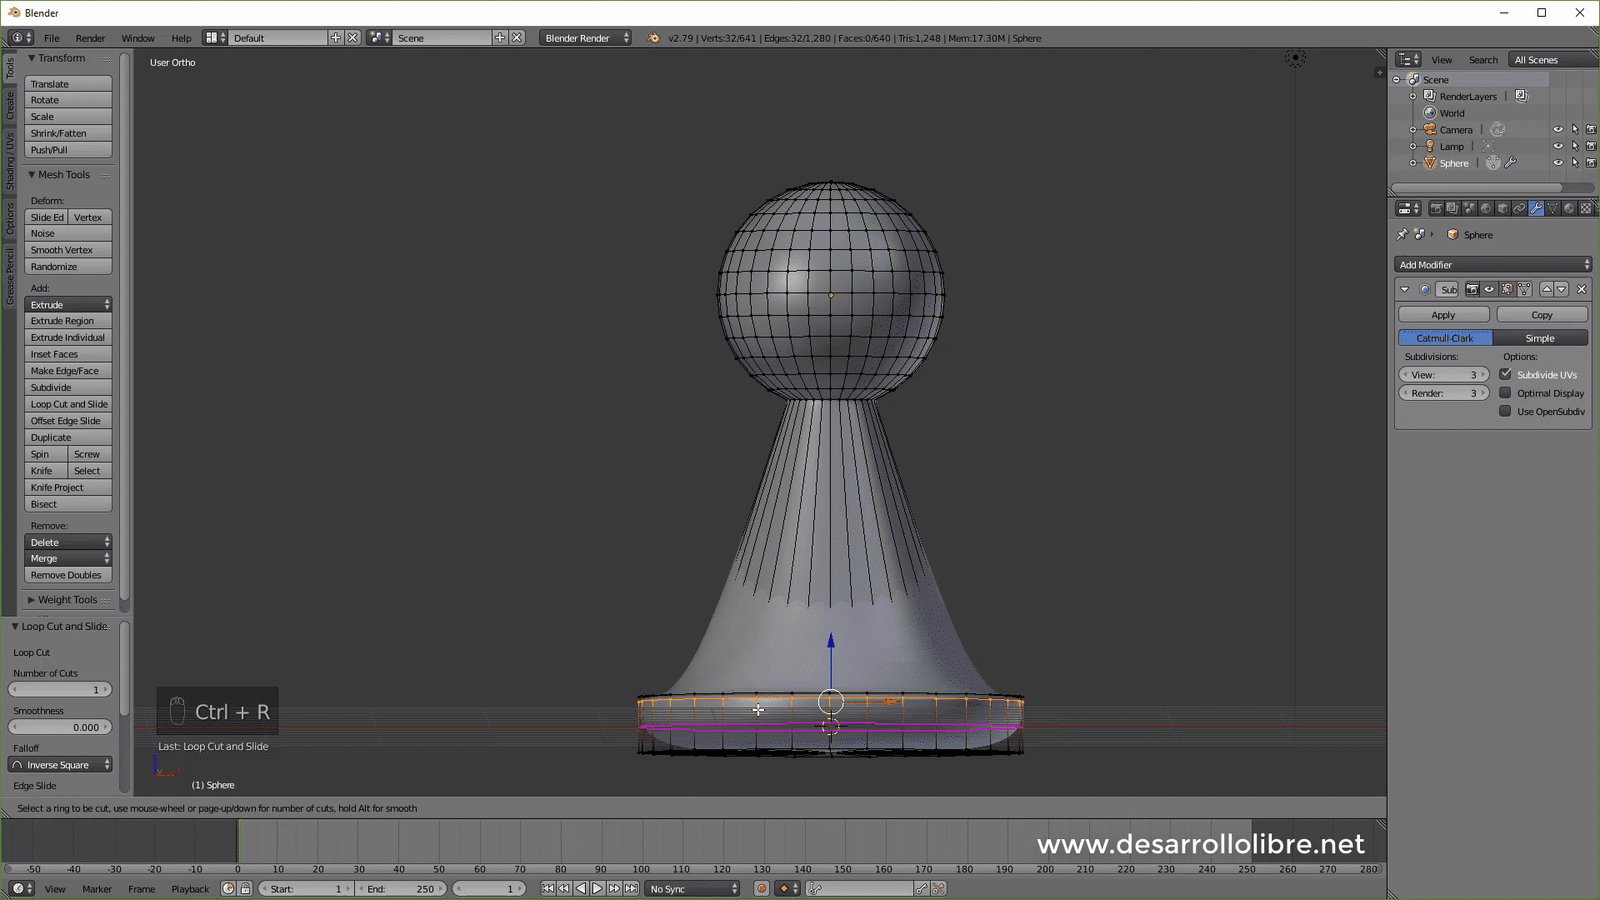
One last cut that we will place from the middle of the figure to the bottom of it:

We switch to Object Mode with Tab and add a Smooth.
And then we go to the materials section and add a material and set it to the color we prefer:
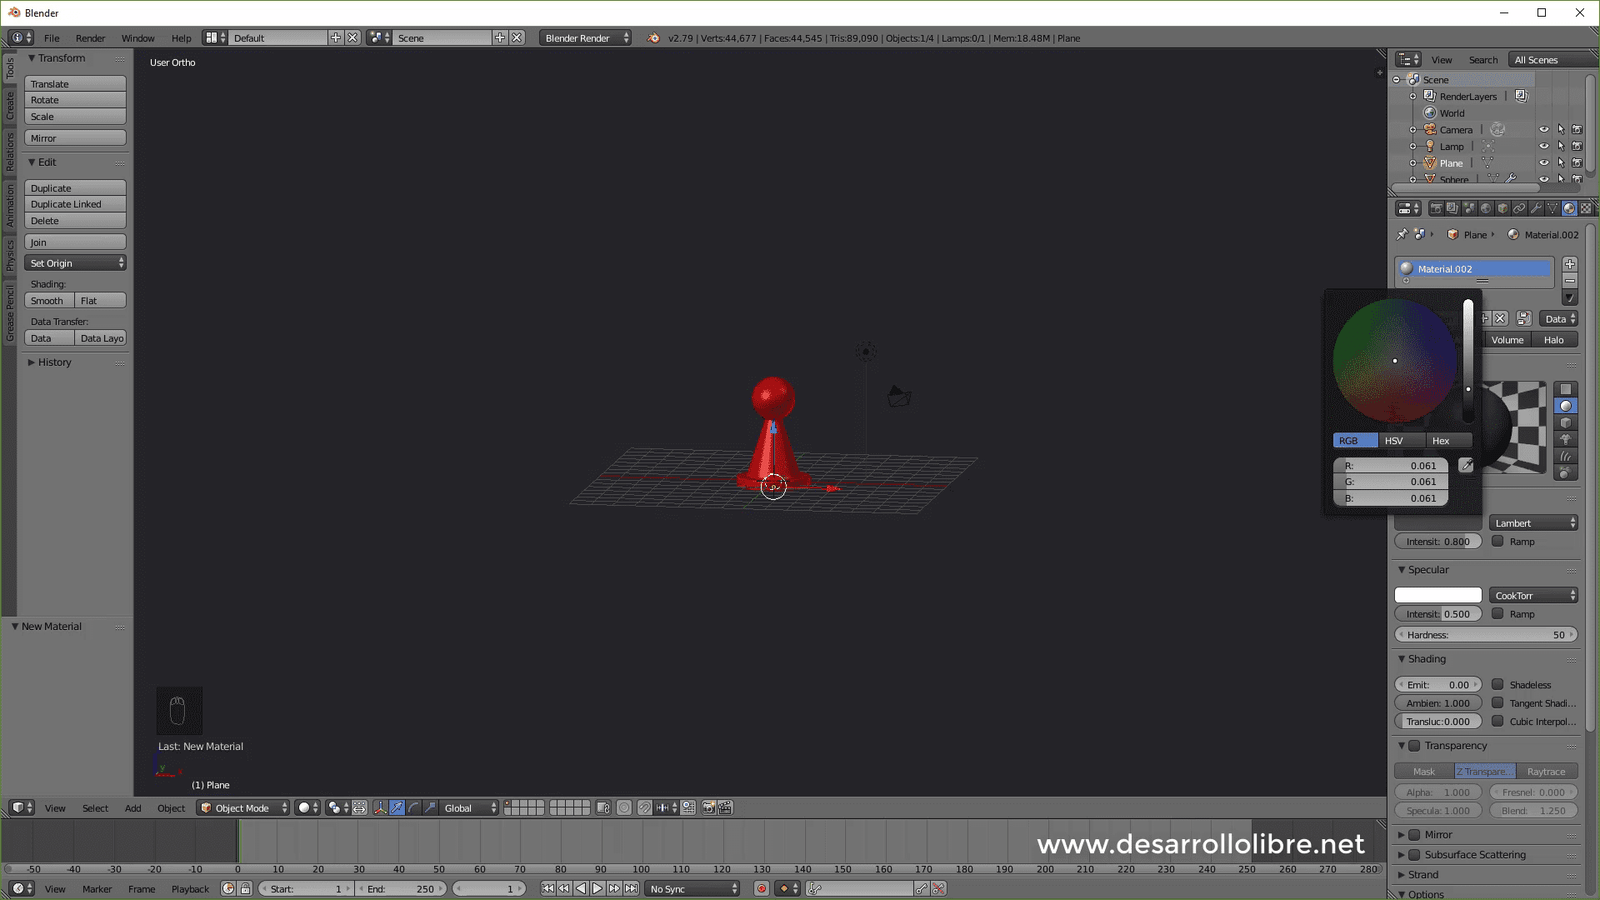
With this we have our pawn ready, we are going to make a few more additions to be able to take a render; for that the first thing we have to do is add a plane, place it at the bottom of the pawn and scale it with S and then 100 and set a material:
Now we select the lamp and place it as specified in the image and give it 10 energy:
Finally, we select the camera and position it as shown in the image; you can help yourself with the "Lock Camera to View" option in the panel that appears with N:
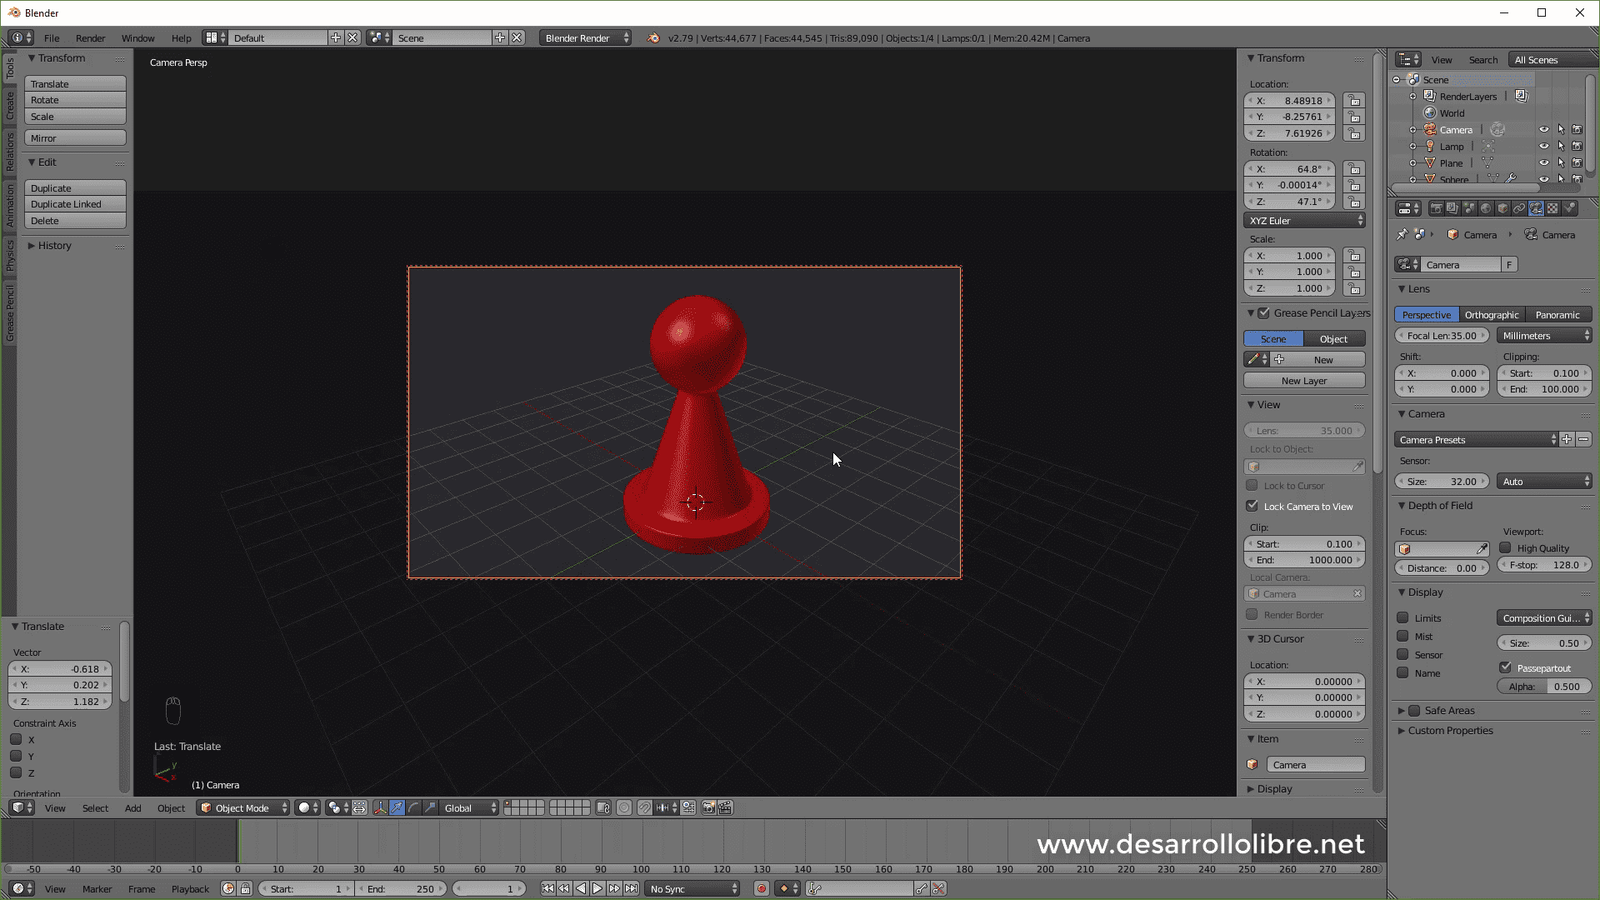
And that would be all, you just need to hit render with F12 and we're ready.
Learn now the difference between Perspective and Orthogonal (Orthographic) projection in Blender.