Forms are an important part of almost any web application; in many ways, in the quintessential way to interact with the user, whether to create or edit data, use them as filters, step by step and much more.
We already know how to create our first route and controller, our Hello World in Laravel, let's move on to the next step, handling user data through forms.
Forms in Laravel can be directly a classic HTML form and adding CSRF protection and little else.
Form handling in Laravel also includes validation of the data submitted by the user; for this, additional classes generated by artisan are used, in which we have a series of predefined methods ready to use or we can create our own; these validations are essential since you always have to generate server-side validations.
Laravel provides a clear and very powerful syntax to define validation rules either at the controller level or, as is classic, in separate classes that we then inject into the controller or clearly reference. With this, we always make sure that the data received by the server are correct.
In this post we are going to learn how to process a form in Laravel in a basic way, send it, consume the data from a Post type function and display a response page; this is the common operation when we are working with forms that are responsible for processing and receiving data from the user with the purpose of storing them in the database.
In this entry we will continue working with controllers, routes and views; so it will be an entry similar to the one we already discussed previously; but we are going to go a step further and we are going to work a little with the forms to be able to send information or data to our controller and then be able to print it in the view; so let's get to it.
Create function and get route in our Home controller and the form
We are going to use the controller that we already defined previously (HomeController); but we are going to create a new function that we are going to call simply contact:
public function contact()
{
   return view('contact');
}
And the route in Laravel of type GET:
Route::get('/contact', 'HomeController@contact');Now the view that we are going to develop in the previous function will simply be a page called:
- contact.blade.php
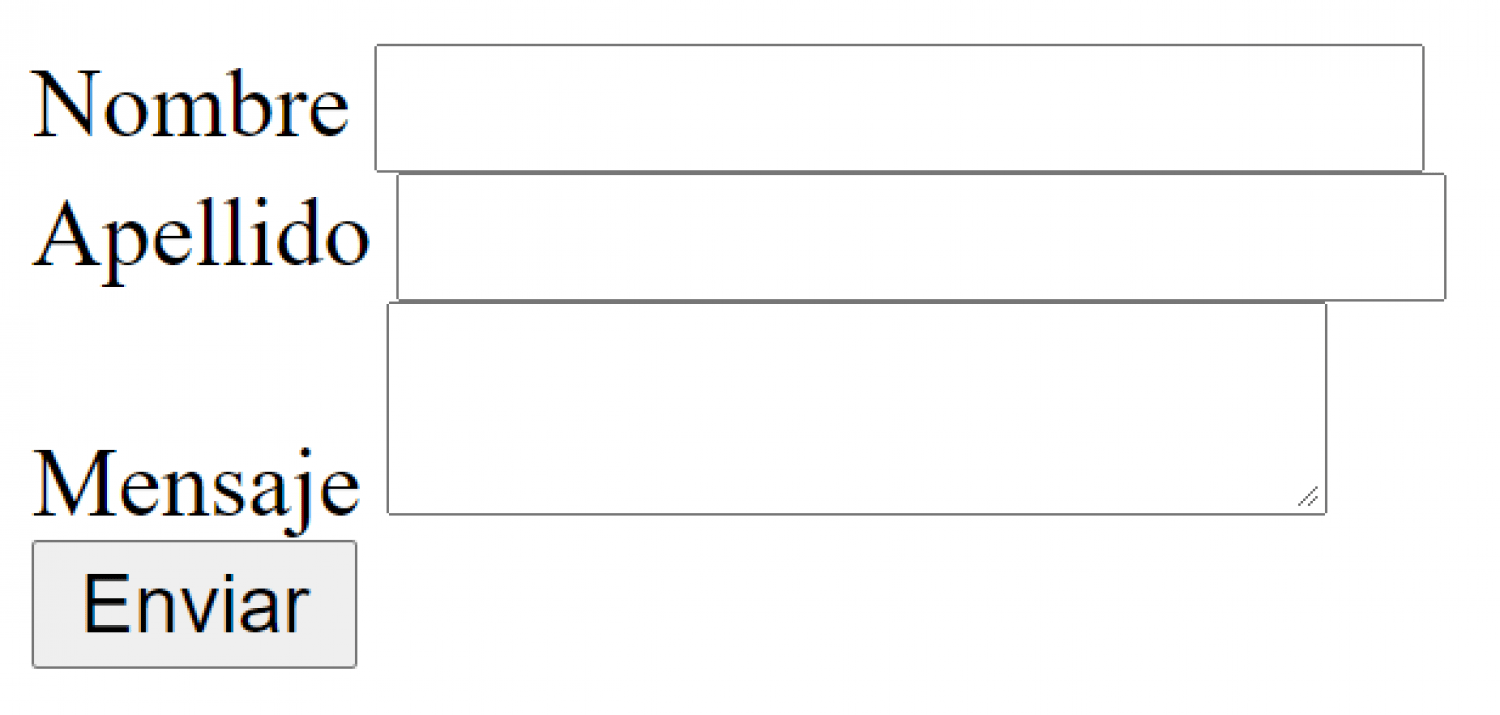
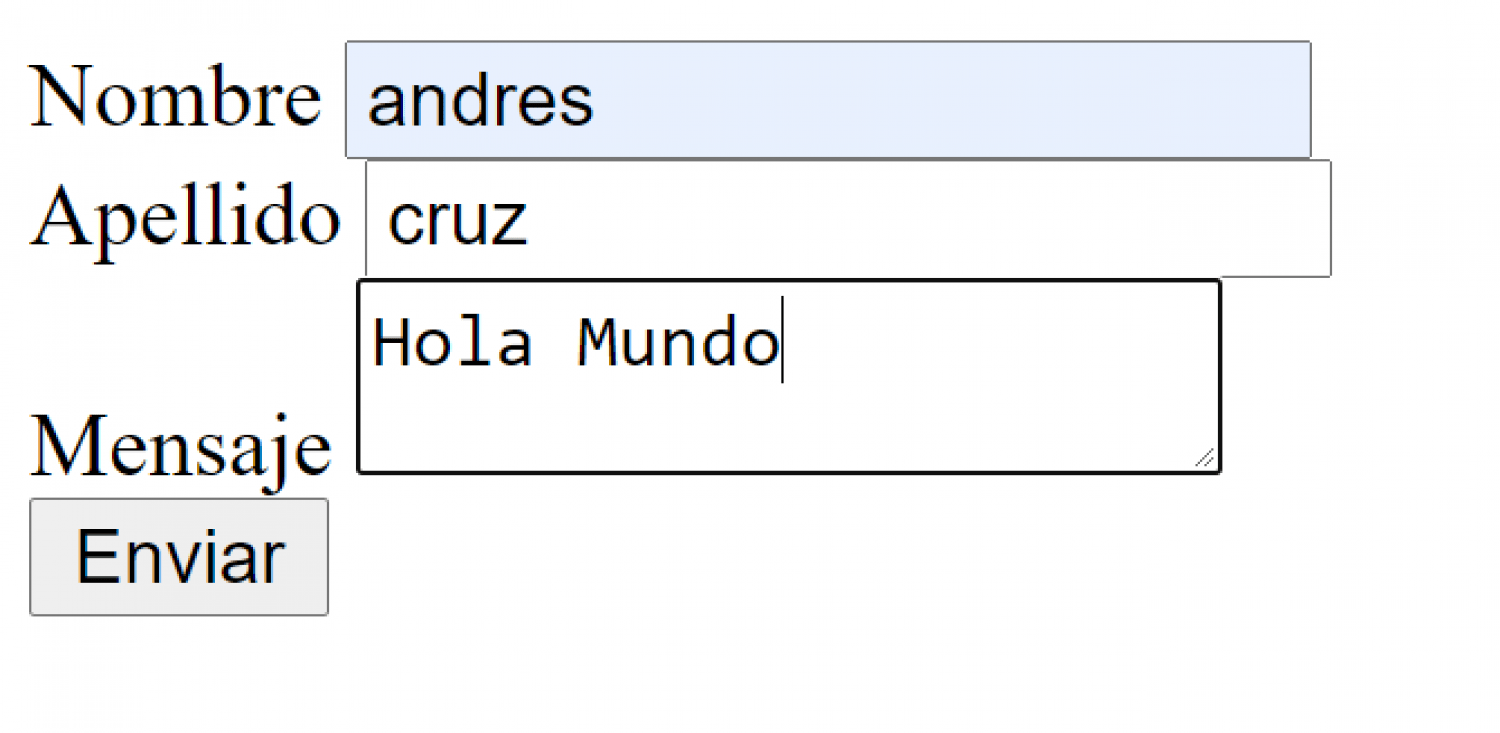
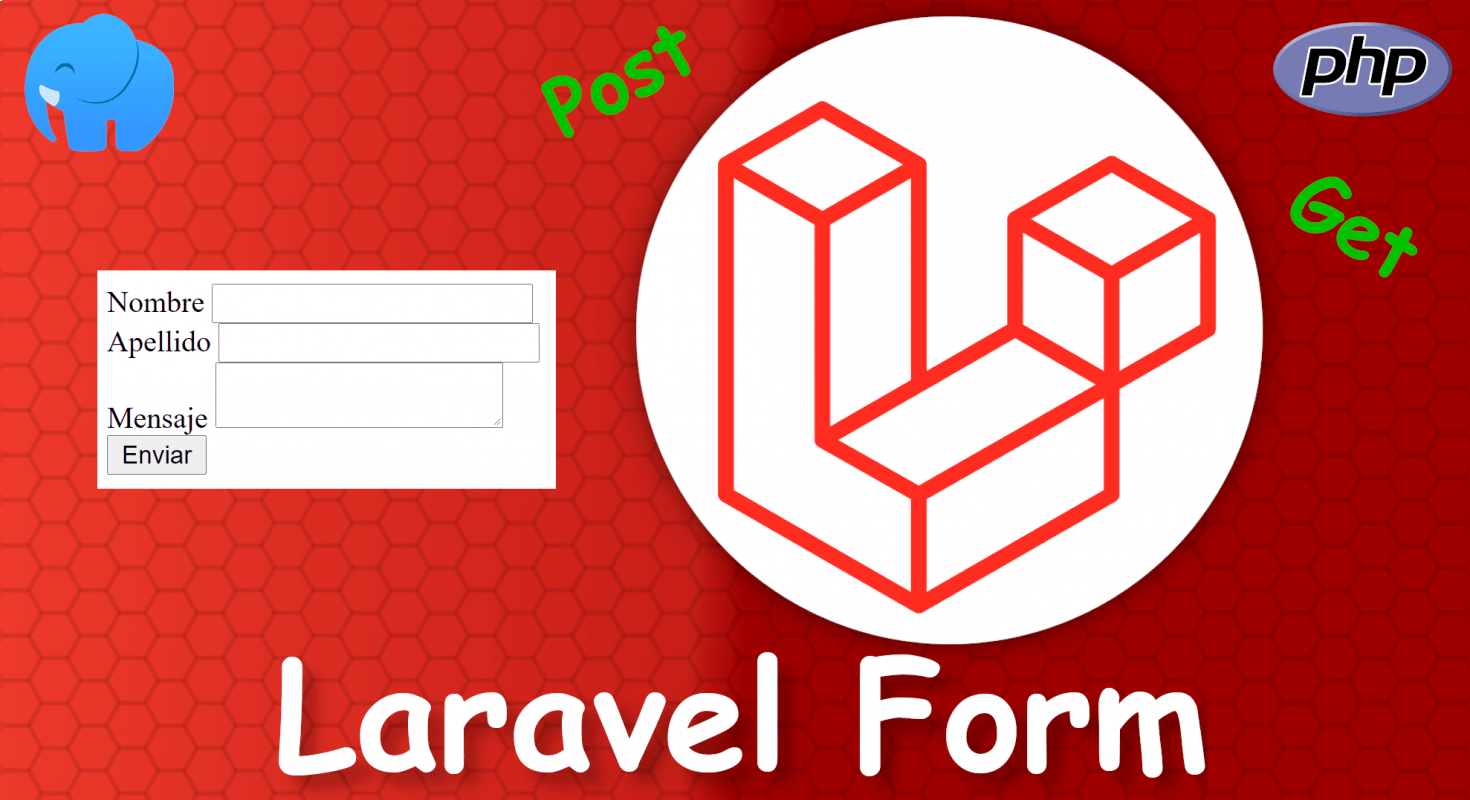
With a form or in which we can place the name, surname and a message; as you can see:
<form action="contact_post" method="POST">
    <label>Nombre</label>
    <input type="text" name="nombre" id="">
    <br>
    <label>Apellido</label>
    <input type="text" name="apellido" id="">
    <br>
    <label>Mensaje</label>
    <textarea name="mensaje"></textarea>
    <br>
    <input type="submit" value="Enviar">
</form>
At least for now we are going to send it via get; we could send it to the same function we defined above, but the best we can do is send it to a new function; for that:
    public function contact_post()
    {
        return view('contact');
    }
Create the Post function and route to receive the data
Now, we are going to define the function that is in charge of receiving the data (POST); as you can suppose if you have developed in other frameworks; in these cases we have to work with the user's request, which in English is called request; in Laravel 10 we can inject it, that is, pass it as a parameter to the controller function; therefore, we are injecting our user's request into the function that is responsible for receiving the data; I leave you the official documentation.
So that you can see what else you can do with the requests , since we can obtain information or interesting data from our user, but what interests us in this opportunity is to obtain the data.
And now, let's print the data we received from our user from the same controller function:
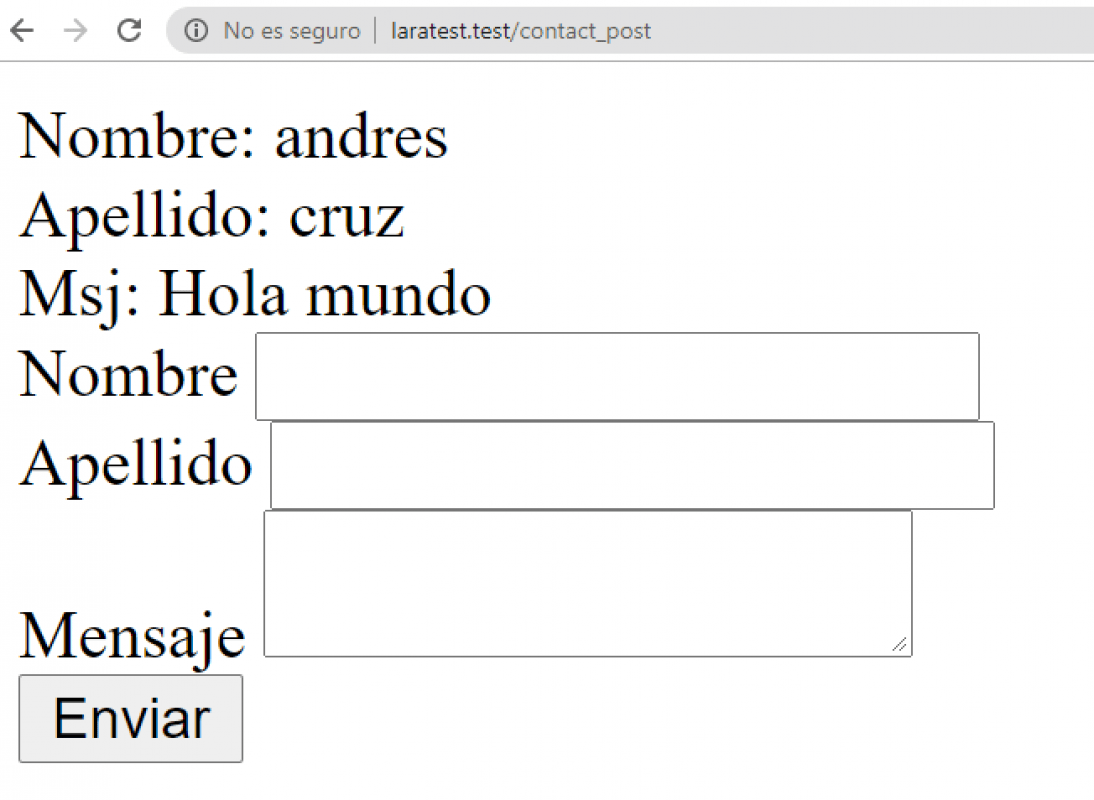
    public function contact_post(Request $request)
    {

        echo "Nombre: ".$request->input('nombre')."<br>";
        echo "Apellido: ".$request->apellido."<br>";
        echo "Msj: ".request('mensaje')."<br>";

        return view('contact');
    }
And if we define a route like the following:
Route::post('/contact_post', 'HomeController@contact_post');And if we go to our browser:
We will see that it does not work and it returns a 419 type message:

CSRF Protection in Laravel
This is because when we make a Post, Put Patch or Delete request, we have to use a protection token called csrt; therefore our form is as follows:
<form action="contact_post" method="POST">

    @csrf

    <label>Nombre</label>
    <input type="text" name="nombre" id="">
    <br>
    <label>Apellido</label>
    <input type="text" name="apellido" id="">
    <br>
    <label>Mensaje</label>
    <textarea name="mensaje"></textarea>
    <br>
    <input type="submit" value="Enviar">
</form>
CSRF (Cross-Site Request Forgery) protection is a security mechanism used to prevent CSRF attacks. Laravel provides protection against these types of attacks by generating a CSRF token, which is a random string that is generated for each request made from a form. This token is then internally checked by Laravel to know that the received request was generated from an internal view of the application in Laravel.
And if we try again:
Buala! We have it all there:
Receive data via post from our form
Generally, when we are going to send data to the server, it is recommended to use post type requests, because the data is more securely encapsulated in the request and not by the URL as is the case with get. Get requests are generally used to get data; so remember to define your form with the post method and use the corresponding routes.
Extra: Variations to obtain the request
As you saw previously; there are several variations that we can use to get the user's request; for example:
$request->input('nombre'); $request->apellido; request('mensaje');Display form data in a view
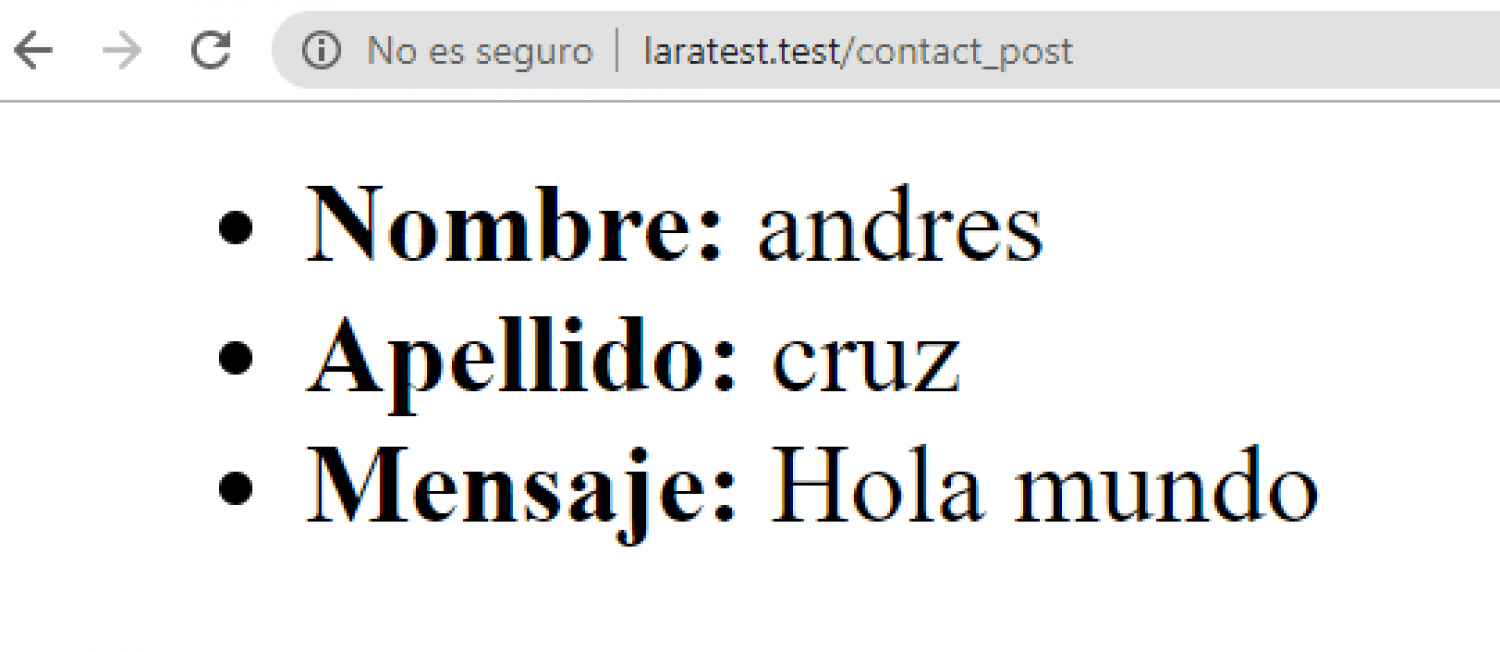
Now, the goal of this post was to print the data submitted by our user on a separate page; for that we are going to create an HTML page like the following:
<ul>
    <li><strong>Nombre: </strong>{{ $nombre }}</li>
    <li><strong>Apellido: </strong>{{ $apellido }}</li>
    <li><strong>Mensaje: </strong>{{ $mensaje }}</li>
</ul>
In which as you can see, we are simply printing the data; and now, from our function, we pass the data to this view:
   public function contact_post(Request $request)
    {
        return view('contact_info', [
            'nombre' => request('nombre'),
            'apellido' => request('apellido'),
            'mensaje' => request('mensaje'),
        ]);
    }
And with this, when submitting the form this is the result:
Notes and considerations
- Remember that there are multiple types of methods that we can use with HTTP, GET, POST, PUT, DELETE, PATCH type methods and with these we can communicate with the server, but we can only use GET or POST type requests when we are working with the server. HTML APIs.
- We use GET type routes to consume resources from the browser, for example, enter a page or do filters or searches; since they are more insecure requests than the rest of the types, for example the POST type and the GET type, the parameters travel in the browser's URL, which leads to a possible security hole if you want to pass sensitive data of the app; therefore, to process data through forms we generally use POST type requests.
- Remember to use Laravel's CSRF protection to avoid attacks on your website; this is simply a token that Laravel generates to know that the data it is receiving is from the form that is part of the application: {{ csrf_field() }}
PrepareForValidation, generate data before validating forms in Laravel
Content Index
- Create function and get route in our Home controller and the form
- Create the Post function and route to receive the data
- CSRF Protection in Laravel
- Receive data via post from our form
- Extra: Variations to obtain the request
- Display form data in a view
- Notes and considerations
- PrepareForValidation, generate data before validating forms in Laravel
- Implementation Example
- Using prepareForValidation()
- Final Considerations
Usually, in applications that handle a field for the slug, it is generated internally from another field, in this case, the title field.
In Laravel, we can perform this process automatically using the `prepareForValidation()` function, in which we merge the generated slug from the title, using the helper provided by Laravel: `Str::slug()`.
Remember that the `prepareForValidation()` function executes before performing validations, making it the ideal place to automatically prepare data.
Therefore, we must place this code in both corresponding validation files, for both the creation and updating of records.
app/Http/Requests/Category/Store.php
app/Http/Requests/Category/Put.php
// ***
public function prepareForValidation()
{
    if(str($this->slug)->trim() == "")
    $this->merge([
        'slug' => str($this->title)->slug()
    ]);
}
// ***
Implementation Example
- We convert the title into an Str object.
- We apply the `slug()` method to generate the friendly URL.
- We merge with the request, ensuring we do not overwrite an already existing slug.
- We assign the result to the slug field.
Important: We always use the title as a reference, and we check if the slug already exists to avoid overwriting it when the user edits the title, thus preventing conflicts or duplicates.
Using prepareForValidation()
To automate this process, we have the `prepareForValidation()` method, which executes before performing the validations. As its name indicates, it prepares the data we are going to validate, functioning as a kind of middleware that modifies the data before it reaches the controller.
The basic logic consists of checking if the user has not provided a slug. In that case, we generate it automatically and merge it with the current request data. Remember that merge means to mix: we combine the existing request with the changes we are making.
This allows us not only to auto-generate the slug but also to take advantage of this space for any other operation we want to perform on the data before validation.
Final Considerations
- This optimization does not depend on Inertia or Livewire, but it can be used without problems in any Laravel form.
- When the user edits the title, the slug will not change if it already exists, ensuring consistency in the URLs.
- The page reload to reflect the changes can be handled later through redirection or view update.
The next step is to connect a Laravel project with MySQL.