
Content Index
- Why use Antigravity (Gemini CLI) locally
- What is Antigravity CLI and what is it for
- Features and request limits
- CLI Usage Examples
- Step-by-step Installation of Antigravity CLI
- Step 1: Install Node.js
- Step 2: Install the Antigravity package
- Updating the tool
- First Commands and Initial Configuration
- Practical examples in the terminal
- Antigravity Agent VS Antigravity CLI: Which is better for programming?
- The Agent Approach (IDE Extensions)
- The CLI Approach (Antigravity CLI)
- Main Differences
- Configure your first MySQL MCP in Antigravity CLI
- 1. What are MCPs and why install them locally
- The Antigravity CLI assistant and MCPs
- Differences between local and cloud MCP
- When it is convenient to install MCPs in your environment
- 2. Step-by-step installation of the MySQL MCP
- 3. Configuring the .env file
- 4. Automated content creation with real data
- “Gemini is not reading the .env”
- 5. First tests and useful prompts for MySQL MCP
- Create a pillar article for my blog
- 6. Real results and benefits of the automated workflow
- Troubleshooting Common Issues
- Frequently Asked Questions about Gemini CLI
- Conclusion
Antigravity CLI (the direct evolution and new ecosystem of Gemini CLI) is an artificial intelligence assistant that we can use entirely locally on our PC or computer.
We can use it through the terminal, CMD, or any console you are currently using. In my case, since I am on Mac, I use the terminal; if you are on Windows, you would use CMD.
As a developer, what interests me the most is being able to create and manage projects with this command-line assistant. However, it can be used for many other things: for example, if you have a folder full of unorganized videos, you can ask it to help you classify them. In short, it allows you to automate many tasks on your computer.
Why use Antigravity (Gemini CLI) locally
Using Antigravity CLI has several advantages over traditional web tools or the standard Gemini CLI ecosystem:
- Greater control: you can decide where your files run and how the results are managed.
- Real automation: ideal for repetitive tasks, such as classifying documents, generating reports, or batch-creating content.
- Integration with projects: if you already work with Node.js or Python, you can integrate AI directly into your backend workflows.
- Performance: lower resource consumption and immediate execution from the terminal.
In my case, I use it mainly to create and manage projects. But I have also used it to organize folders with videos, where Antigravity helped me automatically classify the content according to its name and format.
What is Antigravity CLI and what is it for
Antigravity CLI is the next-generation command-line interface based on Google's models. It is the advanced way to use Gemini directly from your terminal, without needing to open the browser or rely on the standard web interface.
With this tool, you can create projects, execute automated tasks, generate content, analyze files, or interact with APIs, all with simple integrated commands.
Since I work on Mac, it is very convenient for me to run these commands in the terminal. If you use Windows, you can do exactly the same from CMD, and if you are on Linux, from your usual console. It is ideal if you want to harness the power of Gemini 2.5 models and higher without visual distractions, in a fast, clean, and local environment.
Features and request limits
In summary, it is an assistant focused on executing tasks on your computer. The free access plan follows very generous and comfortable schemes for development:
- Free version: 60 requests per minute and 1,000 requests per day.
- Paid version: for those who need more computing capacity or a higher volume of calls.
I think the free plan is more than enough for most people. And if you reach the daily limit, you can always switch accounts or wait until the next day.
CLI Usage Examples
- Automate system tasks.
- Create projects and code scaffolding.
- Make direct requests and chained workflows.
- Generate and interact with multimedia files locally.
Step-by-step Installation of Antigravity CLI
To install it, we go to the installation section of the official repository. Antigravity CLI is distributed via Node.js, so it needs to be previously configured on your system.
Step 1: Install Node.js
If you do not have Node installed on your computer:
- Go to the official website (nodejs.org).
- Download the recommended version (LTS) for your operating system.
- Install it with the classic "Next → Next → Finish".
This will automatically install npm, the package manager we will use next.
Step 2: Install the Antigravity package
Open your terminal and run the global installation command. If you are looking for classic compatibility with the Gemini CLI ecosystem, the new Antigravity command handles everything:
$ sudo npm install -g @antigravity/cli- The
sudoprefix is used on Mac/Linux because it is a global installation on the system. - Once the process is complete, you can invoke the assistant by simply typing
antigravityin your console.
Updating the tool
To keep the environment up to date with the latest models and patches, you can update it with:
$ sudo npm update -g @antigravity/cliFirst Commands and Initial Configuration
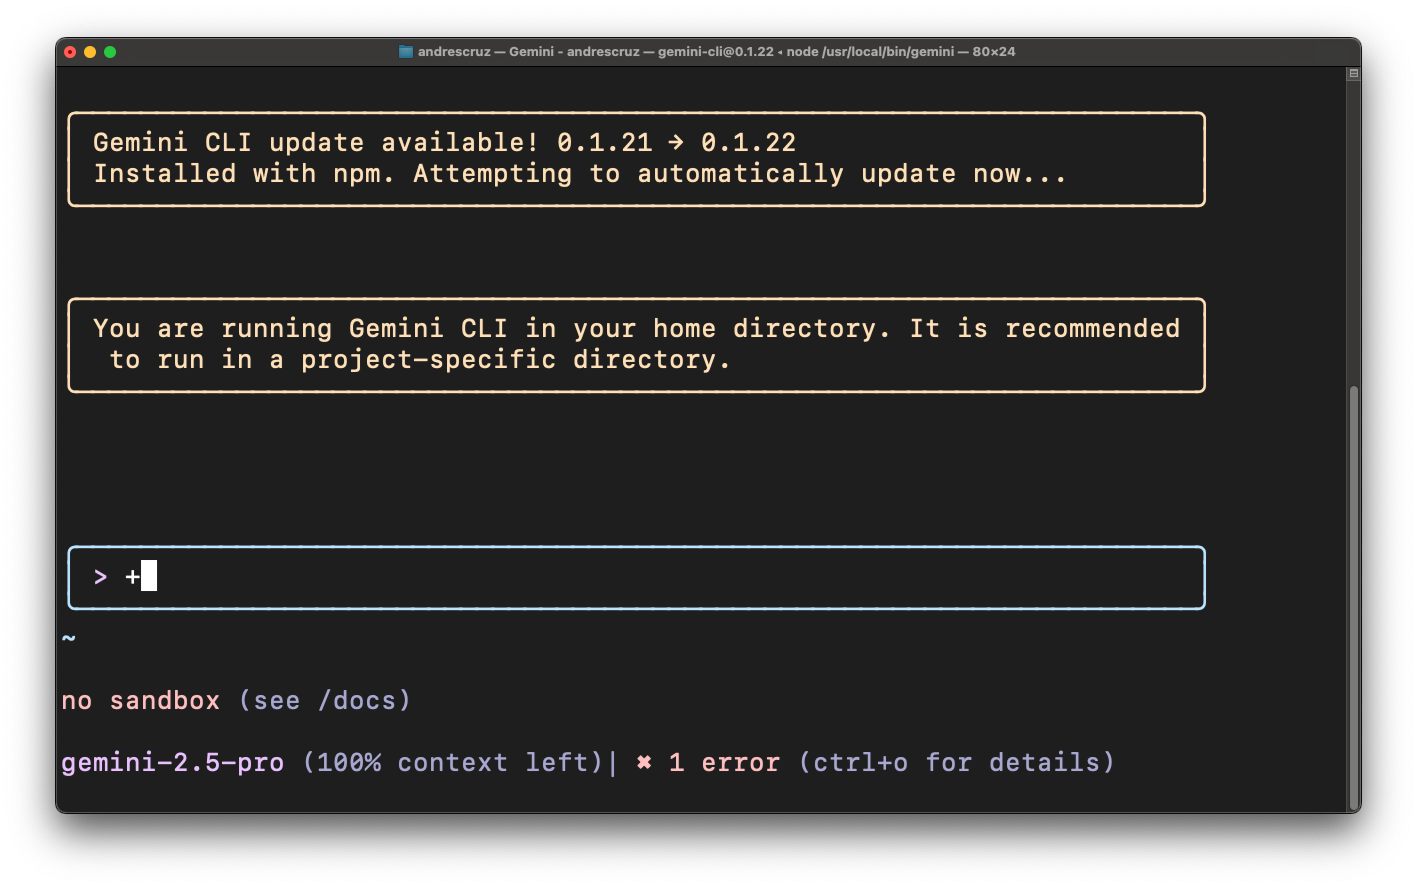
Once installed, you can start the assistant in interactive mode by typing:
$ antigravityThe prompt will appear in the console, and you can start interacting in natural language.
Practical examples in the terminal
Create a new project with a base structure:
$ antigravity new proyecto-aiAutomate a local sorting task:
$ antigravity "sort my files by type"Generate a summary or analyze a code file:
$ antigravity "generate a summary of the readme.md file"Useful integrations
You can combine Gemini CLI with tools like:
- Google APIs (Drive, Docs, Sheets).
- Git to generate smart commits.
- Node scripts to automate complete workflows.
- Configure your first MySQL MCP in Antigravity CLI
Antigravity Agent VS Antigravity CLI: Which is better for programming?
It is common to wonder about the difference between editor-integrated agents and terminal tools like Gemini CLI or Antigravity CLI. Let's look at how they complement each other in programming.
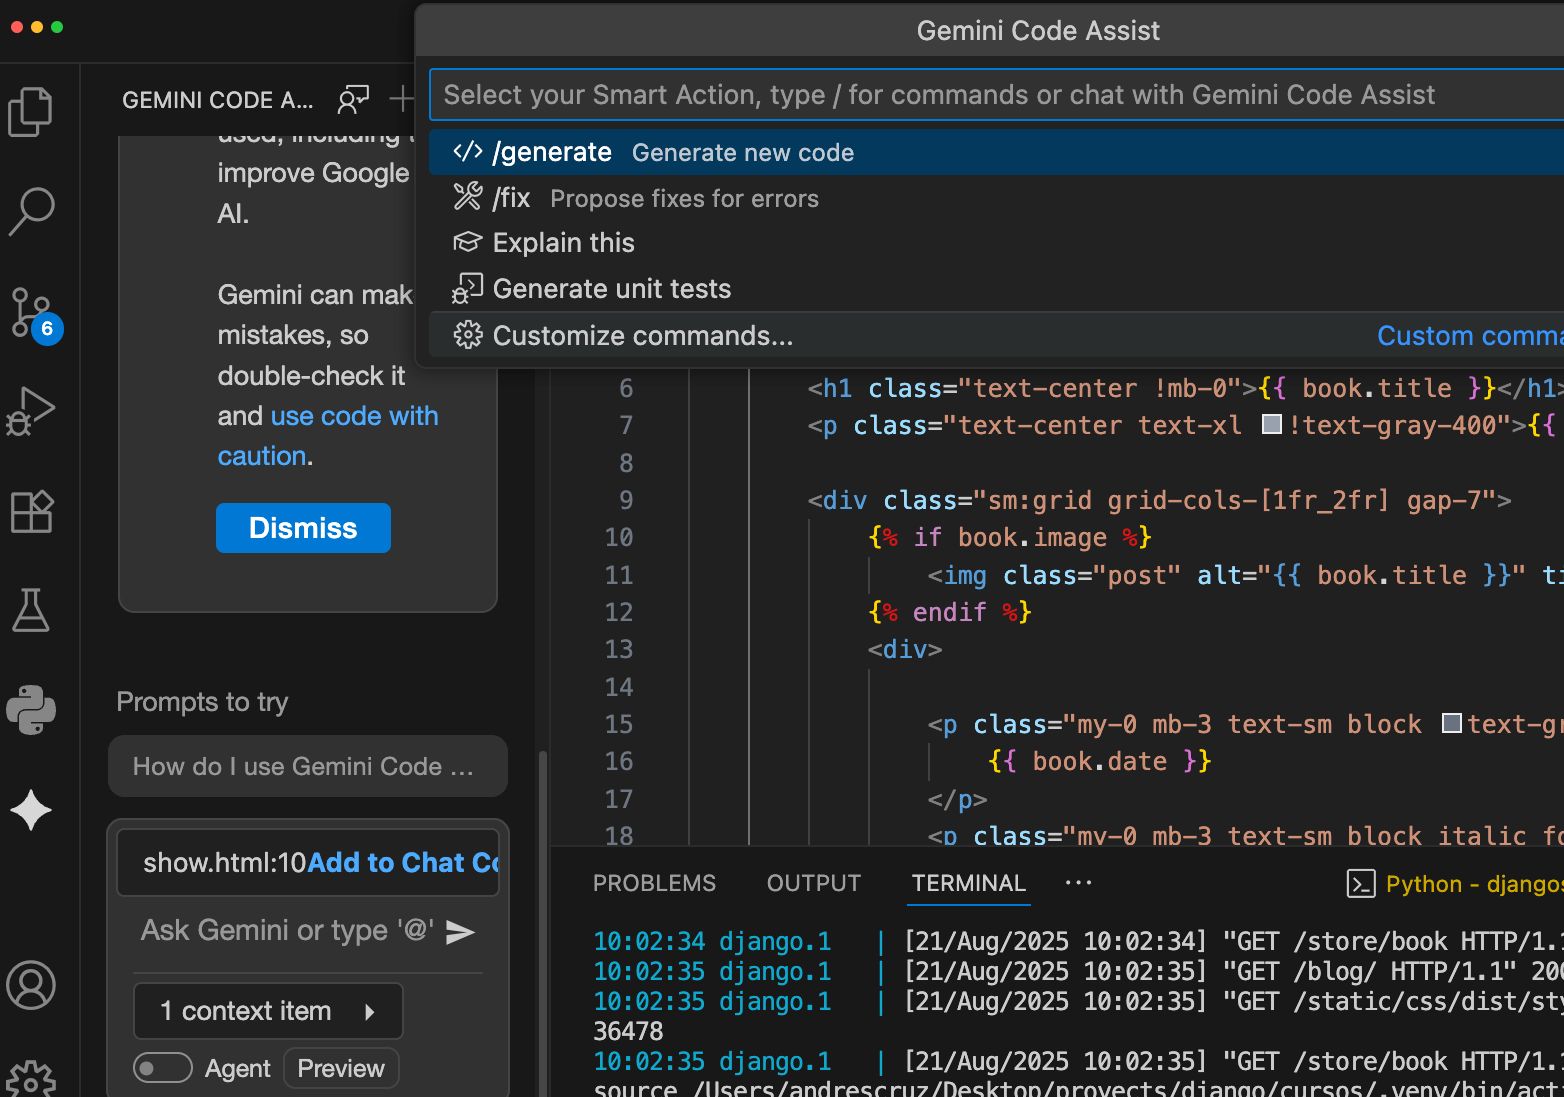
The Agent Approach (IDE Extensions)
An AI Agent in the editor is simply an extension for VS Code, similar to GitHub Copilot. You go to the extensions section, search for the agent, and install it. Once authenticated, you work visually on your code by selecting text, pressing combinations like Ctrl + I, or interacting with buttons in the graphical interface.
The CLI Approach (Antigravity CLI)
On the other hand, Antigravity CLI works directly at the root of your system through the terminal. There are no windows or buttons here; everything is controlled using precise global commands.
The new way of programming often positions us more as "reviewers" than as pure code writers. Advanced tools like Claude Code or Antigravity CLI assist us by generating complete structures, automated tests, documentation, or fixing bugs in batches.
For example, while running tests to create a Flutter application aimed at practicing English with true or false questions, I used the CLI to speed up development:
- I asked the initial Flutter project to add pages using Go Router, and then the questions module with its respective data model. It generated almost the entire schema and saved a lot of work.
- Detail to keep in mind: Just as it happened in workflows with Gemini CLI, AIs sometimes tend to invent redundant fields in models or install unnecessary packages (like Provider in early stages) due to bias in their training data. I had to manually correct a couple of imports and structure names.
My recommendation: Always work in small iterations. It is not a good idea to ask the AI for something massive like “Create a Duolingo-like application from scratch for me” and expect a perfect result. The prompt is the new code: move forward step by step, review the generated code, and maintain solid programming foundations to guide the workflow.
Main Differences
- Editor/Agent: Visual and interactive extension within VS Code. Ideal for fixing, debugging, and refining lines of code in real time as you write.
- Antigravity CLI (Gemini CLI): Global terminal tool. Ideal for generating full projects, CRUD modules, file automations, or broad tasks outside the text editor.
Configure your first MySQL MCP in Antigravity CLI
Installing and configuring MCPs (Model Context Protocols) locally can seem intimidating at first, but it completely transforms how you use AI. Here I show you how to connect Antigravity CLI to a local MySQL database to interact with your data using natural language.
1. What are MCPs and why install them locally
MCPs are "bridges" that allow language models to securely interact with external tools and data sources. By running an MCP locally, you ensure absolute control and privacy over your sensitive data, allowing the CLI to query local databases without exposing them to the cloud.
Official extensions can be explored from the compatibility directories, such as the Gemini CLI extensions section: https://geminicli.com/extensions/.
Critical safety caution: AIs with a local MCP have real access to your file system and databases. Do not install extensions from unknown repositories. Always review the activity on GitHub and the permissions they request to avoid malicious prompt injections.
The Antigravity CLI assistant and MCPs
Antigravity CLI is the command-line interface that allows you to install and manage these extensions. Thanks to MCPs, Gemini can connect to databases, APIs, or even your own local system.
Differences between local and cloud MCP
A local MCP runs in your own environment. This means greater control and privacy, ideal for developers who work with sensitive data or who want to experiment without relying on a remote server.
When it is convenient to install MCPs in your environment
If you work with internal data, automate processes, or want to develop your own MCPs, doing so locally will save you time and headaches.
2. Step-by-step installation of the MySQL MCP
For this example, we will use the MySQL MCP repository adapted to the local environment:
Important: Make sure to close or stop Antigravity CLI in your terminal before running the installation command:
$ antigravity extensions install https://github.com/gemini-cli-extensions/mysqlOnce installed, start the executable CLI and verify the status of the tools by typing:
$ /mcpIf the system returns MySQL (disconnected), it means the extension was successfully registered but is waiting for connection credentials.
3. Configuring the .env file
Create a .env file in the root of your workspace to define the connection variables for your database:
MYSQL_PATH="C:\Users\andre\AppData\Local\com.tinyapp.DBngin\Binaries\mysql\8.4.2\bin\mysql.exe"
MYSQL_HOST="127.0.0.1"
MYSQL_PORT="3306"
MYSQL_USER="root"
MYSQL_PASSWORD=""
MYSQL_DATABASE="ld"
Note from experience: If you notice that the CLI does not process the file automatically on the first run, tell it directly in the interactive prompt: "Read the .env file to connect". Once this is done, the system will map the variables and remember the configuration persistently for future sessions.
4. Automated content creation with real data
Once connected, you can interact with your database using pure natural language:
- "Show me all the tables."
- "Get me the records from the posts table where the category ID is 34."
- "Analyze this structure and optimize the indexes."
The true potential of this workflow is strategic productivity, such as the automated **creation of pillar articles** for technical blogs. A pillar article acts as a master index that organizes the content of a category (such as Laravel, CSS, or JavaScript).
Doing this by hand when you have more than 300 posts is incredibly tedious. By connecting Antigravity CLI with the MySQL MCP, the AI directly analyzes the real posts table in your database, extracts the corresponding links, classifies them by difficulty levels, and generates the skeleton of the structured article with pedagogical sense in seconds.
Here comes the most delicate part: the configuration.
Create and structure the .env file
Create a .env file in the root of your project with the necessary variables:
.env
MYSQL_HOST=localhost
MYSQL_PORT=3306
MYSQL_USER=your_user
MYSQL_PASSWORD=your_password
MYSQL_DATABASE=your_database
For example, in my case where I have MySQL installed in a different path:
.env
MYSQL_PATH="C:\Users\andre\AppData\Local\com.tinyapp.DBngin\Binaries\mysql\8.4.2\bin\mysql.exe"
MYSQL_HOST="127.0.0.1"
MYSQL_PORT="3306"
MYSQL_USER="root"
MYSQL_PASSWORD=""
MYSQL_DATABASE="ld"
“Gemini is not reading the .env”
In my case, Gemini simply ignored the .env at the beginning.
I had to tell it directly, so I told it to read the file:
“Read the .env file to connect.”
And it replied: “Perfect, I've read it, from now on I will use it automatically.”
Since then, I never had that problem again.
This is part of the interaction I had with Gemini CLI:
✦ I have read the .env file and loaded the following configuration:
   * MYSQL_PATH: C:\Users\andre\AppData\Local\com.tinyapp.DBngin\Binaries\mysql\8.4.2\bin\mysql.exe
   * MYSQL_HOST: 127.0.0.1
   * MYSQL_PORT: 3306
   * MYSQL_USER: root
   * MYSQL_PASSWORD: (empty)
   * MYSQL_DATABASE: ld
  From now on, I will use this configuration for all database operations.
5. First tests and useful prompts for MySQL MCP
Once connected, you can interact in natural language.
Basic queries, for example:
- “Show me all the tables.”
- “Get me the records from the posts table where the category ID is 34.”
- “Analyze this table and tell me which columns could be keys.”
- Adjusting results and improving the prompt
Create a pillar article for my blog
Here comes the most powerful thing: leveraging this integration to create pillar articles automatically.
A pillar article is like a master index that strategically organizes all your relevant content.
For example, if I go to my blog and search for “Laravel”, you can see the structure:
- A main article (pillar)
- And from there I link to more specific ones
The problem is that doing this manually with 300+ posts is crazy.
So I take advantage of Gemini + MySQL MCP to analyze my data and automatically prepare the skeleton of the article for me.
The first time, Gemini delivered barely 8 links… way too poor.
I asked it:
- “Give me more content for each link.”
- “Not just the title.”
- “Go a bit deeper.”
And the result was much more complete. Here I understood that the prompt is the new code: the better you formulate it, the better the result.
I'm not saying I'm going to copy and paste without thinking. But I already have 70% of the work advanced.
And I won't do this just with Laravel, but also with:
- CSS
- JavaScript
- CodeIgniter
- etc.
I have more than 300 posts about Laravel. Asking Gemini to sort them manually for me would be crazy.
Thanks to the MySQL MCP, Gemini analyzes the posts table and automatically generates a master index-like schema for me.
And here I have it for free.
This is where the best of both worlds blends together:
- The MySQL MCP makes the exact and reliable extraction from the real database.
- Gemini (AI) interprets, structures, summarizes, and gives it pedagogical and strategic meaning.
And if I don't like the result, I simply tell it:
- “Expand.”
- “More technical.”
- “Classify them by levels.”
- “That format doesn't work for me, change it to a guide-like section structure.”
- Automate queries
With the MCP, Gemini can execute SQL queries without writing a single line manually. Ideal for those who prefer to focus on analysis, not syntax.
6. Real results and benefits of the automated workflow
The result is not just technical; it is a revolution in productivity.
Time savings
What used to take me days, I now do in minutes. I can automatically generate structures, indexes, and full article outlines.
Future applications
I plan to replicate it with other categories on my blog: CSS, JavaScript, CodeIgniter… and more.
Integration with my ecosystem
Everything connects with my Academy website, where I have books, courses, and premium content.
Thanks to Gemini + MySQL MCP, I can keep everything updated without losing time.
Troubleshooting Common Issues
| Issue | Probable cause | Solution |
|---|---|---|
| Antigravity does not detect the MCP | Installation with CLI running | Stop Antigravity and reinstall |
| MySQL connection failure | Incorrect variables | Check .env and port |
| Antigravity ignores .env | File poorly referenced | Load manually with prompt |
| MCP inactive | Outdated repository | Verify date and activity on GitHub |
Combining precise data extraction from a local SQL environment with the logical capabilities of Antigravity CLI reduces tasks from days to a couple of minutes, allowing you to drastically scale content optimization and marketing for your educational platforms.
Frequently Asked Questions about Gemini CLI
- What is Antigravity/Gemini CLI?
- It is the command-line interface for the Gemini artificial intelligence assistant, developed by Google.
- How is it installed?
- With sudo npm install -g @antigravity/cli after installing Node.js.
- Does it work on all operating systems?
- Yes, on Windows, Mac, and Linux.
- Does it have a free version?
- Yes, with 60 requests per minute and 1,000 per day.
- Can I use it without knowing how to program?
- Yes, the commands are natural and do not require prior experience.
- What exactly is an MCP?
- A protocol that allows Gemini to interact with external data or services, such as databases or APIs.
- How to install an MCP in Antigravity?
- With the command gemini extension install mcp-name, preferably with Gemini stopped.
- What to do if Gemini does not recognize my MCP?
- Restart the CLI, verify permissions, and ensure that the .env is properly configured.
- What is the difference between local and remote MCP?
- The local one runs in your environment, while the remote one uses external servers (higher latency, less control).
Conclusion
Gemini CLI is a powerful, lightweight, and practical tool for those who want to use Gemini directly from the terminal.
In my experience, its installation is simple, and daily use becomes addictive: I can launch projects, automate processes, and classify files without leaving the console.
If you are just starting out, follow the steps in this guide, try the examples, and soon you will be leveraging the power of AI right from your own computer.