
Content Index
- What is Vue and what is it for?
- Features of Vue
- Vue in the current context
- What is a SPA?
- Ways to install/use Vue
- Using Vue via CDN
- Creating a Vue project using Node
- Vue vs jQuery
- Some jQuery Pros
- Some jQuery cons
- Some Vue advantages
- Why start using Vue?
- Reactivity in depth
- What is reactivity?
- Vue examples: creating our first applications
- Project creation
- Project structure
- Declarative rendering
- Vue in practice, counter app
- Main features of Vue - Main options in the script block
- Data property, reactive variables
- Method
- Computed Properties (computed)
- Why use them instead of methods?
- Development flow summary
- Communication between Components: Props
- Validations and default values
- Component Lifecycle in Vue
- Plugins and Extensibility
- Vue Router
- Axios
- Sharing data between components
- Conditionals
- v-if
- v-show
- Summary
- v-for
- v-for with an object
- Reactivity in arrays
- Ref()
- The @ symbol for importing components or files
- Communication between Components
- Parent → Child Communication (props and refs)
- Child → Parent Communication (Custom events)
- Component Redrawing: The key trick
- Style and Class Binding
- Dynamic Content with slots
- ️ Observers (watch)
- HTML Injection: v-html
- Options API or Composition API?
- Main options in the template block
- Output
- V-model
- Form Management and the .prevent modifier
- The reload problem
- Events
- Alias Key
- System modifier keys
- Custom events
- Main options in the style block
- Raw or rendering HTML in Vue
- Aliases for imports in Vue
- Local and global styles to scoped Vue components
- Component 1: Hello World
- Component 2: My First Component
- Defining style scope
- Vue devtools: Debug your apps
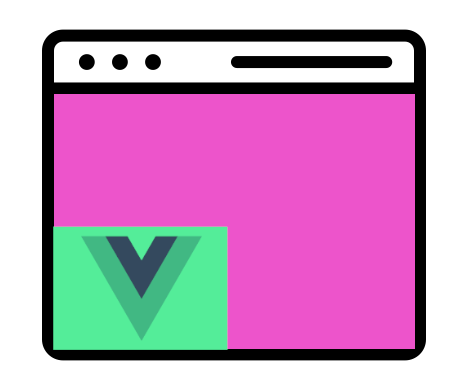
In this entry we will see the first steps with this framework called Vue, which is today's boom, the most fashionable JavaScript framework; we will take a quick look at Vue's features, where to install it, how to download Vue, we will make a simple comparison of Vue with jQuery and then we will give some small examples to start working with Vue.
What is Vue and what is it for?
Vue is a progressive framework, which means it serves to consume the user interface; it was created by Evan You, who worked at Google at that time; Vue emerged in 2014, as you can see it is a recent framework with "little" time in the market but it is very polished, it has a good reception by users, a growing community, good documentation and ease of use that do not even require using Node to use it, which is a great advantage it has over the competition.
Features of Vue
Vue is a progressive framework, which means we can use it for something very basic, just like jQuery, or larger and more complex systems, and in general it has very good performance for how little it weighs:
- Vue is an accessible framework that is available to everyone through open source.
- It is a very small framework that greatly facilitates interaction with the interface or HTML.
- Optimized; its core is very small and takes up about 70Kb which is quite light.
- As we indicated before, it has a growing community and good documentation with a low learning curve as it is simple to use and very concise.
Vue is another framework we have for JavaScript that, at the time, managed to carve out a niche among the two giants that dominated the landscape: Angular and React.
This happened mainly because Vue is:
- A lightweight framework.
- Versatile.
- With a smaller learning curve.
- And, ultimately, easier to start in the world of modern frameworks.
Vue in the current context
I speak a bit in the past because today we also have other modern frameworks, for example:
- Svelte
- Astro
However, Vue remains an excellent choice for developing all types of web applications. It is still a modern framework and features:
- All the necessary features to create SPA (Single Page Applications).
- A large number of plugins to easily extend its functionality.
Although there are somewhat more modern alternatives today like Svelte or Astro, Vue remains an excellent option for any development. It is a modern framework that possesses all the necessary features to create SPAs (Single Page Applications) and has a robust ecosystem of plugins to extend its functionalities.
<template>
  <div>
    <div v-if="loading">
      Loading...
    </div>
    <div v-else>
      <h1>Content ready!</h1>
    </div>
  </div>
</template>
<script>
export default {
  // 1. Here we define our variables (the state)
  data() {
    return {
      loading: true
    };
  },

  // 2. Here we run logic when the component loads
  mounted() {
    // We simulate a wait of 2 seconds
    setTimeout(() => {
      this.loading = false; // "this" accesses the variable above
    }, 2000);
  }
};
</script>
When loading is true, it means the application is loading data.
So we show a loader.
When loading changes to false, Vue automatically:
- Detects the change.
- Updates the interface.
- Shows the content.
All this without us having to manually manipulate the DOM.
What is a SPA?
A SPA (Single Page Application) is a web application that:
- Loads everything needed the first time (HTML, CSS, and JavaScript).
- Then it only makes requests to an API to get dynamic data.
That is:
- The application is loaded.
- From there, everything updates dynamically without reloading the page.
Although it is also possible for all the information to be local in the same application, without the need to consume an API. It all depends on how you want to implement it.
Ways to install/use Vue
There are many ways to create a project in Vue, we can use the CDN option, which is ideal when we want to experiment a bit with the framework or do small projects or projects with limited scope, and through the Vue CLI and Node; we will talk about this in the following sections.
Vue is so versatile that we can include it not only as part of a solution, that is, governing a complete page:

Otherwise, we can include it as part of an existing application, that is, one not developed in Vue, and that is why it is known as progressive:
That is, we don't have to have a web application defined with Vue in 100% of the page or the totality of it; we can specify that only one container (for example, a DIV) be the only one that Vue will control.
Using Vue via CDN
This installation option is the simplest, but the least scalable as we lose all the advantages we have in a project in Node, such as its immense number of plugins and package management through NPM; but, it is the best option if we want to perform projects with limited scope or tests; for this, we add the Vue dependency in an HTML page:
<script src="https://unpkg.com/vue@next"></script>Creating a Vue project using Node
Let's start by creating a project in Node via:
$ npm initIt will ask for base information such as:
name: (project-name) <project-name>
version: <0>
description: <The Project Description>
entry point: <//leave empty>
test command: <//leave empty>
git repository: <//the repositories url>
keywords: <//leave empty>
author: <// your name>
license: <N/A>
We move inside the new project:
cd <project-name>And we add Vue via:
$ npm install vueWith this, we install the latest version of the framework in the project we created earlier.
You have more information at:
Vue vs jQuery
The first thing you have to keep in mind is that they are two worlds apart, two different paradigms that seek to do the same thing, web applications in a simple way. jQuery has an immense amount of plugins and gives us that plus that we don't have with native JavaScript, and Vue also gives us a significant number of plugins and allows us to gain in organization, optimizing at the code level to the minimum to do things that are general as we will see below.
There are many reasons why we can use frameworks like Vue that are progressive instead of jQuery or similar frameworks; Vue offers us a greater organization (although in practice jQuery offers us no organization or development pattern) than jQuery offers us, the code is easier to understand and maintain as it has components and the Vue template pattern that we saw in the previous section; a very strong point is, as we will see in other Vue entries, the powerful interaction based on events, we can establish models or variables in Vue and tie them to an element in HTML and modify it wherever we want, that is, if we modify the variable from JavaScript, this change will be reflected in the variable; the same occurs if we modify it in an HTML element.
We can reference variables in the HTML as if it were a template and it will be printed and updated in real time if the variable undergoes changes without us doing anything.
It is now up to you to imagine how to do this with native JavaScript or jQuery, which although it is not a complicated task, as you will see in the Vue examples section it is something native and works very well.
We can easily print arrays from the HTML itself using special clauses that Vue itself processes internally, in the case of jQuery we would have to iterate everything using a for or each inside the script block.
In the end, one technology does not have to overlap the other, it all depends on the project you carry out and on intelligently coupling one or the other technology, or even both without any problem.
Some jQuery Pros
- Be able to make Ajax requests easily.
- A set of animations extensible through plugins.
- Thousands of plugins at your disposal.
Some jQuery cons
- You must handle each HTML element independently.
- The rendering system (showing content in HTML) is typical and somewhat obsolete compared to other technologies.
- It is a headache when the application grows, as it lacks organization.
Some Vue advantages
- Wonderful system to render from JavaScript to HTML as if it were a template.
- Low learning curve.
- Organization through components.
- Extensible through components.
Why start using Vue?
As we mentioned before, we should not cling to one technology or another, each of them has its advantages and disadvantages, the same things can be done in different ways so depending on what you want to do select one or the other technology; Vue allows us to save time when creating applications with which we are going to manipulate the HTML DOM a lot due to how it is conceived, but there are many other more specific tools that you can also use depending on what you want to achieve.
Reactivity in depth
Now is the time to dive deep! One of Vue's most distinctive features is the unobtrusive reactivity system. Models are JavaScript proxy objects. When you modify them, the view updates. It makes state management simple and intuitive, but it's also important to understand how it works to avoid some common mistakes. In this post, we're going to get to know some of the details of Vue reactivity.
What is reactivity?
Reactivity is tied to the properties we define in the data options; Vue will detect every time we modify those properties.
Each of these properties has an internal watcher to the framework that detects when there are changes in it and, upon detection, fires the render option (of the template) resulting in us seeing the changes reflected in that property in the logic we have defined in our template; it is important to point out that the render process is executed ONLY if the changes in the property affect the template.
In practice, we have a very optimized process at the moment Vue updates the DOM (template).
Thanks to reactivity, we don't need to manually manipulate the DOM. If we declare a variable in our state, Vue will be attentive to any change in its value to automatically update the interface.
For example, if we have a loading variable, when its value changes from true to false after consuming an API, Vue will detect the change and paint the component automatically. This saves hours of manual and error-prone logic.
Vue examples: creating our first applications
In this section we will see how to use the basics of Vue, reminding you that as a framework Vue can expand its functionalities through plugins and has its own command line system via Vue CLI, but we can do really interesting things with Vue using a minimum of JavaScript.
Project creation
Unlike older versions, today we don't need complex global installations. Simply use the official command in your terminal:
$ npm create vue@latestAfter creating the project we must install the dependencies:
$ npm installThis will download all the necessary libraries into:
node_modulesProject structure
Once created, it is fundamental to run npm install to download dependencies and then npm run dev to start the development server.
- package.json: Defines the project scripts and dependencies.
- src/: Main folder where our source code resides.
- main.js: The boot file where we mount the application into an HTML element (normally a div with id="app").
And serve the project via:
$ npm run serveWhen running this command, we will see output like the following:
> bases@0.0.0 dev
> vite
  VITE v7.3.1  ready in 8415 ms
  ➜  Local:   http://localhost:5173/
  ➜  Network: use --host to expose
  ➜  Vue DevTools: Open http://localhost:5173/__devtools__/ as a separate window
  ➜  Vue DevTools: Press Alt(⌥)+Shift(⇧)+D in App to toggle the Vue DevTools
  ➜  press h + enter to show help
Declarative rendering
As a very powerful feature, Vue has its own rendering system where in the HTML that we define the Vue scope, we can render values of variables declared in JavaScript and referenced in HTML as we see below:
<div id="app">
    <h1>{{message}}</h1>
</div>
<script src="https://cdn.jsdelivr.net/npm/vue/dist/vue.js"></script>
<script>
    new Vue({
        el: '#app',
        data: {
            message: "Hello Vue"
        }
    })
</script>
This gives us the following output:

As you can see it is a very powerful feature of Vue, today when we receive data from everywhere, we can easily reference variables, gaining readability and organization in JavaScript like never before.
You might think something like "Ok ok we can print variables in the HTML with some curly braces what else can it do".
Vue in practice, counter app
Starting from the project we created in the previous section, now that we know the basic features of Vue in a theoretical way, let's get to know it in practice by creating our first Vue application which will be a counter; when we press a button, a counter increases by one unit; for this, we add the following code:
Main features of Vue - Main options in the script block
In this section we will get to know the main features of the framework with which we create components in Vue.
In the previous section, we saw how to create a simple example where we saw the most basic aspects of the framework; in this section, we will delve deeper into the concepts we saw before and introduce some new ones; specifically, all the options we will see in this section are implemented in the script section:
<script>
export default {
    ***
}
</script>
Data property, reactive variables
The data option returns the initial state of the component, that is, a set of reactive variables that we can use throughout the component, either in the script section or in the template.
The data option is the most important in a Vue component, at least the most used since it is the heart of a component; in it, through the definition of a function, it returns an object containing the reactive variables that can be used in the component, specifically, from the template printing them with the double brace syntax {{}}:
<script>
export default {
    data: function(){
        return {
            counter:0
        }
    },
}
</script>
This option is a function that returns an object containing the data used in the component and can be accessed from anywhere in the component. For example, if you want to define a data object called message, you can do it like this:
<script>
export default {
    data: function(){
        return {
            message: ""
        }
    },
}
</script>
In this example, we have defined a component with an object containing a variable called message. The message variable is used in the component template to show a message. Previously we saw an example in which, by clicking a button, the reactive variable called counter is updated.
In this example, a data object called message is defined containing a text string. This object can be used anywhere in the component, such as in the template or in methods.
Method
The methods section of a Vue application is where the methods are defined that are used in the Vue instance; the utility of methods are many, use them at the beginning of the creation of a component to initialize the component or as responses to events, for example, when clicking a button, form submit event, among others.
In the end the methods section as its name indicates we can define multiple methods, as many as the component needs:
<script>
export default {
  methods: {
    showAlert: function () {
      alert('Hello world!')
    }
  }
}
</script>
Computed Properties (computed)
Computed properties are a fairly important feature of Vue and allow us to create other properties that are calculated from other properties or reactive variables in the case of Vue; in this way, we can evaluate complex conditions efficiently and while maintaining Vue's reactivity.
Why use them instead of methods?
Although they look like functions, they are used as properties/variables (without parentheses ()).
- Syntax: They are defined in a computed block inside your export object.
- Efficiency: Unlike methods, computed properties are cached. They are only recalculated if any of the reactive dependencies change.
- Example: If you have a text and need to reverse it, the computed property will do it cleanly and efficiently.
- Cache: Unlike methods (methods), computed properties are cached. If the data they depend on (like message) does not change, Vue will return the saved result without re-executing the logic, optimizing heavy processes.
- Reactivity: When a variable on which the computed property depends is updated (for example, through a setTimeout), Vue detects the change automatically and recalculates the value of the property, reflecting it in the DOM.
- Use: They are ideal for transforming lists, performing filters or processing data before displaying it, allowing them to be called as if they were simple properties ({{ reversedMessage }}) instead of functions ({{ reversedMessage() }}).
src\components\ComputedComponent.vue
<template>
  {{ reversedMessage }}
  {{ reversedMessage }}
  {{ reversedMessage }}
  {{ reversedMessageMethod () }}
</template>
<script>
export default {
  data: function () {
    return {
      message: "Hello World 1"
    }
  },
  methods: {
    reversedMessageMethod: function () {
      // console.log('reversedMessageMethod')
      setTimeout(()=>{
        this.message = 'Hello World 2'
      }, 3000)
      return this.message.split('').reverse().join('')
    }
  },
  computed: {
    reversedMessage: function () {
      console.log('reversedMessage')
      return this.message.split('').reverse().join('')
    }
  }
}
</script>
Development flow summary
- data(): Where your state resides (reactive variables).
- methods: Where execution logic resides (events, API calls).
- computed: Where data transformation logic resides (data derived from others).
- v-model: The bridge to capture user interaction in real time.
This modular and expressive approach is what makes Vue so powerful. By separating view logic and automating reactivity, we forget about manual DOM manipulation, allowing us to focus on what really matters: our application's functionality.
As you can see, computed properties are actually functions in which comparisons or other elaborate logic are established, in this example, reversing a text string; in the previous computed property we placed a console print:
src\components\ComputedComponent.vue
reversedMessage: function () {
   console.log('reversedMessage')
   return this.message.split('').reverse().join('')
}
And from the template, we use the computed property as if it were a reactive variable in Vue; you can see that we print it several times in the template, specifically, 3 times:
<template>
   <ul>
    <li> {{ reversedMessage }} </li>
    <li> {{ reversedMessage }} </li>
    <li> {{ reversedMessage }} </li>
   </ul>
</template>
However, if we inspect the console, we will see that only one print appears:
reversedMessageWe can decide that the computed property function was printed only once, as we mentioned before, the computed property is only evaluated once no matter how many times the computed property is used and will only run again when any of the values it contains change, in this example it would be the message variable.
If we vary it, an operation we can do through v-model, for example to add one more letter, we will see that the computed property is invoked again, but only once:
<template>
   <ul>
    <li> {{ reversedMessage }} </li>
    <li> {{ reversedMessage }} </li>
    <li> {{ reversedMessage }} </li>
   </ul>
   <input type="text" v-model="message">
</template>
In contrast, if we use a method instead, we would see that it is invoked as many times as we reference it in the template:
<template>
   <ul>
    <li> {{ reversedMessageByMethod() }} </li>
    <li> {{ reversedMessageByMethod() }} </li>
    <li> {{ reversedMessageByMethod() }} </li>
   </ul>
</template>
So, in short, if you need to perform operations on some Vue reactive variable, the use of computed properties is your best option not only because of its efficiency but also because they allow for a separation between logic that should always be in the script section and the template.
More information at:
https://vuejs.org/guide/essentials/computed.html
Communication between Components: Props
Props are the standard mechanism for passing data from a parent component to a child component.
- Definition: In the child component, we declare the props object to specify what data we expect to receive and what type of data they are (String, Number, etc.).
- Data passing: From the parent, we pass data through custom attributes.
- Static: message="Hello"
- Dynamic: :message="variableName" (Using the colon : is crucial for Vue to evaluate the expression as a variable and not as plain text).
- Validations: You can configure props as complex objects to add validations, define if they are required (required: true) or set default values (default).
As mentioned before, many times it is necessary to pass data between components. Vue is a modular technology in which each of the graphical interface elements is built through components, specifically from a parent component to a child component.
Properties are defined in a component's props object and passed to the child component as custom attributes.
Props can be used to pass simple data like strings and numbers, as well as more complex objects and arrays.
In most cases it is necessary to pass data between components to properly build graphical interface elements and with this have the application work as expected; the use of props is the default way we have to communicate between components.
Props are nothing more than attributes that we define at the component level when we instantiate it from the parent component; for example:
src\components\props\ParentComponent.vue
<template>
  <div>
    <h1>{{ title }}</h1>
    <ChildComponent :message="message" />
  </div>
</template>
<script>
import ChildComponent from './ChildComponent.vue';
export default {
  components: {
    ChildComponent,
  },
  data() {
    return {
      title: 'Props in Vue',
      message: 'Data from parent',
    };
  },
};
</script>
And they must be registered in the child component:
src\components\props\ChildComponent.vue
<template>
  <div>
    <p>{{ message }}</p>
  </div>
</template>
<script>
export default {
  props: {
    message: String,
  },
};
</script>
Vue components require an explicit declaration of props so Vue knows which props will be passed to the component.
There are several options available with props, we can define the props we are going to receive as an array:
props: ['foo'],Validations and default values
Or a better option is specifying it as an object where data about the props can be specified, such as the data type:
export default {
  props: {
    title: String,
    likes: Number
  }
}
As you can see, besides indicating the name of the attribute/prop, the data type is also specified; also, we can define a series of options for props such as a default value:
export default {
  props: {
    title:  {
      default: 'Title'
    },
  }
}
Validations to indicate the format or other:
export default {
  props: {
    title:  {
      validator(value, props) {
        return value.length > 5
      }
    },
  }
}
In which you can place any kind of validation and if the prop does not pass the validations, you will see an exception in the browser console like the following:
main.js:4 [Vue warn]: Invalid prop: custom validator check failed for prop "message".
  at <ChildComponent message="Data from parent" >
  at <ParentComponent>
  at <App>
Or if it is required or can be null:
export default {
  props: {
    title:  {
      type: String,
      required: true
    },
  }
}
Or a default data type:
export default {
  props: {
    title:  {
      type: String
    },
  }
}
Component Lifecycle in Vue
Vue application lifecycles are fundamental so that we can create components effectively, in essence, the Vue cycle is represented by functions that we can use in components for when the component is created, deleted, among others:
export default {
  mounted() {
    console.log(`the component is now mounted.`)
  }
}
For example, a very common operation is that, when the component loads, we want to initialize data by connecting to some API.
Suppose we have a list component which is built from a JSON array provided by a Rest API which must be consumed at the time of loading the component, in these cases, we can use the mounted() function:
export default {
  mounted() {
    this.$axios.get(url).then((res) => {
     this.dataList = res.data;
    });
  }
}
Each component in Vue goes through a series of stages from when it is born until it is destroyed. You can "hook" into these events using special methods:
- created(): It runs when the component has been created. Useful for initial logic, although there is no DOM access yet.
- mounted(): The component is already inserted in the page. It is the ideal point for API calls or initialization of external libraries.
- beforeUnmount() / unmounted(): Ideal for performing cleanup, closing sessions or canceling subscriptions before the component is deleted to save resources.
src\components\LifecycleHooksComponent.vue
<template>
</template>
<script>
  export default {
    beforeCreate(){
        console.log('beforeCreate');
    },
    created(){
        console.log('created');
    },
    mounted(){
        console.log('mounted');
    },
    beforeDestroy(){
        console.log('beforeDestroy');
    },
    destroyed(){
        console.log('destroyed');
    },
    data: function(){
      return {

      }
    },
    methods: {

    },

  }
</script>
Plugins and Extensibility
Vue has an immense amount of plugins available to perform all kinds of operations.
Vue is highly extensible through the .use() method. When we create our application instance in main.js, we can install global plugins (like Pinia for state or Axios for HTTP requests) centrally.
Plugins in Vue usually have a configuration like the following:
src\main.js
import PLUGIN from 'PLUGIN';
const app = createApp(App)
app.use(PLUGIN) // Global registration
app.mount('#app')
Where, in the file where the Vue application is created, the use() function is used to register the plugin and with this, be able to use the features of the plugin we have installed, throughout the book, we will install some plugins to enhance the experience.
Vue Router
By default, when creating a Vue application, we only have one page, that is, we cannot navigate to other windows of the application and this is where plugins like Vue Router come in, which is the official router for Vue.js, that is, it is the one that allows us to create pages to be able to navigate between different pages that in the end are Vue components.
Vue Router is not part of Vue and must be installed through a dependency, that is, a plugin; Vue Router was developed by the same team that developed Vue therefore its integration is perfect with the framework.
Some of the features of Vue Router include:
- Map nested routes.
- Dynamic routing.
- Modular and component-based router configuration.
- Route parameters, query, wildcards or hashes.
- Transition effects between views.
We will use Vue Router later and therefore we will see a practical adaptation of the plugin.
Axios
Another library that cannot be missing is axios, which is the library used par excellence to perform HTTP requests, that is, to make GET, POST, PUT, PATCH or DELETE requests and is an alternative to the API built into modern web browsers through the fetch() function; some advantages we have when using axios instead of fetch():
- Simpler syntax: Axios offers a simpler and easier to use syntax; in axios there are already methods that have their equivalent with the HTTP request such as axios.get() or axios.post().
- Request and response interceptors: Axios allows adding interceptors to HTTP requests and responses. This means you can add custom logic to handle errors, authentication, etc.
- Automatic data transformation to JSON format which is the most used format for sharing data in REST APIs.
- Compatibility with older browsers, being a library that is installed in a JavaScript project, it is possible to use it in a large number of browsers where fetch is not supported.
Axios is not a specific plugin for Vue, but for JavaScript, it is possible to use it via Node or similar or via CDN, later we will show how to use this library.
Sharing data between components
There are two default ways to share data between components, the one we have by default is props, which we presented earlier, but we can also use additional plugins like Vuex or Pinia which are state managers.
A state manager is a tool used in application development to handle the application state.
The state of an application corresponds to the data that is manipulated and modified in it while the application runs.
Like Vue Router, they are plugins created specifically for Vue and in chapter 5 we will see how to use Pinia as a state manager.
Conditionals
In Vue, there are two ways to use conditionals through the v-if and v-show directives; both are directives that allow evaluating true and false conditions to show or hide HTML elements.
The main difference between the two is that v-if removes the element from the DOM if the expression is false, while v-show simply hides the mentioned element.
v-if
Just as in Vanilla JavaScript we can use conditionals in templates whose uses are equal to those we do in vanilla JavaScript, but these can be established in templates as follows:
<template>
    <h4 v-if="true">Is True</h4>
</template>
To make it more interesting, let's create a property to evaluate:
<template>
    <h4 v-if="counter > 10">Counter is greater than 10</h4>
</template>
<script>
export default {
    data: function(){
        return {
            counter: 11
        }
    },
}
</script>
In this example, it is an integer property but it can be of any other type and how we want to evaluate conditionals is exactly the same as we do in vanilla JavaScript:
if(counter > 10) {
  // TODO
}
To make it even more interesting, let's implement a click event:
<template>
    <h4 v-if="counter > 10">Counter is greater than 10</h4>
    <p>Counter is: {{ counter }}</p>
    <button @click="addOne">+1</button>
</template>
<script>
export default {
    data: function(){
        return {
            counter:0
        }
    },
    methods: {
        addOne(){
            this.counter++
        }
    },
}
</script>
We load from the main component which is App.vue:
src\App.vue
<template>
  <Counter/>
</template>
<script>
import Counter from './components/CounterComponent.vue'
export default {
  name: 'App',
  components: {
    Counter
    // HelloWorld
  }
}
</script>
As you can see, the structure is very similar to what we use in vanilla JavaScript:
<button onclick="addOne">+1</button>Although, being a simple operation that we can perform in a single line, we can use inline JavaScript; it is important to note that we use:
this.counterTo reference the inline variable; to reference any variable, prop or method in the script block, we use the reserved word this as if it were a class.
Then, we reference the reactive variable from the template:
{{ counter }}We also have the else clause:
<template>
    <h4 v-if="counter > 10">Counter is greater than 10</h4>
    <h4 v-else>Counter is less than or equal 10</h4>
    <p>Counter is: {{ counter }}</p>
    <button @click="addOne">+1</button>
</template>
If the if condition is true:
counter > 10What will happen when the value of counter is equal to or greater than 11, we will see:
Counter is greater than 10And if it is false:
Counter is less than or equal 10As you can see, to use a component we must import it:
import Counter from './components/CounterComponent.vue'Register it at the component level through the components option:
components: {
  Counter
}
And then, we can use it from the template:
<Counter/>Returning to the component we created called Counter.vue, we begin by defining the reactive variables we are going to use in the project for the counter:
counter:0Which is nothing more than a variable we initialize to zero that will be the counter we will use to add one unit when we click on the button.
From the template, we use a click event when pressing a button, we increment by one unit:
@click="counter++"In this example, we use inline JavaScript to increment a property defined in the data block:
counter++Although we can use a more traditional approach organized into functions:
src\components\CounterComponent.vue
<template>
    <div>
        {{ counter }}
        <!-- <button @click="counter++">+1</button> -->
        <button @click="addOne">+1</button>
    </div>
</template>
<script>
export default {
    data: function(){
        return {
            counter:0
        }
    },
    methods: {
        addOne(){
            this.counter++
        }
    },
}
</script>
As you can see, the structure is very similar to what we use in vanilla JavaScript:
<button onclick="addOne">+1</button>Although, being a simple operation that we can perform in a single line, we can use inline JavaScript; it is important to note that we use:
this.counterTo reference the inline variable; to reference any variable, prop or method in the script block, we use the reserved word this as if it were a class.
Then, we reference the reactive variable from the template:
{{ counter }}In summary, you can see a minimum example in which we use a reactive variable (the one declared in the data() block) and by updating it in the script block, it is automatically updated in the template block and this is precisely the concept of reactivity in Vue, but seeing it in practice. All this behavior is performed without the need to manually perform the operation of referencing an element through the ID to update its value.
In this simple example we can see several important features of Vue, such as the declaration of properties to then use them in the template, the use of events and the reactivity of Vue that is used when updating the property called count, when this happens, all the parts where it is referenced at the component level are updated, as in this case it is in the template.
Even the event with @ that I showed you before is really a short form of:
v-onWhich is used to handle events.
Another example, the following code:
<div id="app">
    <h1 v-if="isActive">{{name}}</h1>
</div>
<script src="https://cdn.jsdelivr.net/npm/vue/dist/vue.js"></script>
<script>
    let vm = new Vue({
        el: '#app',
        data: {
			isActive:true,
			name: 'Andres'
        }
    })
</script>
In this way, if we change the value of the isActive property to false then the h1 defined in the HTML would not be displayed; for the previous example the output would be like the following:
But as we mentioned before, we can place an else clause or rather v-else like the following to show another message, block of code or whatever you prefer:
<div id="app">
    <h1 v-if="isActive">{{name}}</h1>
	<h1 v-else-if="name === 'Andres'">Hello Andres how are you</h1>
	<h1 v-else="isActive">No User</h1>
</div>
<script src="https://cdn.jsdelivr.net/npm/vue/dist/vue.js"></script>
<script>
    let vm = new Vue({
        el: '#app',
        data: {
			isActive:false,
			name: 'Andres'
        }
    })
</script>
And we can even place the typical v-else-if to place more conditions as in the following case:
<div id="app">
    <h1 v-if="isActive">{{name}}</h1>
	<h1 v-else-if="name === 'Andres'">Hello Andres how are you</h1>
	<h1 v-else="isActive">No User</h1>
</div>
<script src="https://cdn.jsdelivr.net/npm/vue/dist/vue.js"></script>
<script>
    let vm = new Vue({
        el: '#app',
        data: {
			isActive:false,
			name: 'Andres'
        }
    })
</script>
Figure 2-1: Conditional example
But we can place an else clause or rather v-else like the following to show another message, block of code or whatever you prefer:
v-show
In case we always need the HTML to be rendered (or we don't care if it's rendered) we can use the v-show directive instead:
<h4 v-show="true">Vue is fantastic</h4>As you can see, if the property is TRUE, the content is rendered, just like with v-ifs:
<h4>Vue is fantastic</h4>If it is FALSE, we will see that the content is rendered but hidden by the following CSS rule:
<h4 style="display: none;">Vue is fantastic</h4>With v-shows we can also hide elements; the difference lies in that with v-show the element is hidden and not removed from the DOM as in the case of v-if.
Summary
To hide or show elements, we have two main directives:
- v-if: Physically removes the element from the DOM. It is cleaner, but if you use it with heavy elements, the add/remove process can generate overhead.
- v-show: Simply applies a style display: none. It is much faster for elements that change state frequently, as it does not destroy the HTML node.
Let's see the final example, a counter in which, when the number is greater than 10, then one text or another appears:
src\components\ConditionalComponent.vue
<template>
    <h4 v-if="true">Is True</h4>
    <h4 v-else-if="false">Is False</h4>
    <h4 v-else>Is True</h4>
    <h4 v-if="counter > 10">Counter is greater than {{ counter }}</h4>
    <h4 v-show="counter > 10">Counter is greater than {{ counter }}</h4>
    <button @click="counter++">++</button>
    <button @click="counter--">--</button>
</template>
<script>
export default {
    data: function(){
        return {
            counter: 11
        }
    },
}
</script>
As well as the use of else-if and else.
v-for
We can use the v-for directive to iterate a list of elements in a JavaScript array; its use is very similar to what we have in Vanilla JavaScript:
<template>
    <ul>
        <li v-for="i in items">
            {{i}}
        </li>
    </ul>
</template>
<script>
export default {
    data: function(){
        return {
            items: [
                'Item 1',
                'Item 2',
                'Item 3',
                'Item 4',
            ]
        }
    },
}
</script>
If we try to run the previous code, we will see an error like the following in the browser console:
Elements in iteration expect to have 'v-bind:key'In addition to the v-for directive, it must be accompanied by a key that must be unique for each element rendered in the list, usually the cycle index or a piece of data contained in the iterable element (array in this example) that we are iterating:
<li v-for="i in items" v-bind:key="i">And we will see the following content rendered in the browser:
<ul>
  <li>Item 1</li>
  <li>Item 2</li>
  <li>Item 3</li>
  <li>Item 4</li>
</ul>
v-for also supports an optional second argument for the current element index:
<li v-for="(i, index) in items" v-bind:key="i">Remaining the exercise as:
<template>
    <ul>
        <li v-for="(i, index) in items" v-bind:key="i">
          {{index}} - {{i}}
        </li>
    </ul>
</template>
And we will see the following content rendered in the browser:
<ul>
  <li>0 - Item 1</li>
  <li>1 - Item 2</li>
  <li>2 - Item 3</li>
  <li>3 - Item 4</li>
</ul>- Syntax: v-for="(item, index) in list" is used.
- The importance of :key: It is vital to assign a unique :key attribute to each iterated element. This allows Vue to track which element is which, ensuring correct and efficient reactivity when you remove or move elements in the DOM.
- Array methods: Vue is able to observe mutations in arrays when you use methods like push, splice or pop. However, be careful: some direct assignment operations may not be automatically detected if they do not follow reactivity conventions.
v-for with an object
You can use v-for to iterate through the properties of an object:
<ul>
  <li v-for="value in object">
    {{ value }}
  </li>
</ul>
<script>
export default {
    data: function(){
      object: {
        name: 'Andrew',
        lastname: 'Cruz',
        age: 30
      },
  }
}
</script>
Or a list of objects:
<template>
<ul>
<li v-for="i in items" v-bind:key="i">
{{i.title}}
</li>
</ul>
</template>
<script>
export default {
data: function(){
return {
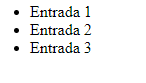
items: [
{id: 1, title:"Entry 1"},
{id: 2, title:"Entry 2"},
{id: 3, title:"Entry 3"}
]
}
},
}
</script>We see several interesting features, the first thing we see is that we define an unordered list to show the array elements that we have defined as a property that simulates the content of 3 entries; in the v-for directive located within the li element we define a key which is optional to indicate the element identifier; it is something internal to Vue, the next thing we see is the basic rendering of the posts property which we treat as if it were an array; the output is the following:
With this directive we can iterate lists; that is, arrays:
    <div v-for="c in array" v-bind:key="c.id">
      <h3>{{ c.name }} {{ index }}</h3>
    </div>
Or the most complete form, with the index and the element:
    <div v-for="(c, index) in array" v-bind:key="c.id">
      <h3>{{ c.name }} {{ index }}</h3>
    </div>
Or with the array and/or based on components:
    <hello-world v-for="c in [1, 2, 3, 4, 5]" v-bind:key="c.id" />
    <br />
With cycles, in short, we can repeat several times either an HTML tag or a Vue component.
Here is the JavaScript block:
data() {
   return {
     array: [
       {
         id: "123",
         name: "andres",
       },
       {
         id: "1234",
         name: "juan",
       },
     ],
   };
 },
It is not recommended to use conditionals and the v-for cycle on the same HTML tag:
<li v-for="i in items" v-if="item.visible" v-bind:key="i.text">If we try to place the v-if and v-for directives on the same HTML element, we will see a message like the following:
This 'v-if' should be moved to the wrapper elementWhich indicates that we should move the v-if to an internal element of the v-for:
<template>
  <div>
    <ul>
      <template v-for="i in items" v-bind:key="i.text">
        <li v-if="i.visible">{{ i.body }}</li>
      </template>
    </ul>
  </div>
</template>
<script>
export default {
  data() {
    return {
      items: [
        { body: "Item 1", visible: true },
        { body: "Item 2", visible: false },
        { body: "Item 3", visible: true },
        { body: "Item 4", visible: false },
      ],
    };
  },
};
</script>
In the previous example we use a template element with which we can avoid rendering an additional HTML element, in other words, the template element is not rendered.
Reactivity in arrays
Internally Vue listens to the changes we make in reactive variables, when they are numbers, booleans or strings the change detection is direct and has no complications, however, when we use arrays we must use certain functions so that Vue detects changes and performs the changes in the script and/or template block.
For example, having the following script:
<template>
  <table >
    <thead>
      <tr>
        <th>Id</th>
        <th>Title</th>
        <th>Actions</th>
      </tr>
    </thead>
    <tbody>
      <tr v-for="(d, index) in data" :key="d.id">
        <td>{{ d.id }}</td>
        <td>{{ d.title }}</td>
        <td>
          <button @click="remove(index)">Delete</button>
        </td>
      </tr>
    </tbody>
  </table>
</template>
<script>
export default {
  data() {
    return {
      data: [
        {
          id: 1,
          title: 'Test 1'
        },
        {
          id: 2,
          title: 'Test 2'
        }
      ],
    };
  },
  methods: {
    remove(index){
        delete this.data[index]
    }
  },
};
</script>
We will see that the changes are not detected by Vue when removing elements from the array; as not all functions or mechanisms that exist in JavaScript to manipulate arrays are detected by Vue; functions like:
- pop()
- shift()
- splice
- Direct assignments
- push()
Are detected by Vue when tracking reactive variables of type array.
So, the changes in the previous script remain as:
<template>
<button @click="add()">Add</button>
  <table >
    <thead>
      <tr>
        <th>Id</th>
        <th>Title</th>
        <th>Actions</th>
      </tr>
    </thead>
    <tbody>
      <tr v-for="(d, index) in data" :key="d.id">
        <td>{{ d.id }}</td>
        <td>{{ d.title }}</td>
        <td>
          <button @click="remove(index)">Delete</button>
        </td>
      </tr>
    </tbody>
  </table>
</template>
<script>
export default {
  data() {
    return {
      data: [
        {
          id: 1,
          title: 'Test 1'
        },
        {
          id: 2,
          title: 'Test 2'
        }
      ],
    };
  },
  methods: {
    add(){
      this.data.push(
        {
          id: Date(),
          title: 'Test'
        }
      )
        /* this.data = [].concat(this.data, {
          id: Date(),
          title: 'Test'
        }); */
     /* this.data = [...this.data,
      {
          id: Date(),
          title: 'Test'
        }];*/
      /* this.data[this.data.length] =
        {
          id: Date(),
          title: 'Test'
        }*/
    },
    remove(index){
        this.data.splice(index,1)
    }
  },
};
</script>
And this time we will see that Vue's reactivity works perfectly.
Ref()
Through the ref() function we can create reactive variables without needing to define them in the data() block, this is particularly useful when we use Vue's composition mode or when using state managers like Pinia.
The @ symbol for importing components or files
As we will see later, when developing applications in Vue the at symbol @ is used as a shortcut to refer to the project base path; then, the path to the component you want to import is specified; this is extremely useful when we are using imports in subfolders.
For example:
</script>import MyComponent from '@/components/MyComponent.vue';Communication between Components
Vue architecture is modular, and communication between them is a fundamental pillar:
Parent → Child Communication (props and refs)
- props: Send data downwards. Remember they are read-only.
- refs: Allow the parent to get a direct reference to a method or property of the child component.
In this first example, we have the parent component that passes data through a child prop, with fixed content:
<ChildComponent message="Andres"/>And another variable:
<ChildComponent :message="name"/>It is important to note that, when it is necessary for the attribute to be evaluated (prop in this example), a colon (:) is placed, the example remaining as:
src\components\props\FatherComponent.vue
<template>
  <ChildComponent message="Andres"/>
  <hr>
  <ChildComponent :message="name"/>
  <ChildComponent/>
</template>
<script>
// import ChildComponent from './ChildComponent.vue';
import ChildComponent from '@/components/props/ChildComponent.vue';
  export default {
    components:{
      ChildComponent
    },
    data: function(){
      return {
        name:'Andres'
      }
    },
    methods: {

    }
  }
</script>
The child can be anything, in this example, simply printing the prop provided from the parent:
src\components\props\ChildComponent.vue
<template>
  <h1>I am a child</h1>
  <p>{{message}}</p>
</template>
<script>
  export default {
    data: function(){
      return {

      }
    },
    methods: {

    },
    // props:['message']
    // props:{
    //   message: String
    // }
    props:{
      message: {
        type: String,
        required: false,
        default: 'Hello World'
      }
      // message: {
      //   type: String,
      //   required: true
      // }
    }
  }
</script>
When you use refs inside a v-for loop, the result will be an array of references, not a single element. Make sure to handle it correctly by accessing the corresponding index.
Child → Parent Communication (Custom events)
When a change occurs in the child (for example, when removing an item), it must "notify" the parent to update the actual data source.
- Emission: From the child, you trigger a custom event: this.$emit('event-name', data).
- Listening: The parent reacts to the event: <ChildComponent @event-name="parentMethod" />.
Avoid "infinite loops" when communicating components. Do not call a parent event that, in turn, attempts to trigger another event in the child if it is not strictly necessary. Keep data logic in the parent and representation logic in the child whenever possible.
src\components\props\events\FatherComponent.vue
<template>
  <ChildComponent v-for="d in data" :key="d.id" ref="childComponent" @event-remove="remove" :item="d" />
</template>
<script>
// import ChildComponent from './ChildComponent.vue';
import ChildComponent from '@/components/props/events/ChildComponent.vue';
export default {
  components: {
    ChildComponent
  },
  data() {
    return {
      data: [
        {
          id: 1,
          title: 'Test 1'
        },
        {
          id: 2,
          title: 'Test 2'
        }
      ],
    };
  },
  methods: {
    remove(id) {
      const index = this.data.findIndex(item => item.id === id);
      this.$refs.childComponent[index].callFromFather(index);
      this.data = this.data.filter(item => item.id !== id);
    }
  },
};
</script>
Notice that, to communicate with the child component and be able to reload it when an event occurs in the parent, the preferred way is through a reference:
ref="childComponent"With this reference, it is possible to invoke methods or properties from the parent component to the child:
this.$refs.childComponent[index].callFromFather(index);In the child, we implement this method as a normal method in Vue components:
src\components\props\events\ChildComponent.vue
<template>
  <div>
    <p>{{ item.id }}</p>
    <p>{{ item.title }}</p>
    <button @click="$emit('event-remove', item.id)">Delete</button>
    <!-- <button @click="remove">Delete</button> -->
    <hr>
  </div>
</template>
<script>
export default {
  data: function () {
    return {
    }
  },
  methods: {
    // remove(){
    //   this.item.title = 'Removed'
    //   // this.$emit('remove', this.item.id)
    // }
    callFromFather(index){
      console.log('Call from Parent '+index)
    }
  },
  props: {
    item: {
      type: Object,
      required: true,
    }
  }
}
</script>
Component Redrawing: The key trick
Sometimes, for technical needs, you need to force Vue to destroy and recreate a child component from scratch. The most direct way to achieve this is through the key attribute.
- How does it work? Every time the value assigned to the key changes, Vue considers the component a new instance and redraws it completely, resetting its state and lifecycle.
- Practical use: You can use a timestamp (Date.now()) or a random number as the key value. When you need to refresh the child, just update this variable from the parent through a click event.
This method is inefficient for performance. Use it only when communication via refs or events ($emit) is not sufficient.
src\components\props\events\FatherComponent.vue
<template>
  <ChildComponent v-for="d in data" :key="d.id" ref="childComponent" @event-remove="remove" :item="d" />
  <br>
  <ChildComponent v-for="d in [{id:10, title: new Date().getTime()} ]" :key="dateKey" :item="d" />
  <button @click="dateKey=new Date().getTime()">Reload By Key</button>
</template>
<script>
// import ChildComponent from './ChildComponent.vue';
import ChildComponent from '@/components/props/events/ChildComponent.vue';
export default {
  components: {
    ChildComponent
  },
  data() {
    return {
      dateKey: new Date().getTime(),
      data: [
        {
          id: 1,
          title: 'Test 1'
        },
        {
          id: 2,
          title: 'Test 2'
        }
      ],
    };
  },
  methods: {
    remove(id) {
      const index = this.data.findIndex(item => item.id === id);
      this.$refs.childComponent[index].callFromFather(index);
      this.data = this.data.filter(item => item.id !== id);
    }
  },
};
</script>
Style and Class Binding
In addition to CSS classes, you can link inline styles through objects or arrays reactively.
- Object syntax: v-bind:style="{ color: activeColor, fontSize: size + 'px' }"
- Array syntax: Allows combining multiple style objects. If there are repeated properties, the last one in the array overwrites previous ones (similar to how cascading style sheets work).
- scoped: By adding this word to the <style scoped> tag, you limit style scope solely to the current component. This prevents design "leaks" towards other child or parent components.
Here are the most common examples:
src\components\BidingStyleComponent.vue
<template>
  <div>
    <h2>Style Binding</h2>
    <!-- 1. Inline object -->
    <div :style="{ color: activeColor, fontSize: fontSize + 'px' }">
      Style with inline object (Color and Size)
    </div>
    <!-- 2. Object in data -->
    <div :style="styleObject">
      Style linked to an object in data
    </div>
    <!-- 3. Style array -->
    <div :style="[baseStyles, overridingStyles]">
      Style linked to an object array
    </div>
    <button @click="toggleStyles">Change Styles</button>
  </div>
</template>
<script>
export default {
  data() {
    return {
      activeColor: 'red',
      fontSize: 20,
      styleObject: {
        color: 'blue',
        fontSize: '18px',
        border: '1px solid black',
        padding: '10px',
        marginTop: '10px'
      },
      baseStyles: {
        backgroundColor: '#eee',
        padding: '10px',
        marginTop: '10px'
      },
      overridingStyles: {
        fontWeight: 'bold',
        color: 'darkgreen',
        marginTop: '1000px'
      }
    }
  },
  methods: {
    toggleStyles() {
      this.activeColor = this.activeColor === 'red' ? 'purple' : 'red';
      this.fontSize = this.fontSize === 20 ? 24 : 20;
      this.styleObject.color = this.styleObject.color === 'blue' ? 'orange' : 'blue';
    }
  }
}
</script>
Dynamic Content with slots
Slots are the solution for passing complex HTML structures (like tables, cards or layouts) towards your child components.
- Default slot: Is the space without a name. Any HTML you place inside the parent component tag will end up there.
- Named slots: Allow inserting content into specific child sections (e.g. <template #header>...</template>).
- Advantage: It allows you to maintain a fixed structure in the child (styles, animations) while customizing content from the parent in a clean and reusable way.
In the child component we define the slots, whether default or named, remember there can only be one default slot, which is the one that DOES NOT have a name:
src\components\slot\SlotChild.vue
<template>
  <div class="slot-child">
    <h3>Child Component (Defines Slots)</h3>

    <div class="header-area">
      <!-- Named Slot -->
      <slot name="header">
        <p>Default Header content</p>
      </slot>
    </div>
    <div class="content-area">
      <!-- Default Slot -->
      <slot>
        <p>Default Body content</p>
      </slot>
    </div>
  </div>
</template>
<style scoped>
.slot-child {
  border: 2px dashed #ccc;
  padding: 15px;
  margin: 10px 0;
}
.header-area {
  background-color: #f4f4f4;
  padding: 5px;
  margin-bottom: 10px;
}
</style>
From the parent, we use the slots:
src\components\slot\SlotComponent.vue
<template>
  <div>
    <h2>Slots Example (Parent)</h2>
    <div class="header-area">
      <!-- Named Slot -->
        <p>Default Header content</p>
    </div>
<hr>

    <SlotChild>
      <!-- Using named slot 'header' -->
      <template v-slot:header>
        <h4>Custom title from Parent</h4>
      </template>
      <!-- Content for the default slot -->
      <p>This paragraph is injected into the child's main slot.</p>
      <button>Injected Action</button>
    </SlotChild>
  </div>
</template>
<script>
import SlotChild from './SlotChild.vue';
export default {
  components: {
    SlotChild
  }
}
</script>
️ Observers (watch)
Watchers are ideal for executing custom logic when a property changes value.
- Syntax: They are defined within the watch block. Each function must bear the name of the property it wishes to observe and receives two arguments: (newValue, oldValue).
- Use case: They are perfect for executing side effects, such as making an API request when a filter changes or synchronizing data between components.
In the following example, you will see that, when pressing the button, whose property is being observed, a message is printed to the browser console:
src\components\WatchComponent.vue
<template>
  <div class="watch-container">
    <h2>Watch Example</h2>
    <p>Current count: {{ count }}</p>
    <button @click="count++">Increment</button>
    <p><strong>Log:</strong> {{ message }}</p>
  </div>
</template>
<script>
export default {
  data() {
    return {
      count: 0,
      message: 'Waiting for changes...'
    }
  },
  watch: {
    count(newValue, oldValue) {
      this.message = `The value changed from ${oldValue} to ${newValue}`;
    }
  }
}
</script>
HTML Injection: v-html
If you need to render raw HTML content (e.g. from a CMS), use the v-html="content" directive.
src\components\HTMLComponent.vue
<template>
  <div>
    <h3>Print HTML (v-html)</h3>
    <!-- The v-html directive interprets the string as real HTML -->
     {{ htmlContent }}
    <div v-html="htmlContent"></div>
  </div>
</template>
<script>
export default {
  data() {
    return {
      htmlContent: '<p style="color: blue; font-weight: bold;">This is dynamically rendered text with HTML tags.</p>'
    }
  }
}
</script>
Only use this directive with trusted content, as injecting unfiltered HTML is an open door to XSS (Cross-Site Scripting) attacks.
Options API or Composition API?
We have been working with Options API, which organizes code into blocks (data, methods, computed, watch). However, Composition API exists (the modern standard since Vue 3):
- Key difference: In Composition API, logic is grouped by functionality rather than by options. It is cleaner, shorter and allows for superior code reuse.
- Recommendation: Although Options API is excellent for starting out and understanding reactivity, I recommend becoming familiar with Composition API as you gain experience. It is the future of the Vue ecosystem and official documentation increasingly leans towards this syntax.
Here is an example of Composition API and you can compare it with the style binding we did before using Options API:
BidingStyleComponent.vue
<template>
  <div>
    <h2>Style Binding</h2>
    <!-- 1. Inline object -->
    <div :style="{ color: activeColor, fontSize: fontSize + 'px' }">
      Style with inline object (Color and Size)
    </div>
    <!-- 2. Object in data -->
    <div :style="styleObject">
      Style linked to an object in data
    </div>
    <!-- 3. Style array -->
    <div :style="[baseStyles, overridingStyles]">
      Style linked to an object array
    </div>
    <button @click="toggleStyles">Change Styles</button>
  </div>
</template>
<script setup>
import { ref, reactive } from 'vue';
const activeColor = ref('red');
const fontSize = ref(20);
const styleObject = reactive({
  color: 'blue',
  fontSize: '18px',
  border: '1px solid black',
  padding: '10px',
  marginTop: '10px'
});
const baseStyles = reactive({
  backgroundColor: '#eee',
  padding: '10px',
  marginTop: '10px'
});
const overridingStyles = reactive({
  fontWeight: 'bold',
  color: 'darkgreen',
  marginTop: '1000px'
});
const toggleStyles = () => {
  activeColor.value = activeColor.value === 'red' ? 'purple' : 'red';
  fontSize.value = fontSize.value === 20 ? 24 : 20;
  styleObject.color = styleObject.color === 'blue' ? 'orange' : 'blue';
};
</script>
Main options in the template block
In this section, we will see the most common options we can perform in template blocks, such as using directives like conditionals, for, output and imports.
Output
As we mentioned before, to output some primitive like text, number or boolean we use double braces:
{{var}}V-model
As we mentioned before, v-models in Vue are a directive that allow creating a bidirectional link between a value of any HTML tag of a form such as a SELECT, INPUT, TEXTAREA or similar.
Using v-model is the most efficient way to create a Full Duplex (bidirectional) connection between the script and the template.
How does it work? Everything the user types into a form field (input, textarea, select) is automatically synchronized with a variable in your data block.
- Syntax: v-model="variableName" is used.
- Reactivity: Any change to the variable from the script is instantly reflected in the HTML, and vice versa.
If in the template, we place a v-model with which we can reference creating a bidirectional binding between data and a form field (TEXTAREA, INPUTS, SELECT, RADIUS... in short, we can use v-models in all types of form fields) like a text type input:
<template>
    <label>Name</label>
    <input type="text" v-model="name">
    <label>Sex</label>
    <select type="text" v-model="sex">
        <option value="M">Male</option>
        <option value="F">Female</option>
    </select>
    <label>About</label>
    <textarea v-model="about"></textarea>
</template>
And a reactive variable in Vue:
<script>
export default {
    data() {
        return {
            name:'',
            sex:'',
            about:''
        }
    },
}
</script>
Vue monitors the form field element and links it with the reactive variable and updates the variable when there is a change in the linked form element and vice versa; you can try running the following exercise:
<template>

    <label>Name</label>
    <input type="text" v-model="name">
    <label>Sex</label>
    <select type="text" v-model="sex">
        <option value="M">Male</option>
        <option value="F">Female</option>
    </select>
    <label>About</label>
    <textarea v-model="about"></textarea>
    <button @click="send">Send</button>
</template>
<script>
export default {
    data() {
        return {
            name:'',
            sex:'',
            about:''
        }
    },
    methods: {
        send(){
            alert(`
            name ${this.name}
            sex ${this.sex}
            about ${this.about}
            `)
        }
    },
}
</script>
And you will see that, when establishing the data in the v-model, they are automatically updated in the reactive variables; although we can also establish values from the script block, for example, to reset the form:
<template>

    <label>Name</label>
    <input type="text" v-model="name">
    <label>Sex</label>
    <select type="text" v-model="sex">
        <option value="M">Male</option>
        <option value="F">Female</option>
    </select>
    <label>About</label>
    <textarea v-model="about"></textarea>
    <button @click="send">Send</button>
    <button @click="reset">Reset</button>
</template>
<script>
export default {
    data() {
        return {
            name:'',
            sex:'',
            about:''
        }
    },
    methods: {
        send(){
            alert(`
            name ${this.name}
            sex ${this.sex}
            about ${this.about}
            `)
        },
        reset(){
            this.name=''
            this.sex='M'
            this.about=''
        }
    },
}
</script>
Form Management and the .prevent modifier
When working with <form> tags, the default HTML behavior is to reload the page upon sending data. This is counterproductive in a SPA.
The reload problem
If the browser reloads, we lose all our application's state in memory.
Using the @submit.prevent attribute, which is actually a listener for the form submit event, we capture the event and it is processed through the mySubmit() method:
src\components\FormComponent.vue
<template>
  <form @submit.prevent="send">
    <input type="text" v-model="name">
    <!-- <button @click="send">Send</button> -->
    <button>Send</button>
  </form>
</template>
<script>
export default {
  data: function () {
    return {
      name: ''
    }
  },
  methods: {
    send() {
      console.log(this.name);
    }
  }
}
</script>
In Vue, the form is more of a visual convention. You don't need to define action or method in the HTML, since communication with your API (using fetch or axios) will be managed directly from your Vue methods.
You are going to see these directives in Vue begin with v- followed by a hyphen and this is an internal framework organization to specify that these directives/attributes are Vue's.
Events
Events are the mechanism we have so that the user can interact with the application. Events in Vue are the same as those available in vanilla JavaScript such as click and keyboard events; besides this, we have many options to, for example, listen for the enter key, execute the event only once, among others.
We use the v-on directive to listen to DOM events occurring in JavaScript or the shortcut form @.
To use events, we must use the following attribute:
v-onFollowed by the event we want to use, for example, click:
v-on:clickThe shortcut to v-on is the at character:
@So, if we want to use the click event it remains as:
@click
To define the event body, we have two ways:
Inline: This is the simplest format available, consisting of being able to indicate the operation to be performed directly in the @click attribute, that is, as part of the value:
const count = ref(0)template
<button @click="count++">Add 1</button>
<p>Count is: {{ count }}</p>
Through methods: This is a scheme similar to that used in vanilla JavaScript, which consists of specifying a method using the @click attribute which will be invoked at the time the click event occurs.
const name = ref('Vue.js')
function hello() {
  alert(`Hello ${name.value}!`)
}
template
<button @click="hello">Hello</button>Other events we can use are keyboard ones:
<input type="text" @keyup="submit" />Capturing the enter key:
<input type="text" @keyup.enter="submit" />Alias Key
Besides listening for the enter key, Vue provides aliases for the most commonly used keys:
- .enter
- .tab
- .delete (captures "Delete" and "Backspace" keys)
- .esc
- .space
- .up
- .down
- .left
- .right
System modifier keys
In Vue, we also have access to other keys known as modifiers to activate mouse or keyboard event detectors only when the corresponding modifier key is pressed:
- .ctrl
- .alt
- .shift
- .meta
For example:
<input type="button" @keyup.ctrl="toDo" />Custom events
We can also create custom events in Vue, which are very useful for communicating child components with the parent; for that, in the parent component, we define the event at the time of loading the child:
<template>
  <div>
    <h1>{{ title }}</h1>
    <ChildComponent @event-in-child="callback" />
  </div>
</template>
<script>
import ChildComponent from './ChildComponent.vue';
export default {
  components: {
    ChildComponent,
  },
  methods: {
    callback(){
      console.log('Custom event')
    }
  },
};
</script>
From the child component, you can emit custom events using the $emit method:
<template>
  <button @click="$emit('eventInChild')">Click this button</button>
</template>
You can pass parameters through the event:
<script>
import ChildComponent from './ChildComponent.vue';
export default {
  components: {
    ChildComponent,
  },
  methods: {
    callback(p1){
      console.log('Custom event '+p1)
    }
  },
};
</script>
And in the child:
<template>
  <button @click="$emit('eventInChild', 'param')">Click this button</button>
</template>
You can pass as many parameters as necessary by separating them with commas:
<template>
  <button @click="$emit('eventInChild', 'param', n1, *** , nx)">Click this button</button>
</template>
Custom events are very useful for passing data or states from the child component to the parent, as communication is inverse (since the parent component is the one that loads the child).
Main options in the style block
As an important feature we have available in the style block, whose purpose is to define the style or CSS for the component is, if you want the style to be global to the application:
<style>
    button{
        background: green;
    }
</style>
Or local to the component:
<style scoped>
    button{
        background: green;
    }
</style>
Raw or rendering HTML in Vue
Many times we have HTML content in a property or function that we want to render directly in the template; if we do it the standard way with double curly braces {{}} the desired result will not be obtained, we must use the v-html directive instead and indicate the property or function.
    <!-- **RAW HTML -->
    <p>
      {{ rawhtml }}
    </p>
    <p v-html="rawhtml"></p>
    <!-- **RAW HTML END-->
And in JavaScript
rawhtml: "<span style='color:red'>Hello red text</span>",You can check the repo for more information.
Aliases for imports in Vue
In Vue, to avoid having syntax like the following when loading separate components from different locations in your project:
import Base from "../../components/Base" Which becomes more complicated depending on where we import from; for example if we are in more internal locations and have to navigate to higher level files; we have to continue with this navigation.
Instead of using this type of syntax, we can use an alias, which points directly to the source (src) folder of our project; therefore, regardless of where our elements are located, we always have direct access to our src folder; with this our imports remain much more concise, readable and direct; for this, we must use the at symbol @:
import Base from "@/components/Base"Local and global styles to scoped Vue components
In Vue, we can apply style rules globally, for the entire application or to apply only to a single component.
Vue is a framework that was created for modular applications, it is the new scheme that is not so new, but that little by little evolves under a same alignment in which we require everything to be perfectly modular and integrable with other modules or submodules; in Vue these modules are called components in which we have mini applications that perform a particular task; remember that, following the structure of a Vue application, in a component we have:
- template
- script
- css
This is a component, as for the template and the script we know that it easily corresponds to or lives in the same component, but style when dealing with cascading style sheets, CSS, things change a bit, since one of the characteristics we have in this language is that it is global to the ENTIRE app, and in the end it doesn't matter how much you deconstruct your app into components, in the end it will be ONE single application running in a browser; therefore the CSS you place at the end in each component will leak to the rest when you run your app!
Suppose the following scheme; we have in our App.vue a template that loads two components:
In App.vue:
<template>
  <my-first-component/>
  <hello-world/>
</template>
<script>
import MyFirstComponent from ',/components/MyFirstComponent'
import HelloWorld from './components/HelloWorld'
export default {
  components: {
    MyFirstComponent,
    HelloWorld
  },
}
</script>
We see the use of components more clearly in the entry where we create a CRUD type Vue app that consumes a Rest API.
Component 1: Hello World
Has an H1 to which I want to apply a blue color
<template>
  <h1>C1<h1/>
</template>
<style scoped>
 h1 {
     color: blue
 }
</style>
Component 2: My First Component
Has an H1 to which I want to apply a red color
<template>
  <h1>C2<h1/>
</template>
<style scoped>
h1 {
  color: red;
}
</style>
When you render your app, you have the following result:
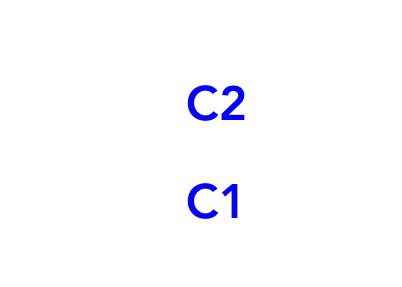
Only one color will appear, which may be red or may be blue, but it is NOT what we specified, since we wanted a different color for the H1 per component.
Defining style scope
As indicated, by having components, it is likely that you don't want your styles to clash, for example you may have a list component where you style a div to show an item, but this div element may be used for the banner, footer, sidebar and if we don't do something, these styles will clash dreadfully!
To indicate that we want each style to stay in its component, we have the scope attribute, which we define for style sheets, therefore, for our components, if we want the style they define to be local to it and NOT extend like a "Cascade" to other sibling, child or parent components...:
<style scoped>
h1 {
  color: red;
}
</style>
You have to place scoped for each style you want to be local to that component
With this, we have the expected result:
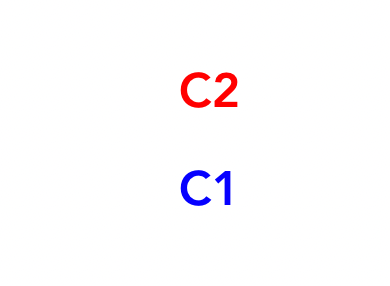
Vue devtools: Debug your apps
Vue devtools are fantastic tools that allow us to easily debug our Vue applications; the reason for this is that when we create a Vue app, based on components, everything ultimately ends up in a single file and if a piece or component fails or we want to track it and we debug that application with the tools we already know:
As you can see, we don't see anything related to our app in components; to be able to debug properly and see components and properties, we have to install the devtools which are available in most modern browsers like Firefox or Google Chrome; in the case of Google Chrome:
https://chromewebstore.google.com/detail/vuejs-devtools/nhdogjmejiglipccpnnnanhbledajbpd
With this, we have a new tab in our developer console.
In which, as you can see, we see the app as it really is. This extension is ideal for following this guide.