
Content Index
- Create a project in Laravel
- Software necessary to create our apps in Laravel
- A bit about Laragon, the chosen one to work with Laravel
- Creating our first application in Laravel
- Install the Laravel installer via composer
- Create the Laravel app via the above installer
- How to create a project in Laravel Livewire
- Install manually
- How to create a project in Laravel Inertia
- General explanation of a Laravel project
- Vite manifest not found manifest.json
- Laravel with Svelte, Inertia.js, and Vite
- Project Creation and Update
- Project Structure with Svelte
- Final Verification
- Know the current version of your Laravel and update
- Find out the current version of Laravel installed in your project
- Update a project in Laravel
- Example of Laravel update to version 10
- Laravel Base, Livewire or Inertia, which one to choose?
- Laravel is now component-ready
- Livewire as a natural evolution
- When should you use Livewire?
- And why not Inertia?
- Organization and productivity
- Migrating a project from Laravel 11 to 12
- Artisan: The command line to create components in Laravel
- Updating Laravel: Manual vs. New Project
- 1. Updating via Dependencies (Composer)
- 1.5. Automated Update with Laravel Bus
- The Problem of Legacy Applications (Legacy Context)
- 2. Manual Migration From Scratch: When to Implement It
- Recommendation: The Hybrid Approach
- Conclusions
Today who has not heard of Laravel; which is an excellent and very popular framework, which is characterized by having a large community, recurring updates and all kinds of integration, packages and features that we can use very easily.
Laravel is a framework for PHP that is used to develop server-side web applications, but we can easily integrate it with other technologies such as Node, Vue, React, among others, since from a Laravel project, we also have access to Node.
Laravel offers a set of functions and tools that allow you to create a clean, structured and easy-to-maintain code, and best of all, it is scalable with the immense amount of features that the framework has.
A Laravel project is exquisitely segmented into modules ranging from database management, authentication, validation, routing, blade views, models, migrations, and many more.
One of the most fascinating features that Laravel has is its ORM called Eloquent with which we can make queries using the Query Builder or Eloquent itself.
Furthermore, Laravel has a large community of developers who regularly contribute packages and libraries to improve the platform. It is a very useful tool for developers looking to increase their productivity and build high-quality and professional web applications quickly and efficiently.
At this point I hope I have convinced you to work with Laravel.
Create a project in Laravel
In this post, we are going to create our first application in Laravel on Windows; before starting it is necessary that you have the necessary Laravel Herd ecosystem that you can find more information here:
Remember that if you want to use Laragon on Windows but you don't know how to prepare everything so that it is ready, we have an entry in which we prepare our ecosystem to work with Laravel installed and our project created.
As you can see, it is a list of software to take into account, since we need a bit of everything to work comfortably with Laravel, which we are going to analyze in the next section.
Software necessary to create our apps in Laravel
You can install all these software manually and this is beyond the scope of this entry, or you can install a software known as Laragon, which provides us with all the necessary tools to start creating our applications in Laravel; best of all, if you already have some of the necessary software installed on your computer, such as composer, Node/NPM or a LAMP, this does not affect Laragon and vice versa; you can install Laragon with complete confidence that nothing on your PC will stop working.
A bit about Laragon, the chosen one to work with Laravel
Laragon in short is a necessary and fundamental software kit to create our apps in Laravel or any other PHP framework or even Node; It brings us already ready Node, NPM, Composer, Redis, the complete LAMP, a decent terminal and other additions but we already covered this before.
Creating our first application in Laravel
Laravel is always a bit more complicated if you compare it with other frameworks like CodeIgniter, when it comes to installing and using it; Laravel is a huge framework that has EVERYTHING and is extensible through packages created specifically for Laravel or simply PHP packages; as if this were not enough, it also has a perfect integration with Node, therefore we have a HUGE range of possibilities not only on the server side with Laravel, but also on the client side with Node that we can integrate Vue, Bootstrap, React, Angular and anything that can be installed via Node that we teach in my Laravel course:
Once we already have the necessary software, the next thing we have to do is create our app; to do this, the first thing you must do is activate your Laragon from the "Start all" button:
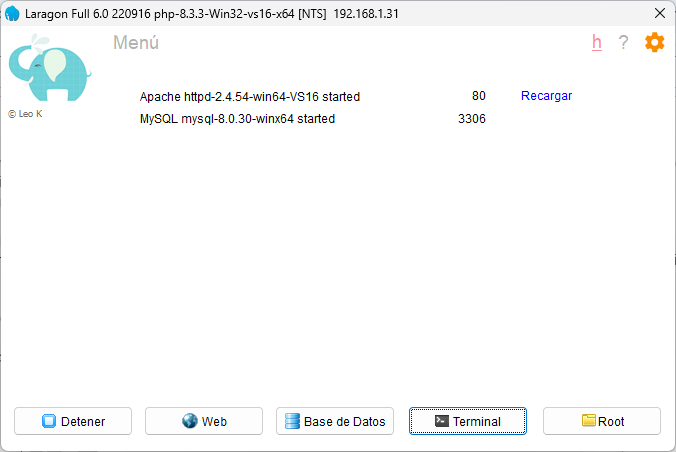
You open the console that brings us from the terminal button:
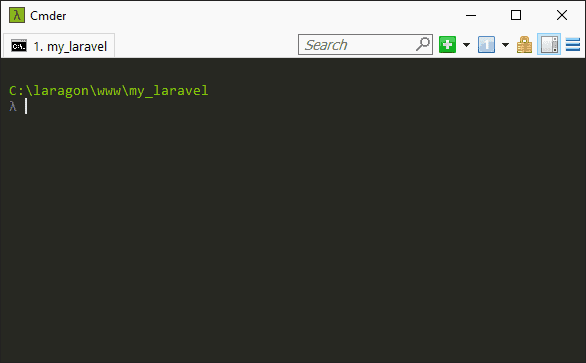
And here you are going to execute the command that we will see in the next section.
Install the Laravel installer via composer
We already have the entire ecosystem ready to develop our apps in Laravel; but before we start creating our project, we need to install the Laravel installer dependency (via composer) which will allow us to create a Laravel project via the command line.
$ composer global require laravel/installerThe above command allows you to install the Laravel installer as a PHP dependency via composer, which was one of the software required to work with Laravel.
Create the Laravel app via the above installer
Now with our installer ready, the next thing we are going to do is create our application in Laravel; we execute:
$ laravel new blogWhere blog is simply the name you give your Laravel project; you can put any name, without spaces, special characters, etc; try to keep it simple.
And with this we already have our project in Laravel in its latest version perfectly created.
The second option available to create a Laravel project is without using the Laravel installer and using Composer instead:
$ composer create-project laravel/laravel larafirststepsIn which you even have the advantage of being able to specify a specific version; for example:
$ composer create-project laravel/laravel="13.*" larafirststepsIn both cases, the result will be a new folder corresponding to the project in:
C:\laragon\www
Called "larafirststeps"
Restart your Laragon by selecting the Reload option or by clicking the "Stop" button and then "Start All." At that point, a Windows notification will appear stating that Laragon is attempting to modify the system (the Windows host file). You must accept this modification, and then you will be able to access it as follows:
http://larafirststeps.test
If you create the project using Composer, you must also run the migrations:
$ php artisan migrateWe will see the use of migrations later in the book; to run the previous command, remember that you must be inside the project.
How to create a project in Laravel Livewire
Livewire is a complete framework for Laravel that simplifies the creation of dynamic interfaces while maintaining the ease of use of Laravel. As a front-end framework, Livewire is ideal for building applications with extensive client-server interaction much faster than with basic Laravel. With Livewire, you can build fully functional applications in less time than with basic Laravel and the traditional Laravel + REST API + Client approach.
Building modern web applications is challenging. Tools like Vue and React are extremely powerful, but the complexity they add to a full-stack developer's workflow is overwhelming.
If, on the other hand, you want to create a project in Livewire, you must follow the same steps, but at the time of creation, the wizard will:
$ laravel new livewireIt asks you:
  _                               _
  | |                             | |
  | |     __ _ _ __ __ ___   _____| |
  | |    / _` | '__/ _` \ \ / / _ \ |
  | |___| (_| | | | (_| |\ V /  __/ |
  |______\__,_|_|  \__,_| \_/ \___|_|
Which starter kit would you like to install?
○ None
○ React
○ Vue
● Livewire
And logically you select Livewire.
Install manually
Of course, you can install Livewire as if it were just another Composer package; this option is useful if you want to add the library to a base Laravel project, and you don't want to keep the rest of the functions that Laravel Livewire provides in the default scaffolding, such as the login module.
composer require livewire/livewireAnd add the Livewire dependencies to your project:
    @livewireStyles
</head>
<body>
    ...
    @livewireScripts
</body>
</html>
And with this, you'll be able to use the full power that Laravel Livewire offers; remember that I have the most comprehensive Laravel Livewire course.
This second option is simpler and doesn't include any of the free features that come with creating a Livewire project, such as a dashboard module, Forty authentication, user profile management, and other features.
If you're going to continue down this path, I recommend that you now understand what has been created by learning about the characteristics of a Livewire project.
How to create a project in Laravel Inertia
If, on the other hand, you want to create a project in Livewire, you must follow the same steps, but at the time of creation, the wizard will:
$ laravel new inertiaIt asks you:
  _                               _
  | |                             | |
  | |     __ _ _ __ __ ___   _____| |
  | |    / _` | '__/ _` \ \ / / _ \ |
  | |___| (_| | | | (_| |\ V /  __/ |
  |______\__,_|_|  \__,_| \_/ \___|_|
Which starter kit would you like to install?
○ None
○ React
● Vue
○ Livewire
And logically you select Vue.
If you want to continue learning Laravel Inertia, I recommend that once you have created your project, you understand what you have created by understanding the features of a project in Laravel Inertia.
General explanation of a Laravel project
As you can see, Laravel has a significant number of files and folders that together make up the framework and its structure; it uses a bit of everything from integration with NPM through Node to everything necessary for a framework from a PHP point of view; here we are going to explain the following structure a bit so that you know what each component does in general terms:
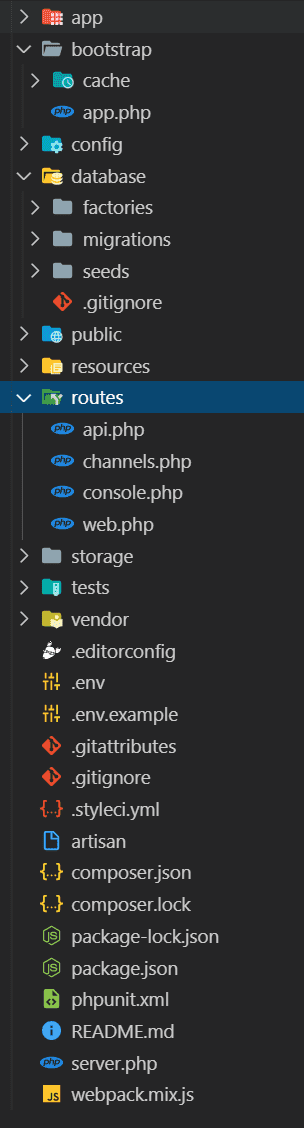
- In the routes folder we can create our routes for our application, that is, the way in which we can access the functions defined within our controllers, we must specify a route to indicate which route will correspond to which controller and its function.
- The resources folder stores web resources without compiling or generating them; that is, sass CSS files, or imports and definitions of Node modules (you will also see that we have a package.json to define Node dependencies), are defined here and by means of a command they are generated in the public folder in which we have our CSS and JS files ready to be consumed by our browser; also here you will find other resources such as images, videos, etc; our views are also in the resources folder.
- We also have the config folder, in which we can make different configurations of our application; database, emails, etc; we have a file called .env which is ideal for development environments where we have global and general configurations of our project; the same configurations that we got in the previous folder we can define here to make a clear distinction between the development configurations (those stored in the .env file) and the production configurations (those that are defined in the multiple files within the config folder).
- We have an Http folder where our controllers are located, and also another component that is the middleware that defines functions in which we can intercept and execute actions before the controller and another folder called Requests where validation files for the forms are generated.
- The vendor folder stores the Laravel dependencies installed by composer, as well as any other dependencies installed by us.
- In the node_mdoule folder, which you will only have if you run the npm install command, you will find all the node modules.
These are some of the most important components, but you can grab the full list at: Laravel: Directory Structure.
Vite manifest not found manifest.json
Since Laravel version 9, Laravel uses Vite instead of Laravel Mix. This brings some important changes to keep in mind. Once the Laravel project is created, we must run:
npm install
npm run dev
php artisan migrate
When developing in Laravel with Vite, we must always have the following command active:
npm run dev To prevent the error from appearing:
Vite manifest not found manifest.jsonLaravel with Svelte, Inertia.js, and Vite
We can now use Svelte directly with Laravel and Inertia. That is the big news. Now, alongside React and Vue (which was the first), we also have official support for Svelte.
To use it, all you need is to have the Laravel Installer updated. If you use Herd, this is done automatically, but if you don't know what I'm talking about, remember that Laravel is the recommended environment for development. If you are on Mac or Windows, you can download it from its official site.
Project Creation and Update
Let's create a Laravel project to see the new options panel. To do this, we position ourselves in the desired folder and run:
$ laravel new test-svelteBy doing so, the system may ask you to update the installer. Once updated, you will see that Svelte already appears as an available alternative in the Inertia options.
 ██╗        █████╗  ██████╗   █████╗  ██╗   ██╗ ███████╗ ██╗
 ██║       ██╔══██╗ ██╔══██╗ ██╔══██╗ ██║   ██║ ██╔════╝ ██║
 ██║       ███████║ ██████╔╝ ███████║ ██║   ██║ █████╗   ██║
 ██║       ██╔══██║ ██╔══██╗ ██╔══██║ ╚██╗ ██╔╝ ██╔══╝   ██║
 ███████╗ ██║  ██║ ██║  ██║ ██║  ██║  ╚████╔╝  ███████╗ ███████╗
 ╚══════╝ ╚═╝  ╚═╝ ╚═╝  ╚═╝ ╚═╝  ╚═╝   ╚═══╝   ╚══════╝ ╚══════╝
 ┌ Which starter kit would you like to install? ────────────────┐
 │   ○ None                                                     │
 │   ○ React                                                    │
 │ › ● Svelte                                                   │
 │   ○ Vue                                                      │
 │   ○ Livewire                                                 │
 └──────────────────────────────────────────────────────────────┘
Project Structure with Svelte
Once the project is downloaded, we can check what we have. Remember that there are also other starter kits created by the community.
If we check the package.json file, we will see that it already includes the Inertia and Svelte dependencies. When exploring the resources/js folder, we will find the .svelte files. Although at first glance the syntax is similar to Vue's, each one has its own particularities.
resources/js/components
resources/js/components/Breadcrumbs.svelte
***
<script lang="ts">
    import { Link } from '@inertiajs/svelte';
    import {
        Breadcrumb,
        ***
Final Verification
If we enter the project and serve it (in my case using a local URL like test.test), we can see that everything is working correctly. You now have a Laravel environment ready to program with Svelte!
Know the current version of your Laravel and update
Laravel is the PHP framework by reference and for many reasons it has become the reference web framework and not only in PHP; Laravel follows a custom Model-View-Controller (MVC) architecture since, extending quite a bit to this architecture, Laravel has provides a simple and elegant syntax for developing web applications and a large number of functionalities to develop all kinds of applications.
If there is one thing that makes Laravel stand out, apart from its excellent framework full of various useful features and a most extensible all-terrain framework with both php packages and Node packages, it is because of its development team. that it is always incorporating new features and fixing bugs; and with this constant updates of the most popular php framework today; but this behavior can generate a couple of circumstances that we are going to address in this post:
- Find out the current version of Laravel installed in your project
- Update a project in Laravel
Find out the current version of Laravel installed in your project
We are going to learn how we can find out the current version of your project in Laravel: which is a fundamental task when we want to update an existing project to another version, find out if it is convenient for us to update and if this will have a negative impact on our disabled project on partially or totally or on the contrary, the project would be working in a perfect and stable way.
To find out what version of Laravel we are using, just run the artisan command
$ php artisan --version At this point, it is recommended that you see the releases on the official Laravel website, obtain information on all the updates that the Laravel team have made and see if any would negatively affect the project you already have created.
Update a project in Laravel
To update a Laravel project, it is recommended to follow the following steps:
- Create a backup of your current project in case something goes wrong during the update process and you can check if there are any issues with the stable version.
- Check the current version of Laravel you are using and compare it to the most recent version available; to do this, you can use the above command or check your composer.json and search for the Laravel package.
- Update composer dependencies by opening terminal in your project directory and running the composer update command. This will update all dependencies to their latest versions.
- Update configuration files whose changes are required for the newer version of Laravel; this is somewhat complicated, since many times you have to make additional changes at the project level.
- If you have customized your project views, make sure they are still compatible with the new version of Laravel; usually in views there are not many changes to make.
- Make sure that the rest of the components are supported by the new version of Laravel; in Laravel, at least the basic resources like controllers, models… are kept intact.
- Lastly, test your app and verify that everything works as expected.
- It is important to note that additional updates may sometimes be required depending on the specific nature of your project. Therefore, always refer to the official Laravel documentation and perform the necessary tests before deploying the new version to production.
As an additional recommendation, make a list and verify that it is easier, whether to update the project or create a new project and copy the dependencies.
Example of Laravel update to version 10
Now that we know what version of Laravel we have installed on our computer and whether or not we are going to have problems with our project, the next step that remains is to update; for that we have to go to the file called composer.json and look for the package called "laravel/framework": "^10.0" and depending on the version we want to update of Laravel we would have to place the exact version; for example, if we want to update to 1010:
"laravel/framework": "10.10",Or if we want to update to the latest 10:
"laravel/framework": "^10.0",We simply specify the "^" character. After you know which version of Laravel you are going to update to, the next thing we will do is execute the following command:
$ composer updateAs you can see, it is a composer command and not a php artisan command, because it is composer that is in charge of updating and installing packages for our project, including our framework.
The command takes a while while it downloads and installs all packages including Laravel; Also remember that when we change versions, many times you have to make additional configurations at the project level.
Laravel Base, Livewire or Inertia, which one to choose?
As we've seen, Livewire and Inertia are already practically integrated into the Laravel experience; as soon as we create a new Laravel, ALL the options appear. But which one should you choose? I'll give you my opinion in the next section.
Laravel is now component-ready
Why do I think this? Well, there are several reasons. Starting with the basics: Laravel already supports the use of components. We have two main types:
- Anonymous components, like the one you're seeing on the screen, which function as a slight evolution of what we have in views. They allow us to pass props and keep the code more organized.
- There are also class-based components, which give us even more power when structuring interfaces.
This already gives us a solid foundation for working with components, but Livewire takes it much further.
Livewire as a natural evolution
In our ongoing course, we've covered what Livewire offers: custom attributes, JavaScript events, SPA creation in Laravel, wire:model, wire:click, and more. All of this represents an evolution of traditional Blade components.
Mind you, I don't mean we should eliminate Laravel's core components. These are still very useful for simple tasks, such as defining button styles or displaying simple lists. For example, what you're seeing on the screen is a basic Blade component, without LiveWire, used to display a list or a detail. And it's perfectly fine.
When should you use Livewire?
But when we want to do more complex things—like having events, server requests without reloading the page, or working with more dynamic interfaces—Livewire makes development much easier.
Instead of making a traditional request or reloading the view, we simply use an attribute like wire:click and that's it. Everything is encapsulated, well organized, and managed by Laravel. That's why I think this would be a natural evolution within the framework.
And why not Inertia?
Now, many will say: why not include Inertia instead? This is where the second reason why I think Livewire is a better fit as the default option comes in:
- Inertia relies on external technologies like Vue or React, and both cannot be used in the same project.
- It would be confusing for new users to have to choose between Vue or React when creating a Laravel project from scratch.
- There would also be questions when returning views: do you render them in Blade, Vue, or React?
This would add unnecessary complexity, especially for beginners.
In contrast, Livewire is a parallel framework that integrates seamlessly with the Laravel core, without imposing external technological decisions.
Organization and productivity
Livewire boosts productivity. Especially in admin dashboards, CRUD form creation, status management, quick event responses, and more. I personally use it whenever I can because it helps me keep my code clean and organized.
Migrating a project from Laravel 11 to 12
I want to quickly tell you how you can update Laravel 11 to Laravel 12, as simple as I told you in the previous video where I was talking about the new features and so on, which is what is new and we have very little. This is basically what we have to do, simply place a 12:
composer.json
laravel/framework to ^12.0
phpunit/phpunit to ^11.0
pestphp/pest to ^3.0
If you have a minimum version of php unit or Pest you can also upload it and little else; we execute:
$ composer installThat's basically all here, remember that you may have problems with other third-party dependencies, that is, packages installed by you that are or are not part of the Laravel ecosystem that may have conflicts between versions and in that case you must decide whether to update Laravel or remove the package.
Artisan: The command line to create components in Laravel
At this point you already know the structure of a project in Laravel, we can start creating components; to create the different components that we explained in the previous section, we use the command line, through artisan, which is the one that is in charge of creating the different Laravel components; to see everything we can create, run:
php artisanAnd you will see a very complete and organized list of everything we can do with Laravel, from creating controllers, models, migrations and many other things that we will discuss in another post; but stay with the idea that here we can perform different operations to create components in Laravel.
However, Laragon has been a paid product for some time now, and we have a new tool called Install Laravel Herd that we can use instead.
Updating Laravel: Manual vs. New Project
One of Laravel's unique characteristics is its release cycle, which introduces a new major version every year. Keeping applications up to date is essential to guarantee security, performance, and compatibility with the global PHP ecosystem. There are two main methodologies to approach updating a project: following the official migration guides by modifying dependencies, or performing a manual migration by creating a project from scratch.
1. Updating via Dependencies (Composer)
The standard method consists of modifying the existing project's composer.json file following the directives of the official Laravel migration guide. The framework's development team meticulously details the breaking changes between consecutive versions.
The basic process requires raising the version of the framework's core packages and their associated dependencies, followed by executing the update command:
// Conceptual modification in composer.json for Laravel 13
"laravel/framework": "^13.0",
"nunomaduro/collision": "^8.0"
composer updateAlthough this approach is usually straightforward for projects with standard dependencies, the official guide may fall short if the application implements third-party packages that have not adapted as quickly to the framework's new major version.
1.5. Automated Update with Laravel Bus
A modern alternative that leverages artificial intelligence in the workflow is the use of Laravel Bus. By integrating this tool into your projects, you gain access to specialized commands designed to automate source code refactoring and updating tasks based on the new framework specifications:
php artisan bus:upgrade --version=13This command is not limited to modifying versioning in configuration files; it intelligently inspects the source code to rewrite obsolete syntax and automatically adapt the project to new Laravel standards. This suite of tools significantly mitigates the time lag of traditional AI models, adapting the code directly to the developer's specific needs.
The Problem of Legacy Applications (Legacy Context)
The main drawback of updating a project solely by bumping Composer dependencies is the leftover code carried over from previous versions. Laravel has a history of introducing tools that, over time, are replaced or deprecated, such as Laravel UI, Jetstream, or early versions of Laravel Breeze.
Although the framework's core continues to support these tools in new versions, an incrementally updated project does not adopt modern architectural features by default (such as using Flux or Livewire 4 in recent versions). The result is a hybrid application that mixes old components with new libraries. This increases architectural noise, makes it difficult to consult recent technical documentation, and fosters highly specific compatibility errors between system dependencies.
2. Manual Migration From Scratch: When to Implement It
The second methodology consists of initializing a clean project using the most recent version of Laravel Installer (or integrated environment management tools) and progressively moving the old application's code to the new environment.
It is essential to verify that the server or local environment meets the minimum requirements of the new version (for example, the most recent PHP versions). Although this approach requires a higher volume of work, it offers an ideal opportunity to:
- Perform a deep cleanup of obsolete code.
- Refactor business logic toward best practices.
- Adopt the framework's new default standards (for example, the transition in Livewire toward single-file components or single-file components).
Recommendation: The Hybrid Approach
Rebuilding the application from scratch with every annual release is neither viable nor efficient. Therefore, it is recommended to adopt a hybrid model based on the impact of the new version:
| Project Scenario | Recommended Strategy | Main Benefit |
|---|---|---|
| Minor changes between consecutive versions (e.g., Laravel 11 to 12). | Update via Composer / Laravel Bus | Speed and continuity of the development workflow without halting production. |
| Releases with radical changes or accumulated changes over 2 to 3 years. | Manual Migration From Scratch | Elimination of technical debt, updates to secondary libraries, and structural optimization. |
By implementing this periodic update cycle, we guarantee that the software does not become an outdated and difficult-to-maintain application, ensuring maximum stability and taking full advantage of the competitive benefits offered by the framework.
Conclusions
And that concludes this first entry on how to take the first steps with Laravel, where we have already installed the necessary tools and software to create the application in Laravel, learned about the structure of a project, introduced the command line known as artisan, and of course, the use of forms in Laravel.
Next step, your first Hello World in Laravel 13.