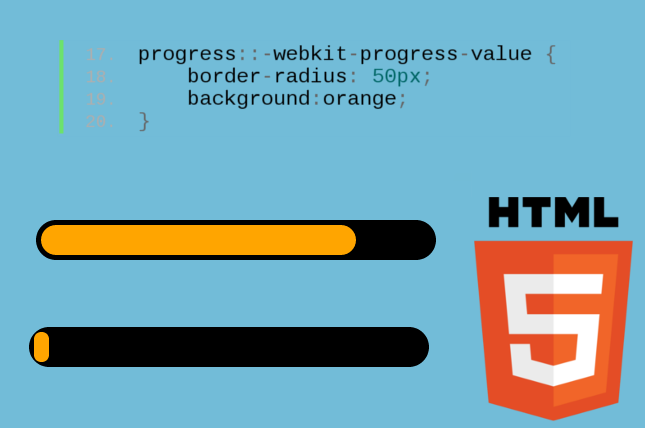
When building interfaces that need to show progress—especially step-by-step forms, which is where I use it most—I always opt first for the native HTML5 progress bar: the <progress> element.
The HTML5 progress bar is lightweight, accessible, easy to style, and doesn't require external libraries. It is one of those solutions that the browser already comes with resolved by default, and that many developers overlook looking for third-party plugins.
In this article, I explain everything you need to know to master it: attributes, states, CSS, JavaScript, accessibility, and a complete ready-to-use example.
Previously we looked at the HTML5 meter element.
What is an HTML5 Progress Bar and what is it used for?
A progress bar is a visual indicator showing how much of a task has been completed. The great thing about the <progress> element is that HTML5 includes it as a native component, capable of representing both determined progress (when we know the exact percentage) and indeterminate progress (when the process is underway but we don't know how much is left).
The function of the
progresselement or tag is to indicate the completion status of a task.
The <progress> tag and its main purpose
Its basic syntax is as follows:
<progress></progress>Like most tags in HTML, it features an opening tag <progress> and a closing tag </progress>. By itself and without attributes, the bar automatically enters indeterminate mode (we will see this later).
Being a progress bar, the most common approach is to add a completion value to it:
<progress value="50" max="100"></progress>This represents that the task is 50% complete. The value attribute indicates current progress, while max defines the required total.
When to use progress bars (and when not to)
They are useful for:
- File uploads and downloads.
- Server waiting processes.
- Steps of a multi-step form.
- Background tasks (imports, data processing, etc.).
It makes no sense to use it to indicate a range measurement or scale (for example, a battery level or temperature). For that, the <meter> element exists, which is semantically more appropriate.
Attributes of the progress tag
Apart from the global attributes for all tags (class, id, etc.), and unlike the <meter> element, the <progress> element only possesses two specific attributes according to the W3C:
value: Specifies how much of the task has been completed. It is a floating-point number representing the current value. It must be between0.0and the value ofmax, or between0.0and1.0if themaxattribute is not present.max: Specifies how much represents the total task; that is, the maximum possible value for thevalueattribute. It must be greater than0.0. If not specified, its default value is1.0.
States of the progress element
The <progress> element can be in two states: determined and indeterminate. Understanding the difference is key to choosing which one to use in each situation.
Determined state of the Progress Bar
For the progress bar to be in a determined state, the value attribute must be present. The browser will calculate the progress percentage automatically based on the ratio between value and max.
<progress value="0.5"></progress>Indeterminate state of the Progress Bar
For the bar to enter an indeterminate state, simply omit the value attribute, or remove it with JavaScript using removeAttribute('value'). The browser will display a continuous progress animation without a defined percentage.
A practical case: imagine you have a progress bar on your page and you lose server connection. Your JavaScript code should detect that state and remove the value attribute, indicating to the user that there was a communication problem or that the process is waiting, without making it look like the bar got frozen.
<progress></progress>General rules of the Progress Bar (summary)
- All mentioned attributes are floating-point numbers greater than
0.0. - The
maxattribute must be greater than0.0. - According to the definitions of each attribute, the following expressions are true:
0.0 <= value <= 1.0(ifmaxis not specified).0.0 <= value <= max(ifmaxis specified).
Syntax of <progress>: value and max attributes explained
How the determined state works
A bar is determined when it includes the value attribute. The browser renders the bar filled proportionally to the ratio value / max.
Example at 40%:
<progress value="40" max="100"></progress>If you don't add max, its default value is 1, and you can use decimals to express the percentage as a fraction:
<progress value="0.4"></progress>How the indeterminate state works
If you remove the value attribute, the browser displays an unknown progress animation (a continuous sweep effect). This is useful when a process depends on an external server and you don't know how long it will take.
<progress></progress>I use it when a process depends on an external server and I don't know how much is left. In fact, during a development project I had to remove value temporarily to indicate that the system was awaiting a response… and it worked perfectly so the user understood there was no error yet.
Best practices to avoid common mistakes
- Do not use negative values in
valueormax. valueshould never exceedmax; if it does, browser behavior is undefined.- If you use decimals, respect the standard: between
0and1when you don't definemax. - If you update
valuewith JavaScript, always validate that the calculated value is within the allowed range before assigning it.
Styling the progress tag
The <progress> element is stylable with CSS, although it requires browser-specific pseudo-elements to customize its interior. Below are the most important ones:
| Pseudo-element / Pseudo-class | Description |
|---|---|
::-webkit-progress-bar | Defines the style of the bar container (track) in Chrome and Safari. |
::-webkit-progress-value | Defines the style of the bar fill (current value) in Chrome and Safari. |
::-moz-progress-bar | Defines the style of the bar fill in Firefox. |
Styling the progress bar with CSS
Native styling works, but it is usually basic and varies significantly across browsers. To customize properly, you must first reset default appearance with -webkit-appearance: none:
progress {
 -webkit-appearance: none;
 appearance: none;
 width: 100%;
 height: 20px;
}
WebKit and Firefox pseudo-elements
For Chrome and Safari:
progress::-webkit-progress-bar {
 background: #eee;
 border-radius: 6px;
}
progress::-webkit-progress-value {
 background: #4caf50;
 border-radius: 6px;
}
For Firefox:
progress::-moz-progress-bar {
 background: #4caf50;
 border-radius: 6px;
}
Colors, sizes, and custom styles
Thanks to these pseudo-elements, you can create bars that are:
- Rounded with
border-radius. - Gradient-styled using
background: linear-gradient(...). - Animated with smooth transitions.
- Ultra-thin "YouTube" style (adjusting
heightto 3–4px).
For example, to visually smooth out value increments:
progress[value]::-webkit-progress-value {
 transition: width .4s ease;
}
That transition makes progress feel smooth rather than abrupt, noticeably enhancing user experience.
Example 1: without max attribute
This first example shows the case where the max attribute is not present, so it takes its default value of 1.0. The value attribute must then be a decimal between 0.0 and 1.0.
Additionally, a script is used to vary the value of the <progress> element over time and appreciate its animation and behavior.
<progress id="progress1" value="0" ></progress>To view the complete code for the experiment, click here.
Example 2: with value and max attributes
This example uses both attributes explicitly: value for current progress and max for total. With max="100" we can work with integer values from 0 to 100, which is more intuitive for representing percentages.
<progress id="progress2" max="100" value="0" ></progress>To view the complete code for the experiment, click here.
Example 3: customizing the bar with CSS
We can customize the progress tag in various ways: changing border-radius, background, padding, and many other properties. Below is an example with styles applied for both Chrome/Safari (::-webkit-progress-bar, ::-webkit-progress-value) and Firefox (::-moz-progress-bar):
progress {
	display:block;
	-webkit-appearance: none;
}

progress::-webkit-progress-bar {
	background: black;
	border-radius: 50px;
	padding: 2px;
}
progress::-moz-progress-bar {
	background: black;
	border-radius: 50px;
	padding: 2px;
}

progress::-webkit-progress-value {
	border-radius: 50px;
	background:orange;
}
To view the complete code for the experiment, click here.
Update the Progress Bar with JavaScript
Change value dynamically
Modifying the value of a progress bar with JavaScript is straightforward. Simply access the element and assign a new value to its .value property:
const bar = document.querySelector('progress');
bar.value = 70;
To switch to the indeterminate state from JavaScript, simply remove the attribute:
bar.removeAttribute('value');Animate the progress bar
Ideal for background processes that gradually increment the value:
setInterval(() => {
 if (bar.value < bar.max) bar.value++;
}, 100);
Example: real-time updating progress bar
In my step-by-step forms, I update the bar when the user completes a section. This small helper centralizes the logic:
function setStepProgress(step, totalSteps) {
 const bar = document.getElementById('form-progress');
 bar.value = step;
 bar.max = totalSteps;
}
That simple snippet makes the user feel they are making progress. The difference in form drop-off rates is remarkable when users can see their progress at all times.
Progress Bar in multi-step forms
This is precisely the reason I use <progress> almost daily. When forms have 3, 4, or 5 steps, showing users where they are significantly increases completion rates. The perception of advancement reduces the feeling of effort.
How to calculate step-by-step progress
The logic is straightforward: assign the total number of steps to max and the current step to value. If you have 4 steps:
- Step 1 →
value="1" - Step 2 →
value="2" - Step 3 →
value="3" - Step 4 →
value="4"
And max="4".
Practical example: progress bar for multi-step form
Below is a complete example combining the progress bar with a <label> to show the current step, and a JavaScript script managing navigation between steps:
<progress id="form-progress" value="1" max="4"></progress>
<div class="step step-1">Contenido del paso 1…</div>
<div class="step step-2" style="display:none">Paso 2…</div>
<div class="step step-3" style="display:none">Paso 3…</div>
<div class="step step-4" style="display:none">Paso 4…</div>
<button id="next">Siguiente</button>

<script>
let step = 1;
document.getElementById('next').addEventListener('click', () => {
 const totalSteps = 4;
 if (step < totalSteps) {
   document.querySelector('.step-' + step).style.display = 'none';
   step++;
   document.querySelector('.step-' + step).style.display = 'block';
   setStepProgress(step, totalSteps);
 }
});
function setStepProgress(step, total) {
 const bar = document.getElementById('form-progress');
 bar.value = step;
 bar.max = total;
}
</script>
UX tips based on real experience
- Showing current step over total (e.g., "Step 2 of 4") increases clarity and reduces user anxiety.
- Bars that advance smoothly (with CSS transitions) build more trust than those jumping abruptly.
- I noticed that when using a bar without a numeric percentage, users moved faster: the visual sense of progress is sufficient motivation.
Accessibility: how to make an accessible Progress Bar
The <progress> element already has built-in semantics that screen readers understand. Even so, reinforcing it with ARIA attributes is good practice to guarantee an accessible experience in all contexts:
<label for="task-progress">Progreso de carga:</label>
<progress id="task-progress" value="40" max="100"
 aria-valuenow="40"
 aria-valuemin="0"
 aria-valuemax="100">
 40%
</progress>
Quick accessibility tips:
- Always use a
<label>linked to the element via theforattribute. - Add fallback text inside the element (for example, "40%") for very old browsers or contexts without support.
- Maintain good contrast between the bar color and the track background.
- When updating
valuewith JavaScript, updatearia-valuenowas well to keep screen readers in sync.
Cross-browser compatibility
- Chrome, Firefox, Edge, and Safari support
<progress>natively. - Visual differences exist between browsers, but you can normalize them completely using the CSS pseudo-elements described earlier.
- On mobile devices it works well natively, but it helps to give it more height (at least
12–16px) to make it more visible and comfortable to interact with on touch screens.
Complete example: Animated HTML5 Progress Bar with JavaScript and CSS
In this complete example, we see how to combine HTML, CSS, and JavaScript to create an animated progress bar simulating a loading process using requestAnimationFrame:
<label for="demo-progress">Progreso:</label>
<progress id="demo-progress" value="30" max="100"></progress>

<script>
function simulate() {
 const bar = document.getElementById('demo-progress');
 if (bar.value < bar.max) {
   bar.value += 1;
   requestAnimationFrame(simulate);
 }
}
simulate();
</script>

<style>
progress {
 width: 100%;
 height: 20px;
 -webkit-appearance: none;
 appearance: none;
 border-radius: 8px;
}
progress::-webkit-progress-bar {
 background: #eee;
 border-radius: 8px;
}
progress::-webkit-progress-value {
 background: #ff8a00;
 border-radius: 8px;
 transition: width .3s ease;
}
progress::-moz-progress-bar {
 background: #ff8a00;
 border-radius: 8px;
}
</style>
Notice the use of requestAnimationFrame instead of setInterval: it is more efficient because the browser synchronizes it with the repaint cycle, avoiding unnecessary updates when the tab is in the background.
Frequently asked questions about the HTML5 Progress Bar
- How does the
<progress>tag work?- It visually displays the progress of a task using the
valueandmaxattributes. The browser calculates the percentage automatically.
- It visually displays the progress of a task using the
- What happens if I don't set
value?- The bar enters indeterminate mode, showing continuous motion without a defined percentage.
- How do I update the bar with JavaScript?
- Select the element and modify its
.valueproperty directly.
- Select the element and modify its
- How do you make a bar for a multi-step form?
- Assign the current step number to
valueand total steps tomax.
- Assign the current step number to
- How do I make it accessible?
- Use ARIA attributes:
aria-valuenow,aria-valuemin,aria-valuemax, and link a<label>to the element.
- Use ARIA attributes:
- How do I style it to look consistent across browsers?
- Reset with
-webkit-appearance: noneand apply styles using the pseudo-elements::-webkit-progress-bar,::-webkit-progress-value, and::-moz-progress-bar.
- Reset with
Conclusions
The HTML5 progress bar is one of those tools that the browser brings ready to use and that, properly applied, has a real impact on user experience. You don't need an external library to show progress: with the <progress> element, two attributes (value and max), a bit of CSS, and a few lines of JavaScript, you have everything you need.
Use it in file uploads, background processes, or multi-step forms, and you will notice how users feel more oriented and less likely to abandon the flow.
Next step: how to use the dialog element in HTML5.