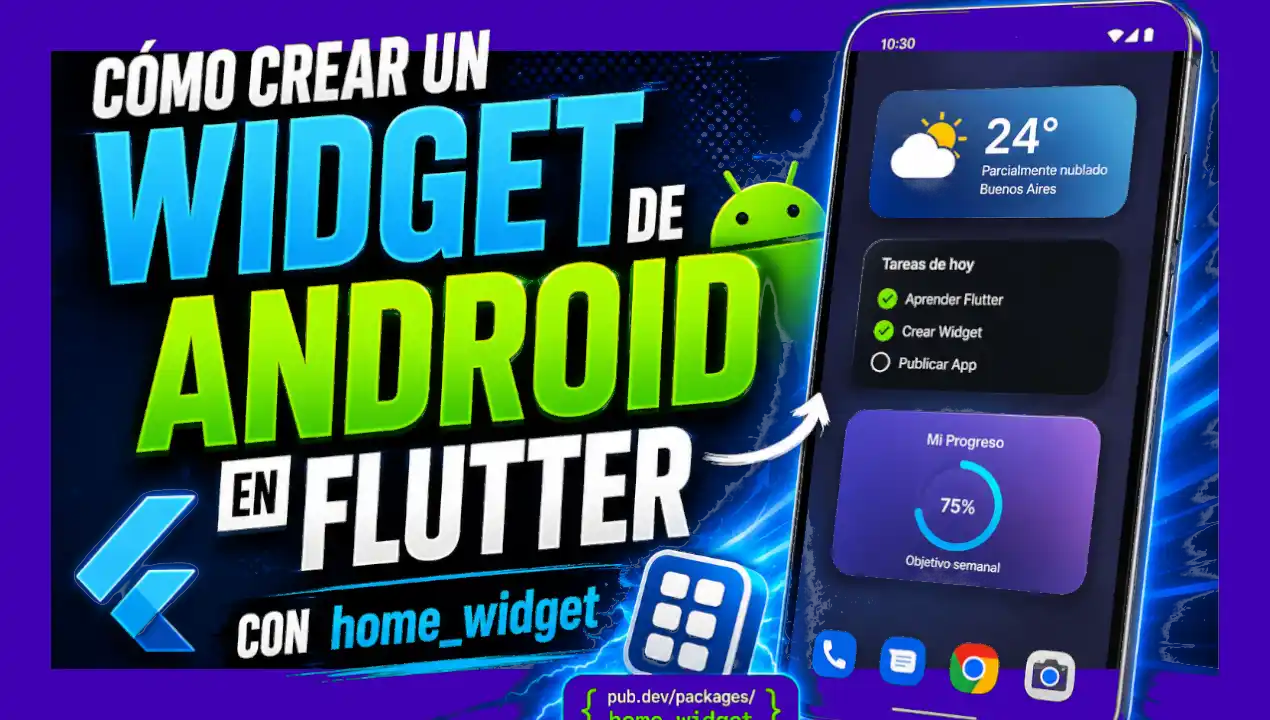
Android home screen widgets are one of the most requested features by users. They allow displaying relevant information from your application directly on the device's home screen, without needing to open the app. In this article, you will learn how to create a native Android widget in your Flutter project using the home_widget package, achieving seamless synchronization between your app's data and what is displayed on the home screen.
We are going to build a real widget: a streak counter that displays how many consecutive days the user has used the application. The widget will update automatically whenever the value changes within the Flutter app.
Earlier we saw how to create PRIVATE Packages in Flutter with Git to reuse as dependencies in your apps
Prerequisites
- A functional Flutter project with Android support.
- Basic knowledge of Dart, Kotlin, and XML for Android layouts.
- Flutter SDK 3.10 or higher.
- Android SDK compileSdk 33 or higher.
Step 1: Install the home_widget package in Flutter
The home_widget package is the key piece connecting your Flutter application with Android's native widget system. This package handles storing data in SharedPreferences on the native side and sending update signals to the widget when data changes.
Open your pubspec.yaml file and add the dependency:
dependencies:
  flutter:
    sdk: flutter
  home_widget:
Then run in your terminal:
$ flutter pub getWith this, the package will be installed and ready to be used in both Dart and native Android code.
Step 2: Create the widget visual design (XML Layout)
Android widgets use a remote views system (RemoteViews), which means the layout is defined using a traditional Android XML file, not Flutter's widget system. Only a subset of views is allowed: LinearLayout, RelativeLayout, TextView, ImageView, among others.
2.1 Create the layout file
Create the file in the following path of your project:
android/app/src/main/res/layout/streak_widget.xmlThis file defines the visual structure that users will see on their home screen. Below is the complete code:
<?xml version="1.0" encoding="utf-8"?>
<RelativeLayout xmlns:android="http://schemas.android.com/apk/res/android"
    android:layout_width="match_parent"
    android:layout_height="match_parent"
    android:padding="12dp"
    android:id="@+id/widget_container">

    <LinearLayout
        android:layout_width="match_parent"
        android:layout_height="match_parent"
        android:orientation="vertical"
        android:gravity="center"
        android:background="@drawable/widget_background"
        android:elevation="6dp">

        <ImageView
            android:id="@+id/widget_icon"
            android:layout_width="48dp"
            android:layout_height="48dp"
            android:src="@mipmap/launcher_icon"
            android:layout_marginBottom="8dp" />

        <TextView
            android:id="@+id/streak_text"
            android:layout_width="wrap_content"
            android:layout_height="wrap_content"
            android:text="0"
            android:textColor="#FFFFFF"
            android:textSize="36sp"
            android:textStyle="bold"
            android:fontFamily="sans-serif-black"
            android:includeFontPadding="false"
            android:shadowColor="#40000000"
            android:shadowDx="1"
            android:shadowDy="2"
            android:shadowRadius="3" />

        <TextView
            android:id="@+id/streak_label"
            android:layout_width="wrap_content"
            android:layout_height="wrap_content"
            android:text="STREAK DAYS"
            android:textColor="#F3E5F5"
            android:textSize="11sp"
            android:textStyle="bold"
            android:fontFamily="sans-serif-medium"
            android:letterSpacing="0.05"
            android:layout_marginTop="2dp" />
    </LinearLayout>
</RelativeLayout>
Let's analyze the key points of this layout:
@+id/widget_container: The main container of the widget. We will use this ID later to assign a click event that opens the application.@+id/streak_text: TheTextViewthat will display the numerical value of the streak. This is the ID we will update dynamically from Kotlin with the synchronized value from Flutter.@+id/streak_label: The descriptive label below the number.@drawable/widget_background: A custom background defined as an XML drawable, which we will look at in the next step.
2.2 Create the widget background (drawable)
To make the widget look professional and attractive, we create a background with a color gradient and rounded corners. Create the file:
android/app/src/main/res/drawable/widget_background.xmlWith the following content:
<?xml version="1.0" encoding="utf-8"?>
<shape xmlns:android="http://schemas.android.com/apk/res/android"
    android:shape="rectangle">
    <gradient
        android:angle="135"
        android:centerColor="#8E24AA"
        android:endColor="#4A148C"
        android:startColor="#AB47BC"
        android:type="linear" />
    <corners android:radius="24dp" />
</shape>
This drawable creates a rectangle with a linear gradient going from light purple (#AB47BC) to dark purple (#4A148C), with 24dp rounded corners. The 135-degree angle produces a diagonal gradient that gives the widget a modern look.
Step 3: Configure widget metadata (appwidget-provider)
Android requires a metadata XML file to inform the operating system about the widget's characteristics: its minimum size, update frequency, initial layout, and resizing behavior.
Create the file in:
android/app/src/main/res/xml/streak_widget_info.xmlWith the following content:
<?xml version="1.0" encoding="utf-8"?>
<appwidget-provider xmlns:android="http://schemas.android.com/apk/res/android"
    android:minWidth="110dp"
    android:minHeight="40dp"
    android:updatePeriodMillis="86400000"
    android:initialLayout="@layout/streak_widget"
    android:resizeMode="horizontal|vertical"
    android:widgetCategory="home_screen">
</appwidget-provider>
Explanation of each attribute:
android:minWidthandandroid:minHeight: Define the minimum size of the widget on the home screen grid. Android converts these values into grid cells.android:updatePeriodMillis: Defines how often (in milliseconds) the system will call theonUpdatemethod of the widget provider. The value 86400000 equals 24 hours. Note that Android does not guarantee updates more frequent than every 30 minutes. However, in our case, primary updates will arrive programmatically from Flutter throughhome_widget, not from this timer.android:initialLayout: References the layout file created in Step 2. This is the layout Android will use to render the widget.android:resizeMode: Allows the user to resize the widget horizontally and vertically.android:widgetCategory: Indicates that this widget is meant for the home screen (home_screen).
Step 4: Create the AppWidgetProvider in Kotlin
The AppWidgetProvider is the native Android class responsible for receiving widget update events and rendering data to the view. This is where reading data synchronized from Flutter takes place.
Create the file in the path matching your Kotlin package:
android/app/src/main/kotlin/your/package/app/StreakWidgetProvider.ktComplete code:
package your.package.app

import android.appwidget.AppWidgetManager
import android.appwidget.AppWidgetProvider
import android.content.Context
import android.widget.RemoteViews
import es.antonborri.home_widget.HomeWidgetLaunchIntent
import es.antonborri.home_widget.HomeWidgetPlugin

class StreakWidgetProvider : AppWidgetProvider() {
    override fun onUpdate(
        context: Context,
        appWidgetManager: AppWidgetManager,
        appWidgetIds: IntArray
    ) {
        for (appWidgetId in appWidgetIds) {
            val views = RemoteViews(context.packageName, R.layout.streak_widget)

            // Get synchronized data from Flutter via home_widget
            val widgetData = HomeWidgetPlugin.getData(context)
            val streakValue = widgetData.getInt("streak", 0)

            // Update the TextView with the streak value
            views.setTextViewText(R.id.streak_text, streakValue.toString())

            // Create an Intent to open the app when tapping the widget
            val pendingIntent = HomeWidgetLaunchIntent.getActivity(
                context,
                MainActivity::class.java
            )
            views.setOnClickPendingIntent(R.id.widget_container, pendingIntent)

            // Apply changes to the widget
            appWidgetManager.updateAppWidget(appWidgetId, views)
        }
    }
}
Let's break down the most critical parts of this class:
Reading data with HomeWidgetPlugin.getData()
The most crucial lines in the entire file are:
val widgetData = HomeWidgetPlugin.getData(context)
val streakValue = widgetData.getInt("streak", 0)
The HomeWidgetPlugin.getData(context) method returns the SharedPreferences instance used internally by home_widget to store data sent from Flutter. This is essential: do not use context.getSharedPreferences("custom_name", ...) to read data, because data saved from Flutter using HomeWidget.saveWidgetData() is stored in a specific preference file managed by the package, not an arbitrarily named one.
If an incorrect SharedPreferences name is used, the widget will consistently show the default value (in this case, 0), as it will be reading from an empty file.
Opening the app on click
HomeWidgetLaunchIntent.getActivity() is a utility from home_widget that generates a properly configured PendingIntent to open your Flutter MainActivity when the user taps the widget. We then attach this intent to the main container using setOnClickPendingIntent().
Update loop
The for (appWidgetId in appWidgetIds) loop is necessary because users may place multiple instances of the same widget on their home screen. Each instance must be updated individually.
Step 5: Register the widget in AndroidManifest.xml
For Android to recognize your widget, declare it as a receiver inside the <application> tag of AndroidManifest.xml:
android/app/src/main/AndroidManifest.xmlAdd the following block inside <application>, below existing meta-data entries:
<receiver android:name=".StreakWidgetProvider" android:exported="true">
    <intent-filter>
        <action android:name="android.appwidget.action.APPWIDGET_UPDATE" />
    </intent-filter>
    <meta-data android:name="android.appwidget.provider"
        android:resource="@xml/streak_widget_info" />
</receiver>
Registration key points:
android:name=".StreakWidgetProvider": The name of the Kotlin class we created. The leading dot specifies it is within the root package declared in the namespace.android:exported="true": Required so Android's widget system can communicate with your receiver.APPWIDGET_UPDATE: The intent broadcast sent by the system whenever the widget needs an update.@xml/streak_widget_info: References the metadata file created in Step 3.
Step 6: Synchronize data from Flutter with home_widget
This is where everything comes together. From your Flutter application's Dart code, send updated data to the native widget whenever changes occur. The home_widget package writes the data to native SharedPreferences and triggers a broadcast to instruct Android to update the widget.
6.1 Create the Provider in Flutter
In this example, we use Provider's ChangeNotifier to manage streak state and synchronize it with the widget automatically:
import 'package:flutter/foundation.dart';
import 'package:home_widget/home_widget.dart';

class StreakProvider with ChangeNotifier {
  int _streak = 0;
  int get streak => _streak;

  StreakProvider() {
    loadStreak();
  }

  Future<void> loadStreak() async {
    // Fetch value from your data source (database, API, etc.)
    _streak = await getStreakFromYourDataSource();
    await _updateWidget();
    notifyListeners();
  }

  Future<void> incrementStreak() async {
    // Business logic to increment the streak
    await saveNewStreak();
    await loadStreak();
  }

  Future<void> _updateWidget() async {
    try {
      // 1. Save data to native SharedPreferences
      await HomeWidget.saveWidgetData<int>('streak', _streak);

      // 2. Notify the Android system to update the widget
      await HomeWidget.updateWidget(
        name: 'StreakWidgetProvider',
        androidName: 'StreakWidgetProvider',
      );
    } catch (e) {
      debugPrint('Error updating widget: $e');
    }
  }
}
6.2 Synchronization flow explanation
The _updateWidget() method performs two core operations:
HomeWidget.saveWidgetData<int>('streak', _streak): Writes the streak value to native Android SharedPreferences under the key'streak'. This key must match the key read in Kotlin withwidgetData.getInt("streak", 0).HomeWidget.updateWidget(name: 'StreakWidgetProvider', androidName: 'StreakWidgetProvider'): Sends anAPPWIDGET_UPDATEbroadcast to Android, executingonUpdate()insideStreakWidgetProvider. TheandroidNameparameter must match your Kotlin class name exactly.
Every time _updateWidget() is called:
- Flutter writes the data to native storage.
- Flutter requests Android to update the widget.
- Android invokes
onUpdate()in yourStreakWidgetProvider. - The Kotlin Provider reads the value from SharedPreferences and updates the view.
Step 7: Register the Provider in your application
In your main.dart file, register StreakProvider so it becomes available across your Flutter widget tree:
import 'package:provider/provider.dart';

void main() {
  runApp(
    MultiProvider(
      providers: [
        ChangeNotifierProvider(create: (context) => StreakProvider()),
        // ... your other providers
      ],
      child: const MyApp(),
    ),
  );
}
This ensures that whenever StreakProvider initializes on app launch, it fetches the updated streak value and synchronizes it with the home screen widget.
File structure summary
To maintain a clear overview of all files involved, here is the full directory layout:
your_project/
├── lib/
│   └── providers/
│       └── streak_provider.dart          ← Flutter Provider (sends data)
├── android/
│   └── app/
│       └── src/
│           └── main/
│               ├── AndroidManifest.xml    ← Receiver registration
│               ├── kotlin/your/package/app/
│               │   ├── MainActivity.kt
│               │   └── StreakWidgetProvider.kt  ← Native Provider (reads data)
│               └── res/
│                   ├── drawable/
│                   │   └── widget_background.xml  ← Widget background
│                   ├── layout/
│                   │   └── streak_widget.xml      ← Visual widget layout
│                   └── xml/
│                       └── streak_widget_info.xml ← Widget metadata
└── pubspec.yaml                           ← home_widget dependency
Common issues and how to resolve them
Issue: The widget always shows default value (0)
This is the most frequent issue. It occurs when Kotlin reads data from a different SharedPreferences file than the one home_widget wrote to. Always use HomeWidgetPlugin.getData(context) instead of context.getSharedPreferences("custom_name", Context.MODE_PRIVATE).
// ❌ INCORRECT: Reads from the wrong preference file
val prefs = context.getSharedPreferences("HomeWidgetPreferences", Context.MODE_PRIVATE)
val streakValue = prefs.getInt("streak", 0)

// ✅ CORRECT: Reads from home_widget's preference file
val widgetData = HomeWidgetPlugin.getData(context)
val streakValue = widgetData.getInt("streak", 0)
Issue: androidName mismatch
The androidName parameter in HomeWidget.updateWidget() must match your Kotlin class name exactly, without the package path. If your class is named StreakWidgetProvider:
// ✅ Correct
await HomeWidget.updateWidget(
  name: 'StreakWidgetProvider',
  androidName: 'StreakWidgetProvider',
);

// ❌ Incorrect
await HomeWidget.updateWidget(
  name: 'streak_widget',
  androidName: 'net.desarrollolibre.practicaingles.StreakWidgetProvider',
);
Issue: Key mismatch between Dart and Kotlin
The key string passed to HomeWidget.saveWidgetData<int>('streak', _streak) in Dart must match the string passed to widgetData.getInt("streak", 0) in Kotlin exactly. Case differences or accidental spaces will prevent retrieval.
Compilation Error: Incompatible JVM target
If compilation fails with "Cannot inline bytecode built with JVM target 11 into bytecode that is being built with JVM target 1.8", plugin subprojects are using a different JVM version than your application. Configure the root Android project's build.gradle.kts to enforce a uniform JVM version across all subprojects.
Tips to improve your widget
- Immediate updates: Call
_updateWidget()whenever relevant data changes, not only on application startup, to keep the widget synchronized at all times. - Error handling: Wrap update logic in a
try-catchblock. An update error should never disrupt standard application behavior. - Visual design: Use gradient drawables and rounded corners to integrate nicely with system aesthetics. Clean visual design increases the likelihood of users retaining the widget on their home screen.
- App icon: Include your application icon using
@mipmap/launcher_iconto reinforce brand identity and help users instantly connect the widget to your app. - Tap interaction: Always configure an intent so tapping the widget opens your application, enhancing overall user experience and navigation flow.
Conclusion
Building an Android widget in Flutter using the home_widget package involves working with native Android files (XML and Kotlin), but the architecture is straight forward once understood:
- The XML layout defines the visual presentation.
- The appwidget-provider XML defines system metadata and attributes.
- The Kotlin AppWidgetProvider reads stored values and updates UI elements.
- The Dart code writes values to storage and triggers system updates.
- The AndroidManifest.xml registers components with the Android OS.
The home_widget package bridges Flutter and native Android components by abstracting SharedPreferences management and system broadcasts. Following these steps allows integrating native home screen widgets for any Flutter application seamlessly.