Before we begin, let's quickly introduce what Flutter is.
In this post I want to summarize a bit about the Flutter ecosystem, so that you can get a quick explanation of what all this Flutter is about, what Flutter is and how an app is formed in Flutter.
This with the aim of introducing a new set of sections that we are going to work on in our Learn to create your first apps on Android and iOS course using a Rest Api in PHP with CodeIgniter; so, welcome to this section where we are going to learn how to get started with Flutter and how to create our first application with Flutter from scratch; that now we not only cover the following:
- Backend creation
- Creation of the Rest API
- Introduction to Kotlin
- Introduction to Swift
- Movie app development on Android and Android Studio
- Movie app development on iOS with xCode
Now to this we add the development of an app in Flutter, and with this we are complying with the extensions proposed at the beginning for this great course on creating mobile apps and connecting them to a Rest Api in PHP.
Reasons to build apps in Flutter
The huge advantage of developing apps in Flutter is that we can build for two different mobile operating systems with a single codebase; that is, with a single project you can create your applications for Android and iOS using the Flutter declarative interface and under the Dart programming language.
These two technologies, Dart as a programming language and Flutter as an SDK or graphical interface toolkit for creating natively compiled applications, that is, no webview for our mobile applications.
These two technologies are created by a single company, the mother or father of Android such as Google, therefore you can expect the combination of Dart with Flutter to be complete to create our applications on Android and of course iOS.

And proof of this is the compilation process, which is so fast that when we make a change in our code, the changes are reflected almost instantly in our emulator through Hot Reload technology, which is based on injecting the code that we have modified and in this way we can quickly experiment and create interfaces which is a huge advantage over current development with Android Studio using Kotlin or Java and Swift with xCode.
Added benefits of learning to code natively for Android and iOS from Dart and Flutter
Another advantage is that we only need to learn one programming language, Dart, to create our Android and iOS apps. Although at this point where we also know Kotlin and Swift for the development of mobile apps we won't have any problem and this also brings an advantage to us as developers, since by knowing more than the fundamentals on both mobile platforms, it will become more It is easy to create applications in Flutter with Dart, and that is because Flutter abstracts us from a large part of the code that we have to implement for the development of functionalities.
For this reason, if we did not know the traditional development on these platforms, this could bring us some problems since we might not know what the original behavior of the components that we try to implement is like and what we want to implement and how.
Declarative interface and Widgets
The way in which we can work with Flutter is through components, and these components can be anything, anything in the world of mobile apps, buttons, app bars, lists, texts, images and many more that exist and we will see the main ones in this course, but there are many that you can consult from the official website which we are going to use in this section.
These graphical interface elements are known as widgets, which are simply pieces of an interface that we can use and configure, in addition to using Material Design, which is a style route created by Google itself and is fully extensible and customizable.
What is Flutter?
To all these we have seen several clues about what this Flutter is about but I have not told you explicitly what is Flutter?:
Flutter is a framework for Dart and an SDK with UI elements.
Flutter is on the one hand an SDK for graphical interface elements and on the other hand it is also a framework for Dart that offers us a range of functionalities and components that we use to develop our mobile apps that allows us to create allows us to create apps in 2D (nothing of games), the typical ones that have the elements explained above through an SDK that is also a framework or toolkit for Dart (functions, classes, properties and of course the Widgets that we can use in Dart for free when using Flutter)

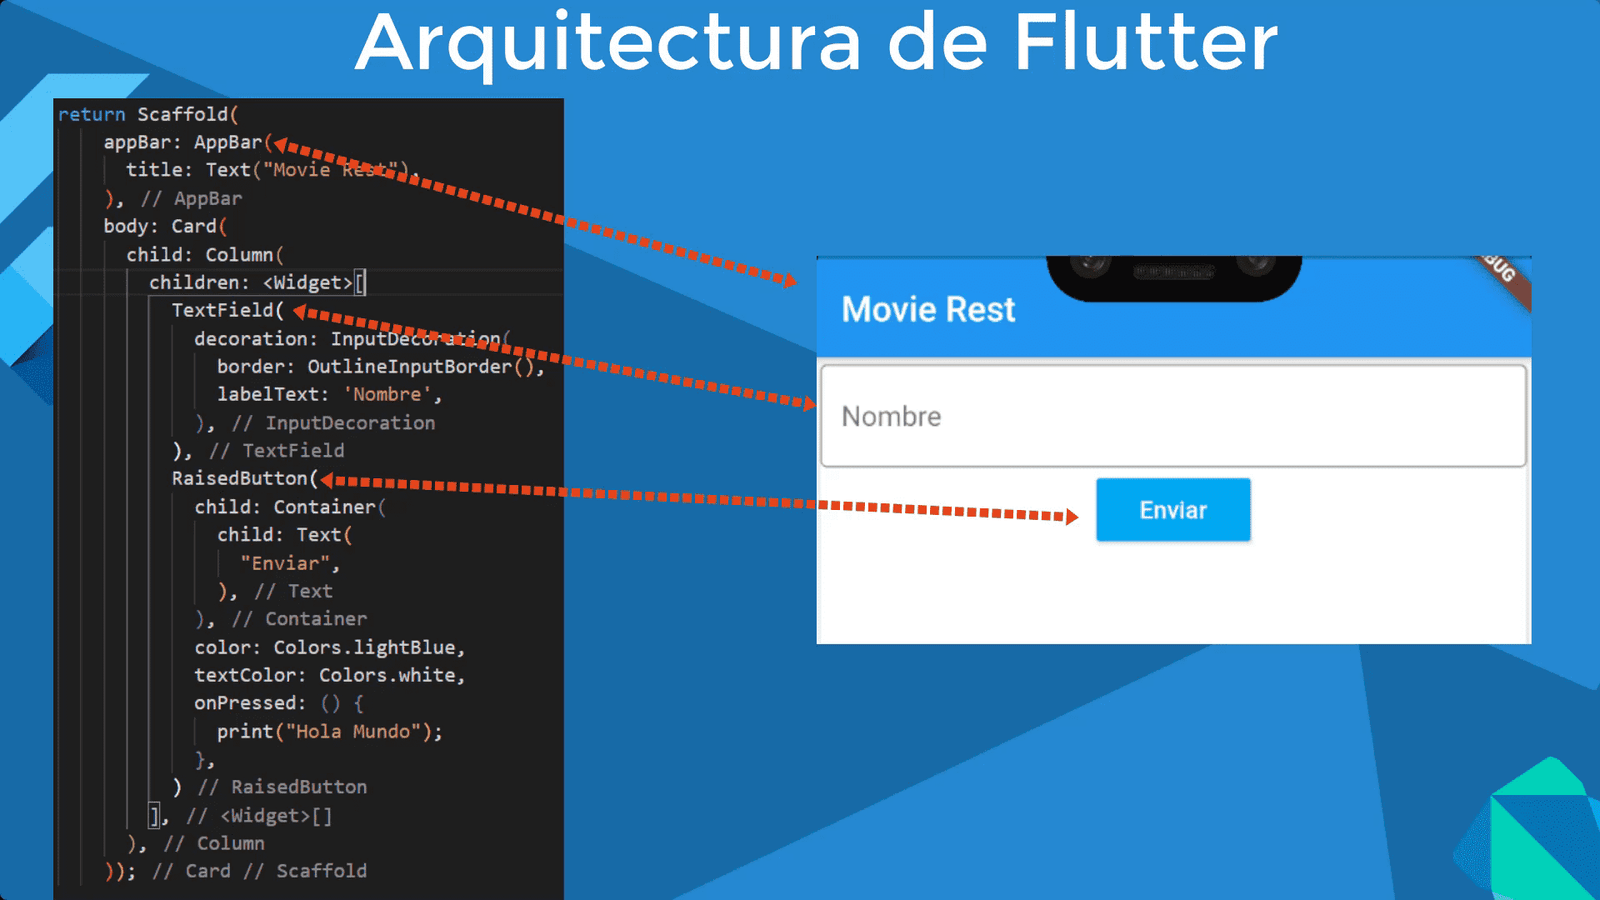
A simple flutter app looks like the following, as you can see we have these components known as widgets, which are the elements for our declarative interface that we can use from Dart through the Flutter framework:
Flutter is designed for any type of 2D app, such as note apps, calendars, maps, queries, as in the case of our application etc, but if you want something very specific like a game or use advanced graphical interface elements, Flutter is not It could help you since it is not designed for this.
Flutter widget tree architecture for an app
So that we can work in the next section, we must first know what the architecture of an app or project in Flutter is like, which, as we have said before, can be based on components called widgets, so we can have as many widgets as we want in our application. that start from a node or root or parent widgets, whatever you want to call it, then, in this tree of widgets together they form our application.
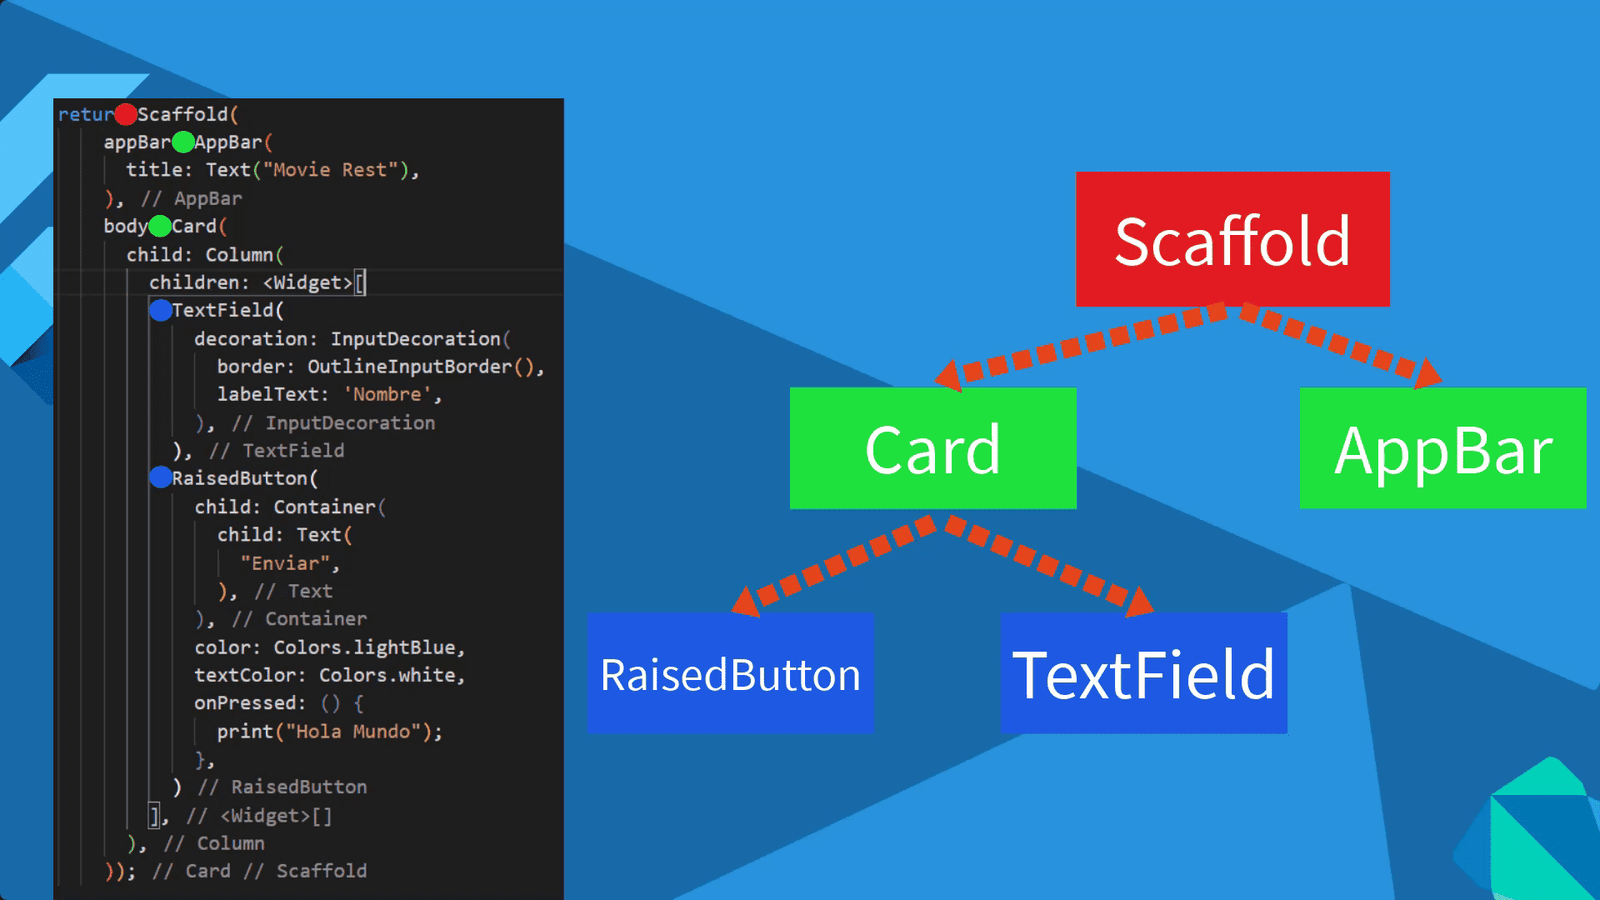
And as you can see, our widget tree has multiple levels. Another important point is that even if we have only one base project, optionally and depending on our requirements we can develop specific code for each platform.
Widgets in Flutter
Flutter was developed by Google to make sure there isn't a steep learning curve for an iOS developer or an Android developer when they want to go cross-platform.
Widgets are an essential part of the Flutter framework, which is a popular mobile app development platform created by Google. Flutter uses a widget-based approach to building apps, which means that the user interface (UI) is created by assembling widgets in a tree-like structure. Each widget represents a different visual element of the UI, such as buttons, text fields, images, and more. By combining these widgets, developers can create complex and dynamic UIs that are both visually appealing and easy to use.
One of the main benefits of using widgets in Flutter is that they are highly customizable and offer a wide range of functionality. Developers can use pre-built widgets that are included with the framework, or they can create their own custom widgets to meet specific design requirements. With Flutter, developers have access to a vast library of widgets that can be easily customized to fit the look and feel of their app.
There were pre-built widgets so developers didn't have to spend hours thinking about which code base to copy to the notepad and vice versa.
The core idea behind a widget is that once you've created your user interface using widgets, you can use these widgets to describe what the view should look like, along with its settings and state.
See how we can use a simple Flutter app to call the runapp() function with a widget; the minimal Flutter app simply calls the runApp() function with a widget:
import 'package:flutter/material.dart' ;

void main () {
 runApp(
     Center(
       child: Text(
         'Hello, world!'
         textDirection: TetDirection.ltr,
       ),
     ),
   );
}
The widget tree consists of two widgets, the center widget and its child, the text widget.
Some basic widgets are listed here for your immediate reference:
- Text
- Row
- Column
- Stack
- Container
There is a lot of free information available on the official Flutter widgets page, which you can find here.
The functionalities of a widget consist of anything from an application-wide framework (scaffold widget) to a simple animation.
Creating your first widget
Each widget has its own unique purpose. Imagine if as a developer, you should code an "action button" for a shopping app. You can use the code base of a Dart programming language and create a complete application in no time.
Context in Flutter
How to create a widget
To create any widget, the build method is used, which accepts the BuildContext as an argument.
BuildContext is a description of the widget's position in the widget tree and also brings a lot more information about the element we are rendering, such as the state, widget type, etc. It is this class that describes the parent-child relationship and allows to implement functions like showDialog, Theme.of and some other functions that allow to use the context of the parent widget, such as its size and location. BuildContext is used to avoid direct manipulation of the widget main and to get the necessary information that is contained in the main context.
What do you need to know about the context?
- The context is a link to the location of a widget in a tree structure of widgets.
- The context can belong to only one widget.
- If a widget has child widgets, the parent widget context becomes the parent context for the direct child contexts.
- A widget is visible only in its own context or in the context of its parent context.
Thus, it becomes clear that by knowing the context of the children, the parent widget can be easily found. Instead, using the parent context, you can find the child widget.
The "of()" method
As we already know, widgets in Flutter have a tree structure and can communicate with other widgets located both below and above the widget tree. The "communication" of widgets with each other is provided by the Of() method. Let's consider a small example:
@override Widget build(context) { return Text('Subscribe to the AppVesto Instagram!', style: TextStyle(color: Theme.of(context).primaryColor), ); }The of() method searches the widget tree for a parent widget that is of type Theme and uses its primaryColor property for the current widget. This is possible because Flutter knows the position of the Theme object in the tree relative to the current buildContext.
The of() method can be useful for many tasks, such as getting the screen size with MediaQuery.of(context) or navigating with Navigator.of(context). To create some widgets, like the snackBar, you need to use the closest Scaffold context so that Flutter can draw it correctly on the screen.
When you run the following code you will get an error: "Scaffold.of() called with a context that does not contain a scaffold."
A very particular example about how the context works and its importance to build certain widgets like the SnackBar one; it needs to be contained within a scaffold in order to be displayed; if there is no Scaffold there is NO life for the SnackBar.
What we will see in the extension of our course
The main objective of this section is to create a similar mobile app and with the same functionalities that we created in the previous sections, elements such as navigation between screens, data passing, lists with pagination and filters, login and authentication and much more will be treated. in this section, which cover more than just the basics of Flutter itself and no prior knowledge of Dart or Flutter is required as we'll cover that in the course as well.
Editors: Visual Studio Code with Flutter and Dart plugins
To create your apps in Flutter you can use Android Studio or derivatives that would be the IDEs of IntelliJ IDEA; You can also use Visual Studio Code, which is what we will use to develop our apps in Flutter using the official plugins that will allow us to create our apps in Flutter:
Flutter is Google's framework for creating applications for Android and iOS, leaving out apps for Windows on mobile devices; Flutter's policy is similar to that of other frameworks such as Xamarin in which we can create two applications for different platforms such as Android and iOS with a single project.
A strong point that Flutter has is that it is fast when developing applications for mobile devices, in addition to this, it allows you to create native applications for these platforms and not webapps, as is the case with Ionic; and for this reason we have applications with a better finish.
Another important point is the programming language used by Flutter; Flutter uses Dark, so we have to learn this object-oriented programming language, so we can create classes, in different files, and relate them to each other.
Another important point is that Flutter uses Material Design; therefore you will see that how many components created from our application, this automatically take the design of the Material Design.
Install Flutter on our computer
To install Flutter, the first thing to do is go to the official site and download the Install Flutter installer for your operating system.
The next page details the steps to install Flutter correctly on your computer; in the case of Windows:
Flutter Windows install.
Flutter Extension for Android Studio and Visual Studio Code
You must decide which IDE you are going to use if Android Studio or Visual Studio Code; in both IDEs you can install Flutter and start creating your applications; If you don't want to complicate yourself too much, you could use Android Studio, since when you install it you already have access to the Android Simulators automatically from the IDE itself.
Likewise, for both IDEs, once Flutter is installed on your computer, you must install the extension to be able to create projects with this Framework for Material Design in mobile applications on Android and iOS.
Creating our first application: Tutorial
Once you have your environment ready to work with Flutter; as we talked a bit in the previous section; We are going to start working with Flutter; we are going to use Android Studio and with this we are ready to continue with our little Flutter course or guide; Now it's your turn to start our application.
The first thing we will do is open the IDE that you have selected; In my case it will be Android Studio which, as we have already seen, is useful for much more than Kotlin and Android.
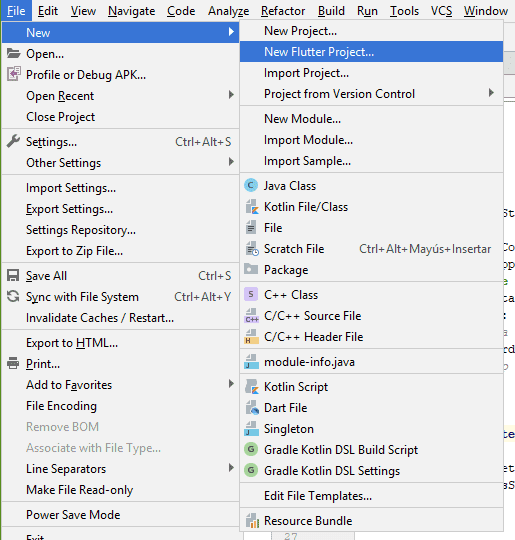
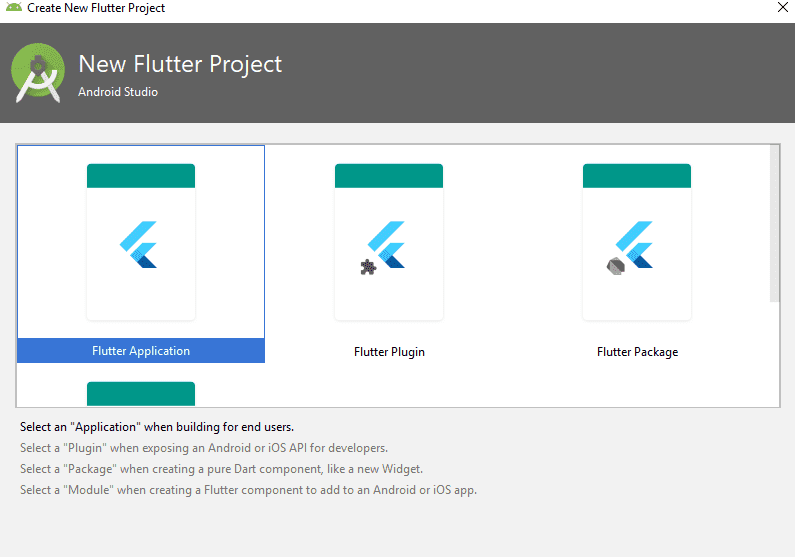
At this point we are ready to start creating our application; for that we go to File - New - New Flutter Project:
And we select the option that tells us Flutter Application:
Then we will have the typical window to define the parameters of our application; the name, location, of the SDK, of the project that we are going to create and little else:
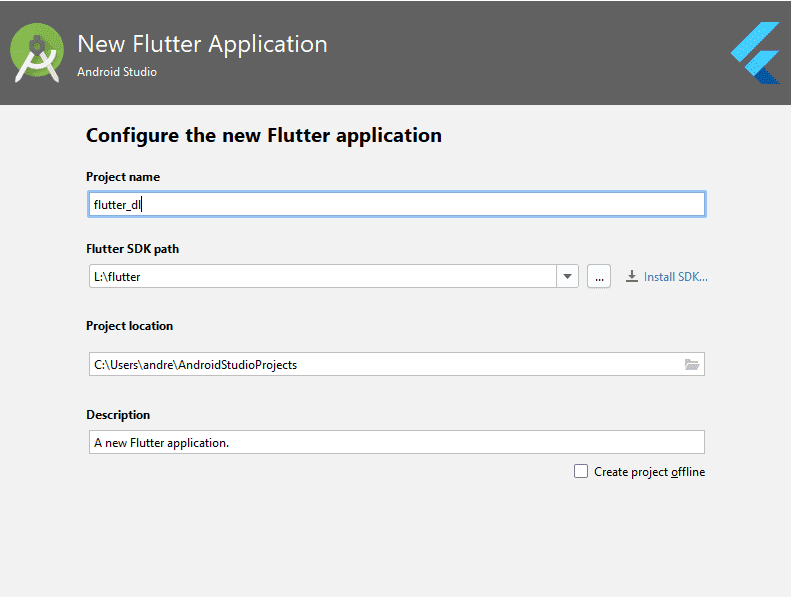
Once this is done, you hit next until Android Studio finishes configuring your project.
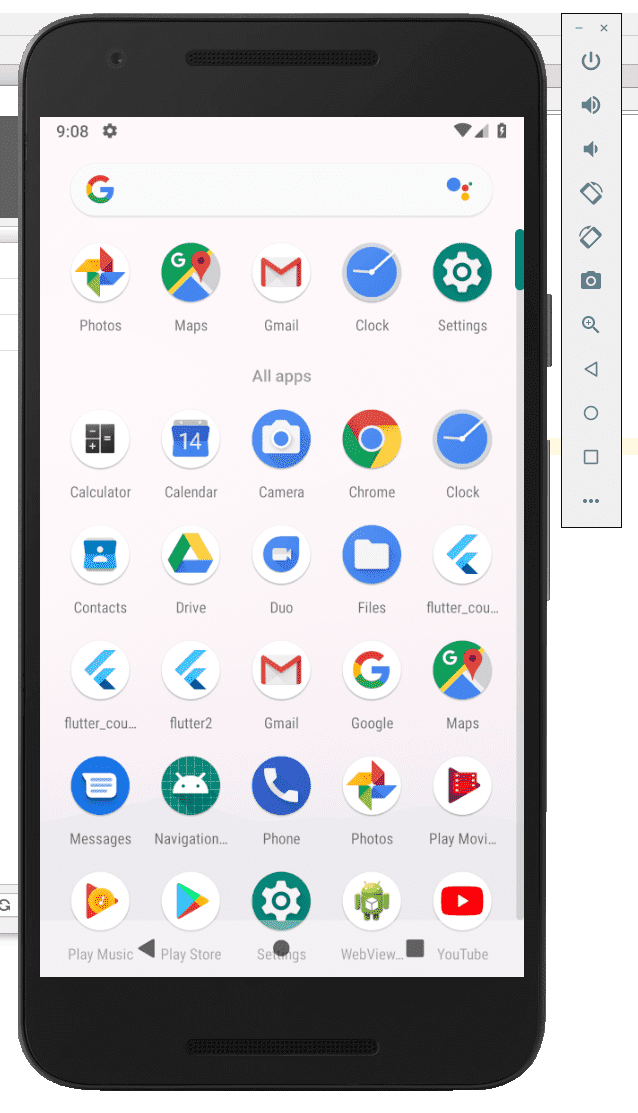
Once it is ready, try to run the application in a simulator, you will see the following message from Android Studio:
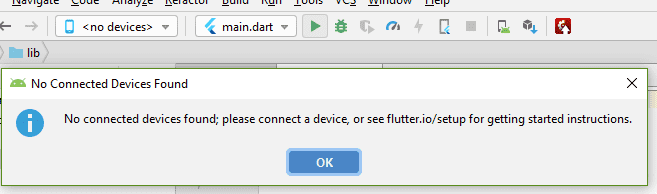
As you can see, it does not give us the option to run the Android Virtual Device or AVD for its acronym or anything, it only works if we connect an Android device to our PC which is already correctly configured as a development device; however, there is a "trick" to call it in some way to be able to use our Android Studio virtual devices.
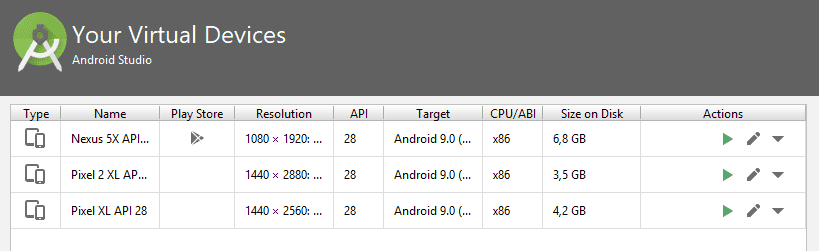
Running our Android emulator to debug in Flutter
As we indicated, you will go to AVD Manager and then launch your Android simulator that you have selected:

Now with this, you wait for the simulator to start and load and you can run your Android application that will be like the following:
Although also remember that you can use a physical device if you wish instead of a virtual one; this is useful when you do not have a team with many features.
Widgets in Flutter for everything
Then you run the application in the simulator that you already launched in the previous steps and you will see an application like the following:
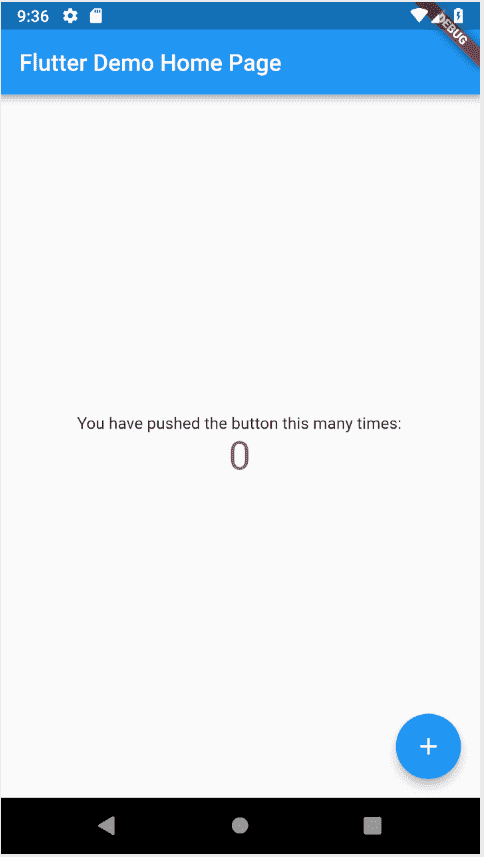
How you see is a kind of counter; the interface consists of the toolbar (1), the central body (2) and button (3) and a text (4); This is where we come in with the widget explanation; widgets are the cornerstone of Flutter application development.
All these numbers that we mentioned before are blocks that correspond to a Widget, which you can see as small applications that make up your application; and not only that, each of the 4 previous components are internally made up of more widgets; for example, in the case of the floating button, which by its nature is a widget, internally has an image component, to define the + that you see in it, which, as you can guess, is a widget; in summary; everything is a widget until the base element that can be a text or an image.
The widgets are a mechanism that allow us to develop the different components; everything in Flutter is a widget; and if EVERYTHING; if we analyze the previous image that our emulator sent us; each of the elements we highlight is a widget; there is a component for the most fundamental things we can do; even all that interface that we point out is contained in a large widget that is our application:
The MaterialApp to define as the base or home of our application
The first thing we are going to do is delete all the content of our main.dart which, as you can suppose, is the first file to be executed, it is the one that the Flutter SDK looks for when executing our application; it must return a special class called MaterialApp that expects as a parameter, what you can assume, a Widget, which we are going to implement next.
We are going to implement our first application in a separate class; which is the best way we have to develop new components; in other words, develop our own Widgets, that is, our application:
The first thing we are going to do is create a class in our main file, for that we use the reserved word class followed by the name of the class, which in our case will be MyFirstApp:
class MyApp
At the moment we have done very little, just define a class, but as you must already know at this point, this class needs a body, and not just any body; the classes that use visual interface components, in other words our widgets need something special, a type of the class that offers us elements that we can reuse to develop our components, and a starting point for our code (the build method); for this we must extend our class with a class that allows us to draw our widget tree!; for that we can use the StatelessWidget class, which is one of the simplest there is:
class MyApp extends StatelessWidget {
}
When we do this, the compiler will give us an error indicating that it expects something else, we must define our startup method, something similar when we are programming our applications for this platform in Android Studio we must indicate (once our appcompatactivity is defined) the methods of our life cycle of an Android app; here we must define a build method; that simple:
class MyApp extends StatelessWidget {
build(context) {

}
}
The same as once receives a parameter but we will see this later...
This is a special method where we can build our widget; It has also been our main method of our class, since at no time are we going to call it if the flutter SDK will not do it internally at the time of execution of our application.
Of course this method called build of the Flutter SDK has to do something, it has to define something interesting for our application; the first thing we are going to do is define an elementary method, which is actually a Widget, like everything here in Flutter; Said method or Widget is called MaterialApp to which we can define a home attribute so that it looks as follows:
class MyApp extends StatelessWidget {
build(context) {
	home: XXX
}
}
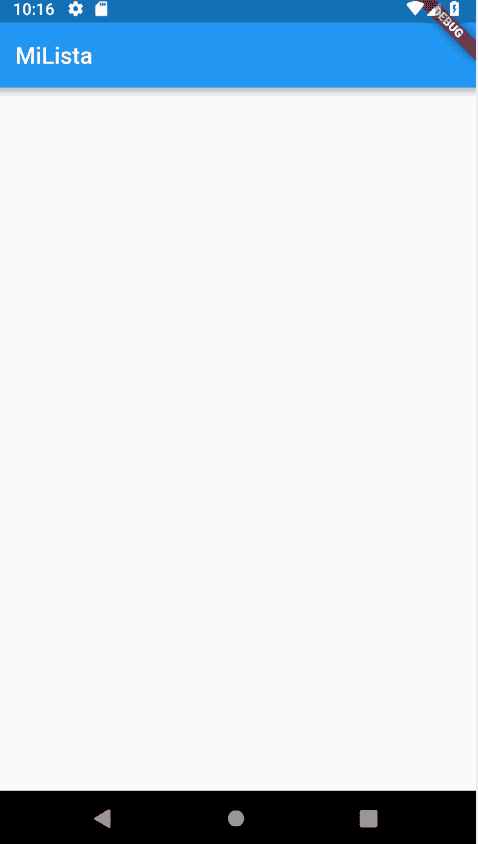
This attribute, as you must assume, receives a Widget, which in this case will be one called Scaffold that simply paints a blank screen like the following:
class MyApp extends StatelessWidget {
build(context) {
	home: Scaffold
}
}
This Scaffold Widget allows us to define the body of our application, we can define the entire screen through this container; in other words, we can define the header or the appBar and the body or body; the first thing we are going to define is the AppBar:
class MyApp extends StatelessWidget {
 build(context) {
   home: Scaffold(
       appBar: AppBar(
       title: Text("MiLista"),
   ),
   );
 }
}
As you can see, we simply define a new attribute called title which, as you can guess, receives a Widget that can be anything but the traditional text like the one we define here.
Of course, the build expects to return something, and that something must be our MaterialApp with everything we defined above:
void main() => runApp(MyApp());

class MyApp extends StatelessWidget {
  @override
  Widget build(BuildContext context) {
    // TODO: implement build
    return MaterialApp(
      home: Scaffold(
        appBar: AppBar(
          title: Text('MiLista'),
        ),
      ),
    );
  }
}
Also remember to place the main which is essential to run our application; since everything starts from here.
Now at this point you can run your application and you will see the following output:
Creating a letter or card in Flutter
The next thing we are going to define will be the body of our application, which is contained in our Widget called Scaffold; We are going to create one of these cards that are so cool on Android, one of the best things brought to us by the Material Design that Google adopted with Android 5 and later called Card Views; For that we are going to use a Widget as you should already know that it is called Card:
class MyApp extends StatelessWidget {
 @override
 Widget build(BuildContext context) {
   // TODO: implement build
   return MaterialApp(
     home: Scaffold(
       appBar: AppBar(
         title: Text('MiLista'),
       ),
     ),
   );
 }
}
How can you start realizing, everything is having more order, everything makes more sense and a Stack-type structure, where we add new components; as you probably already ventured, our Widget Card has some attributes that we can fill in, which would be the title and the image; so that you know how to work with images in Flutter from your assets folder, you can go to the last point in this article:
class MyApp extends StatelessWidget {
@override
Widget build(BuildContext context) {
// TODO: implement build
return MaterialApp(
home: Scaffold(
appBar: AppBar(
title: Text('MiLista'),
),
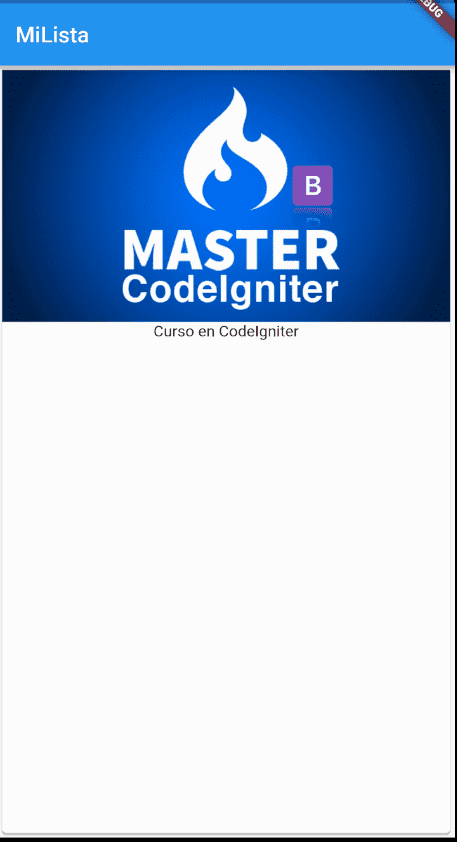
body: Card(
child: Column(
children: <Widget>[
Image.asset('assets/codeigniter.png'),
Text("Curso en CodeIgniter")
],
),
),
),
);
}
}
Here we use a new component or widget, in this case it is the one for the images; is a simple widget that specifies the image that we import into the assets folder.
In addition to this, we create a widget to be able to place a stack of widgets, for that is the Column helpers that as you can see implements a collection of widgets through an array of widgets.
Finally, when you run your app; you'll get:
Enabling our assets folder
In order to use resources in our Flutter project, we need to go to pubspec.yaml and uncomment the following lines:
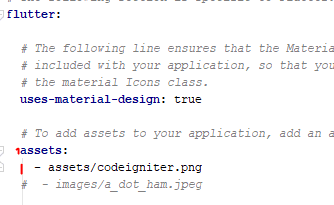
You have to be careful with the tabs since they are used since with them the name of the folder that you are going to create to throw resources in your project is defined, which in our case is called assets:
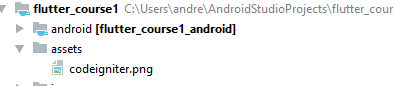
With the previous step covered, you can create a folder called assets or whatever name you defined in the root of your project and drop your image into it.
Remove debug ribbon or banner in Flutter
The Flutter debug banner is a very useful tool for developers building applications using Flutter. When activated, the banner is displayed in the upper right corner of the screen and contains important information about the running application, such as the name of the running mode, version number, build number, and device identifier.
The debug banner is especially useful during the development process, as it allows the developer to quickly identify the version of the application they are using and to verify that the application is running in the correct mode. It can also help identify bugs or problems in the application and make debugging easier.
It is important to note that the debug banner is automatically displayed when running an application in debug mode. If you want to change the visibility or content of the banner, you can do so through the settings in the Flutter code.
The debug ribbon is an annoying red side banner that appears in the upper right corner of any application that we are developing in Flutter; this may seem useful or curious when we are developing our application,
The tape can be a bit annoying and of course we have to remove it when we go to for example production environment; For this purpose we can easily do it through a property called debugShowCheckedModeBanner that we have to import from:
import 'package:flutter/services.dart';
Así que, construyendo un ejemplo mínimo, quedaría para de la siguiente forma:
class MyApp extends StatelessWidget{
  @override
  Widget build(BuildContext context) {
    return MaterialApp(
      debugShowCheckedModeBanner: false,
      theme: ThemeData(
        primaryColor: Colors.indigo
      ),
      home: Scaffold(
        appBar: AppBar(
          title: Text("Primera App"),
        ),
        body:Center(
          child: new Text("Hola Mundo", style: TextStyle(color :Colors.indigo, fontSize: 50),)
        )
      ),
    );
  }
}
And with that, goodbye to the Flutter debug banner; in this post, you learned how to remove the annoying banner that indicates that we are developing or testing our applications in Flutter for Android or iOS.
Null Safety in Dart and Flutter

Content Index
- Reasons to build apps in Flutter
- Added benefits of learning to code natively for Android and iOS from Dart and Flutter
- Declarative interface and Widgets
- What is Flutter?
- Flutter is a framework for Dart and an SDK with UI elements.
- Flutter widget tree architecture for an app
- Widgets in Flutter
- Creating your first widget
- Context in Flutter
- How to create a widget
- What do you need to know about the context?
- The "of()" method
- What we will see in the extension of our course
- Editors: Visual Studio Code with Flutter and Dart plugins
- Install Flutter on our computer
- Flutter Extension for Android Studio and Visual Studio Code
- Creating our first application: Tutorial
- Running our Android emulator to debug in Flutter
- Widgets in Flutter for everything
- The MaterialApp to define as the base or home of our application
- Creating a letter or card in Flutter
- Enabling our assets folder
- Remove debug ribbon or banner in Flutter
- Null Safety in Dart and Flutter
- Know the current version of Dart and Flutter
- Key operators to work with Null Safety in Dart
- What is Null Safety?
- Types that can be null
- Key operators
- Null assertion operator
- What about classes
- Definition of the Class with required
- Enabling Network Access in Flutter for macOS
- Why is it important to enable network access?
- Setting up Network Access in macOS
In this post we are going to talk about the null safety in Flutter in which is the new scheme that we have from Flutter 2 and Dart 2.12.
The first thing you have to do before starting is to verify the version of Flutter that you have installed on your computer and you can check the Dart version:
Know the current version of Dart and Flutter
dart --version
flutter --version
And you will see some calls like the following:
Dart SDK version: 2.13.4 (stable) (Wed Jun 23 13:08:41 2021 +0200) on "windows_x64"
Flutter 2.2.3 • channel stable • https://github.com/flutter/flutter.git
Framework • revision f4abaa0735 (2 months ago) • 2021-07-01 12:46:11 -0700
Engine • revision 241c87ad80
Tools • Dart 2.13.4
Remember that Flutter 2 or higher is the one that has support with NullSafety
Key operators to work with Null Safety in Dart
In the official guide we have a lot of information about Null Safety, the first thing we have to know is about the operators, the operators are a key element to work with Null Safety.
In this post I want to give you a summary of the aspects that you have to take into account when working with Null Safety, although this is an aspect that you have to practice, therefore, I recommend that you watch the videos that I leave here attached in this post. entrance.
In the same way we are going to give some lessons.
What is Null Safety?
We can easily define this, for this you have to understand the purpose, the problem of nulls is when we have a variable or object that MAY be null at some point but from your app you DO NOT detect it and perform operations on it with catastrophic results; operations like the following:
var texto = null;
Text(texto)
They will crash your app or the "your app is not responding" window of death or just slam.
That's what this feature is for that incorporates modern programming languages like Kotlin. swift and of course now also Dart, to prevent these failures in our applications.
What does it consist of
The null safety consists of AVOIDING the user from having null values, as simple as that, it is like denying a reality as much as possible; therefore, our DEFAULT variables or objects CANNOT be null, simple as that.
Therefore, now our variables are of type int, String, bool... It can NOT take null values, since the editor would give you an error at compile time and NOT at execution, therefore your code will NOT compile.
Types that can be null
But we know that this is a half-truth because on many occasions there are scenarios in which this cannot be fulfilled and you have to work with values that can be null, in these cases you can place the ? in front of your data types; For example:
- int?
String?
These can be null which is our original approach, but you should avoid using them as much as possible!
Best of all, the editor is always telling you that you are going to have problems with nulls since ALL the packages you use have to have this protection.
Key operators
As I mentioned, there are multiple scenarios in which you are forced to use types that MAY be null, in this case you have to do it SAFELY.
Smarter null-aware methods
String? notAString = null;
print(notAString?.length);
This operation will return null, instead of stopping the app, and that's what the ? operator works for. about some method or property that MAY be null.
Another operator used is the OR, in which when you try to assign a value that can NOT be null to one that if (for example this list) if it does NOT have a value, then you give it a default value.
bool exist = list?.isEmpty ?? falseNull assertion operator
This operator is similar to the first one, but you have to be COMPLETELY sure that the operation is NOT going to return null, because if it is, the application will throw an exception and with it, a possible hang:
error!.toUpperCase()These examples I have taken from the official documentation.
These are some cases that we see in detail in the videos attached to this publication.
What about classes
In the classes we have another problem and that is that we declare properties that by default we DO NOT initialize, for this there are many ways to do it:
If we do NOT have a constructor; We can use the late operator:
class _MyAppState extends State<MyApp> {
 late int _startI;
 late int _endI;
 @override
 void initState() {
   this._startI = 0;
   this._endI = 1;
 }
}
In which we indicate in a nutshell that, BEFORE doing a GET of the property, WE ARE GOING to give that property a value.
This is useful when we are working with state and stateful widgets, for example, since we have an init State function in which we generally initialize these properties.
If you use a constructor for your class, before defining its body with the {} you must do an inline initialization of those properties
Definition of the Class with required
We use required in the constructor to ensure that the model and year arguments are always passed.
class Coche {
 final String modelo;
 final int anio;
 final String? color; // '?' indica que el color es opcional y puede ser null
 Coche({
   required this.modelo, // ¡Obligatorio! Si falta, error de compilación.
   required this.anio,   // ¡Obligatorio! Si falta, error de compilación.
   this.color,           // Opcional, puede ser omitido o ser null.
 });
 void descripcion() {
   print('Modelo: $modelo, Año: $anio, Color: ${color ?? "No especificado"}');
}- required is an annotation added from Null safety to add null safety: A keyword is now required that must be passed to a named parameter so that it will not allow the compiler to run if this parameter has not been passed . It makes your code more strict and secure.
Enabling Network Access in Flutter for macOS
Enabling network access is essential for our Flutter application to work correctly in macOS environments, since, probably when you try to consume a resource through an HTTP communication, you will see an error like the following:
SocketException: Connection failed (OS Error: Operation not permitted, errno = 1) with flutter app on macOSAnd for this, we must enable network access.
Why is it important to enable network access?
- Communication with External Servers:
- Many applications require connecting to external servers to obtain real-time data, such as updates, dynamic content, or authentication. Without network access, the application will not be able to communicate with these servers, which will affect its functionality.
- Integration with APIs and Web Services:
- Most modern applications use APIs or web services to obtain relevant information, it allows our application to communicate with these services and provide a complete experience to the user.
- Updates and Downloads:
- Applications may require updates or downloads of additional resources (images, files, etc.). Without network access, these operations will not be possible.
Setting up Network Access in macOS
To enable network access in a Flutter app on macOS add the following key-value:
macos/Runner/DebugProfile.entitlements
<key>com.apple.security.network.client</key>
<true/>
Next step, learn how to use button widgets in Flutter.