Content Index
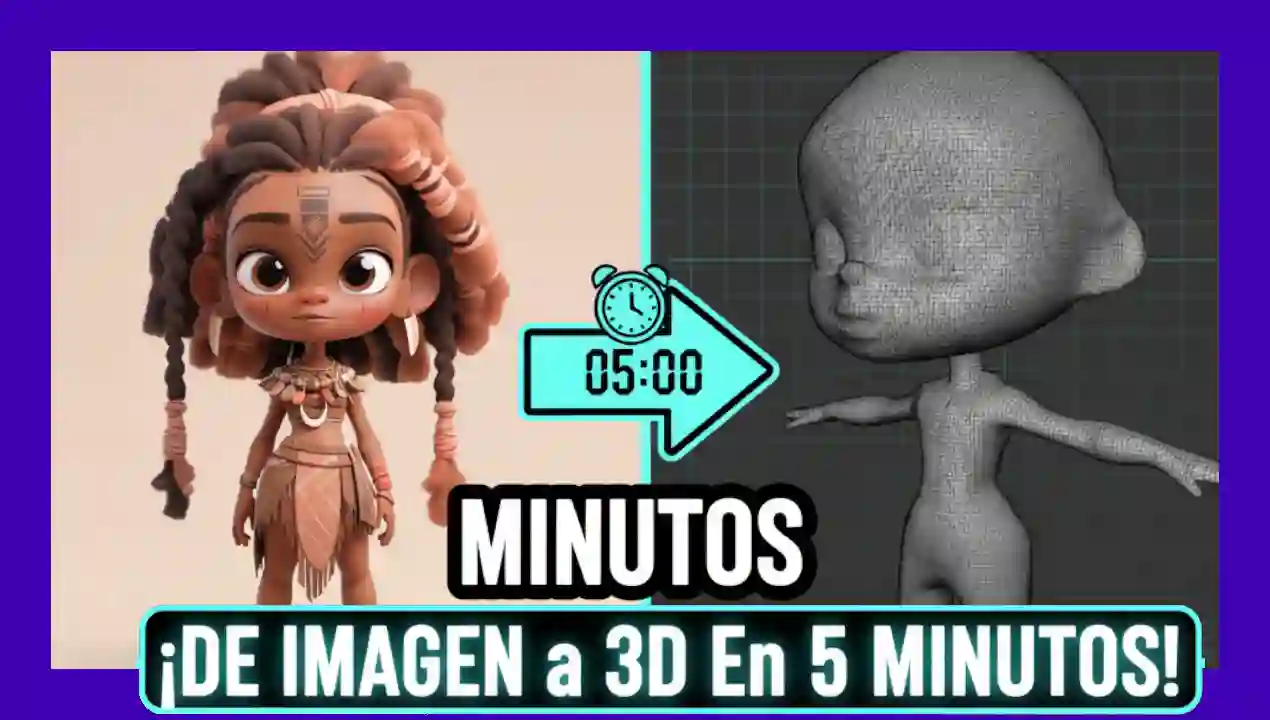
I'm going to show you how you can generate a 3D model for sculpting, using a simple image as a reference, regardless of the pose it's in. That's the interesting thing about this process.
I'll leave the author with the Pinterest link, which is where I got the image I want to use to generate the 3D model:
https://www.pinterest.com/pin/15973773674351504/
For me, Pinterest is a great source of inspiration: I look there for images that I can use directly for modeling or, as in this case, as a reference.
Following our basic Blender tutorial, remember that we modeled candy letters with Blender.
Generate the poses
Obviously, these images aren't meant for modeling, as they often feature dynamic poses. Ideally, they'd be in the famous "T-pose," but that's almost never what we find.
Generating T-poses with Gemini NanoBanana
To solve this problem, we can use tools like Gemini (NanoBanana). This tool allows us to maintain the fidelity of the original image, avoiding distortions.
This is the prompt I used:
Use the provided photo as reference. Center the full figure (head-to-toe) against a clean white background with soft, even studio lighting.
First, produce a *full-figure framing* version showing the subject in their **natural pose**, preserving body proportions, lighting, and textures—no cropping or distortion.
Next, produce a *full-figure framing* version of the same subject in a *classic T-pose* (arms extended horizontally, relaxed hands), keeping the same lighting, proportions, and background.
Then, render four separate, consistently framed and stylized views (all in T-pose):
1. Front view
2. Side view (90°)
3. Back view
Another prompt you can use:
Use the provided photo as reference. Center the full figure (head-to-toe) against a clean white background with soft, even studio lighting.
First, produce a *full-figure framing* version showing the subject in their **natural pose**, preserving body proportions, lighting, and textures—no cropping or distortion.
Next, produce a *full-figure framing* version of the same subject in a *classic T-pose* (arms extended horizontally, relaxed hands), keeping the same lighting, proportions, and background.
Then, render four separate, consistently framed and stylized views (all in T-pose):
1. Front view
2. Side view (90°)
3. Back view
4. 45° angle (front turning toward side)Style all outputs as though they’re a **3D-printed architectural model**: use realistic, physically-based lighting and shadows; clearly define materials like reflective glass, metallic surfaces, and concrete; and preserve massing and key textures with a subtle “game-ready” stylization for high-quality rendering.
In separate images
And Full Color
Generate 3D model with AI
Once the image is processed, the tool returns a 3D model. The result is quite good considering it's based on a single image.
The mesh has many polygons, which isn't ideal for video games, but it's excellent as a reference base for sculpting:
With the free plan, you can only generate one image, although 4 or 5 views are ideal for greater accuracy. If you upgrade to a paid plan, you can upload multiple images and create a more accurate model.
Customize and modify the generated mesh
With the previous step, we now have a mesh ready to work with. We import the .obj into Blender and modify it.
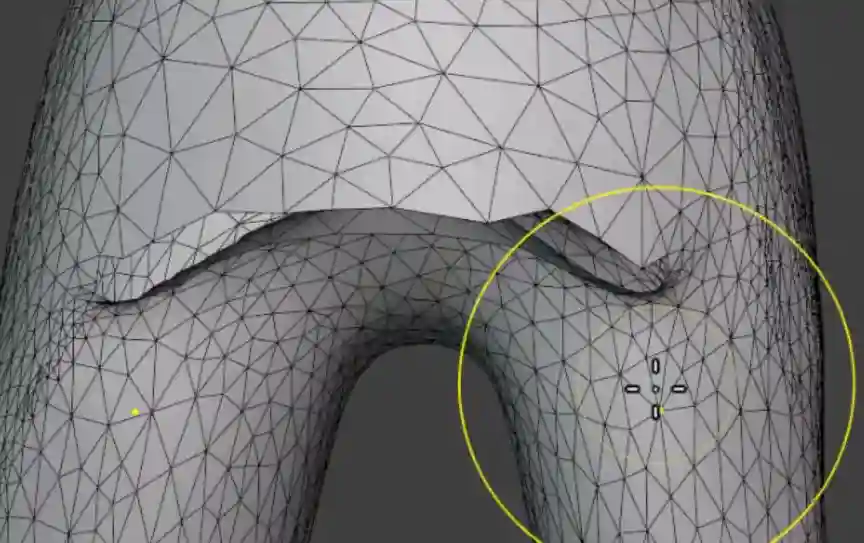
The first thing I did was remove parts I wasn't interested in:
- I removed the side skirt.
- I removed accessories like earrings.
- I also trimmed my hair, which was badly shaped.
To do this, I went into edit mode, activated transparent view, selected the vertices, and deleted them. Obviously, holes remained in the mesh.
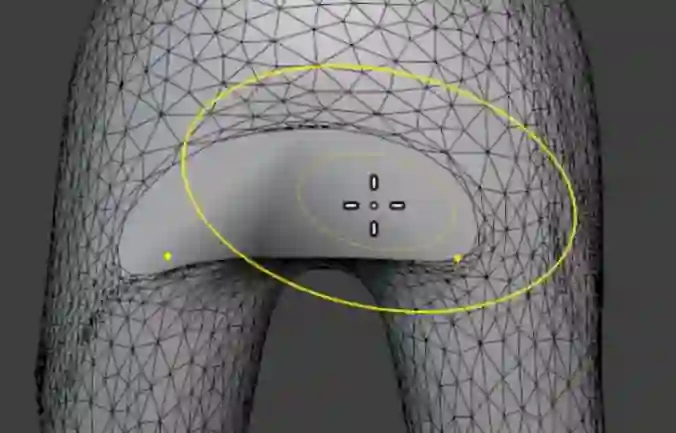
Repairing holes in the mesh
With the previous step, we'll likely have left several holes in the mesh. To fix them, I selected the areas with Select All by Trait > Non Manifold and pressed F to complete. The mesh was still a mess, but it was enough to retopologize later:
Retopology and symmetry
In sculpting mode, I used the Remesh option with Ctrl + R to generate a better mesh. This even helps close holes:
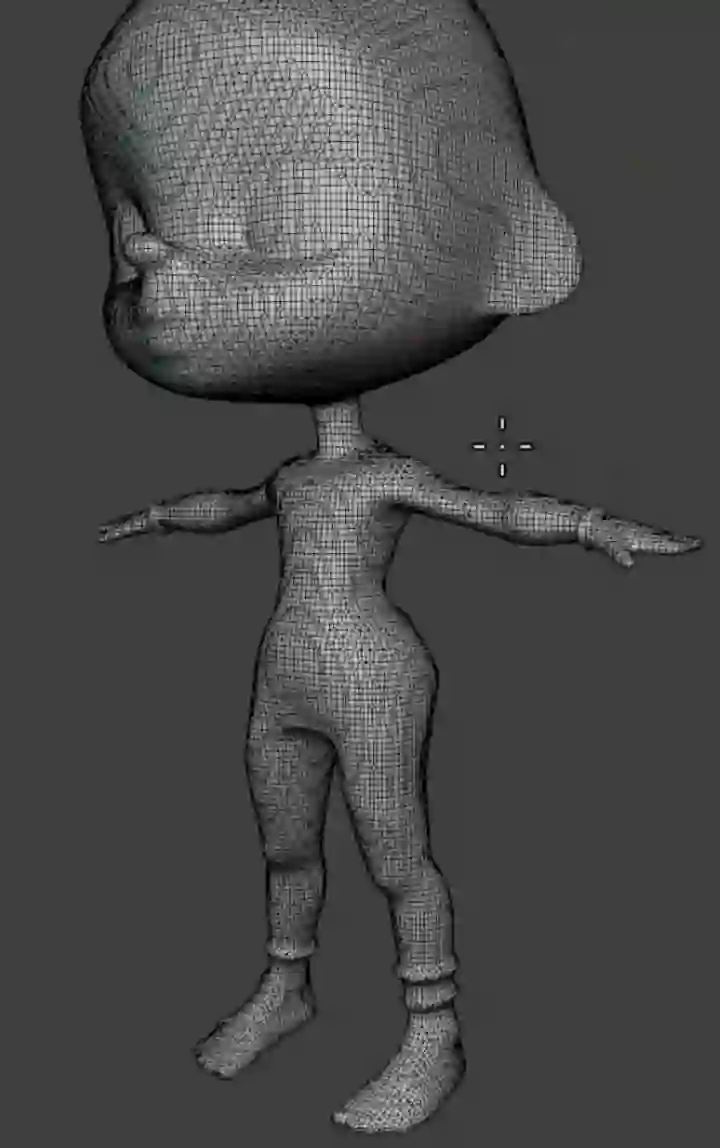
Then I applied symmetry from the Mesh > Symmetrize panel in Blender. This helped me fix the differences and keep the figure balanced.
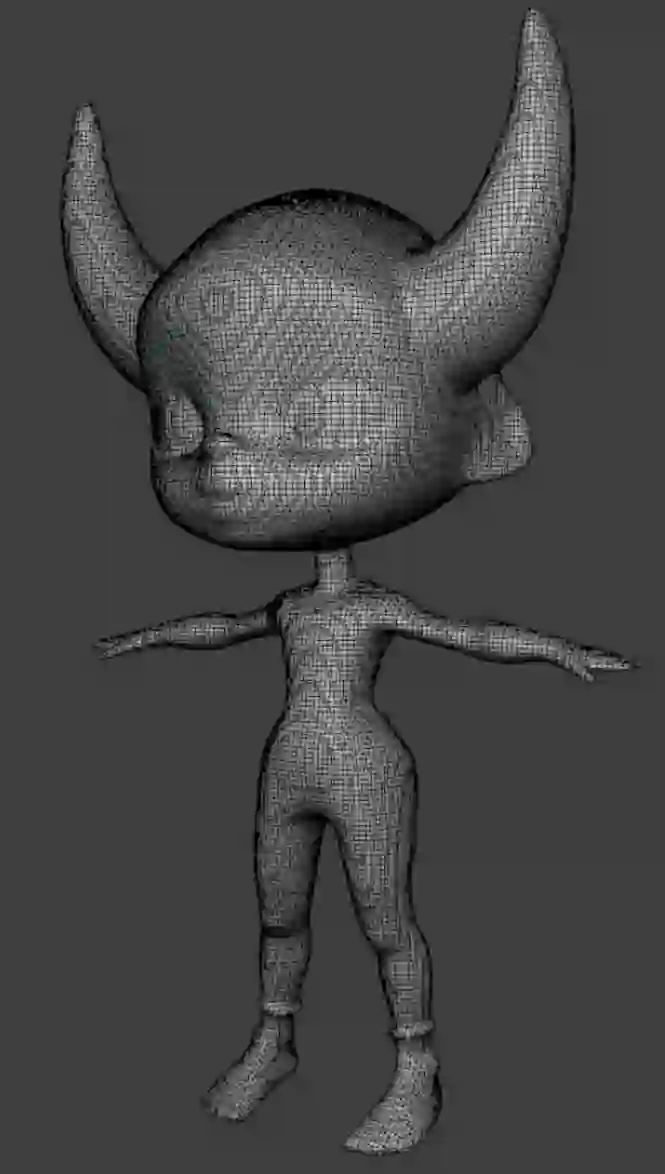
From there, I began sculpting with symmetry enabled, gradually shaping it. The goal wasn't to have a perfect final model, but rather a base to work from. For example, I added horns to my character:
Conclusion
In just a few minutes, we went from a single reference image to an editable 3D model. Although it's high in polygons, it's more than enough to sculpt, save time, and use as a base.
Before, I did everything manually, using flat reference images, and the results were distorted. Now, however, I have a solid starting point that allows me to adapt it to my needs, whether for a video game or animation.
Continuing with modeling, let's see how to correct some problems during the modeling process, specifically when you didn't activate symmetry in the Modeling or Sculpting mode in Blender!