Download Zend Framework from the official site
The first thing we must do is get our version of Zend Framework; to do this we must go to the official Zend Framework site and click on the link that says "download now" or click on the following link; Now we choose the version of our preference (1 or 2) and if you want the Full Package or the Minimal Package.
The Full Package and the Minimum Package
The Zend Framework Full Package contains unit tests, demos, documentation, and the Dojo Toolkit while the Zend Framework Minimal Package only contains components from the standard library; that is, the minimum necessary so that we can work with Zend Framework.
Installing Zend Framework
After we get our version of Zend Framework, the next thing we must do is unzip the package and upload the folder resulting from the decompression to our server and apply the recommended permissions (755) to both the folder and the files contained in it.
With this we have Zend Framework installed; but if we want to use the Zend_Tool tool, which allows us to perform operations such as creating projects, modules, controllers, actions, etc.; Instead of copying it to our web server, we must do the following:
Installing Zend Framework and Zend_Tool on Linux
After downloading Zend Framework, we relocate the zip/package. You can install Zend Framework from the current directory (probably your 'Download' folder), but to keep your work environment organized, it is advisable to relocate it; For this tutorial we relocate it to the /usr/local/ directory; since this directory contains data that belongs to programs that are not part of the system.
Follow these easy five steps to install Zend Framework on Linux:
1. Relocating the Zend Framework zip
To execute the previous step, we simply move it from one folder to another through our file manager or by executing the following command:
cp /home/Descargas/ZendFramework-x.x.x.tgz /usr/local/Where ZendFramework-x.x.x.tgz is our zend packaging; either the minimal or the full and x.x.x is the version of the framework.
2. Unpacking Zend Framework
The next thing will be to unpack the package once relocated through the following command:
sudo tar -xzvf ZendFramework-x.x.x.tgz For simplicity, we will rename the folder containing Zend Framework to zend:
sudo mv ZendFramework-x.x.x zendThus leaving our route.
/usr/local/zend3. Changing Zend Framework folder permissions
We change the permissions of both the folder that contains the framework and the files contained therein recursively:
sudo chmod 0755 zend/
sudo chmod -R 0755 zend/*
4. Referencing the Zend Framework libraries in php.ini
Open the php.ini, look for and uncomment the following line depending on the operating system you are on.
include_path = ".:/php/includes"Now we must add the Zend Framework library (library folder) to the php.ini path; For that we replace the previous path of php.ini with:
include_path = ".:/usr/local/zend/library"5. Creating the symbolic link to the Zend Framework libraries
We create a symbolic link (links between files) between the zend script (zf.sh) and another file that we will create and call zf; the latter can have any name; It is the way in which we will 'call' or execute zf from the console to be able to work with the Zend_Tool; Depending on the name you give it, that way you will call it from the console and this file must be located in the /usr/bin/ directory; this directory contains data that belongs to the programs installed in the root of the local computer; we create the link:
sudo ln -s /usr/local/zend/bin/zf.sh /usr/bin/zfIf you have made it this far, congratulations! you have installed Zend Framework and Zend_Tool on Linux; even so, let's look at some extra steps to ensure that everything has gone well:
6 (optional). The Zend Framework command console
If you run the zf command in its console? (where zf is the file name linked to zf.sh in the previous step) we will see the Zend Framework help menu:
Zend Framework Command Line Console Tool v1.12.3
Usage:
    zf [--global-opts] action-name [--action-opts] provider-name [--provider-opts] [provider parameters ...]
    Note: You may use "?" in any place of the above usage string to ask for more specific help information.
    Example: "zf ? version" will list all available actions for the version provider.

Providers and their actions:
  Version
    zf show version mode[=mini] name-included[=1]
    Note: There are specialties, use zf show version.? to get specific help on them.

  Config
    zf create config
    zf show config
    zf enable config
    Note: There are specialties, use zf enable config.? to get specific help on them.
    zf disable config
    Note: There are specialties, use zf disable config.? to get specific help on them.

  .
  .
  .

  DbAdapter
    zf configure db-adapter dsn section-name[=production]

  DbTable
    zf create db-table name actual-table-name module force-overwrite
    Note: There are specialties, use zf create db-table.? to get specific help on them.

  ProjectProvider
    zf create project-provider name actions
7 (optional). Creating our first project with Zend Framework
To create our test project that we will call test we must open the console and go to the root of the web server and execute:
zf create project pruebaIf everything has gone well and the console does not give us any errors; We will see in the directory of our web server a folder called test, if we enter it, we will see the structure of the project:
prueba
    application
    docs
    library
    public
    tests
Now we open our favorite browser and place:
<nuestro-host>/prueba/publicWhere local <our-host> is the host where we install zend framework, in our case it will be localhost.
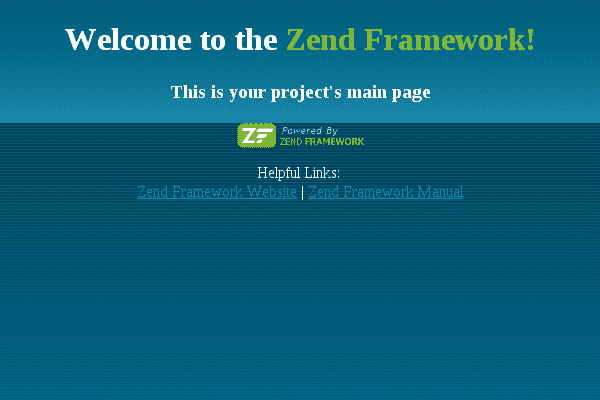
localhost/prueba/publicAnd we will see a screen like this:
I agree to receive announcements of interest about this Blog.
In this post we will see how to install Zend Framework on Linux and Zend Tool in a Linux environment.