
Content Index
I'm going to show you how you can add these Widgets (objects or resources) to the user interface right when you start your game in Unreal Engine 5.
1. Common Uses and Applications
This technique is fundamental for creating the HUD (Heads-Up Display) and showing relevant information to the player:
- Player Statistics: Percentage of collected objects, number of enemies eliminated, kill counter, etc.
- Status Information: Health or life percentage (which will be our example), energy bars, or mana.
2. Example Elements
In our practical case, we are going to add a simple interface that includes:
- A bar that we will use to represent life/health.
- Some informative text.
- Some reference images.
This is just a sample; the final implementation depends on what you need to display.
Widget Blueprint
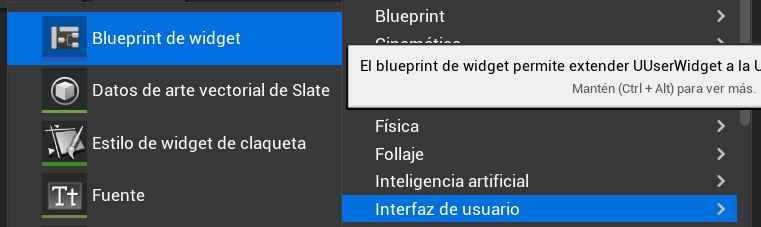
For this, the first thing is to open your Player Character Blueprint—in my case, it's this one. I recommend you create a folder; I named mine UI for the graphical interface. Right-click, select User Interface, and then Widget Blueprint .
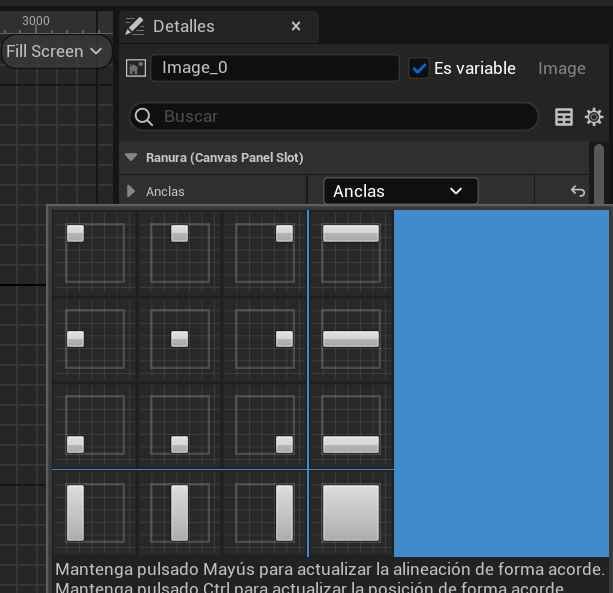
Search for Canvas Panel in the palette:

When creating the user interface, you'll be presented with a "box" which will be your design space to add all your widgets, components, text, images, and buttons.
1. ️ Adding Elements
Adding elements is intuitive:
- Drag and Drop: You simply have to search for the desired element (for example, Image or Text) in the sidebar and drag it to the design space.
- Customization: Once added, you can navigate the side panel to adjust the specific options for that widget (size, color, font, etc.).
Next Steps: In another video, I will show you how to perform binding so that these elements (like a text field) can be updated dynamically using game variables.
2. Positioning and Anchors
To organize and position your widget effectively, you must use Anchors:
- Function: Anchors allow you to indicate where on the screen you want your widget to appear (e.g., top-left corner, bottom center, etc.).
- Adjustment: You can then move and refine the widget's position within that frame. This is crucial because by setting the limits using these tools, you ensure that the widget appears correctly regardless of the user's screen resolution or size.
Create Widget Node
Once you have designed your page or Canvas (the User Interface Widget), the next step is to bind this Widget to the Viewport so that it appears on screen when the game starts.
As you can notice, the interface is only visible when the game starts. To achieve this, you must follow these steps in your character's Blueprint:
- Open the Character Blueprint: Open the Blueprint of your main character (e.g., PlayerCharacter).
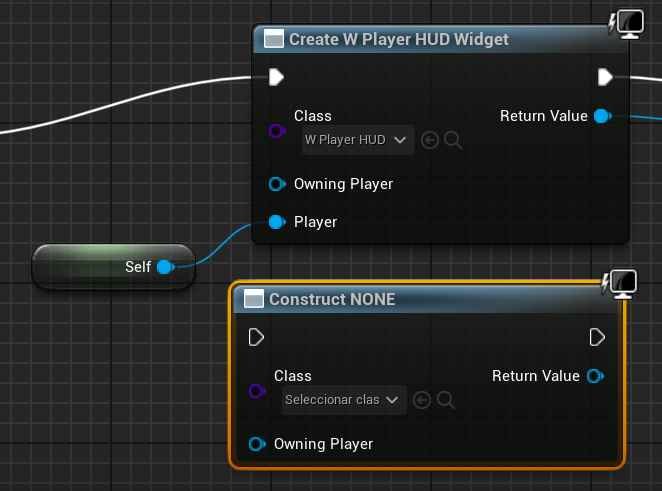
- Use the Initial Event: In the Event Graph, look for the Event Begin Play node.
- Create the Widget: Connect the Event Begin Play to the Create Widget node.
- Class: In the Class option of the Create Widget node, search for and select the Widget file you just designed (in my case, Player Hud).
- Add to Viewport: Finally, connect the Create Widget node to an Add to Viewport node.
This ensures that when the game starts, the Widget is created and immediately displayed on the player's screen.
Viewport Node
Once you have selected the Widget class (Player Hud), the Create Widget node automatically changes to reflect the class you just chose.
- Widget Creation: At this point, we have created the instance of the Widget (the class you designed).
- Required Action: Now we have to decide what to do with that instance. The goal is for it to appear on screen.
Final Connection
Adding to the Screen: To display the Widget in the game, we must use the Add to Viewport node.
- Connection: Connect the instance result (Return Value) from the Create Widget node to the Add to Viewport node.
- Note: When searching for the node, be careful to correctly type Add to Viewport to ensure it appears in the options.
That's all. With these simple steps, you ensure that your HUD (your Widget instance) is displayed correctly on the screen when the game starts.

This part of the node is something else I'm doing and has nothing to do with this; the important thing is the Event Begin Play, the Create Widget, and the Add to Viewport. That would be practically everything. With this, when you start your game, you will see your elements on the screen.