
WordPress is an excellent and robust content management system (CMS) with which millions of websites of all types are built: blogs, online stores, portfolios, corporate sites, and even custom systems. Its flexibility, ease of use, and the huge community that supports it have made it the most popular platform in the world for creating websites.
In this guide, we will not only see how to install WordPress on your own server, but we will also take the first steps for you to understand its operation, get to know its administration panel, and start creating content effectively.
WordPress is developed in PHP and uses MySQL or MariaDB as a database. It is licensed under the GPL, which means it is free and open-source software.
Step 1: Preparing the ground
Downloading WordPress
The first thing is to get the WordPress files. You can download them for free from its official page. It is always advisable to download the version in your language.
Once downloaded, you will get a .zip file. Unzip it and you will see a folder called wordpress. You can rename it if you wish (for example, to my-blog) or keep the name. This folder is the one you should upload to your web server (usually in the public_html, www or htdocs directory).
Creating the Database
WordPress needs a database to store all the information: posts, pages, users, settings, etc. Before starting the installation, we must create it.
Access your hosting control panel (like cPanel or Plesk) and look for the "MySQL Databases" section. From there, you can:
- Create a new database: Give it a descriptive name, for example,
my_blog_db. - Create a user for the database: Assign it a username (e.g.
wp_user) and a strong password. - Assign the user to the database: Grant all privileges (
ALL PRIVILEGES) to that user on that database.
Important! Write down the database name, username, and password. You will need them in the next step.
Step 2: The famous 5-minute installation process
Configuring the wp-config.php
Inside the WordPress folder that you uploaded to your server, you will find a file called wp-config-sample.php. This file is a template that we must configure.
Rename it to wp-config.php and open it with a text editor. You will need to fill in the database information that you created in the previous step:
// ** MySQL settings ** //
/** The name of your WordPress database */
define('DB_NAME', 'your_db_name');
/** Your MySQL username */
define('DB_USER', 'your_db_user');
/** Your MySQL password */
define('DB_PASSWORD', 'your_password');
/** The hostname of your MySQL server */
define('DB_HOST', 'localhost'); // Usually it's 'localhost'
Make sure to replace 'your_db_name', 'your_db_user' and 'your_password' with the data you wrote down.
Launching the installer
Once the wp-config.php is configured, open your browser and go to the URL where you uploaded WordPress (for example, http://www.yoursite.com/ or http://localhost/wordpress/).
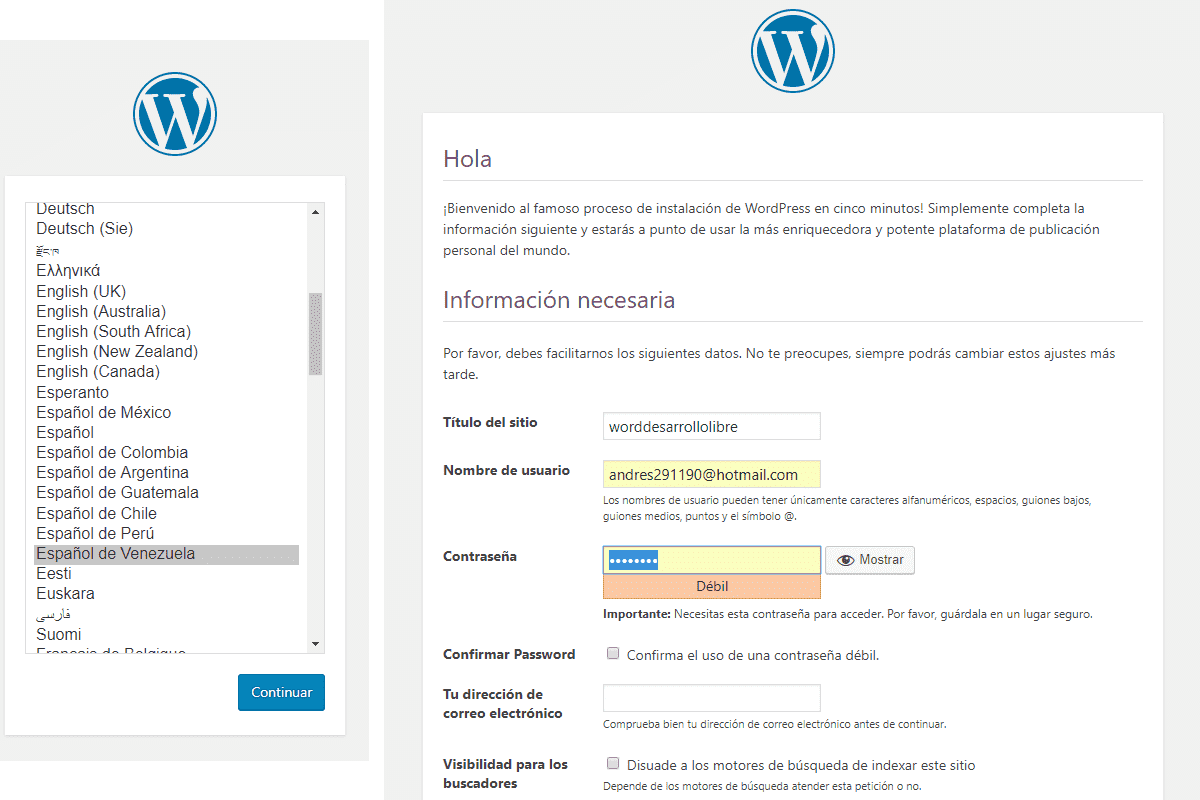
If everything is correct, you will see the WordPress installer welcome screen. Here you will have to configure the main data of your site:
- Site Title: The name of your website (e.g. "My Cooking Blog").
- Username: The user you will use to manage WordPress. Do not use "admin" for security.
- Password: A strong password for your administrator user.
- Your email address: For notifications and password recovery.
- Search engine visibility: If you check this box, you will ask Google and other search engines not to index your site. It is useful while you are building the web, but remember to uncheck it when you launch the site!
After filling out the form, click on "Install WordPress" and... that's it! You now have your own WordPress installation running.
Step 3: Exploring the administration panel (Dashboard)
You can access the administration panel (also called backend) of your site by adding /wp-admin to the end of your URL (e.g. http://www.yoursite.com/wp-admin).
The administration panel is the operations center of your website. From here you will control everything. The main sections are:
- Dashboard: The welcome screen with a summary of your site's activity.
- Posts: This is where you will create and organize your blog articles.
- Media: The library of all the images, videos and files you upload.
- Pages: To create static content such as "About us", "Contact", etc.
- Comments: Moderate the comments left by your visitors.
- Appearance: Manage themes (the design of your website), navigation menus and widgets.
- Plugins: Add new functionalities to your site through plugins.
- Users: Manage users and their roles on your website.
- Settings: Global configuration of your site (title, URL, link format, etc.).
Step 4: Creating Content: Posts vs. Pages
One of the first doubts that arise is the difference between a "Post" and a "Page".
- Posts: They are articles ordered chronologically, ideal for a blog. They have a publication date, author, categories and tags. They are the dynamic content of your website. For example, "Eggplant Lasagna Recipe".
- Pages: They are for static content, which does not depend on time. They do not have categories or tags. They are perfect for sections like "About me", "Privacy Policy" or "Contact".
Creating posts in Wordpress
To create a post we go to our administrator module at:
http://localhost/wordpress/wp-admin
And in our panel we go to Posts - Add Posts; here we go to the "Screen Options" option and enable a series of options -to be able to have a representation of the form fields shown a little further down -like the following:

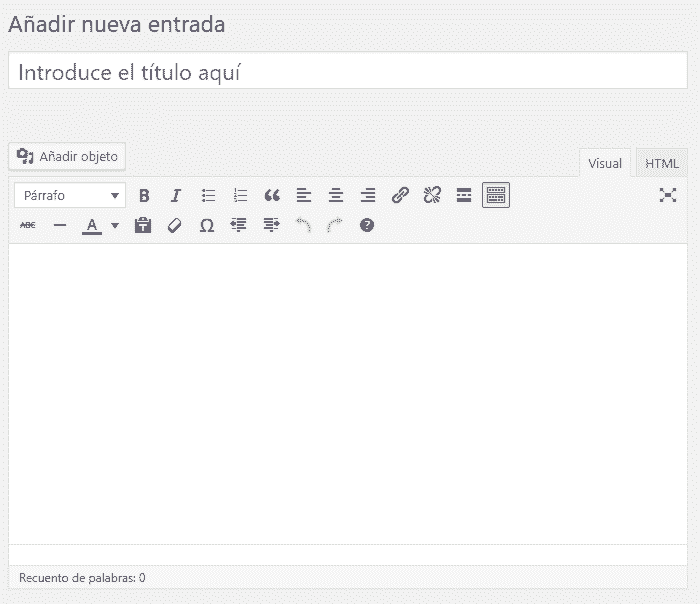
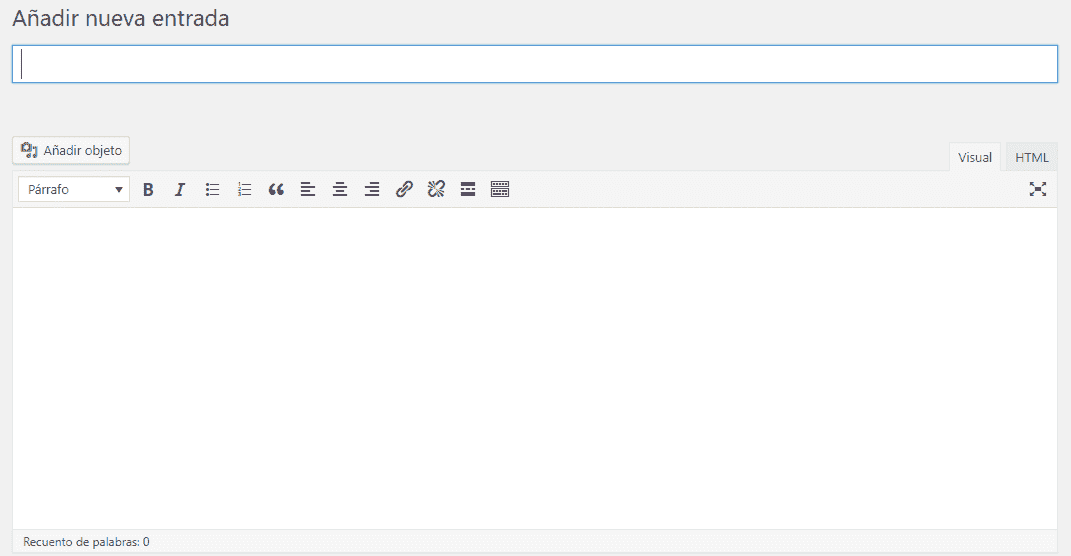
And we have our form for creating posts:
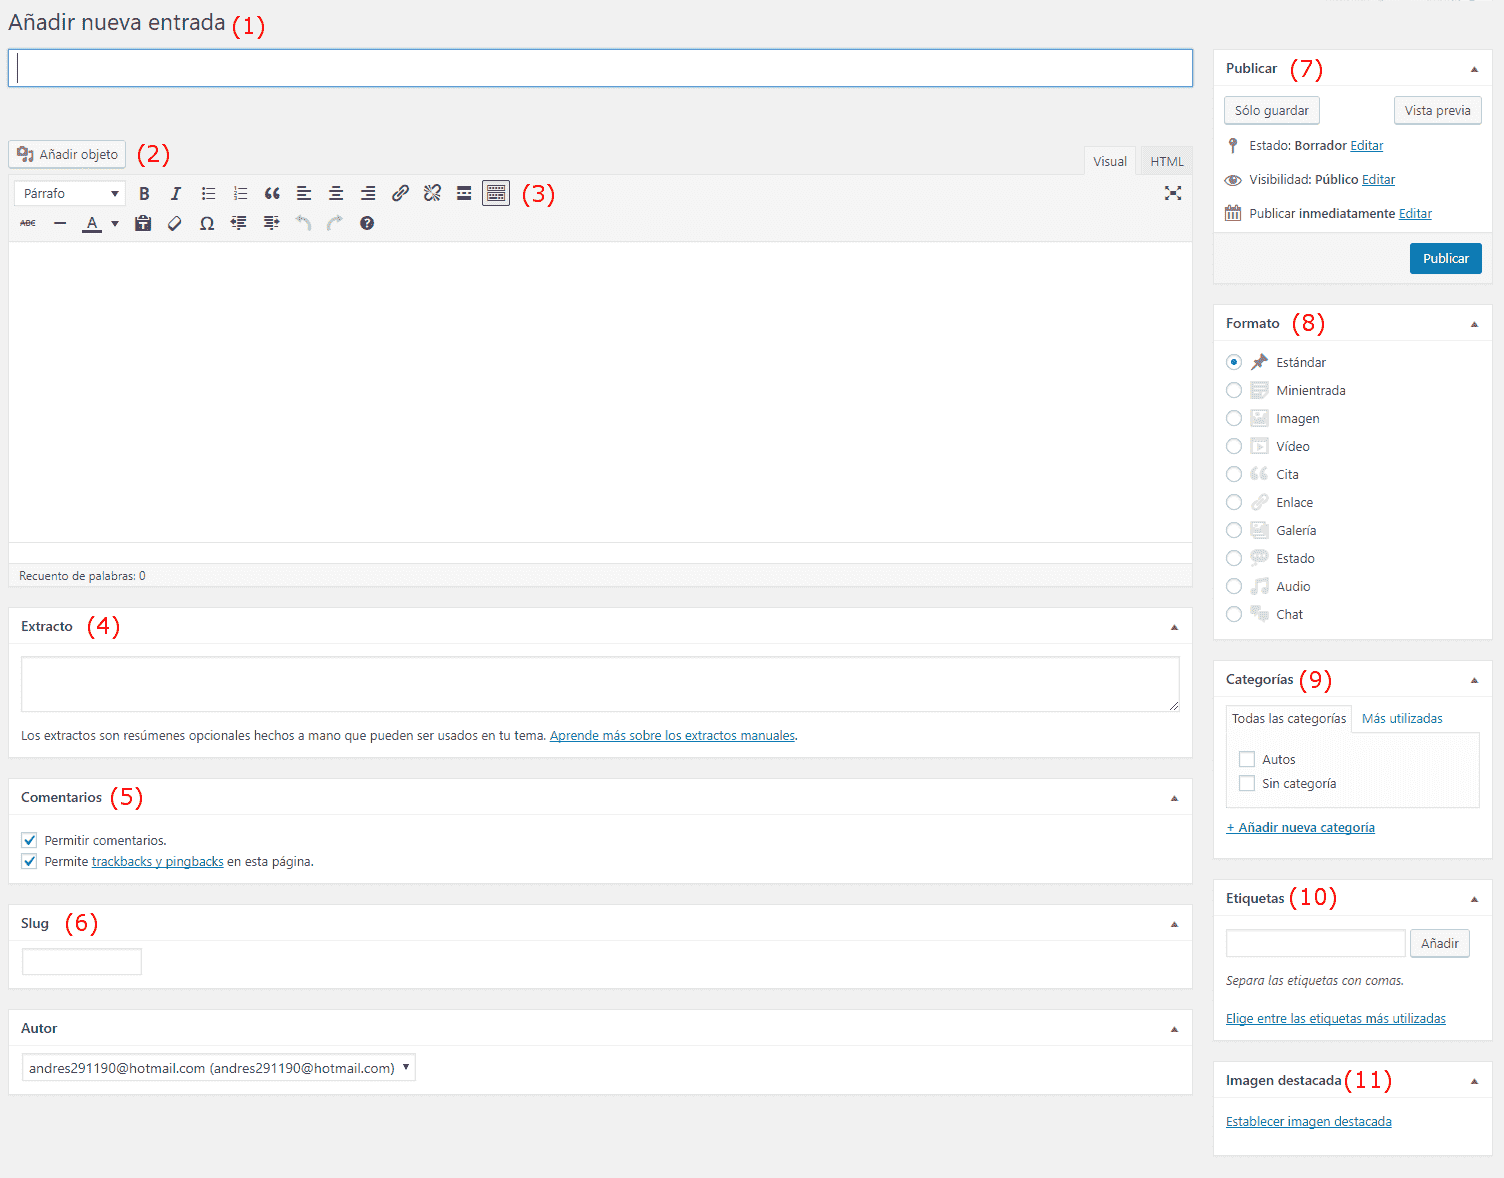
(1) Post Title
From here the first thing we see (1) is an option called "Add new post" where we simply have to add a title that corresponds to our entry or post that we are going to create:
- It must be attractive since this is the first thing the user encounters when reading our post.
- It must be long enough so that the main keywords of our post can be included
- It should not have special characters
- And it is recommended that the title encourages entering the post indicating some lack or key learning for the possible reader
These are some of the aspects that we must take into account in general when creating a good title for our Blog.
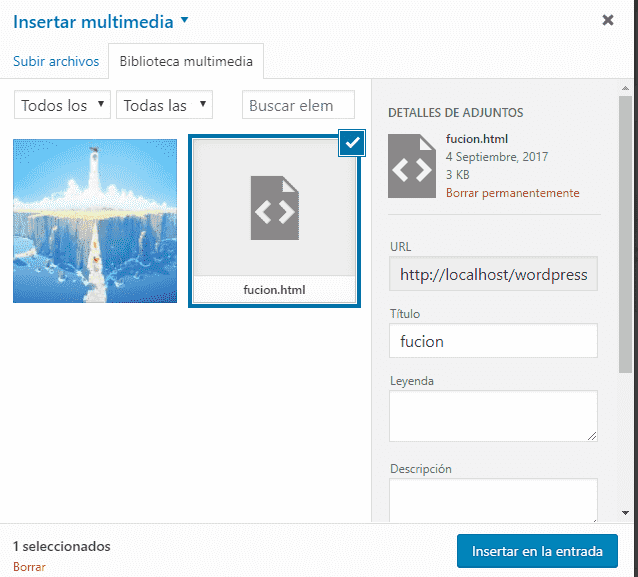
(2) Multimedia: Images and videos
From the button called "Add objects" not only allows you to enter images but other resources such as videos, from here we can manage all the objects or resources that we upload in any other entry and reuse them easily; its use is very simple, it consists of a grid of images or objects where we can manage them completely, adding extra information about them, such as title, name, description, legend, filter them by dates create galleries, insert from some URL on the internet, playlists, etc; it has a large number of options but it is still easy to interpret, therefore we will not detail much in this function:
(3) Content
The third and most important field of all, is that of the content enriched by a WYSIWYG plugin from Wordpress; from here we can write the main content of our post, format the text, alignment, insert links, define images, galleries, videos, lists (through the previous option) among other things that are the typical elements that a WYSIWYG plugin offers in general.
(4) The excerpt field to create summaries
The next element we come across is the excerpt section (3) which is an optional field that provides a summary to our reader; it is also generally used internally by Wordpress to create the description tag of our post, internal search results, etc., so it is highly recommended to complete this field.
(5) The comments in our post
The next section we come across is the comments section, here we can indicate if we want the comments section to be enabled for this post: "Allow comments" and if we want our page to be notified to other websites; you can get more information about this functionality by clicking on the link of the Trackbacks.
(6) Slug for an SEO-friendly URL
In SEO, URLs are a fundamental point and it is one of the first things that both search engines and some internet users can notice is the content that our URL has to have some clues about the content; generally the URL contains the title of our post but removing, accents, special characters and substituting the blank spaces for who and for this the Slug field is for; Wordpress automatically generates the title for our URL which we can modify to our liking in this field; example of a piece of a clean URL:
hello-world
(7) Publish - Visibility
Another less common but not less important point, is the visibility option that we can see in the "Publish" section, which allows us to indicate the type of visualization that our post will have, if we want to protect it with a password so that when someone tries to enter said post it requests a password, if we want it to be Private, which means that it is only visible to the administrator and editor.
(8) Format
The format is simply a variation in the way our post is displayed; that is, if the post consisted of many images or just one we could use the "image" or Gallery type in the format option; although the format option depends a lot on the theme that we are using in our Wordpress.
(9) Categories
Categories are another very important point, it is a classification that we give to our post, if in our post we are talking about how to create menus in Android Studio, some possible categories that we can use would be Android, Android Studio and menu.
(10) Tags
Tags are simply a classification but more general of our post based on a single word or a phrase (complete words) are a more general and spontaneous way of defining our content.
Tags allow you to define the content of a blog in words.
(11) Featured image
The featured image is simply a promotional or main image of our post and is the one that generally appears large and at the beginning of our post, although this depends on the template we have selected.
Other fields and functionalities of interest when working with posts
Revisions
When we edit a post, that is, the post already exists or was created previously, we will see a new section called revisions which are the historical ones, it simply offers us the state of the document or post that we were editing at a given time; by clicking on them we can see the state of the post at a given time comparing them with the current one.
Quick edit
In the list of all our posts we will see the "Quick Edit" option that allows you to quickly edit some key options about the post:

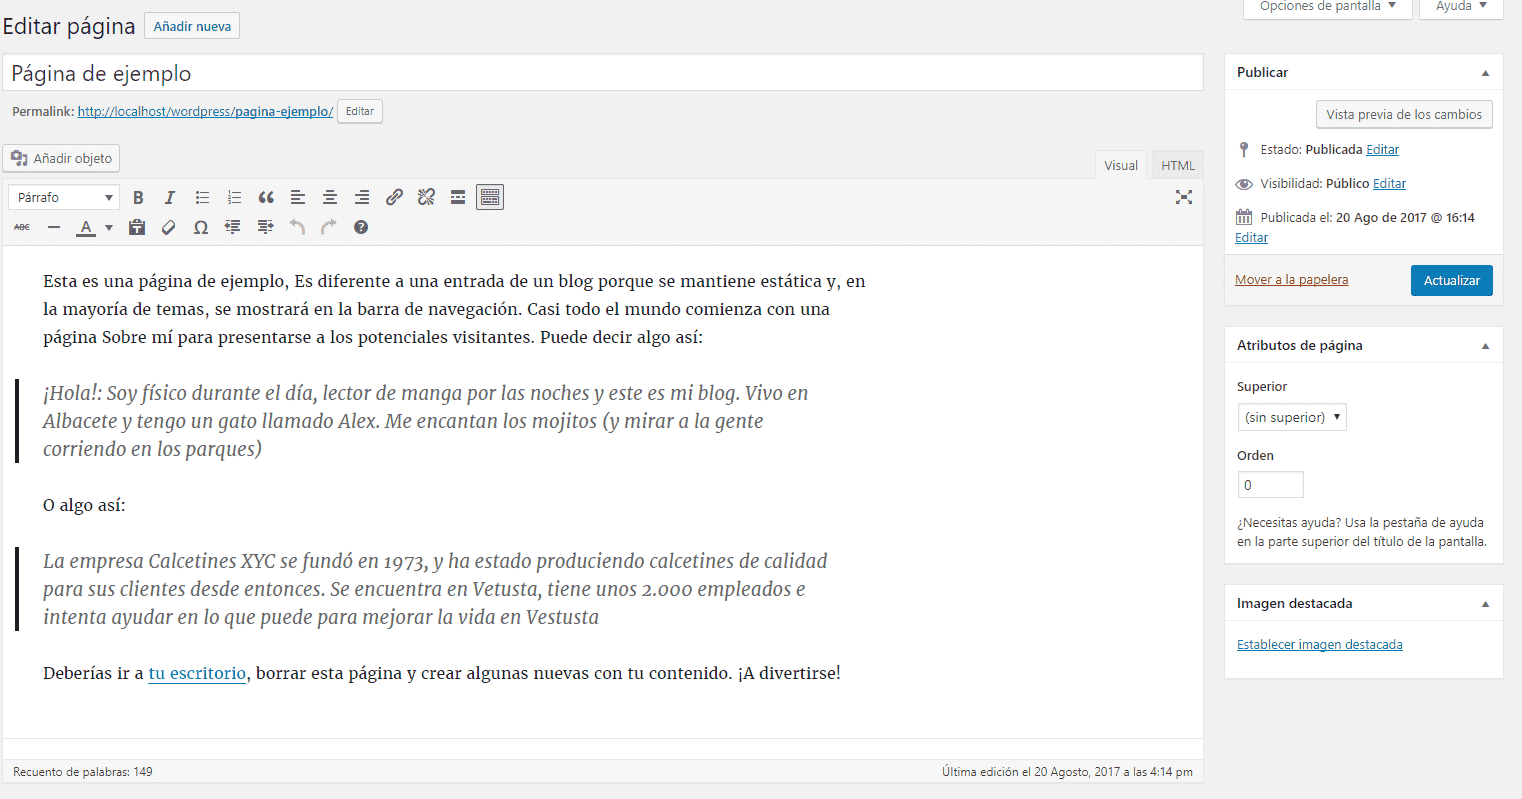
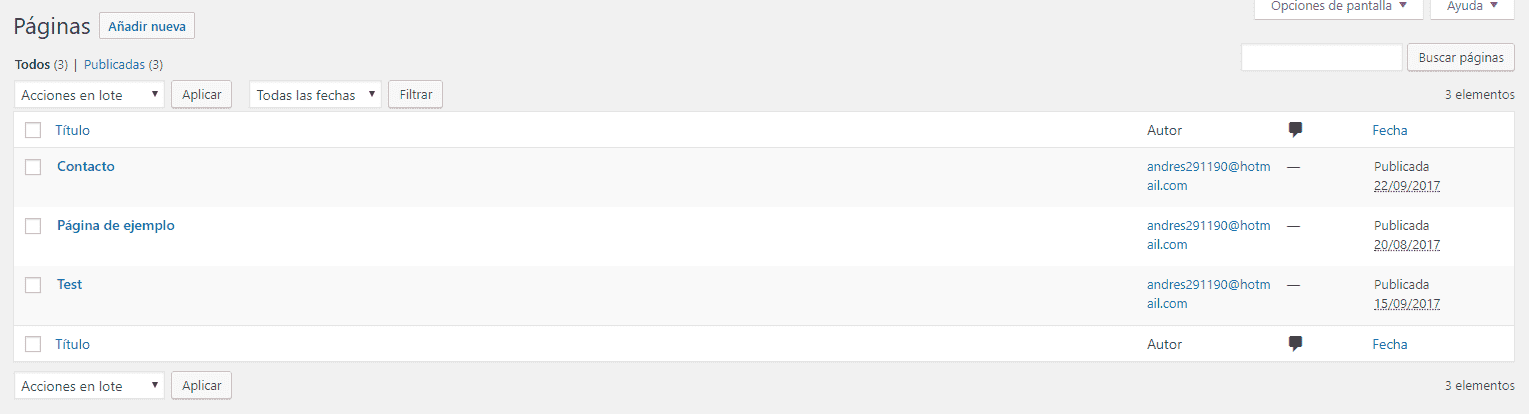
Creating pages in Wordpress
The next point we will talk about is about pages in Wordpress; to create a page we go to our administrator module:
http://localhost/wordpress/wp-admin
And then in our side menu: Pages - Add New, from here we are presented with a form quite similar to the one presented previously to create the posts and that we reviewed before.
But without some sections such as adding categories, tags, excerpt, trackbacks, slug, format, etc; finally, everything translates into placing a title of the page that we want to create, for example who we are, about us, etc, and we place the content of it in the WYSIWYG section:
In the same way, the list of all the pages has a very similar organization to that of the posts:
Organization of the pages
Unlike the posts that can be consulted in chronological order when entering the open panel, or through the categories, the pages are generally located in the menu and can be organized in pages and subpages (parent and child) according to the requirements.
This organization of pages and subpages is nothing more than a hierarchy that we place on our pages to place our content; that is, it is very likely that on more than one occasion we want to place information on the same topic on different pages but that they are related, and with the pages/subpages hierarchy is the way.
Suppose our Wordpress consists of defining the information of a company that has two headquarters, a possible organization is to create a page that talks about the company and two subpages for each of the company's headquarters detailing about them.
Page Attributes
Returning to our page creation section, we see that there is a section called "Page Attributes", where we can indicate if we want the page to be a parent or child page of another page and in this way create a subpage.
Quick edit
From the table we will see the quick edit option that allows us to modify basic information of the content, among it the "parent" that has the same functionality as the one indicated previously.
Extra: First steps
And with this we have our own version of Wordpress running on our server.
Administration and public area in Wordpress
Wordpress has two areas by default; the public area that we access with the base url that we defined at the beginning:
localhost/wordpress
This area by default is open to all types of users and is our website itself; the other area is the administration area, which we access by default with the following URL:
localhost/wordpress/wp-admin
This area is the administration center of Wordpress and allows us to edit each of the remaining sections of Wordpress; here we can manage users, roles, comments, site customization through plugins, widgets, themes and much more.
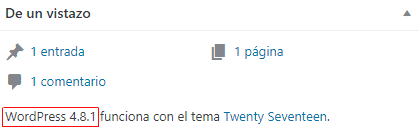
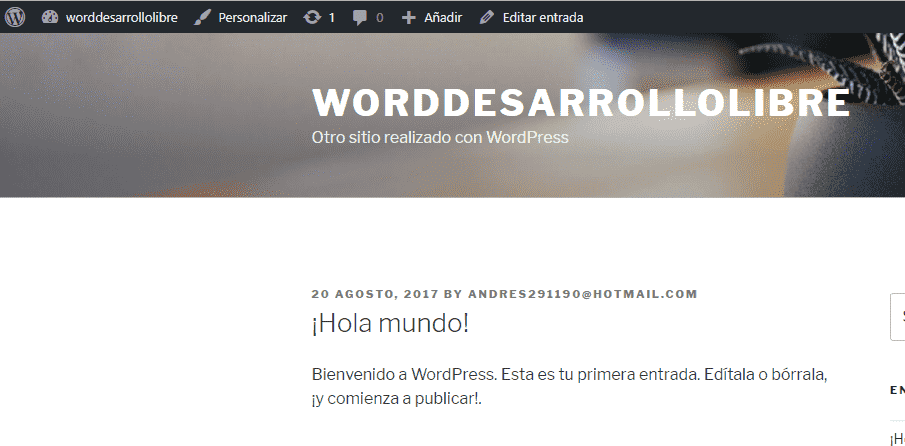
The first screen that we will see in our administration area is a kind of welcome screen with the following message:

Where we see several actions to start working on our website, customize the template, information about wordpress, etc.
From here (the main page of Wordpress) we can perform several quick actions and have basic information about Wordpress; such as the version we are using:
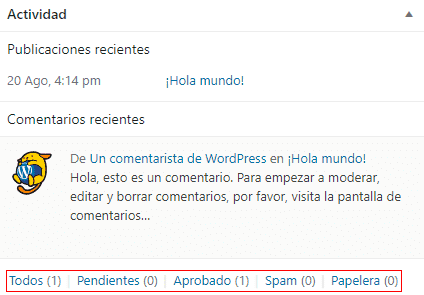
Moderate recent comments:
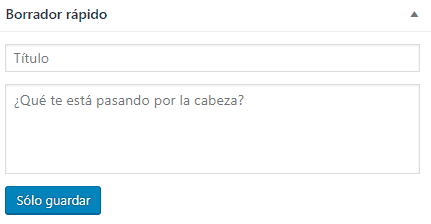
Add drafts of any idea that is crossing our mind:
In the header we see the toolbar, which as in the case of many other systems such as Prestashop allows us some quick actions for the main screen whose content and functions vary depending on where we are:

There is also a button with options for the main screen we have to define which boxes we want to see or not:

Navigating between the different manageable sections
If we are on the right side of our Wordpress, we will see the side navigation bar that we can divide into 3 sections.
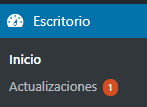
The start along with the pending/available updates we have:
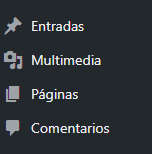
Another block that we have allows us to create posts, manage comments, insert videos which in summary means the section that allows us to manage the content of the web:
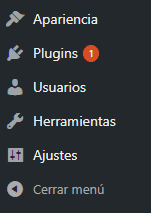
The last block which is the functions area; from there we can change the appearance of our site (Theme, background, widget, etc), plugins, users, etc:
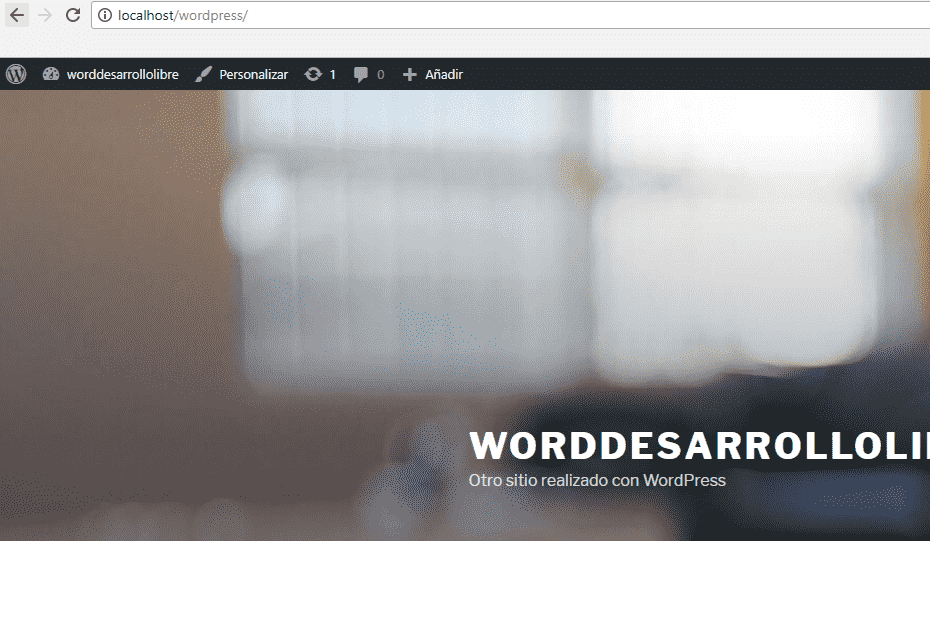
Public area of our website
The public area (http://localhost/wordpress/) has quick access to the administration area and add new posts.
Still located in the public area of our website, if we go to a post that we have created by default, we will see that the toolbar undergoes a slight change -edit the current post-; this is a common feature in this type of system that allow us to have a quick administration of that section that we are seeing with the options -which vary- in the toolbar.
If we click on "Edit post" we will see that it takes us to the administrator area and the toolbar changes again and among several options we have that of seeing the post again in the public area of our website.
Posts area
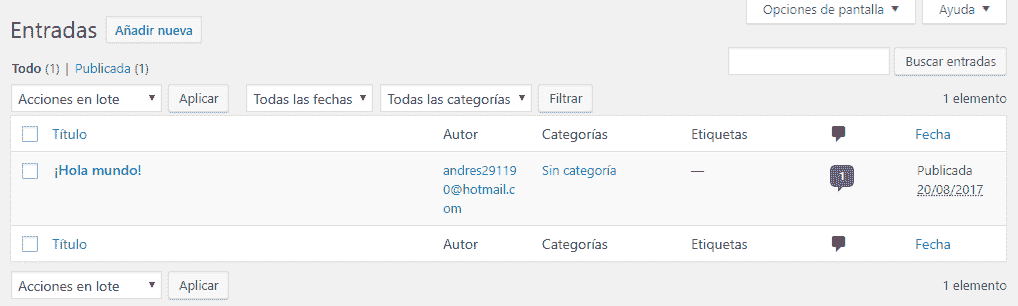
Back in our administration area, we see that Wordpress has a posts section, which is the heart of our website and is where we will generally have the content of our site, from here we can manage our posts or main content of our site; for example if our Wordpress site is a blog, here we register each of our POSTS; upon entering "All posts" we will see the typical administrative table that we can filter by categories, dates and sort by author, categories and other sections:
When we press "Add New", we can create posts; through a form that is made up of two sections:
A title and a rich text content WYSIWYG which is a kind of mini text processor in Wordpress and it is here where we enter our content.
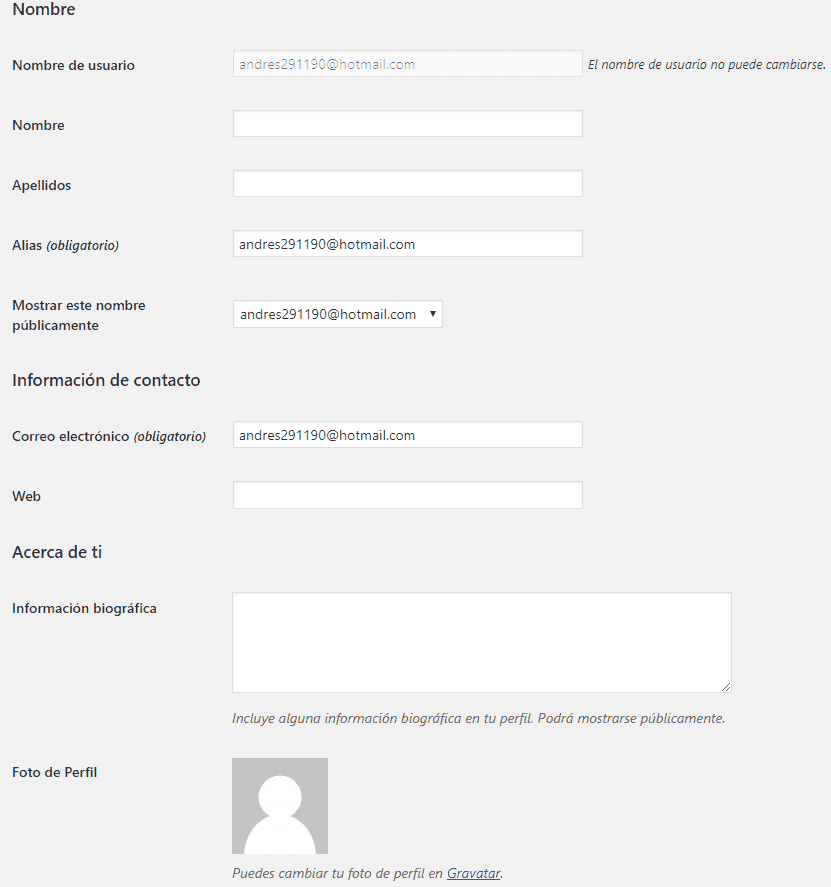
Users Section
The users section that we can access from the main menu (Users -> your profile); from here we can create other users with profiles associated with the function that this user would have on the web etc; and from the option an option that says:
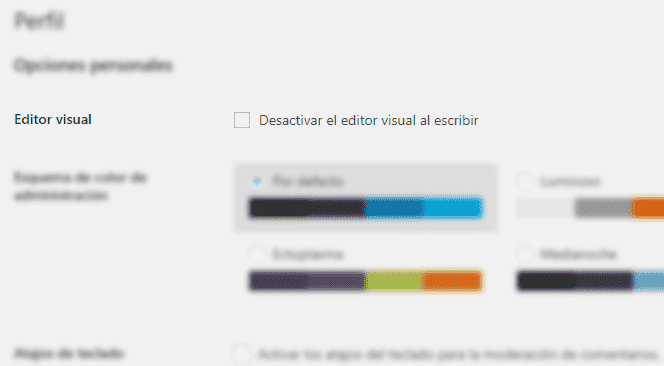
We can indicate if we want (or not the option of visualization of the HTML of the WYSIWYG plugin that Wordpress has by default in the create posts section).
In addition to other basic options to add basic information about our person such as name, last name, etc.
Appearance Section
From this section/option we can change the theme of our Wordpress from the "Themes" option, change some colors, positions, etc quickly among other elements.
Global configuration: Adjust option
From the settings tab we can make changes in multiple lines such as the name, slogan, interaction with the content, comments, writing, etc; from settings -> general:
We can modify the site name and the description that are visible elements from the public area; we also have the URL configuration that we must be careful if the URLs point to localhost and not a domain itself; said we also have the mail configuration that as the field indicates, is purely for administrative purposes and has nothing to do with the mail of our administrator user, options such as avoid/allow registering on the sites (this already depends on the purpose of our site).
Another interesting option is the "Default profile for new users" that allows you to indicate how the interaction of new users to be created with our site will be; if they will be able to edit content on our website, etc:
Among other options that we see in said section.
The next option we have are the Writing Settings:
Writing Mode (option)
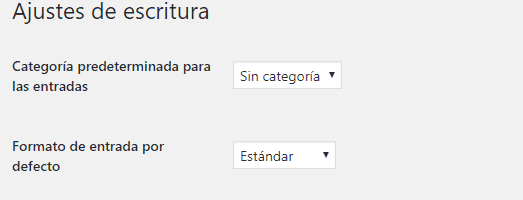
This option allows you to indicate the format of the text, for example allow (or not) emoticons in image format and/or that Wordpress automatically corrects our HTML content.
Reading Mode (option)
The Wordpress reading module allows us to indicate the display format of the main page; that is if we want it to list our posts from newest to oldest or place a static page:
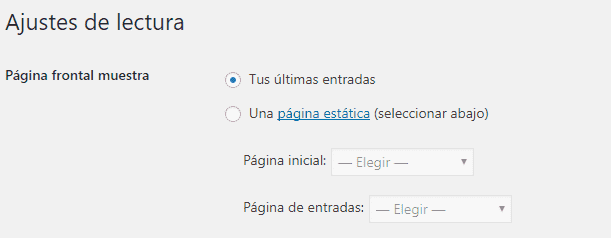
In addition to other options that allow you to indicate the maximums to show for the posts and feed.
Comments
The comments section is the most complete view we have so far due to the large number of options that are presented to us; among the most interesting we have, in the Other comment settings section indicate the data for a user to make a comment (name and email) in a post, or if the user must be authenticated, if we want to close the comments (that users cannot comment on the posts) after a certain number of days, etc.
There are also some options that allow us to indicate if the comments should appear automatically or these must wait for moderation and in case they appear automatically, we can add moderation lists indicating keywords, IPs, etc.
As for the avatars we can indicate if we want to show avatars and the default avatar for our site.
Creating your first Post
Go to Posts > Add New. You will find the WordPress block editor (Gutenberg). It works like a "LEGOs" builder: each piece of content (a paragraph, a title, an image, a gallery) is a block.
- Add a title: Write an attractive title for your article.
- Add content blocks: Click on the `+` icon to add paragraph, heading, image, list, etc. blocks.
- Organize your content: In the right sidebar, you can assign Categories (to group your posts by general topics, e.g. "Italian Recipes") and Tags (to detail the content with keywords, e.g. "eggplant", "vegetarian", "oven").
- Set a Featured Image: It is the main image that will represent your post on the blog and on social networks.
- Publish: When you are ready, click the "Publish" button. Your first article is now online!
Step 5: Customizing your Site with Themes and Plugins
Themes (Appearance)
The "Theme" controls the visual design of your website. There are thousands of free and paid themes.
Go to Appearance > Themes > Add New to explore the official WordPress repository. You can search by features, popularity or filter by web type. Once you find one you like, you can install and activate it with a single click.
Plugins (Functionalities)
"Plugins" are like the "apps" of your WordPress. They add functionalities that do not come by default. There are plugins for almost everything you can imagine.
Go to Plugins > Add New to install them. Here is a list of essential plugins that almost every site needs:
- SEO: To optimize your website for Google. Popular options are Rank Math SEO or Yoast SEO.
- Security: To protect your site from attacks. Wordfence Security or Sucuri Security are excellent.
- Contact Forms: So that your visitors can contact you. WPForms or Contact Form 7 are the most used.
- Cache: To make your website load much faster. LiteSpeed Cache (if your server supports it) or W3 Total Cache.
- Backups: To have a backup of your website. UpdraftPlus is a very reliable option.
Step 6: Essential Settings You Shouldn't Forget
Before finishing the initial configuration, visit the Settings section and review these sections:
- Settings > General: Make sure the Site Title and Tagline are correct. These appear in Google search results.
- Settings > Reading: Here you can decide what is displayed on your home page: your latest posts (blog format) or a static page of your choice.
- Settings > Permalinks: This is very important! By default, WordPress may use unfriendly URLs (e.g.
/?p=123). Change it to "Post name" to have clean and SEO-optimized URLs (e.g./my-first-article/).
Conclusion
Congratulations! You have installed and configured your own WordPress site. We have covered the basic concepts so that you can get off to a good start: from installation and content creation to customization with themes and essential plugins.
From here, the next step is to explore, experiment and start building the website you have in mind. WordPress is an incredibly powerful tool, and now you have the foundation to make the most of it.