Content Index
- What is Laravel Breeze and when to use it
- Differences between Breeze, Jetstream, and Fortify
- Prerequisites before installing Laravel Breeze
- Compatible Laravel version (Laravel 11, 12, and 13)
- Node.js, NPM, and Vite: the minimum necessary
- Local environment (Laragon, Sail, or others)
- How to install Laravel Breeze step by step
- Installing Breeze with Composer
- Compiling assets and running the project
- Using npm with Laravel Sail
- Error handling with Node
- Configuring your routes
- CSS and JavaScript Resources
- What stack to choose when starting (Blade vs Vue vs React)
- Authentication system
- Breeze installer options explained
- Common errors when installing Laravel Breeze (and how to fix them)
When you start a project in Laravel and need authentication, one of the first important decisions is which solution to use. For years, I have seen many developers jump straight into Jetstream or more complex solutions, when in reality Laravel Breeze is usually the best starting point, although it is important to mention that Laravel Breeze is no longer an official package for base Laravel (without Livewire or Inertia) and I would usually recommend that you create a Livewire project and take advantage of the authentication module it provides or use Fortify.
In this guide, I show you the first steps with Laravel Breeze, from what it is and when to use it, to the actual installation, common errors, and what to check after getting it running. It’s not just theory: it’s exactly the workflow I use and teach in my projects, courses, and books.
What is Laravel Breeze and when to use it
Laravel Breeze is the official Laravel starter kit for implementing basic authentication quickly and cleanly. It includes everything necessary to get started without overloading the project.
Laravel Breeze is defined in the official documentation as:
"Laravel Breeze is a minimal, simple implementation of all of Laravel's authentication features, including login, registration, password reset, email verification, and password confirmation. Laravel Breeze's default view layer is made up of simple Blade views styled with Tailwind CSS."
And in short, it offers us two project-level configurations:
- Install and configure Tailwind.css and Alpine.js (which is no longer necessary in modern versions of Laravel as they are included by default).
- Install and configure a simple authentication schema, registration, password recovery, and middleware for access control.
What Laravel Breeze includes by default
By installing Breeze, you get, among other things:
- User registration
- Login and Logout
- Password recovery
- Email verification
- User profile page
- Authentication middleware (auth, verified)
- Ready-to-use views with Tailwind CSS
Differences between Breeze, Jetstream, and Fortify
This is where many get confused when starting:
- Fortify: backend only, no views. Ideal if you want to build the entire frontend from scratch.
- Jetstream: very complete, with teams, 2FA, and more. Perfect for large apps.
- Breeze: ideal balance between functionality and control.
Breeze is the best choice for learning and for small or medium projects, including MVPs.
For what type of projects do I recommend Laravel Breeze?
I recommend Breeze when:
- You are taking your first steps with Laravel
- You want quick authentication without complexity
- You need a clear base to customize later
- You prefer to understand what happens "under the hood"
Important to note that it is not the goal of this book to learn Tailwind.css or Alpine.js; therefore, it is assumed the reader has some knowledge of these; we will try to use these technologies in a simple way, but if you feel lost at any point, as a general recommendation, you can pause the chapter and study these technologies a bit; you will find introductions to these technologies on my YouTube channel.
Laravel Breeze is a basic authentication package that can be installed via composer; it is a package developed exclusively for Laravel that allows adding authentication functionality to a Laravel application in a simple way. Breeze uses Blade, Vue, or React templates to generate each of the visual screens and, of course, the corresponding controllers to process the requests.
By installing Breeze, the application automatically has modules for password recovery, email verification, login, and registration, plus…
Breeze includes a profile page to update basic data of the authenticated user; and with a few changes, you can add a simple role system in the user module, which is a configuration we do in the full course and book about Laravel.
The page for the package we are going to install is at:
https://laravel.com/docs/master/starter-kits
Prerequisites before installing Laravel Breeze
Before installing Breeze, it is advisable to review some basic points that usually cause problems if overlooked.
Compatible Laravel version (Laravel 11, 12, and 13)
Laravel Breeze works perfectly in Laravel 11 and Laravel 12, although from Laravel 12 onwards it no longer appears as a direct option when creating the project. This is not a problem, it just changes the way it is installed.
Node.js, NPM, and Vite: the minimum necessary
This is where most people get stuck.
Breeze uses Vite, which implies that you need a modern version of Node.js. In real projects, I have seen constant errors due to using an old version of Node.
For example, if you see errors like:
it is not a Breeze problem, but an outdated Node version. Versions like v14.x are no longer sufficient. In my projects, I usually work with Node 18+, and with that, there are no problems.
Local environment (Laragon, Sail, or others)
You can use Breeze without problem in:
- Laragon
- XAMPP
- Laravel Sail
- Custom Docker
If you use Sail and do not have Node installed locally, you can also compile the assets from the container, as we will see later.
How to install Laravel Breeze step by step
Installing Breeze with Composer
To be able to install it:
From the root of your Laravel project, run:
$ composer require laravel/breeze --devThis adds Breeze as a development dependency.
Running the Breeze installer
Then run:
$ php artisan breeze:installIt will ask which stack we want to use; if you have experience, you can select any of the technologies such as Vue or React:
Which Breeze stack would you like to install? Blade with Alpine ........................................ blade Livewire (Volt Class API) with Alpine ........................... livewire Livewire (Volt Functional API) with Alpine .................................... livewire-functional React with Inertia ......................................... react Vue with Inertia ................................................. vue API only .................................................. apiBut, to start slowly, it is recommended that you use the "blade" option:
$ bladeYou can enable dark mode:
Would you like to install dark mode support? (yes/no) [no]Indicating "yes":
$ yesAmong other options, such as unit tests, which would not be necessary:
Would you prefer Pest tests instead of PHPUnit? (yes/no) [no]Indicating "no":
$ noAnd wait until the process finishes:
INFO Installing and building Node dependencies.Compiling assets and running the project
After installing Breeze, you need to compile the assets.
Run:
$ npm install $ npm run devThis command:
- Compiles Tailwind and JS
- Generates the final files
Using npm with Laravel Sail
If you use Sail and do not have Node installed locally:
./vendor/bin/sail npm run devThis means that changes you make to the code are automatically reflected in the browser.
Error handling with Node
If you see an error like the following:
failed to load config from C:\laragon\www\testlara11\vite.config.jserror when starting dev server:
Error: Cannot find module 'node:path' Require stack: - C:\laragon\www\testlara11\node_modules\vite\dist\node-cjs\publicUtils.cjs - C:\laragon\www\testlara11\node_modules\vite\index.cjs - C:\laragon\www\testlara11\vite.config.jsIt means you have a very old version of Node; you can check your Node version with:
$ node -vIf you see a version similar to or lower than this:
v14.16.1In the book, we are using:
$ node -v v18.8.0You must update your version; then you can run:
$ npm run devIn case you are using Laravel Sail and do not have Node installed on your computer:
$ ./vendor/bin/sail npm run devFinally, we will see that our route schema is overwritten in:
Route::get('/dashboard', function () { return view('dashboard'); })->middleware(['auth', 'verified'])->name('dashboard');Configuring your routes
And remember to re-place the overwritten routes:
use App\Http\Controllers\Dashboard\CategoryController;
use App\Http\Controllers\Dashboard\PostController;
***
Route::group(['prefix' => 'dashboard'], function () {
    Route::resources([
        'post' => PostController::class,
        'category' => CategoryController::class,
    ]);
});
CSS and JavaScript Resources
If we check the generated files in the resources folder, we will see:
resources\css\app.css
@import 'tailwindcss/base';
@import 'tailwindcss/components';
@import 'tailwindcss/utilities';
resources\js\app.js
import './bootstrap';

import Alpine from 'alpinejs';

window.Alpine = Alpine;

Alpine.start();
Breeze configured Tailwind.css and Alpine.js in our project with the corresponding imports for that purpose.
Finally, the npm run dev command generates the output files and starts a process for Hot Reload Replacement that allows synchronizing the changes we make in the source code with what we are seeing in the browser.
What stack to choose when starting (Blade vs Vue vs React)
Although Breeze allows Blade, Vue, React, Livewire, and even API-only, for the first steps I always recommend Blade.
Blade allows you to:
- Better understand the structure of Laravel
- Avoid unnecessary complexity
- Customize views without learning a full JS framework
If you already have experience, you can choose Vue or React without problem, but for learning, Blade is the most sensible option.
Authentication system
Apart from the Tailwind and Alpine configuration, Laravel Breeze configures a simple authentication schema that we are going to use below.
If we go to:
http://larafirststeps.test/login
We will see the following screen:
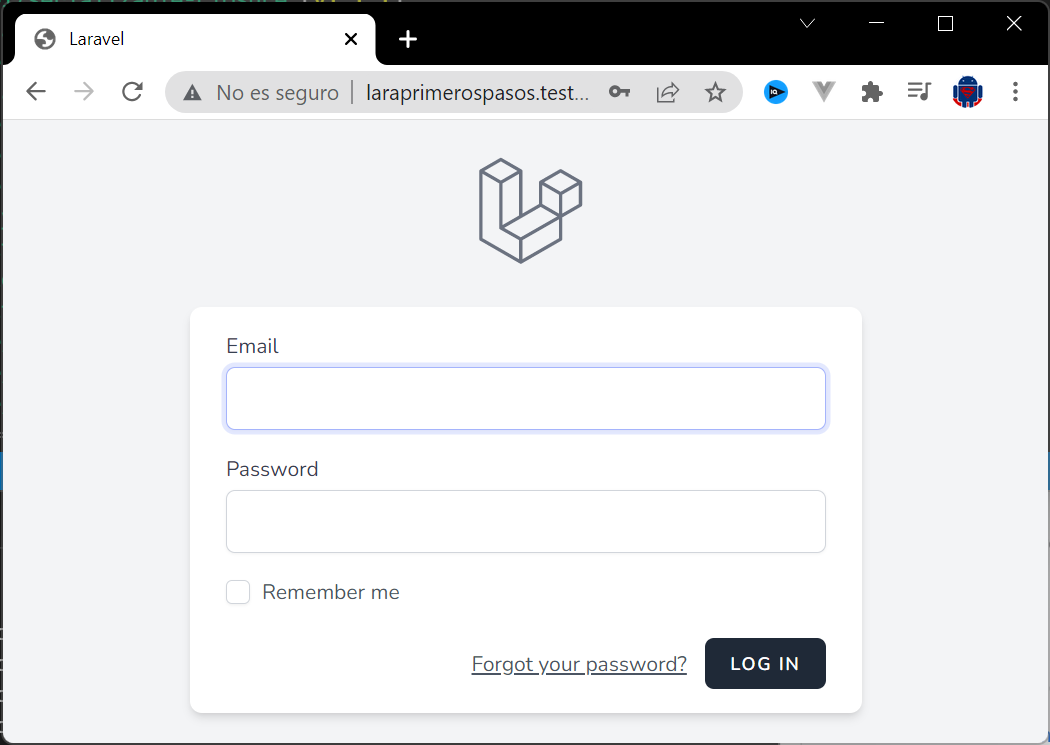
A login page, but we need to create a user:
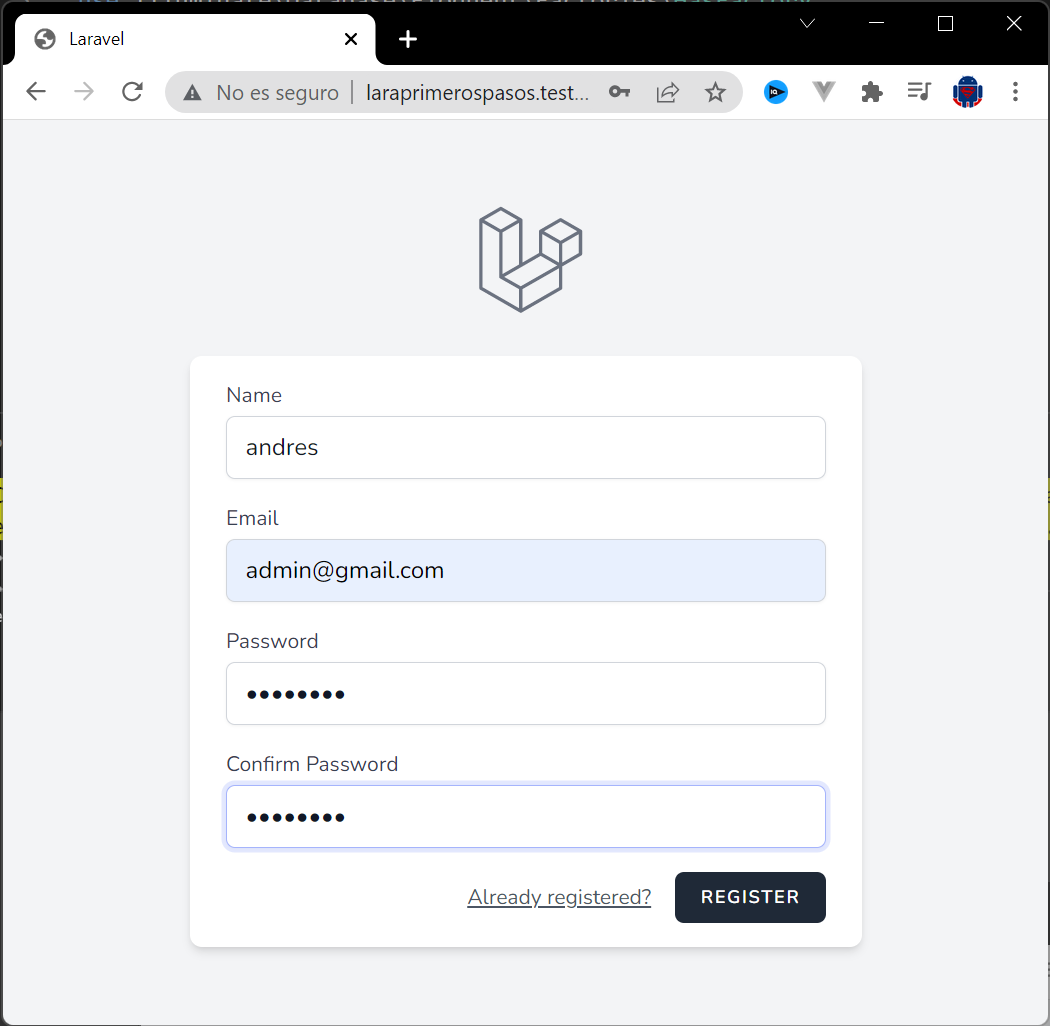
http://larafirststeps.test/register
We create one:
And if we go to the database:

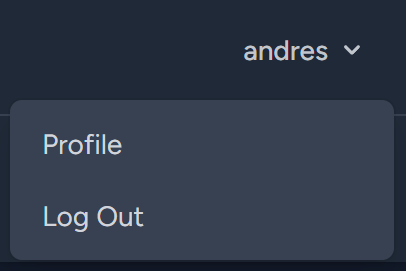
By default, we are already logged in; and as you can see, we already have a nice layout ready for our application; in the project:
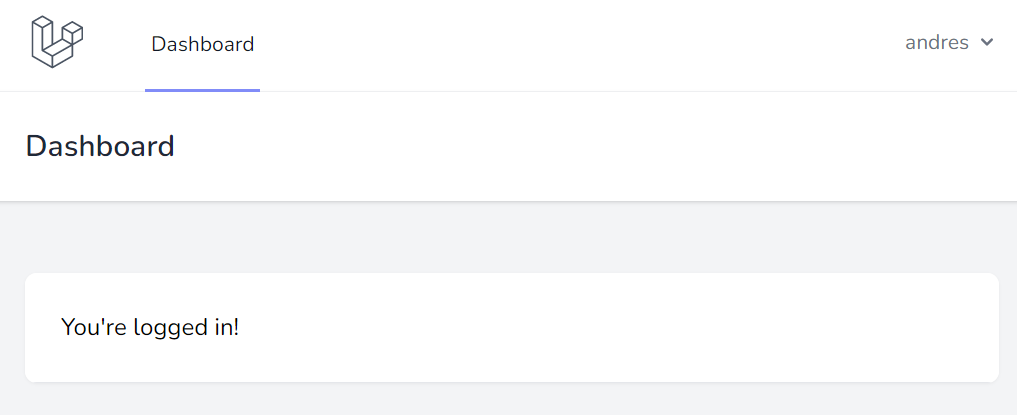
You will see some view files that Laravel Breeze has already generated for us:
I recommend you give them a good look, and you will see all the options we have; register, login, recover password, and logout:
Breeze installer options explained
During the installation, you will see several questions.
- Dark mode support
- You can activate dark mode support. It is not mandatory, but it's nice to have and adds no real complexity.
- Testing with Pest or PHPUnit
- If you are starting, you don't need tests from the first moment. In many initial projects, I prefer to say “no” and add tests later when the flow is clear.
- What each option actually generates
- Breeze generates:
- Routes
- Controllers
- Views
- Blade components
- Frontend configuration
- None of this is “magic”. Everything remains in your project for you to modify.
Common errors when installing Laravel Breeze (and how to fix them)
- Error “Cannot find module 'node:path'”
- This error indicates an old Node version. Check your version:
node -v
- If you see something like v14.x, update. In real projects, I work with versions like v18.x without problems.
- Incompatible Node versions
- Modern Laravel + Vite require modern Node. Updating Node solves 90% of initial errors.
- Problems with Vite in Windows environments
- In Windows, misconfigured routes or permissions can cause errors. They are usually fixed by:
- Updating Node
- Deleting node_modules
- Running npm install again
- In Windows, misconfigured routes or permissions can cause errors. They are usually fixed by: