Create Product and Price Id and Stripe 4 Dashboard

Before moving forward you have to come here to the first page that I presented to you when I indicated to you at the beginning of this section a couple of videos ago in which I indicated to you that when you were authenticated you landed on this page which is dashboard.stripe.com:
So here we are, I'm going to come here to the home page, here you have to come and put test environment, which would be the environments to perform tests, don't pay attention to this, it's something that's asking me for additional information for my account, here you can also enable test mode.
Create Test Environment
As a first step, we must go to the following link:
Click on the top right corner:
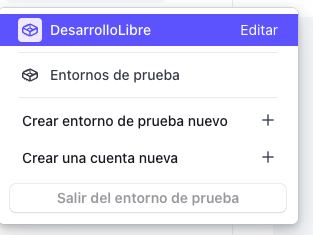
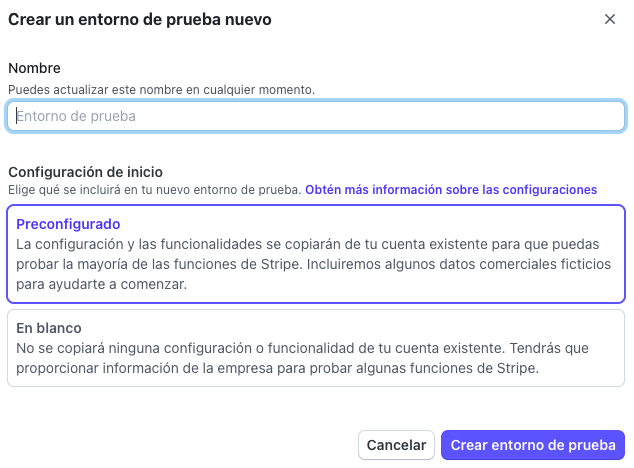
And create the test environment:
Create test products
Unlike PayPal, we must create the products we are going to sell in order to reference them through our application in Laravel/Vue using an identifier as we will see later; to do this, from the following link:
https://dashboard.stripe.com/test/products?active=true
We create at least one product from the "Create a product" button:
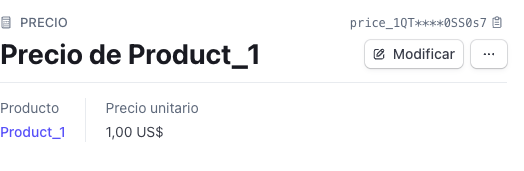
From the product details, at the configured price, by clicking on it, you will have the price identifier, which we will use later to be able to make a purchase of this product at the selected price:
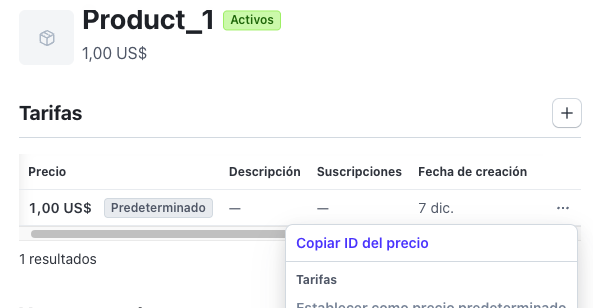
From the + button in the image above, you can create more rates/prices since a product can have from 1 to n prices, which are the ones we use in our application to configure payments; payments must be one-time, NOT recurring, recurring payments are for subscriptions.
I agree to receive announcements of interest about this Blog.
Let's create the price ID in the stripe dashboard.