
Content Index
- What is CKEditor 5 and why it is ideal for Laravel projects
- CKEditor: the Word for the web
- Applying it to our blog
- Searching for a WYSIWYG editor
- Why do I use CKEditor?
- What makes it stand out? What makes CKEditor stand out?
- Advantages over other WYSIWYG editors
- Why I use it for real projects in Laravel
- And the price?
- Why do I use it?
- Prerequisites and environment preparation
- Installation via NPM
- Initial file structure (JS, CSS and build)
- Generate the custom build
- Configure CKEditor 5 in a Laravel project with Vite Configuring CKEditor 5 in a Laravel project with Vite
- Settings in vite.config.js
- Integrate CKEditor 5 in a Blade form
- Editor initialization step by step
- How to enable image uploading (SimpleUploadAdapter) How to enable image uploading (SimpleUploadAdapter)
- Configure the adapter on the client side
- Avoid 419 errors by correctly configuring CSRF
- Upload route and controller in Laravel
- Recommended plugins and advanced editor options Recommended plugins and advanced editor options
- Premium plugins: CKFinder, CKBox, etc.
- Ways to Configure Upload in CKEditor
- Embed Responsive Youtube Videos on your website + Laravel CKEditor Embed Responsive Youtube Videos on your website + Laravel CKEditor
- Video Responsiveness Video Responsiveness
- Installing and Configuring CKEditor in Laravel Livewire
- Remove characters and HTML from CKEditor
- Problem with the generated HTML content
- My implementation for removing unwanted HTML
- Problem of modifying HTML directly in CKEditor
- Installing and Configuring CKEditor in Laravel Inertia - Vue
- Configuration in Vue
- Use in Vue components
- We imported the Classic Editor:
- CSS with Tailwind
- Creating Custom Keyboard Events
- Using a key to execute the action
- Setting a keyboard event
- The key, click() function
- Getting a reference to the button whose click you're going to simulate
- CKEditor Document Outline FREE
- Why I needed it (and why I'm not paying for it)
- Implementation of the homemade document scheme
- Generating the schema with JavaScript
- The double instance of CKEditor
- Final conclusions
- Frequently asked questions about CKEditor 5 in Laravel Frequently asked questions about CKEditor 5 in Laravel
When I started working with WYSIWYG editors in Laravel, I tried many. Lightweight plugins, modern alternatives, even some visually very nice ones... but in the end, I always returned to CKEditor. For me, it is “the Word for the web”: straightforward, complete, and capable of showing exactly what the user is going to see. And since I’ve been working with CKEditor since version 3, I can say that the jump to CKEditor 5—which is the one we’re going to integrate here—is totally worth it.
This tutorial is not just another “copy and paste installation.” Here I tell you how I use it in my real projects, the errors that will almost always come up, how to react when CKEditor decides to show you the famous filerepository-no-upload-adapter, and how to prepare your custom build with Vite in Laravel.
CKEditor is ideal for my dashboard, for managing this type of publication, whose module I protect using the Spatie Permissions system in Laravel.
What is CKEditor 5 and why it is ideal for Laravel projects
If you’ve never worked with WYSIWYG editors, CKEditor 5 is literally what you see-is-what-you-get. I call it that because it behaves like an “online Word”: you can add titles, tables, code blocks, colors, strikethroughs, whatever you want... and you see it exactly as it will appear on your blog, panel, or administrative section.
In my case, I use it a lot for publishing projects, especially blogs in Laravel. When I open the details of a post, I don’t want to see a plain, sad text: I want it to have life, formatting, and, if necessary, video embeds or well-highlighted code blocks.
CKEditor: the Word for the web
Maybe this is the first time you’ve heard about this, or maybe not, I don't know. But basically, CKEditor is exactly what its name says: what you see is what you get. I call it an “online Word” or a “Word for the web,” as it offers features similar to Microsoft Word or Google Docs.
I mean an editor that allows you to apply formats like bold, italics, strikethrough text, color change, titles, tables, lists, etc. This is precisely what the term What You See Is What You Get (abbreviated as WYSIWYG) means: you can format your text and see in real-time how it will look.
That is, we are talking about a plugin that allows us to enrich the content, so that it doesn't look so plain or boring, but with a more visually attractive style. This is ideal, of course, when we work with a blog.
Applying it to our blog
That is why I use this Laravel project again, since we are supposed to be working on a blog and we don’t want our publications to appear so simple.
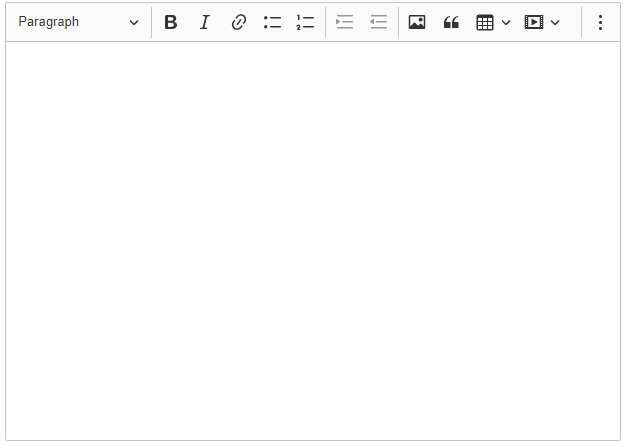
When you enter the details of a publication, it shouldn't look so "pale," but should show enriched content. For example, you can insert YouTube videos, something more advanced than the basic configurations that these editors bring by default.
In this type of editor, like the one you see above, you don't have options to insert a YouTube video or anything similar. Only basic things like titles, bold text, or underlined text.
In addition, I also place code blocks in my publications. That format is defined elsewhere, but when we use CKEditor, we can directly indicate that a block corresponds to code, among many other options.
Now, since we know what these acronyms mean—What You See Is What You Get—which can be referenced in various ways, in a nutshell it's a way to define enriched content.
I already showed you an example of enriched content both in my book and on my blog, so I think the time has come to present some available plugins for this.
Searching for a WYSIWYG editor
Obviously, if you type "What You See Is What You Get JavaScript" into Google, you'll find a lot of plugins. Note: I'm not saying they are bad or anything like that. Surely many of them are excellent, and have been on the market for quite some time.
Why do I use CKEditor?
In my case, I use CKEditor for a very simple reason: it is a project that, colloquially speaking, seems serious to me.
It has been on the market for years, I have been using it for a long time—I think since version 3, although not that long ago—and the team behind the plugin constantly keeps it updated.
This is important, because not all projects have that consistency in their improvements.
Furthermore, CKEditor is highly customizable, and has good documentation (although sometimes it may seem a little abstract).
What makes it stand out? What makes CKEditor stand out?
- It is available for Vanilla JavaScript, which is what we are going to use (without additional frameworks).
- You can also integrate it with frameworks like Angular, React, Vue 2, Vue 3, and even with .NET.
- It has extensive documentation, and an active team that keeps the project alive.
- There is a demos section, where you can see what it looks like, how it works, and test many of its functionalities.
- The editor even includes an AI assistant, which demonstrates the constant evolution of the product.
- You can export to PDF, Word, modify the interface, etc.
- It is visually beautiful and functionally very complete.
Advantages over other WYSIWYG editors
I have tried many others. Some are good, others very simple. But CKEditor stands out for:
- Stability (years on the market).
- An active team that constantly updates.
- Advanced features like exporting to PDF, Word, premium plugins, CKBox, etc.
- The possibility of creating your own build by just checking boxes.
- Clean integration with modern frameworks.
Why I use it for real projects in Laravel
I use it because:
- It has worked well for me for years.
- I know it won't fall short if I need more features tomorrow.
- The build is highly customizable.
- Although the documentation can be somewhat “dense,” once you understand the flow, everything fits together.
And the price?
Some of its more advanced features are paid. That is something to take into account.
For example, the product called SunBox (I think that’s the name), which you can integrate even with services like Dropbox and other online drives, is a separate solution that has a cost.
However, even with the limitations of the free version, the plugin already offers a lot.
Why do I use it?
In short, I use CKEditor for three reasons:
- Trust: I have been using it for years and it has always responded well.
- Customization: I can adjust it to practically whatever I want.
- Scalability: I know it will never fall short if I need to expand functionalities.
Yes, it is true that its configuration can be a bit complex. In fact, that's why I'm making these videos: to help you overcome that initial barrier.
Prerequisites and environment preparation
Installation via NPM
Laravel already comes with Node integration, so this step is straightforward:
$ npm i ckeditor5Initial file structure (JS, CSS and build)
I usually create:
resources/js/ckeditor.js resources/css/ckeditor.cssAnd in ckeditor.js I import the build modules:
// My personal comments are always with double slash (//)
// That way I know what to delete and what to keep later. import Editor from './build/editor.js';
import './build/styles.css';
Generate the custom build
From the following website:
https://ckeditor.com/ckeditor-5/builder/
You can generate your custom CKEditor, ready to copy and paste and replace or complement code in editor.js.
Configure CKEditor 5 in a Laravel project with Vite Configuring CKEditor 5 in a Laravel project with Vite
Here comes one of the parts that confuses beginners the most.
Settings in vite.config.js
Laravel needs to know which JS and CSS files it should process. Therefore, I add the editor:
export default defineConfig({
   plugins: [
       laravel({
           input: [
               'resources/css/ckeditor.css',
               'resources/js/ckeditor.js',
           ],
           refresh: true,
       }),
   ],
});
In the case of Vite, it is important to take the configuration into account. I think I already explained it before, but basically, when we use Vite—which in this case functions as a “compiler,” so to speak—what it does is interpret our transpilation. That is, it translates our CSS or JavaScript into a format that the browser can understand.
To clarify the concept: a traditional compiler would be, for example, Java, which takes a .java file and compiles it into binary code. In the case of Vite, the same type of code is maintained, but it is transformed, for example, from modern JavaScript to a version compatible with old browsers, or from SCSS to CSS.
Within the Vite configuration, we define the files we want it to interpret and we also indicate the corresponding path, just as we established previously.
Integrate CKEditor 5 in a Blade form
You can use a textarea:
<textarea class="form-control !hidden content" name="content"> {{ old('content', $post->content) }} </textarea>Or a div:
<div id="editor"> {!! old('content', $post->content) !!} </div>The <div> is what CKEditor will transform into a visual editor; the textarea remains hidden to save the data when submitting the form.
And at the end:
*** @vite(['resources/css/ckeditor.css', 'resources/js/ckeditor.js'])Editor initialization step by step
This code is the crucial part of the editor and is already configured in the previously generated build:
   .create(document.querySelector('#editor'))
   .then(editor => {
      // Don't be afraid: here you can customize
       window.editor = editor;
   })
   .catch(error => console.error(error));
How to enable image uploading (SimpleUploadAdapter) How to enable image uploading (SimpleUploadAdapter)
Most people get stuck because they drag an image, CKEditor tries to process it... and the error appears:
ckeditor5.js?v=efbb40b8:9479 filerepository-no-upload-adapter Read more: https://ckeditor.com/docs/ckeditor5/latest/support/error-codes.html#error-filerepository-no-upload-adapterIt happened to me a thousand times until I understood that CKEditor doesn't upload anything if you don't specify what adapter you are going to use.
Configure the adapter on the client side
Example:
import { SimpleUploadAdapter } from 'ckeditor5';
const editorConfig = {
   plugins: [ SimpleUploadAdapter ],
   simpleUpload: {
       uploadUrl: '/dashboard/post/upload/ckeditor',
       headers: {
           'X-CSRF-TOKEN': document
               .querySelector('meta[name="csrf-token"]')
               .content
       }
   }
};
Without this, CKEditor doesn't know where to send the image:
uploadUrl : '/dashboard/post/upload/ckeditor', So we go back here. We are going to import it anywhere. Remember that it is the import, so it doesn't matter where you place it; it can go up.
Below are the simple options. Here is an adapter; be careful with the name, since we reference it with this name in the plugins section. You can find it up here, I'm going to put it and, with this, we can use the option called simple.
After all this, the order doesn't matter; the important thing is that it is after the plugin. All these are the options, just as I explained before, a little when I commented on the structure we have in all this.
Avoid 419 errors by correctly configuring CSRF
Remember that in Laravel we have CSRF protection, so we also have to configure it and we usually have it in a meta tag:
<meta name="csrf-token" content="{{ csrf_token() }}">Now, to configure the headers, we go to the headers section and place the following:
	simpleUpload:{
		uploadUrl : '/dashboard/post/upload/ckeditor',
		headers: {
			'X-CSRF-TOKEN': document.querySelector('meta[name="csrf-token"]').content
		}
	},
Upload route and controller in Laravel
Route::post('/dashboard/post/upload/ckeditor', [PostController::class, 'upload']);And in the controller:
public function upload(Request $request)
{
   $file = $request->file('upload');
   $path = $file->store('uploads', 'public');
   return response()->json([
       'url' => asset('storage/'.$path)
   ]);
}
Recommended plugins and advanced editor options Recommended plugins and advanced editor options
Free and widely used plugins:
- Essentials
- Paragraph
- Bold
- Italic
- Table
- CodeBlock
- Image
- ImageUpload
Premium plugins: CKFinder, CKBox, etc.
When I tested CKBox, I noticed that it is excellent, but paid. For most small or medium projects, SimpleUploadAdapter is more than enough.
Ways to Configure Upload in CKEditor
We can work with two main ways: the Premium way, using a couple of packages, and the “poor man's way,” which is simpler and uses these two options: the SimpleUploadAdapter, which already comes as a little package.
import {
    ClassicEditor,
    SimpleUploadAdapter,
    ***
} from 'ckeditor5';
In this way we can import everything. Later we will see how to import it, configure it, and adjust some details.
The other option is to create a custom adapter. The important thing is that you notice the word adapter, which is exactly what is indicated here.
Regarding which one to use: I would go for the SimpleUploadAdapter, because it is simpler. I used to use the other option in CKEditor 3 or 4, but in version 5 I didn't need it and, in fact, when trying the code I had, it didn't work correctly; surely it was some small detail that needed to be corrected.
In any case, this first option is sufficient for most cases. We simply treat it somewhat theoretically now, and then we will implement it in practice:
https://ckeditor.com/docs/ckeditor5/latest/features/images/image-upload/image-upload.html
Embed Responsive Youtube Videos on your website + Laravel CKEditor Embed Responsive Youtube Videos on your website + Laravel CKEditor
Another detail that I consider interesting is that adaptive or responsive YouTube videos can be embedded on our website.
If we go to YouTube, select the video, click on "Share," then "Embed," and copy the generated code.
If you try to paste that code directly into the editor, you will see that it does not automatically adapt to the window size. To solve this, we have a couple of ways, and this again depends on how you have configured your editor.
Video Responsiveness
Video Responsiveness The problem? The video is not responsive, that is, it does not adapt to different screen sizes. You will see that a very uncomfortable scroll bar appears.
To solve this, we are going to adapt the video manually, we define the following CSS:
.video-container {
	aspect-ratio: 16 / 9;
	margin: 15px auto;
	overflow: hidden;
	position: relative;
	width: 100%;
	max-width: 600px;
}

.video-container iframe {
	position: absolute;
	top: 0;
	left: 0;
	width: 100%;
	height: 100%;
}
And now we define the videos as:
<div class="video-container"> <iframe src="..." frameborder="0" allowfullscreen></iframe> </div>With this, the iframe has width and height at 100%, top and left at 0, and the defined aspect ratio is handled from the container.
You can play with these values to see how it behaves. This HTML and CSS works for any YouTube video with a 16:9 aspect ratio, which is the most common.
Installing and Configuring CKEditor in Laravel Livewire
In Laravel Livewire, the installation process is exactly the same; the only difference is that we use it in a Laravel Livewire component, which is simply a DIV, along with a higher-level DIV for column-based alignment.
resources/views/livewire/dashboard/post/save.blade.php
***
<div class="col-span-10 sm:col-span-6">
    <Label for="">Text</Label>
    <div id="ckcontent">{!! $text !!}</div>
</div>
***
At the end of the component, we add the CKEditor script and to create it:
***
    </x-form-section>
    <script src="{{ asset('js/ckeditor/ckeditor.js') }}"></script>
        @vite(['resources/js/ckeditor.js'])
    </div>
</div>
Although in recent versions of Laravel Livewire there shouldn't be any problems updating the component via Livewire when writing to an HTML element wire:model, if you need to perform an update before submitting the form (that is, when in the developer console, in the network section, we see requests, and the affected component is redrawn, which in this example would be the save component), you can specify the following attribute:
<div wire:ignore class="col-span-6 sm:col-span-4">
   <div id="ckcontent">{!! $text !!}</div>
</div>
Remove characters and HTML from CKEditor
I wanted to quickly show you a CKEditor implementation I'm working on. As I mentioned, I have a bit of a love-hate relationship with CKEditor: it's an excellent plugin with many options, but some configurations can be a bit complicated. For example, certain options aren't easy to remove.
The feature I'm implementing is on my Academia website. I was somewhat inspired by the people at PacktPub, which allows you to view books directly on the website. For example, when you click on a book, you can see the HTML directly, which I think is excellent.
Problem with the generated HTML content
The problem I'm having is that the HTML generated by CKEditor automatically adds unnecessary <br> tags when copied. The original content I'm copying doesn't have <br> tags or anything unusual, just some basic classes and tags.
To illustrate, I take a piece of content (in this example, not a whole chapter) and copy it from Source into CKEditor. Then I save it.
Upon review, it looks like this:
- Some line breaks appear "dead".
- CKEditor automatically adds <br>, even where they shouldn't be.
- This complicates direct manipulation of the HTML.
My implementation for removing unwanted HTML
I'm not entirely proud of this solution, but it's what I came up with to avoid messing around too much with the CKEditor settings.
Instead of directly submitting the content with wire:submit.prevent, I do the following.
I create a regular form with an ID:
<form id="formData">
  {{-- <form wire:submit.prevent="sendData"> --}}
</form>
I use JavaScript to listen for the submit event:
document.querySelector("#formData").addEventListener("submit", function(event) {
   event.preventDefault();
   // Código para manipular HTML y enviarlo
});
I store the editor's content in a hidden element where I can manipulate it:
<div id="htmlCkeditor" class="hidden"></div>
document.querySelector("#htmlCkeditor").innerHTML = editor.getData();
document.querySelector("#htmlCkeditor").innerHTML =
document.querySelector("#htmlCkeditor").innerHTML.replaceAll('<p> </p>', "");Finally, I send the clean content to the server using Livewire:
$wire.submit(document.querySelector("#htmlCkeditor").innerHTML);Note: This part can be replaced with the technology you are using, such as Axios or Inertia, to make the request to the server.
Problem of modifying HTML directly in CKEditor
CKEditor automatically redefines the HTML and saves a sort of internal mirror. This prevents direct editing of the content using JavaScript within the editor.
At first, I spent over two hours trying to remove the <br> tags and couldn't understand why they kept regenerating. Finally, I discovered that by manipulating the content outside the editor before sending it to the server, I can remove the unwanted elements without any problems.
Installing and Configuring CKEditor in Laravel Inertia - Vue
In Laravel Inertia or Vue, the process changes because, since you're configuring Vue instead of a Blade template, the steps are slightly different.
When using Inertia with Vue as the view engine, you need to integrate CKEditor for Vue. One of the advantages of CKEditor is its compatibility with many JavaScript technologies, such as React, Angular, and WordPress, among others.
In the case of Inertia with Vue, you need to install two packages:
$ npm install --save @ckeditor/ckeditor5-vue @ckeditor/ckeditor5-build-classicCKEditor is a Word-like text editor designed for web applications. It's an open-source, user-friendly, and highly recommended WYSIWYG plugin. It has been around for a long time and receives regular updates, making it a reliable choice for web projects.
Configuration in Vue
To integrate CKEditor into Vue within a Laravel project using Inertia, add the following to the resources/js/app.js file:
import CKEditor from '@ckeditor/ckeditor5-vue';
createInertiaApp({
   title: (title) => `${title} - ${appName}`,
   resolve: (name) => require(`./Pages/${name}.vue`),
   setup({ el, app, props, plugin }) {
       return createApp({ render: () => h(app, props) })
           .use(plugin)
           .use(Oruga) // otros plugins como Oruga UI
           .use(CKEditor)
           .mixin({ methods: { route } })
           .mount(el);
   },
});
Use in Vue components
Let's say we have a textarea field in a posts form. We convert it into a WYSIWYG editor using CKEditor:
<template>
 <div class="col-span-6">
     <jet-label value="Text" />
     <ckeditor :editor="editor.editor" v-model="form.text"></ckeditor>
     <jet-input-error :message="errors.text" />
 </div>
</template>
<script>
import ClassicEditor from "@ckeditor/ckeditor5-build-classic";
export default {
 components: {
   ClassicEditor
 },
 data() {
   return {
     editor: {
       editor: ClassicEditor
     }
   };
 },
};
</script>
We imported the Classic Editor:
import ClassicEditor from "@ckeditor/ckeditor5-build-classic";We created the <ckeditor> component and associated the v-model with our form field:
<ckeditor :editor="editor.editor" v-model="form.text"></ckeditor>With this, any changes made in the editor will be reflected in form.text, ready to be sent to the server and saved in the database.
CSS with Tailwind
When using Tailwind in the application, we lose the default styling, such as the sizes of titles, lists, etc. Therefore, to recover this styling, we define a CSS like the following:
resources/css/app.css
/* CKEDITOR */
.ck-editor__editable_inline {
    min-height: 400px;
}

.ck-editor__main h1 {
    font-size: 40px;
}

.ck-editor__main h2 {
    font-size: 30px;
}

.ck-editor__main h3 {
    font-size: 25px;
}

.ck-editor__main h4 {
    font-size: 20px;
}

.ck-editor__main ul {
    list-style-type: circle;
    margin: 10px;
    padding: 10px;
}

.ck-editor__main ol {
    list-style-type: decimal;
    margin: 10px;
    padding: 10px;
}
/* CKEDITOR */
Creating Custom Keyboard Events
I'm going to show you how to set up keyboard events in your CKEditor. Notice that I want to implement this as if it were code; that is, this option we have here would have to come here, be clicked, and there you have it.
The problem is that when we're working with a lot of text, having to do this all the time can become inconvenient. I implemented this precisely when I was copying the content of my books to my Academia application, and that's where I have a CKEditor.
Using a key to execute the action
Notice that I'm selecting this text, but instead of clicking here, I'm going to execute an event using a key on my keyboard—redundancy intended. In this case, I press F2, and you can see that it works: the key I just pressed appears here.
Notice that when we create the CKEditor instance -which is what you're seeing here on the screen- that's a promise function that executes. In other words, at this point the editor has been built, and we can do whatever we want with it.
In this case, it was to set it up here on the screen in case I want to do something from the view that CKEditor is creating, like getting the HTML, for example.
Setting a keyboard event
But here I'm also setting up a keyboard event; that is, a standard JavaScript event, using window.addEventListener. The event we want to listen for, in this case, is keydown, although it could be any other.
And here you can see the event:
ClassicEditor.create(document.querySelector('#editor'), editorConfig)
    .then(editor => {
        window.editor = editor;
        window.addEventListener(
            "keydown",
            (event) => {
                if (event.code == "Numpad1" || event.code == "F2") {
                    event.preventDefault()
                    // if (event.ctrlKey) {
                    // en el ckeditor al marcar un texto coloca el bloque de codigo
                    document.querySelector(".ck-splitbutton__action").click()
                }
            },
            true,
        );
    });
The key, click() function
You might not know much about JavaScript, but we also have access to a function called click(), which—for whatever reason—simulates a click event in your application. I say "for whatever reason" because I think it's not a very commonly used function, since the click event is usually directly associated with a function. Therefore, it's often easier to call the function than to trigger it with a click event.
But for these kinds of cases, where we're working with a third-party plugin, it can be incredibly useful. So, in short, what we're doing is simply triggering the normal behavior of CKEditor on the selected element based on the content, as you can see.
And that's it. So, if you want to implement something similar to mine, now you know how.
Getting a reference to the button whose click you're going to simulate
The biggest challenge here is working with the IDs, as you can see. But I think it's just a matter of finding one that works. Remember that you can handle this in many ways: for example, getting a more specific element with a more complex query to ensure it only returns one.
You can put a selector here; for example, I'm going to remove this and see how many elements it returns. I'm going to put... It didn't return anything here. Why on earth didn't it return anything if it's in the dropdown? The other one is supposed to be a child. Here we have the button, and here we have this, which is what you just selected.
ck-splitbutton__actionAnd the selector looks like this:
document.querySelector(".ck-splitbutton__action").click()CKEditor Document Outline FREE
The document outline in CKEditor, which is precisely the feature you see here, is part of the premium version (i.e., it's a paid option). Basically, it's this sidebar tree on the left.
Why I needed it (and why I'm not paying for it)
For me, this is a highly desired feature. Remember in another video I mentioned that, finally, by the gods, I was able to export my books directly from my app, without having to go through Word (which I never actually used) or Google Docs. I also no longer have to rely on the Kindle plugin that allowed me to export to .pub format.
Now I have all the content in one place, and I can export it directly from there. That's why I want to further refine this tool I use behind the scenes: SecEditor, which I use for rich content.
Here you can see, for example, one of the chapters of a book that doesn't yet have a publication date, where I teach you how to create an online store with Laravel. As you can see, I have a lot of content—and believe me, I have much longer chapters than this one.
Implementation of the homemade document scheme
What I did was very simple. I'm going to show you how using this local version of my application. Remember, it's built in Laravel, although you can easily adapt this to any system that uses CKEDITOR.
So, within the application, I have CKEDITOR already installed. If you want to see how to install it, I have other videos on my channel where I explain step by step how to generate the build with the tool you saw on the screen and integrate it into your project.
To make it flexible, I used a Laravel component (although you can also use a simple view). Basically, I imported it, and what you see here is the little black button. I put an "X" on it, but you can add whatever you want:
    <div x-data="{ open: false }">>
        <button class="top-0 p-0 fixed z-40 btn-sm h-10 bg-gray-800 transform -translate-x-8" @click="open = !open">
            <svg xmlns="http://www.w3.org/2000/svg" class="h-9 w-9 text-black" fill="none" viewBox="0 0 24 24"
                stroke="#FFF" stroke-width="2">
                <path v-if="open" stroke-linecap="round" stroke-linejoin="round" d="M4 6h16M4 12h16M4 18h16" />
            </svg>
        </button>

        <div class="top-5 left-2 border shadow-md card max-w-96 fixed z-30 overflow-auto "
            :class="{ '-translate-x-96': !open }">
            <div id="tocCkeditor">
                <!-- Aquí se generará la tabla de contenido -->
            </div>
        </div>
    </div>
I use AlpineJS (which Laravel already includes by default). If you're using Vue, it's pretty much the same.
I declare a variable indicating whether the panel is open or closed, and then apply a translateX transition to hide or show it. I also add overflow: auto to make it grow if necessary.
Generating the schema with JavaScript
I generate the outline content with JavaScript. It's very simple:
function generateTableOfContents() {
    const editorContainer = document.getElementById('editor');
    const tocContainer = document.getElementById('tocCkeditor');
    const headers = editorContainer.querySelectorAll('h1, h2, h3');

    tocContainer.innerHTML = ''; // Limpiar TOC

    headers.forEach((header, index) => {
        if (!header.id) {
            // Generar ID único
            const id = `heading-${index}`;
            header.id = id;
        }

        const link = document.createElement('a');
        link.href = `#${header.id}`;
        link.textContent = header.textContent;
        link.style.display = 'block';

        // Estilo opcional según nivel
        if (header.tagName === 'H2') link.style.marginLeft = '10px';
        if (header.tagName === 'H3') link.style.marginLeft = '20px';

        tocContainer.appendChild(link);


    });
The logic looks for the H1, H2, and H3 headings. I assign a margin to the headings to simulate tabs and iterate through them.
I also generate an identifier (id) for each one.
What I do is directly modify the HTML content of the editor, which is inside an editable div. SecEditor doesn't remove these tags, unlike other prohibited HTML.
These links are exactly what you see here. If you check the HTML, they are links that point to #something. That "something" is the token generated with JavaScript.
The double instance of CKEditor
An important detail I had trouble finding is that, for some mysterious reason, SecEditor generates the same content twice. It has a div with id="editor" that isn't the actual document, and another div (which is the valid document) where the content actually resides.
The fake one has display: none, and while it doesn't affect anything, having the same duplicate id breaks the navigation, so I removed it:
setTimeout(() => {
    const editor = document.getElementById('editor');
    if (editor && editor.style.display === 'none') {
        // editor.style.display = 'block';
        document.getElementById('editor').remove()
    }
}, 2000);
So, if you too want to have your own online document outline without paying for the premium Documenter plugin, you know how to do it: with a little Alpine, a Laravel component, some JavaScript to read headers, and classic HTML links.
It works perfectly, costs nothing, and you can customize it however you want.
Final conclusions
Integrating CKEditor 5 in Laravel is simpler than it seems when you understand four things:
- Vite must compile the editor's JS and CSS.
- You must correctly initialize the editor in Blade.
- You must configure an upload adapter (SimpleUploadAdapter) to avoid errors.
- Generate your custom build from the CKEditor website.
I use it in real projects, it is a great plugin that I have used for many years, especially for blogs, and I can tell you that it is worth dedicating a few minutes to configure it. Once you have it ready, it is stable, elegant, and tremendously useful.
Frequently asked questions about CKEditor 5 in Laravel Frequently asked questions about CKEditor 5 in Laravel
- How to correctly install CKEditor 5?
- With NPM: npm i ckeditor5, create JS/CSS files and configure them in Vite.
- Why does CKEditor show a 419 error?
- CSRF failure. Make sure to read the token from the <meta> and send it in headers.
- How to activate drag and drop images?
- Include SimpleUploadAdapter and define your uploadUrl.
- What plugins are essential for a blog?
- Bold, Italic, Headings, CodeBlock, Image, ImageUpload, Table.
Next step, learn how to use the Laravel HTTP client.