
Content Index
- 1. What is Artisan and why is it so useful in Laravel
- Difference between PHP and Sail when executing commands
- 2. How to use Artisan from scratch
- 3. Most used Artisan commands
- 4. Create your own custom commands in Artisan
- Best practices
- Useful Artisan commands
- Create the class to execute our commands
- Generate the logic of our command
- Optional parameters in commands
- Named parameters
- 5. Artisan Commands to optimize your Laravel application
- 6. Project routes
- See only the routes of our application
- 7. Common errors and how to solve them with Artisan
- 8. Conclusion and recommended resources
- Frequently asked questions about Artisan in Laravel
Laravel has a simple and very powerful command line (CLI) known as artisan; artisan is nothing more than a file located at the root of our project with the name "artisan" and allows a series of preset commands to be executed; of course, we can extend the commands offered by the framework itself by programming our own commands; but that's another topic; now that we know how to use routes in Laravel, let's move on to Artisan, where we can ultimately divide the commands we can use into three groups:
Commands to generate files:
- Create migrations, we will talk about this in another chapter, but they are nothing more than files that store the structure of a table that the framework will map to the database.
- Generate seeds for test data.
- Generate controllers and other types of files.
Commands to manage processes:
- Start a development server, in case you don't want to use Apache or other servers supported by the framework.
- Execute or roll back migrations.
- Clear caches.
- Manage the database.
- Execute migrations and seeds.
Commands to obtain project information:
- Command list.
- List of project routes.
If you are just starting out or want to get the most out of this command, here I explain how to use Artisan step by step with practical examples and real tips.
1. What is Artisan and why is it so useful in Laravel
The artisan file is in the root of the project and works as an entry point to Laravel's command system.
Each command is executed with php artisan command:name, for example:
$ php artisan make:controller UserControllerThis is how you automatically generate a controller. This ease was what made me fall in love with Laravel: everything is created with a single line.
Difference between PHP and Sail when executing commands
If you are using Laravel Sail (the official Docker environment), and you do not have PHP 8 installed on your system, you must execute the commands like this:
./vendor/bin/sail artisan
2. How to use Artisan from scratch
Getting started with Artisan is very easy.
The first command you should try is:
$ php artisan listGeneral structure of an Artisan command
The basic structure is always the same:
$ php artisan command:action [options]For example:
$ php artisan make:model Product -mCreates a model and its associated migration.
The suffix -m indicates that it must also generate the migration.
It will show you all available commands, divided into categories.
3. Most used Artisan commands
For a list of the commands; I recommend you copy it and read it a few times a day and familiarize yourself with these commands which are the most used when developing in Laravel:
- php artisan make:controller: To create controllers.
- php artisan make:migration: To generate a migration file.
- php artisan migrate: To generate a migration and related commands like rollback to reverse migrations.
- php artisan make:model: Generates an Eloquent model.
Commands to manage processes:
- php artisan serve: starts a development server (useful if you don't use Apache).
- php artisan migrate: executes pending migrations.
- php artisan db:seed: inserts test data.
- php artisan cache:clear: clears the application cache.
Commands to obtain information:
- php artisan list: shows all available commands.
- php artisan route:list: To view the application routes.
- php artisan config:show: displays specific configurations.
Don't worry if you don't understand the purpose of these functions, later we will see the operation of each of these elements in detail.
4. Create your own custom commands in Artisan
One of the most powerful features of Artisan is that you can create your own commands.
This allows you to automate specific processes in your application.
Structure of a custom command
$ php artisan make:command CommandNameThis command creates a class inside app/Console/Commands.
There you define the signature (command name) and the logic it will execute.
Practical step-by-step example
Imagine you need to delete old logs:
$ php artisan make:command CleanLogsThen, in the class's handle() method, you add:
public function handle() {
   File::cleanDirectory(storage_path('logs'));
   $this->info('Logs limpiados correctamente.');
}
Now you can run it:
$ php artisan clean:logsBest practices
Use clear names (sync:users, export:orders).
Add messages with $this->info() to display results.
Document each command in your README.
In my case, I have custom commands that synchronize users or clear specific caches.
It is a way to save time and standardize repetitive tasks.
Artisan commands are a command-line tool included in Laravel that are extremely useful for developing our applications in Laravel; its purpose in software development is quite general and we can use them for various tasks, such as creating controllers, components, generating models, test data, database migrations, either to create tables, or remove them or change the tables, execute automated tests and a long etc; even, when we install certain packages for Laravel, additional commands can be added.
Useful Artisan commands
Some of the most used commands are:
- php artisan make:model: Creates a new model.
- php artisan make:controller: Creates a new controller.
- php artisan make:migration: Creates a new database migration.
- php artisan migrate: Executes pending migrations.
With this, we can realize how powerful artisan is, instead of (for example) creating a file, with its class and imports for models, we can execute a command instead and thus generate the corresponding file.
Which leads us to the process of creating our own custom commands for Laravel, which turns out to be a quite simple process to perform; the creation of custom commands is fundamental to carry out any type of operation that you want to automate through a command, commands such as make:controller are at your disposal to create any process: in this post demonstratively we are going to create a user using a custom artisan command.
Create the class to execute our commands
We have an artisan command that allows us to create the file in which we can define the process of our command, that is, the logic: for this:
php artisan make:command CreateUserCommandThis command will automatically create a new ready-to-use Artisan command file in the app/Console/Commands folder which, as you might guess, corresponds to a class with a structure that we have to follow.
Generate the logic of our command
After executing the previous command, it will generate a file that consists of 4 parts:
- The class constructor: in which we can initialize some data
- The handle function: In which we define the logic of our command, in our case, create a user.
- The signature parameter: Which allows us to define the command
- The description parameter: In which we can define a description that appears in the console, describe here what your little command does...
Our file would look like this, with the call to the User class, the model to create the user:
 <?php
namespace App\Console\Commands;
use App\Models\User;
use Illuminate\Support\Str;
use Illuminate\Console\Command;
class CreateUserCommand extends Command
{
    /**
     * The name and signature of the console command.
     *
     * @var string
     */
    protected $signature = 'user:create';
    /**
     * The console command description.
     *
     * @var string
     */
    protected $description = 'Comando para crear usuarios *-*';
    /**
     * Create a new command instance.
     *
     * @return void
     */
    public function __construct()
    {
        parent::__construct();
    }
    /**
     * Execute the console command.
     *
     * @return int
     */
    public function handle()
    {
        User::create([
            'name' => Str::random(8),
            'email' => Str::random(8).'@gmail.com',
            'password' => Str::random(12),
        ]);
        return 0;
    }
}
If we run:
$ php artisan listYou will see our beautiful command:
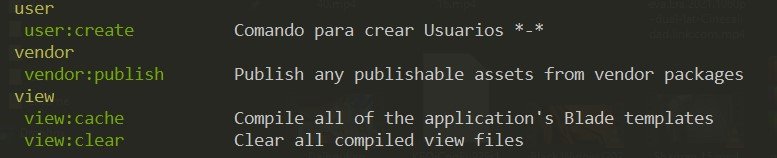
And if we execute it:
php artisan user:createIn the database we will see the result of our created user.
Optional parameters in commands
If you want the password, for example, to be optional, just indicate a ? in the parameter in question:
protected $signature = 'user:create {name} {password?}';Named parameters
You may be interested in placing the named parameter option; that is, in something like this:
php artisan --name="andres"In this case, we can add whether we want to verify the user or not; in the parameter options you have to indicate a -- followed by the name of the parameter and then an equal sign; if we have a verified parameter:
protected $signature = 'user:create {--verified=} {name} {password?}';In the end, our code looks like this:
   protected $signature = 'user:create {--verified=} {name} {password?}';


      $name = $this->argument('name');
        $password = $this->argument('password');
        $email_verified_at = $this->option('verified') ? now() : null;
        User::create([
            'name' => $name ?? Str::random(8),
            'email' => Str::random(8).'@gmail.com',
            'password' => bcrypt($password  ??  Str::random(12)),
            'email_verified_at' => $email_verified_at,
        ]);
5. Artisan Commands to optimize your Laravel application
When your project grows, Artisan also helps you improve performance.
Clear cache and configuration
$ php artisan cache:clear
$ php artisan config:clear
$ php artisan route:clear
$ php artisan view:clear
These commands delete temporary files that can cause unexpected behavior.
Optimize routes and autoload
$ php artisan route:cache
$ php artisan config:cache
$ composer dump-autoload -o
This compiles routes and configurations into static files, making your application load faster.
Restart services with Artisan
Sometimes, when changing code in production, you need to restart queues or events:
$ php artisan queue:restart
This command has saved me in continuous deployments: it avoids manually restarting server processes.
6. Project routes
To view the routes of a Laravel project, we use Artisan with:
php artisan route:listAnd its shortcut:
php artisan r:lSee only the routes of our application
But, what happens if we want to see only the routes of our application and not those generated by third parties; For that, we have the following option:
php artisan r:l --exept-vendorWith this command, we can see all the routes except for the routes generated by third parties.
7. Common errors and how to solve them with Artisan
Artisan does not recognize commands
If you get errors like “Command not defined”, run:
$ composer dump-autoload $ php artisan optimize:clearProblems with migrations or seeds
Sometimes we forget that the database is not synchronized. Solution:
$ php artisan migrate:fresh --seedThis recreates the entire structure and repopulates it with data.
Quick solution with cache:clear
Never underestimate this command. It has solved dozens of mysterious errors for me:
$ php artisan cache:clear| Category | Command | Action |
|---|---|---|
| Generation | make:model [Name] -m | Creates the model and its associated migration. |
| Generation | make:controller [Name] | Generates a new controller. |
| Database | migrate | Run pending migrations. |
| Database | migrate:fresh --seed | Restart the DB and load the seeders. |
| Optimization | optimize:clear | Clear all framework caches. |
| Information | route:list --except-vendor | List only your custom routes. |
8. Conclusion and recommended resources
What you learned about Artisan
Artisan is much more than a simple command executor.
It allows you to automate, optimize and maintain your Laravel application from the terminal, cleanly and quickly.
Don't worry if you don't remember all the commands at first.
You will internalize them over time. In my experience, daily practice is the best teacher.
Frequently asked questions about Artisan in Laravel
- What is Artisan and what is it for?
- It is Laravel's command-line interface, used to create, execute, and manage framework tasks.
- What are the most used commands?
- make:controller, migrate, serve, route:list, cache:clear.
- How do I create a custom command?
- With php artisan make:command CommandName and defining the logic in handle().
- What is the difference between php artisan and sail artisan?
- The former uses your local PHP installation; the latter runs inside the Laravel Sail Docker container.
- How to clear the application cache?
- Run php artisan cache:clear or php artisan optimize:clear
- How can I learn more about a specific command? Run php artisan help [command-name] to see
- all its available options. This empowers the reader to learn independently.
- If you see 'Command not found' errors or PHP version issues, you almost certainly need to use
- ./vendor/bin/sail artisan instead of php artisan.
The next step is to continue working with forms and learn how to implement file uploads in Laravel.