
JavaScript notifications are one of the most effective ways to communicate relevant information to users in applications and websites. They allow displaying operating system messages even when the page is not in the foreground, making them ideal for notices, alerts, errors, or process feedback.
In this guide, I will explain how JavaScript notifications work, how to request permissions correctly, how to customize them, and which errors to avoid, based on both the official API and practical experience using them in real projects.
Previously, we learned how to copy and paste to the Clipboard using JavaScript.
What are JavaScript notifications?
Web notifications are messages that the browser displays at the system level using the HTML5 Notification API. Unlike an alert(), these notifications:
- Do not block code execution
- Are displayed outside the page
- Can appear even if the user is on another tab
This allows informing the user of important events without interrupting their flow.
In my case, I have used them mainly for:
- Action confirmations
- Process status messages
- Warnings and non-critical errors
The Notification API in JavaScript
In HTML5, we can use the Notification object to configure and display informative messages to the user; the syntax for creating a notification is as follows:
var notification = new Notification(title, {options})Where:
- title is the main text
- options is an optional object to customize the notification
Basic notification example
The simplest notification to configure is one where only the title is present; in other words:
var notification = new Notification("Hello World")The simplest notification to configure is one where only the title is present; in other words:
var notification = new Notification("Hello World")We get:
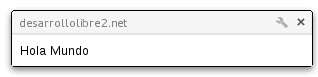
Click the following button to launch the basic notification:
Verify Notification API support in the browser
We can use the following conditional to verify browser support:
if (!('Notification' in window)) {
  alert('This browser does not support the Notification API');
  return;
}
This avoids silent errors in older browsers or limited environments.
General compatibility
- Chrome: ✔
- Firefox: ✔
- Edge: ✔
- Safari: ✔ (with some particularities)
Requires HTTPS in most modern browsers
JavaScript Notification Permissions
It is possible that if we simply launch the notification in the following way without requesting permissions:
var notification = new Notification("Hello World")It may not be enough to show the notification; just as with the HTML5 Geolocation API, it is necessary to request permission from the user to be able to view notifications.
The API defines three possible states:
granted: the user allows notificationsdenied: the user blocked themdefault: has not decided yet
You can check it like this:
Notification.permission
There are also other read-only properties such as:
- Notification.title
- Notification title.
- Notification.dir
- Notification direction.
- Notification.lang
- Language used in the notification.
- Notification.body
- Secondary text of the notification.
- Notification.tag
- Notification ID.
- Notification.icon
URL of the image used as the notification icon.
Request permission correctly
To request permission, use:
Notification.requestPermission().then(function(permission) {
 console.log(permission);
});
Asking for permission without user interaction usually fails or causes automatic browser blocks. Ideally, do it after a click, for example on a button.
This method is used to ask the user if they allow showing notifications:

Once the response is obtained from the user, the notifications can be defined and launched in the body of the method:
Syntax of the Notification.requestPermission() method
Notification.requestPermission(function(permission){
  var notification = new Notification("Hello World");
});
Create and display notifications in JavaScript
Once permission is granted, the notification can be displayed:
let notification = new Notification("Hello World", { body: "This is the body of the notification", icon: "/icon.png" });This is where the possibilities really begin.
Customization Parameters for JavaScript Notifications
It is possible to customize to a greater degree than simply placing a title in the notifications through the second optional parameter that allows configuring a set of options that we will see below:
- title: Main message or title to be displayed in the notification.
- options: (optional)
- body: Text with some extra content to display.
- dir: Indicates the direction of the alignment of the notification texts, can be:
- auto.
- ltr: aligns notification texts to the left:
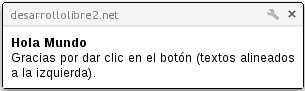
Click the following button to launch the notification with the text aligned to the left:
- Launch notification (left-aligned text)!
- rtl: aligns notification texts to the right:
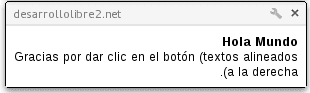
Click the following button to launch the notification with the text aligned to the right:
- Launch notification (right-aligned text)!
- lang: Specifies the language used in the notification.
- tag: Notification identifier.
- icon: URL of an image to be used as an icon in the notification:
let options = { body: "Secondary message", icon: "/icon.png", dir: "ltr", lang: "en", tag: "demo" };JavaScript Notification Events
- Notification.onclick
- Event that indicates when the user clicks on the notifications.
- Notification.onshow
- Event that indicates when the notifications are displayed.
- Notification.onerror
- Event that indicates when an error occurs.
- Notification.onclose
- Event that indicates when the notifications are closed.
The basic syntax for all the events seen above is as follows:
var notification = new Notification( "Hello World");
notification.onshow = function() { console.log("Notification shown"); };
notification.onclick = function() { console.log("Notification clicked"); };
notification.onerror = function() { console.log("Notification error"); };
notification.onclose = function() { console.log("Notification closed"); };
In real projects, the onclick event is especially useful for:
- Redirecting the user
- Triggering an action
- Bringing the window to the front
Handling Common Errors
What happens if I send a notification without permission?
If you try to show a notification without permission, it will not be displayed and may throw errors. That is why it is advisable to control all cases:
if (Notification.permission === "granted") { new Notification("Hello"); }This control avoids many inconsistent behaviors between browsers.
Full JavaScript Notification Example
With the following JavaScript code:
function notificacionBasica() {

  if (!('Notification' in window)) {
    alert('No support');
    return;
  }

  if (Notification.permission === "granted") {
    new Notification("Hi");
  }
  else if (Notification.permission !== "denied") {
    Notification.requestPermission().then(function(permission) {
      if (permission === "granted") {
        new Notification("Hi");
      }
    });
  }
}
And an HTML button to trigger the notification:
<button onclick="notificacionBasica()">Launch basic notification!</button>We get a notification like the following:
You can find all the examples seen so far in the following links:
Notification API vs Push Notifications
It is important to clarify a common confusion:
- Notification API: local notifications, dependent on the page
- Push Notifications: work even with the website closed (require Service Workers)
If you need persistent or background notifications, then you must use Push API + Service Workers, as explained in more advanced guides.
Best Practices for Using Notifications
Request permission only after a user action
- Do not abuse notifications
- Always provide real value
- Use tag to avoid duplicates
- Test in various browsers and devices
A poor implementation can cause the user to block your site forever.
FAQs about JavaScript Notifications
- Do notifications work without HTTPS?
- No, in most modern browsers they require HTTPS.
- Does Safari support the Notification API?
- Yes, although with differences in how permissions are requested.
- Can I use notifications on mobile?
- Yes, but for better compatibility, it is recommended to use Service Workers.
- Can previous notifications be replaced?
- Yes, using the tag property.
Now, learn how to run JavaScript in parallel with workers.
Conclusion
JavaScript notifications are a powerful tool when used correctly. With the Notification API, you can display clear, customized, and controlled messages, always respecting permissions and user experience.
If you start with basic notifications and follow best practices, you will have a solid foundation to then jump into more advanced push notifications.