
With the rise of smart mobile devices, there are a multitude of web applications that use the user's location to offer content appropriate to the area, such as Twitter, Facebook, and various Google services.
Geolocation has become one of the most useful functions in modern web applications. From interactive maps to location-based recommendations, JavaScript offers a simple—yet powerful—way to access the user's position using the Geolocation API.
In my case, I came to master this API because I used it in my thesis, where I needed to display the works of art distributed throughout the entire University City. It was there that I discovered fine details such as permissions, precision, and different behavior between mobile and desktop.
What is Geolocation in JavaScript and how does it really work?
The Geolocation API allows obtaining the user's position from the browser, provided that:
- The browser supports it.
- The user grants permission.
- The site is under HTTPS (mandatory).
How your browser obtains location (GPS, WiFi, and mobile networks)
The browser combines different sources:
- GPS (very accurate, ideal on mobile)
- Nearby WiFi networks
- Cell towers
- User IP (less accurate)
In my thesis project, for example, I noticed that indoors, the precision dropped, so I had to adjust the high-accuracy setting to get better results when I was directly in front of a work.
Requirements: HTTPS, user permissions, and compatibility
- Without HTTPS, the browser does not return location.
- The user can accept or reject the request.
- Not all devices respond the same way.
The Geolocation API in JavaScript
With geolocation, we can know the user's geographic location, as long as the user's browser has this API implemented and the user gives us permission to access their location.
How do we use the geolocation object?
We can access the geolocation API through the navigator object in the following way:
navigator.geolocation
We must take two considerations into account before working with this API:
How to check if the Geolocation API is available
Check if the user's browser has this API implemented; this is to avoid script execution errors; we will check it in the following way:
if(navigator.geolocation){
   /* geolocation is available */
}else{
  /* geolocation is not available */
}
Or an equivalent of the same would be:
if ("geolocation" in navigator)
  /* geolocation is available */
}else{
  /* geolocation is not available */
}
The user can deny or allow access to their location; therefore, it is advisable that this functionality does not have to be mandatory for the user to use the application, only to improve their experience.
For both cases, we must carry out the necessary validations to avoid problems in the execution; we will see how to validate the second case (denial of the request by the user) later.
Typical behavior on desktop vs mobile
- Desktop: relies more on WiFi → lower precision.
- Mobile: excellent precision with GPS, but consumes more battery.
When I did tests in the University City for my Thesis, I often got differences of several meters between laptop and mobile. This matters if you are working with exact points like sculptures, murals, or routes.
How to obtain the user's location with the navigation.getCurrentPosition() object?
We can access the user's location if and only if the user allowed us access to their location and the browser supports this feature using the getCurrentPosition() method:
navigator.geolocation.getCurrentPosition(
  mostrarUbicacion,
  manejarError,
  {
    enableHighAccuracy: true,
    timeout: 5000,
    maximumAge: 0
  }
);
With the getCurrentPosition() method, we can retrieve the user's current geographic location; the location is expressed in geographic coordinates returned in a Position object.
Basic example with latitude and longitude
In this example, we see how we can get the latitude and longitude based on the user's location:
function mostrarUbicacion(position) {
   console.log("Latitude:", position.coords.latitude);
   console.log("Longitude:", position.coords.longitude);
}
Syntax of the getCurrentPosition() method in JavaScript
getCurrentPosition(ShowLocation, ErrorHandler, options);Parameters of the getCurrentPosition() method in JavaScript
- ShowLocation: The method that will receive the user's location information; this is done through a Position object.
- ErrorHandler: (optional) The method that will receive the PositionError object if an error occurs in the user's location.
Complete error and permission handling in the Geolocation API
The PositionError object can return:
- PositionError.PERMISSION_DENIED: The user did not allow location.
- PositionError.POSITION_UNAVAILABLE: It is not possible to obtain the user's position.
- PositionError.TIMEOUT: The operation ran out of time and cannot continue.
- options: (optional) Specifies a set of options to retrieve the data:
- frequency: How often we will retrieve the user's position given in milliseconds (default 10000).
- enableHighAccuracy: A boolean that indicates that the application will attempt to provide the most accurate location estimate possible.
It is false by default; it must be taken into account that if we activate this mode (true), it can increase the response time.
- timeout: The time to let pass in milliseconds for the geolocation.getCurrentPosition or geolocation.watchPosition method to give us a response; this time is given in milliseconds.
- maximumAge: Specifies the elapsed time in milliseconds for the cached location information.
How to improve accuracy without affecting performance
A balanced combination is usually:
{ enableHighAccuracy: true, timeout: 7000, maximumAge: 10000 }Real-time geolocation with watchPosition()
If you need to constantly update the location (for example, when walking between campus buildings), use:
navigator.geolocation.watchPosition(...)Differences with getCurrentPosition()
- getCurrentPosition(): only once.
- watchPosition(): every time the location changes.
- Cases where it is worthwhile:
- interactive routes
- step-by-step guided tours
- activity monitoring
In the University City, I used it for internal tests while walking between works, checking how quickly the system reacted.
Example 1: Basic Geolocation
To get the user's position using the getCurrentPosition() method in JavaScript we can do the following:
As we can see, we first verify if the geolocation API is available and then request the user's location with the getCurrentPosition() method; passing the function that will receive the Position object called MostrarLocalizacion as a parameter.
Example 2: Basic Geolocation and Error Handling
Now we will see a slightly more elaborate example; where we type the errors that may occur, let's see:
Geolocation with JavaScript and Google Maps
Google Maps is an excellent tool for visualizing draggable maps and even routes between different points; this excellent tool is available to use in our web projects, in this post we will see how to use Google Maps in our web projects.
Displaying the location on a map with JavaScript (Leaflet or Google Maps)
An application without a map feels incomplete. I used Leaflet in my thesis because it is light and free.
Loading static points on the map
L.marker([lat, lng]).addTo(map) .bindPopup("Work of art");Centering the map based on the user's position
map.setView([userLat, userLng], 16);Google Maps
Here I integrated both my position and the points of all the works on campus, allowing me to compare distances and plan routes.
Getting the user's location, a topic already explained:
myLatlng = { Lat: position.coords.latitude, Lng: position.coords.longitude }We include a link to the Google Maps API in our HTML document to be able to use it:
<script async defer src="https://maps.googleapis.com/maps/api/js?key=YOUR_API_KEY&callback=initMap"> </script>- Replace YOUR_API_KEY with your key.
- The use of async and defer is recommended for non-blocking loading.
- The parameter callback=initMap is used so that the initMap() function (the one that initializes your map) is automatically executed once the API has fully loaded.
- The parameter sensor=false (which used to be common) is no longer necessary.
Then we include the canvas where the map will be drawn:
<div id="map_canvas" style="width:500px; height:500px"></div>Note that the map can be of different sizes; for the purposes of this example it will be 500px X 500px.
The penultimate step consists of constructing the object used for manipulating the map options:
var mapOptions = { zoom: 8, center: { lat: myLatlng.Lat, lng: myLatlng.Lng }, // Preferred format mapTypeId: google.maps.MapTypeId.ROADMAP };Types of maps available in the Google Maps API:
- MapTypeId.ROADMAP displays the default road map view.
- MapTypeId.SATELLITE displays Google Earth satellite images.
- MapTypeId.HYBRID displays a mix of normal and satellite views.
- MapTypeId.TERRAIN displays a physical map based on relief information.
Possible zoom levels range from 0 to 21 for the furthest away.
The last step is to build the map:
var map = new google.maps.Map(document.getElementById("map_canvas"), mapOptions);Google now promotes the use of an async/await pattern in conjunction with the API loader or the import of libraries. This is more advanced, but useful for avoiding the use of the global callback:
let map; async function initMap() { // Imports the 'maps' and 'marker' library const { Map } = await google.maps.importLibrary("maps"); map = new Map(document.getElementById("map_canvas"), { center: { lat: myLatlng.Lat, lng: myLatlng.Lng }, zoom: 8, });Geolocation best practices in real projects
- Ask for permissions only when the user needs them.
- Use enableHighAccuracy sparingly.
- Inform the user why you want their location.
- Always handle errors.
- Avoid relying solely on geolocation for critical navigation.
How to add markers (POIs) in Google Maps?
We will see how to add POIs or so-called markers in Google Maps; In a last article titled Geolocation With JavaScript And Google Maps we saw how to create a Google Maps map on a web page; Basically we need to follow the following steps:
// The function is called automatically after the API loads via the 'callback' parameter.
function initializeMap() {
// 1. Coordinates (Using 'lat' and 'lng' in lowercase and as numbers)
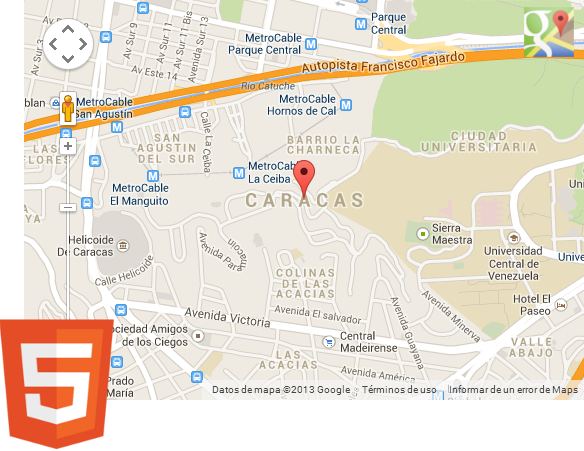
const myLatLng = {
lat: 10.49063, // Latitude for Caracas, Venezuela
lng: -66.886965 // Longitude for Caracas, Venezuela
};
// 2. Map Options Object
const mapOptions = {
zoom: 15,
// The API accepts the literal {lat, lng} object directly for the center
center: myLatLng,
mapTypeId: google.maps.MapTypeId.ROADMAP
};
// 3. Map Construction (Drawing the map in the 'map' div)
const map = new google.maps.Map(
document.getElementById("map"),
mapOptions
);
// 4. Adding the Marker (Point of Interest - POI)
// A Marker is added by instantiating the google.maps.Marker class
new google.maps.Marker({
position: myLatLng, // The Marker's location
map: map, // The Map object where the marker will be drawn
title: "My First Location!" // Tooltip text when hovering over the marker
});
}- First we establish the coordinates where we position the camera:
// coordinates myLatlng = { Lat: "10.49063", Lng: "-66.886965" };
The next thing is to configure the map options: initial zoom, position and the type of map are some of them:
    var mapOptions = {
        zoom: 15,
        center: new google.maps.LatLng(myLatlng.Lat, myLatlng.Lng),
        mapTypeId: google.maps.MapTypeId.ROADMAP
};- Now we indicate where the map will be drawn, in the previous div:
// I build the map map = new google.maps.Map(document.getElementById("map"),mapOptions);
Conclusion
The Geolocation API is simple to use, but getting the most out of it requires understanding permissions, accuracy, performance, and error handling. In my experience developing the guide to works of art in University City, these details made the difference between a "pretty" map and a truly useful experience.
With this article, we can see one of the many functionalities that HTML5 provides us for the development of web applications to provide better experiences for the end user.