
A photo viewer in Flutter is a tool that allows displaying a set of images comfortably, usually in a carousel format, so the user can move from one photo to another using gestures or controls. In practice, this type of viewer is widely used in galleries, catalogs, user profiles, or any screen where images are the main focus.
Previously we learned how to use the Redux state manager in Flutter
In my case, when I needed to show several photos and allow for zoom, rotation, and fluid displacement, using just the Image widget fell short. That's why I ended up using PhotoView, a package that solves this problem elegantly and is very easy to implement.
In this article, I show you how to create a photo viewer in Flutter using PhotoView, from the basics to a complete gallery with swipe and a good user experience.
A photo viewer is a tool that allows users to view images in a carousel or similar; basically, it allows viewing a set of photos in a simple way by moving from one photo to another through controls and/or gestures.
What is a photo viewer in Flutter and what is it used for
An image viewer in Flutter is a view that shows photos in full screen or within a container, normally allowing:
- Scrolling between multiple images (swipe)
- Zooming (pinch)
- Rotating the image
- Viewing high-resolution images without losing quality
This type of component is very common in modern applications. In fact, almost any app that works with images ends up needing a photo viewer with gestures, as it greatly improves the user experience compared to a static image.
Why use PhotoView to create an image viewer
PhotoView solves most of the common problems of a photo viewer in Flutter, and that is why it is the one used in this post.
PhotoView vs Image and InteractiveViewer
- Image
- Used to display images, but does not include zoom or advanced gestures.
- InteractiveViewer
- It is powerful, but requires significantly more code to achieve a gallery-like experience.
- PhotoView
- Comes ready for:
- Zoom
- Rotation
- Scroll
- Galleries with swipe
- Automatic scaling
- Comes ready for:
PhotoView is ideal when you want fast and well-polished results without having to reinvent the wheel or handle complex transformations.
Installation and initial configuration of the PhotoView package
Add the dependency in pubspec.yaml
The first step is to add the package to your Flutter project:
dependencies:
  photo_view:
Then run flutter pub get to download the dependency or save the file in VSC or Android Studio.
With the help of this package, we can easily create the animated or side-to-side Swiper effect for our photos and achieve our goal.
Import and prepare image assets
If you are going to work with local images (as I did), make sure to declare them correctly:
assets:
 - assets/
Then import the package into your Dart file:
import 'package:photo_view/photo_view.dart';PhotoView in practice
The photo view or viewer widget in Flutter is a simple image that appears on our screen using, obviously, a widget. Users will be able to rotate and enlarge the image and move to other images of interest.
The package provides a loading property that we use during the time it takes for any image until the loading indicator rotates. Let's understand the properties in detail.
Some basic properties and concepts:
- scrollDirection: This is to indicate the scroll direction in which we can scroll the list in a vertical or horizontal direction.
- enableRotation: The enableRotation property is used to rotate the image; it is a boolean.
- physics: We use the physics property to perform the scrolling. It determines when the user reaches the maximum scroll limit or stops scrolling.
- controller: Controller properties are a way to control the change factors of PhotoView and listen to their changes using listeners.
- backgroundDecoration: Decoration of the image you are going to show initially.
- loadingBuilder: Progress indicator that appears when the image is loading.
- maxScale: The maxScale property defines the maximum size of the image.
- minScale: The minScale property defines the minimum size of the image.
Minimal example of a photo viewer with PhotoView
As indicated in the official documentation, we can create a minimal example with the following content that does nothing more than show an image:
@override
Widget build(BuildContext context) {
  return Container(
    child: PhotoView(
      imageProvider: AssetImage("assets/large-image.jpg"),
    )
  );
}
With just this, you already have an image viewer in Flutter with zoom and scroll, something that would require more work with standard widgets.
Create an image gallery in Flutter with PhotoViewGallery
This is a more complete example where we will see more options; first, we need a set of images that, of course, if they are local, you have to define within your .yaml:
  assets:
    - assets/
First, we have created an image list.
final imageList = [
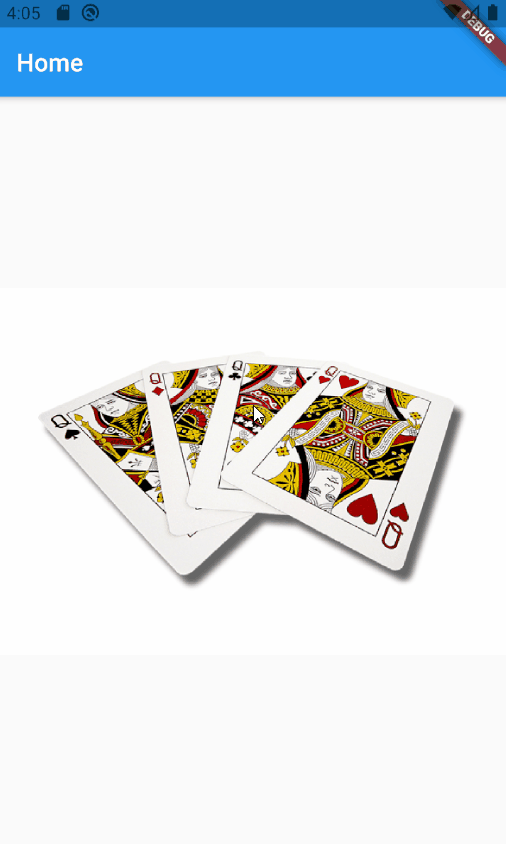
'assets/cartas.jpg',
'assets/maleta.jpg',
'assets/reloj.jpg',
'assets/te.jpg',
];Before using the PhotoView widget, we create a container inside which the PhotoViewGallery.builder class is used. This class will create a list of images. Inside the builder class is the PhotoViewGalleryPageOptions class, which has set the image scale and the enableRotation type to true so the image can rotate.
class HomePage extends StatelessWidget {
  final imageList = [
    'assets/cartas.jpg',
    'assets/maleta.jpg',
    'assets/reloj.jpg',
    'assets/te.jpg',
  ];

  @override
  Widget build(BuildContext context) {
    return Scaffold(
      appBar: AppBar(
        title: Text('Home'),
      ),
      body: Container(
        child: PhotoViewGallery.builder(
          itemCount: imageList.length,
          builder: (context, index) {
            return PhotoViewGalleryPageOptions(
              imageProvider: AssetImage(
                imageList[index],
              ),
              minScale: PhotoViewComputedScale.contained * 0.8,
              maxScale: PhotoViewComputedScale.covered * 2,
            );
          },
          scrollPhysics: BouncingScrollPhysics(),
          backgroundDecoration: BoxDecoration(),
          enableRotation: true,
        ),
      ),
    );
  }
}
The BouncingScrollPhysics allows us to create an interesting effect when scrolling is necessary, for example, during the image scaling phase; for more details, check the official documentation.
Minimum and maximum scale of images
Something I learned testing different configurations is that properly adjusting minScale and maxScale completely changes the feel of the viewer.
Too aggressive or too limited a zoom can ruin the experience, so it's worth testing values until you find the right balance.
Scroll, rotation, and user experience
Using BouncingScrollPhysics adds a very pleasant visual effect when the user reaches the displacement limits, especially when zooming. It's a small detail, but it makes a difference compared to a rigid scroll.
Additionally, with enableRotation: true, you allow the user to rotate the image, which is very useful for photos taken from a mobile phone.
Key PhotoView properties you should know
These are the properties I use most and that really matter in a photo viewer in Flutter.
scrollDirection and physics
They allow defining the scroll direction (horizontal or vertical) and the scroll behavior. Adjusting them well greatly improves fluidity.
enableRotation
It is a simple but very powerful boolean. When the content requires it, allowing rotation provides a much more natural experience.
loadingBuilder and backgroundDecoration
Something I value highly is being able to show a loading indicator while the image is downloading or processing. This avoids blank screens and improves the perception of performance.
Practical tips and common mistakes when creating a photo viewer
- Do not forget to correctly declare the assets in pubspec.yaml
- Always adjust minScale and maxScale
- Avoid mixing too many gestures if they are not necessary
- Use PhotoViewGallery instead of reinventing a manual carousel
Quick FAQs
- Can a photo viewer be created in Flutter without external packages?
- Yes, but it requires more code and doesn't always offer the same experience.
- Does PhotoView work with images from a URL?
- Yes, using NetworkImage without any problems.
- Is PhotoView or InteractiveViewer better?
- For galleries and photo viewers, PhotoView is usually faster to implement.
Trying to oversimplify at the beginning led me to redo part of the viewer. PhotoView saves time precisely because it already covers these scenarios.
Conclusion: when to use PhotoView in Flutter
If you need to create a photo viewer in Flutter with zoom, swipe, and rotation, PhotoView is one of the best options available. It is easy to use, flexible, and offers an experience very close to that of professional applications.
This article offers an introduction to using PhotoView in Flutter through a package quickly and easily with a set of options that are very easy to understand and implement.
After implementing it in real projects, my recommendation is clear:
Use PhotoView when images are a central part of the user experience.
Now, learn about this package so you can create multilingual applications in Flutter.