Content Index
- What are migrations in Django and why are they important?
- How migrations work in Django
- Advantages of migration
- Create your first migration step by step
- 1️⃣ Verify your configuration and model
- 2️⃣ Run python manage.py makemigrations
- Re-running migrations
- Main commands and their usage (visual cheat sheet)
- Renaming fields without losing data
- Reverting a migration
- Other Migration Operations
- Viewing the Status: showmigrations
- Viewing the Generated SQL: sqlmigrate
- ❌ The Nullability Conflict
- Rollback migrations in Django, 2 ways
- Option 1: Revert all migrations for an app
- What does this mean?
- Option 2: Roll back to a specific migration
- Which one to use?
- Conflicts and common errors when using migrations
- Good practices for working with migrations in a team
- Frequently Asked Questions (FAQ)
- Benefits of Using Migration
- Conclusions
Now that we've learned how to configure MySQL with Django, you're probably wondering how to keep the database synchronized with the models in your Django project—migrations are your best ally. In this guide, I'll explain, based on my experience developing with Django, what they are, how to create them, and how to resolve the most common errors.
The first thing you might ask yourself would be...
What are migrations in Django and why are they important?
In general terms, since this same scheme is used by other modern frameworks like Laravel, CodeIgniter 4, and Flask; we could simply see a migration as a schema that will be mapped into the configured database. In it, we generally indicate how a table is described.
Migrations are an incremental way we have to update the schema or how the database is formed; by incremental, I mean that we can keep adding more migrations as we develop the project, and they have a sequential execution order that is directly proportional to the order in which we created them.
In short, a migration in Django is the way the framework translates your Python models (models.py) into actual database structures (tables, columns, relationships, etc.).
Every time you modify a model, Django records those changes in a migration file, which can then be applied to the database with a command.
When I started working with Django, I was surprised by how easy it was to version the schema without directly touching SQL. Unlike frameworks like Laravel or Flask, here migrations are automatically generated and applied with a simple command.
Main advantages:
- Total control of your database schema.
- Versioned history of changes.
- Ease of sharing the database state with other team members.
- Ability to revert or redo changes without losing data.
Migrations make the process easier for developers: instead of sending an SQL dump, we just shared the migration files and everything was perfectly synchronized.
How migrations work in Django
Behind the scenes, Django uses its ORM (Object Relational Mapper) to translate your models into SQL instructions.
Each app within your project contains a migrations/ folder, where the files describing each incremental change are stored.
The general flow is:
- You modify your models.
- You run python manage.py makemigrations → Django generates files with the changes.
- You run python manage.py migrate → Django applies those changes to the database.
I once encountered the classic "No changes detected" message, and it turned out I had forgotten to register the app in INSTALLED_APPS. Since then, I always check the configuration before creating migrations.
Advantages of migration
Migrations have a huge advantage compared to the traditional scheme where database definition is a separate task; with migrations, we can have total control over the tables that we have defined in the database, and therefore we are creating another layer between the database and our project as such, in which we have total control over the structure of the database.
With migrations, it is very easy to share your work schema with other project members, as you can simply pass the file or migration so that your teammate or coworkers can use the same schema as you; it is no longer necessary for everyone to create the database manually, but through our own framework.
So, now you know what migrations are for and their enormous advantage compared to other schemes; let's go to our Django project to create the migrations.
Create your first migration step by step
To create a migration in Django, nothing could be easier—we already have everything free when creating a Django project; we simply have to execute the following command from your terminal, at the level of the application folders (inside the project folder):
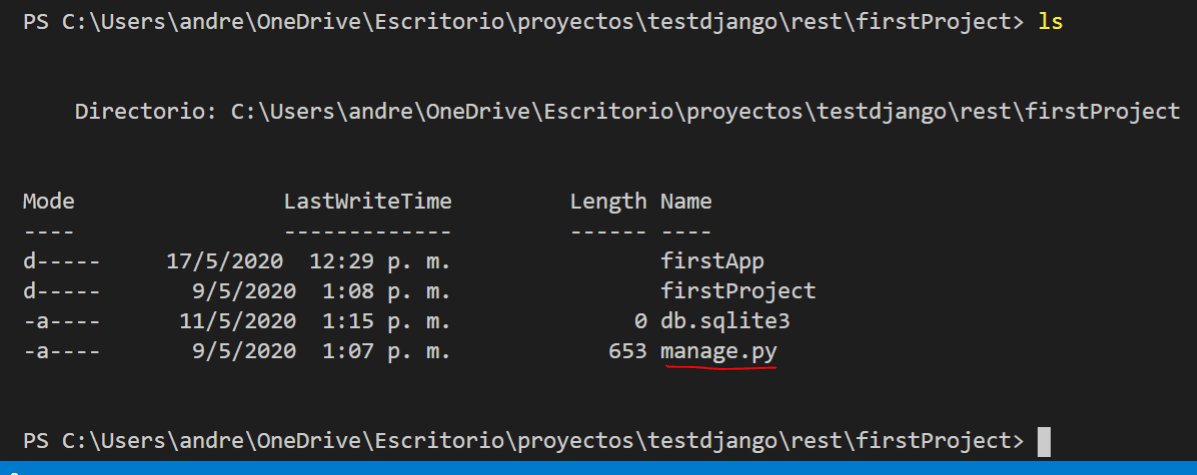
$ python manage.py makemigrationsOr run the migrations per application:
$ python manage.py makemigrations firstAppIn either case, you will see an output like the following:
python manage.py makemigrations firstApp Migrations for 'firstApp': firstApp\migrations\0001_initial.py - Create model EmplyoeeIn which we already have the migration created; therefore, we have a folder called migrations inside the application firstApp and inside it, the corresponding migration.
Here you are free to customize certain aspects of it before Django translates this to SQL to then create the table in the configured database; although generally, it is NOT necessary to make any extra changes.
1️⃣ Verify your configuration and model
First, you must have some model created, for example:
Simple model example:
models.py
from django.db import models
class Employee(models.Model):
   name = models.CharField(max_length=100)
   position = models.CharField(max_length=100)
   salary = models.DecimalField(max_digits=10, decimal_places=2)
2️⃣ Run python manage.py makemigrations
To execute the previous migration, we simply have to run the following command:
$ python manage.py migrateAnd with this, a series of migrations will be executed, and not just yours, since, for every application you have installed even by default in Django, they have migrations created and are therefore ready to be mapped to the database with the previous command:
Migrations for 'firstApp': firstApp/migrations/0001_initial.py - Create model EmployeeAnd with this, if we check the database:
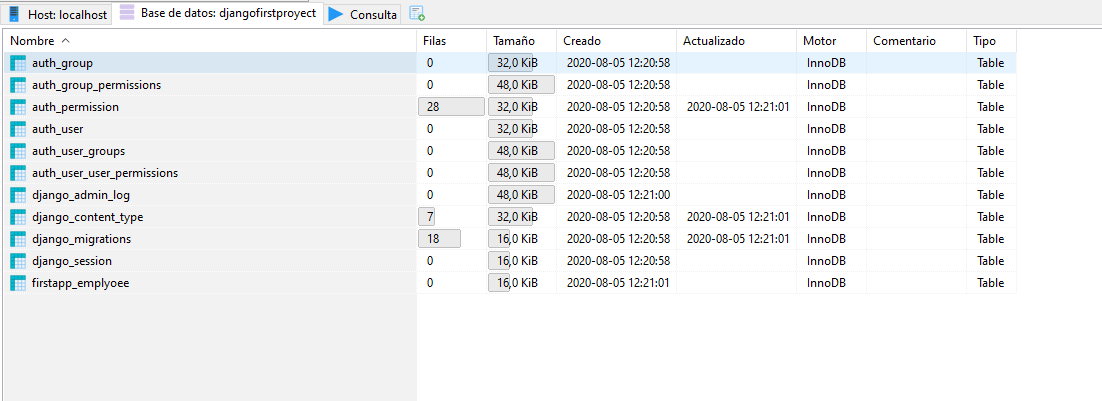
We have our table or tables created in case you had more than one migration or model defined.
Re-running migrations
You can run any of the previous commands again:
python manage.py migrate Operations to perform: Apply all migrations: admin, auth, contenttypes, firstApp, sessions Running migrations: No migrations to apply.
But you will see that nothing happens, as Django detects that it no longer has to create a migration, since it was created and executed in the database and translated with the table in our database that we saw previously; you may wonder how Django knows the table exists; well, basically because of the other table that was created called:
Which basically saves records of the migrations that have been executed in our database; at this point, you can create new applications and models, or define more models or change existing ones, and at any point create and execute the migrations.
Main commands and their usage (visual cheat sheet)
| Command | Description | When to Use It |
|---|---|---|
| python manage.py makemigrations | Generates migration files based on the changes detected in your models. | After creating, modifying, or deleting fields within your models. |
| python manage.py migrate | Effectively applies pending migrations to the database. | To reflect and sync structural changes into the actual database schema. |
| python manage.py showmigrations | Displays a complete list of all apps and the current status of their migrations. | To verify which migrations have been applied (marked with [X]) and which ones are pending. |
| python manage.py sqlmigrate <app> <number> | Displays the raw SQL statements that Django will execute for a specific migration. | To audit database changes or review what the migration will do before running it in production. |
| python manage.py migrate --plan | Shows a detailed execution plan and the exact order in which migrations will be applied. | Before deploying critical changes to production environments to foresee dependencies. |
| python manage.py migrate --fake | Marks migrations as applied in Django's history without executing the SQL in the database. | To resolve manual synchronization conflicts or when the table already exists physically. |
I use showmigrations before deploying, to confirm that everything is in order and avoid surprises in production.
Renaming fields without losing data
Use RenameField to maintain data integrity without deleting the column.
Reverting a migration
You can undo a migration by executing:
$ python manage.py migrate firstApp 0001This reverts to the specified migration.
I once had to revert because I had defined a CharField with insufficient length. Django handled it without data loss.
Other Migration Operations
We have operations that complete our CRUD for migrations. Now we'll review the commands to list the status and to view the generated SQL code.
Viewing the Status: showmigrations
With the following command, we can see the migrations for the entire project:
$ python manage.py showmigrationsIn the output, you will see that migrations marked with an X have already been applied to the database.
Viewing the Generated SQL: sqlmigrate
To view the SQL for a migration, we must use the sqlmigrate command accompanied by the application name and identifier:
$ python manage.py sqlmigrate comment 0001Usefulness of sqlmigrate
This is quite useful, especially when working in a team or when debugging a complex database issue.
- Auditing: It allows developers or database administrators to review the SQL code before applying it.
- Personal Context: I, for example, sometimes use this to generate the SQL and apply it manually if I need to make quick modifications, although it's a poor practice if you are on a team.
If you wish to revert all applied migrations for an application, you use the zero option:
$ python manage.py migrate comment zeroThis option is particularly useful when we are creating relationships (Foreign Keys) to a table that already exists in the database and contains records (data).
❌ The Nullability Conflict
Suppose the following scenario:
- We have a Posts migration applied to the database with several publications already created.
- We want to create a migration for Categories and then establish a non-nullable foreign key relationship between posts and categories.
At this point, it would not be possible to apply the relationship migration. When attempting to modify the Posts table to add the new foreign key column (category_id), Django encounters a conflict: What value should it assign to the `category_id` column for the existing Posts records? Since the relationship cannot be null, the migration fails.
Rollback migrations in Django, 2 ways
In Django, we don't have a direct command like migrate rollback to roll back migrations, which would be extremely useful in many situations.
We often create our models, generate the associated migrations using the makemigrations command, and then realize we made a mistake... and well, that's a huge problem.
Option 1: Revert all migrations for an app
For this case, I'll show you a couple of ways to do it. Again, there may be many implementations, but they all follow more or less the same path.
A very common option is to run the following command:
python manage.py migrate nombre_app zeroFor example, if your app is called blog, it would be:
python manage.py migrate blog zeroWhat does this mean?
All migrations for the blog application, which is supposedly the one with the problem and needs to be fixed, will be reverted.
After that, you'll need to make corrections to both your model and, possibly, the generated migration files.
For example, if you forgot to add the description field, you can do so directly in the model, or you can also manually modify the migration by duplicating and adjusting an existing block, if you prefer.
Option 2: Roll back to a specific migration
Another option is to specify exactly which migration you want to return to.
For example:
python manage.py migrate blog 0002This means you want to return to migration 0002.
Remember that migrations grow each time you make changes to your models. For example:
- 0001_initial.py
- 0002_add_description.py
- 0003_add_subscribers.py
And so on, depending on the changes you make to the blog app.
This method is useful if, for example, you later add a migration for subscribers or another table, and you need to revert only to a specific point without deleting everything before.
Which one to use?
In summary:
- If you want to delete all migrations for an app (for example, because you're starting from scratch or the error is from the beginning), you can use the zero option.
- If you want to revert only a specific migration without deleting everything, you can use the exact migration number as in the second method.
This second command would be the closest to the concept of a rollback, as it allows you to return to a previous, specific state.
It's not as automatic as a rollback, but it essentially accomplishes the same goal: reverting a migration so you can correct something that went wrong.
So, if you only have one migration or the error is in the first one, the zero option is perfect.
But if you need a little more control, you can specify the exact migration you want to revert to.
Conflicts and common errors when using migrations
Errors you will see sooner or later:
- "No changes detected" → the app is not registered or there are no changes.
- "Conflicting migrations detected" → two developers created different migrations in parallel.
- "no such table" → migrations applied out of order.
Practical solutions:
- Merge migrations with python manage.py makemigrations --merge.
- Falsify migrations with migrate --fake or --fake-initial when the database already exists.
- Regenerate migrations by deleting local files and recreating them (only in development environments).
Good practices for working with migrations in a team
- Make sure to run makemigrations only after updating your branch.
- Avoid directly modifying migration files that have already been applied.
- Periodically squash old migrations (python manage.py squashmigrations).
- Keep your migrations under version control (Git).
- Coordinate model changes with your team before merging branches.
Frequently Asked Questions (FAQ)
- What is the difference between makemigrations and migrate?
- The first generates the migration files, the second applies them to the database.
- Why doesn't Django detect changes?
- Because there were no modifications to the models or the app is not in INSTALLED_APPS.
- How to revert a migration?
- Run python manage.py migrate <app> <migration_number>.
- Where does Django store the migration history?
- In the django_migrations table within your database.
- What happens if I delete the migrations/ folder?
- You will lose the history; Django won't know what changes were applied. Avoid this in active projects.
Benefits of Using Migration
Basically, migrations allow us to work with the database as if it were just another process within the code.
- SQL Abstraction: We don't have to write or generate SQL code manually; we can focus directly on working with our project's logic.
- Database Independence: Our project is independent of the database we're using. In this case, it's SQLite, but we can easily configure PostgreSQL, MySQL, or any database supported by Django with just a few lines of code.
This mechanism, called migrations, is the system that allows us to generate these tables. When we run the command in the next lesson, you'll see that a file structure will be generated that will be used to apply these changes to the database.
Conclusions
Migrations are a very powerful component that exists in these types of frameworks; they allow us to modify and add or alter the structure of the models so that we can then reflect these changes in new migrations and subsequently in the database.
Remember the three steps for working with migrations:
- Change the models (in models.py).
- Run the python manage.py makemigrations command to create migrations for those changes
- Run the python manage.py migrate command to apply those changes to the database.
Remember that each command performs a specific operation and must follow the corresponding order for everything to work for you and for you to see the changes reflected.
Working with migrations is simple when you understand their natural flow:
- Change the models (models.py).
- Create migrations (makemigrations).
- Apply changes (migrate).
Following this order will save you errors and headaches.
In my case, mastering migrations changed the way I work with Django: I no longer fear modifying models or touching the database, because I know the framework keeps control for me.
Now, learn how to create a paginated listing in Django.