Continuing with the articles in which we use Kotlin instead of Java together with Android Studio as the official development environment, today we are going to see how to create a NavigationView with Kotlin instead of Java that we already discussed in a previous post:
Creando un Navigation Drawer (menú lateral) en Android
I invite you to compare with this entry and see the common elements that exist when implementing the same task, that is, create a side menu and you will realize that it is the same implementation but with different syntax since we are dealing with languages. different programming methods, in the last entry we used Java and now we will use Kotlin.
Let's remember that in a previous entry we created a RecyclerView with Kotlin in Android Studio where we created the model of our list, the adapter and we put everything together to work to have our list.
As we will see in this post, the implementation is much simpler due to its syntax and we will only need two components; the activity that is responsible for building the menu and layout of the activity, and toolbar; let's first look at the code for our activity in the next section.
The main activity
We are going to go by part so as not to complicate the matter; first we define our toolbar, which together with the ActionBarDrawerToggle method allows us to integrate the functionality of the DrawerLayout (which defines our NavigationView or side menu) indicating as parameters an instance of the activity, the DrawerLayout (remember that in Kotlin it is not necessary to create an instance that relates an object in Java with an element of the view) and the texts for when our side menu is open/closed:
val toggle = ActionBarDrawerToggle( this, drawer_layout, toolbar, R.string.app_name, R.string.close)- setDisplayShowTitleEnabled Indicates by means of a boolean if the title/subtitle will be displayed in our toolbar.
- setDisplayUseLogoEnabled Indicates by means of a boolean if the logo will be displayed in our toolbar.
- addDrawerListener Listener event that allows us to override the method to handle clicks on menu options by the user.
setSupportActionBar(toolbar)
supportActionBar?.setDisplayShowTitleEnabled(true)
supportActionBar?.setDisplayUseLogoEnabled(true)
drawer_layout.addDrawerListener(toggle)
toggle.syncState()
We indicate that our activity will implement the listener event of the NavigationView or side menu:
navigation_view.setNavigationItemSelectedListener(this)In the head of our class we have to implement the NavigationView.OnNavigationItemSelectedListener and with this we can override the onNavigationItemSelected method that handles the interaction (clicks) with the side menu options:
override fun onNavigationItemSelected(item: MenuItem): Boolean {
when (item.itemId) {
R.id.menu_seccion_1 -> {
}
R.id.menu_seccion_2 -> {
}
R.id.menu_seccion_3 -> {
}
R.id.menu_opcion_1 -> {
}
R.id.menu_opcion_2 -> {
}
}
drawer_layout.closeDrawer(GravityCompat.START)
return true
}
Finally, the complete code of the main activity of the application:
import android.content.Context
import android.content.SharedPreferences
import android.os.Bundle
import android.support.design.widget.NavigationView
import android.support.v4.view.GravityCompat
import android.support.v7.app.ActionBarDrawerToggle
import android.support.v7.app.AppCompatActivity
import android.util.Log
import android.view.MenuItem
import kotlinx.android.synthetic.main.activity_main.*
import kotlinx.android.synthetic.main.toolbar.*
class MainActivity : AppCompatActivity(), NavigationView.OnNavigationItemSelectedListener {
    override fun onCreate(savedInstanceState: Bundle?) {
        super.onCreate(savedInstanceState)
        setContentView(R.layout.activity_main)
        val toggle = ActionBarDrawerToggle(
                this, drawer_layout, toolbar, R.string.app_name,
                R.string.close)
        setSupportActionBar(toolbar)
        supportActionBar?.setDisplayShowTitleEnabled(true)
        supportActionBar?.setDisplayUseLogoEnabled(true)
        drawer_layout.addDrawerListener(toggle)
        toggle.syncState()
        navigation_view.setNavigationItemSelectedListener(this)
    }
    override fun onNavigationItemSelected(item: MenuItem): Boolean {
        Log.i("TAG", "hola mundo");
        when (item.itemId) {
            R.id.menu_seccion_1 -> {
                // Handle the camera action
            }
            R.id.menu_seccion_2 -> {
            }
            R.id.menu_seccion_3 -> {
            }
            R.id.menu_opcion_1 -> {
            }
            R.id.menu_opcion_2 -> {
            }
        }
        drawer_layout.closeDrawer(GravityCompat.START)
        return true
    }
    override fun onBackPressed() {
        if (drawer_layout.isDrawerOpen(GravityCompat.START)) {
            drawer_layout.closeDrawer(GravityCompat.START)
        } else {
            super.onBackPressed()
        }
    }
}
The layout of our activity
<android.support.v4.widget.DrawerLayout xmlns:android="http://schemas.android.com/apk/res/android"
    xmlns:app="http://schemas.android.com/apk/res-auto"
    xmlns:tools="http://schemas.android.com/tools"
    android:id="@+id/drawer_layout"
    android:layout_width="match_parent"
    android:layout_height="match_parent"
    android:fitsSystemWindows="true"
    tools:context=".MainActivity">
    <RelativeLayout
        android:layout_width="match_parent"
        android:layout_height="match_parent">
        <FrameLayout
            android:id="@+id/content_frame"
            android:layout_width="match_parent"
            android:layout_height="match_parent"
            android:layout_marginTop="?attr/actionBarSize" />
        <include layout="@layout/toolbar" />
    </RelativeLayout>
    <android.support.design.widget.NavigationView
        android:id="@+id/navigation_view"
        android:layout_width="wrap_content"
        android:layout_height="match_parent"
        android:layout_gravity="start"
        app:menu="@menu/menu_drawer"
         />
    <!--app:headerLayout="@layout/drawer_header"-->
</android.support.v4.widget.DrawerLayout>
The layout of the toolbar:
<?xml version="1.0" encoding="utf-8"?>
<android.support.v7.widget.Toolbar
    android:id="@+id/toolbar"
    xmlns:android="http://schemas.android.com/apk/res/android"
    xmlns:app="http://schemas.android.com/apk/res-auto"
    android:layout_width="match_parent"
    android:layout_height="wrap_content"
    android:background="@color/colorPrimary"
    android:minHeight="?attr/actionBarSize"
    android:theme="@style/ThemeOverlay.AppCompat.Dark.ActionBar"
    app:popupTheme="@style/ThemeOverlay.AppCompat.Light"/>
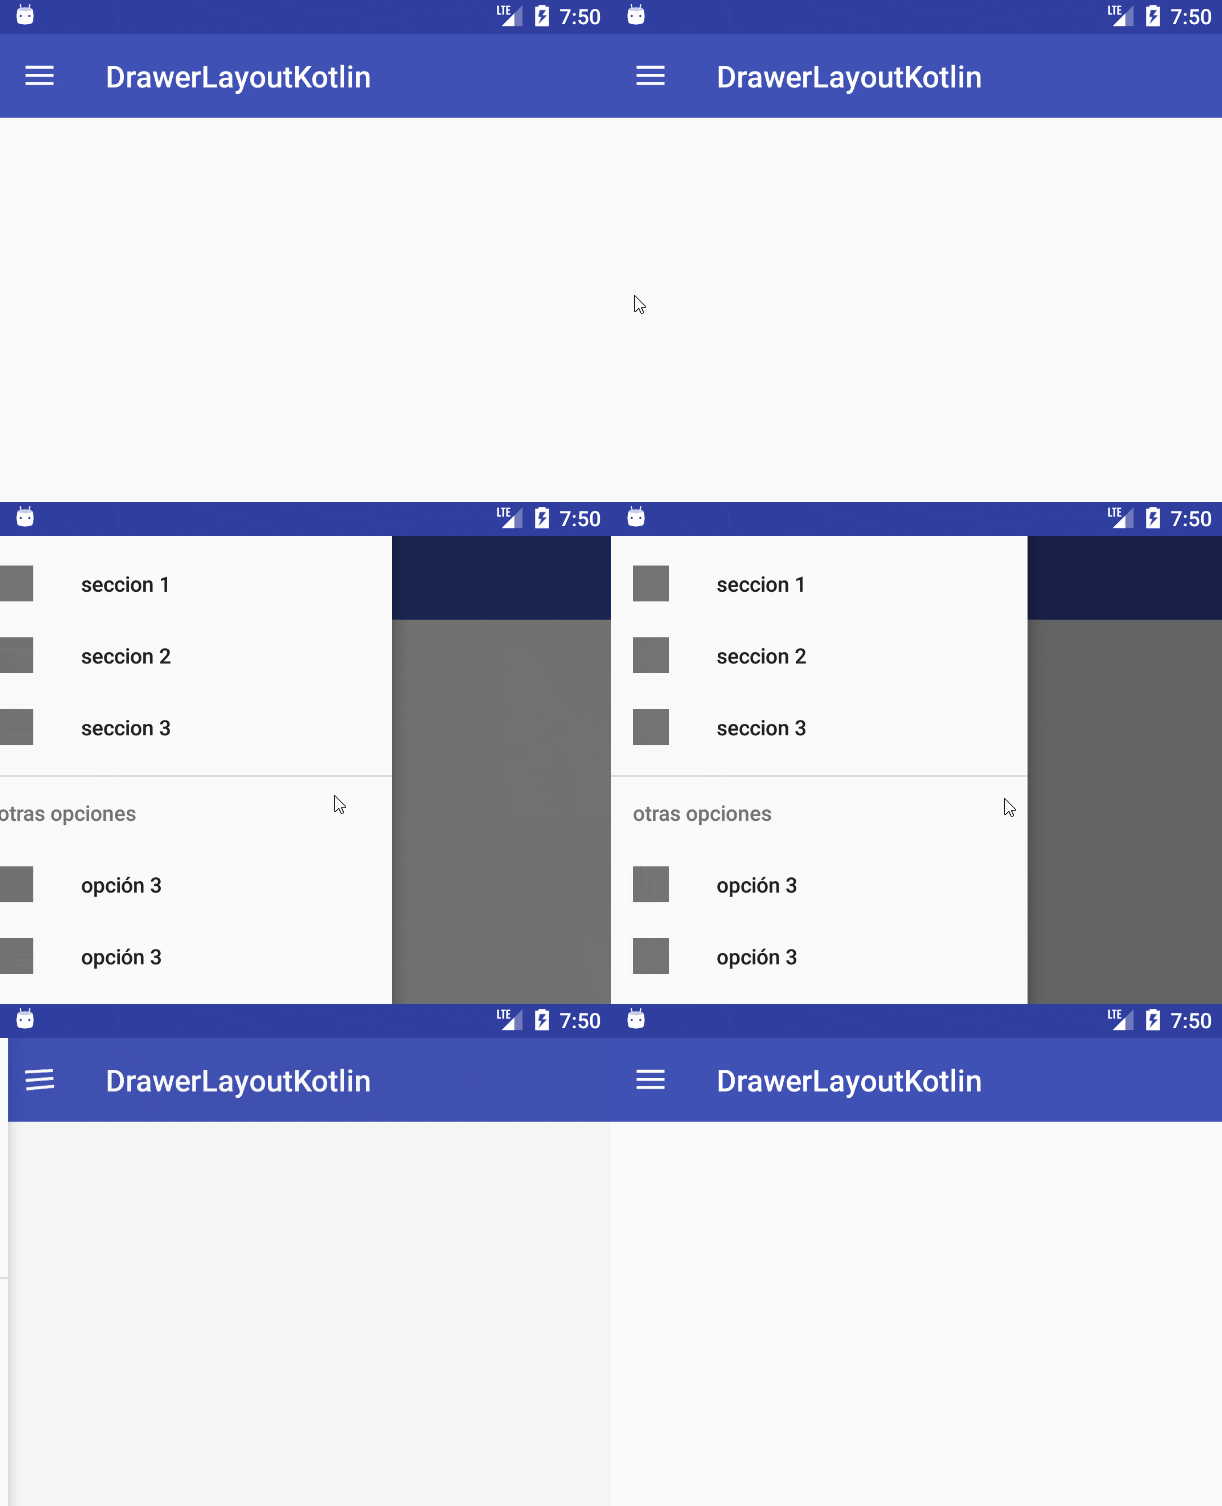
Again we remember that the layouts do not have any characteristics to be compatible with Kotlin, which means that the layouts that we use with Java can be used with Kotlin; when running the application we get:

As we can see, there is no visual or functional difference between any element made with Java or made with Kotlin, they are transparent to the user, so it is up to us to choose which of the two programming languages we want to make our applications.
Conclusion
In this entry we touch on another of the fundamental elements that is in practically any Android application, which is the NavigationView or side menu, and before that we show how to define a simple list through a RecyclerView whose link you can find at the beginning of this entry.
The goal is not to show any advanced programming techniques, to create some kind of structure or anything like that, just to show how to do the same things we do with Java but with Kotlin.
I agree to receive announcements of interest about this Blog.
We are going to learn how to create the side menu using Android Studio and Kotlin.
