Content Index
- The Problem of Dependencies and the Global Environment
- What is a Python virtual environment and what is it for
- In summary, what do virtual environments allow us to do?
- Advantages of using virtual environments in Django
- Difference between venv and virtualenv
- How to Install a virtual environment?
- Prerequisites before creating your environment
- Install the virtualenv tool
- Create a Python virtual environment step by step
- Generated folder structure
- Activate and deactivate the virtual environment
- Exercise
- Optional VS Code: Creating the Virtual Environment using VS Code
- Install Django, Flask, FastAPI inside the virtual environment
- Save and restore project dependencies
- Final tips for keeping your environment clean and stable
- Optional: Select Interpreter with Visual Studio Code
- Frequently asked questions about virtual environments and Django
- Conclusion
We are going to talk about virtual environments in Python; specifically our case of interest, which would be for creating applications in Django 6, Flask, or FastAPI, or in summary, any Python project. Usually, we create a virtual environment.
Virtual environments are simply a tool used to create a Python environment isolated from the rest of the Operating System and in this way, we can develop our Python apps with specific versions of a framework, Python, or its dependencies.
When I started developing with Python, I ran into a very common problem: each project required different versions of the same packages, and that became chaos.
The solution I discovered was to use virtual environments, a simple but powerful tool that allows you to keep each project completely isolated.
In Python, virtual environments are development environments isolated from the operating system, therefore, the packages that we install will not be installed in the operating system but in the virtual environment; we can create as many virtual environments as we want, usually we have one virtual environment per project and with this, all the packages and dependencies necessary for a Python project in general are managed independently.
Specifically, they are used during software development with Python; it is very common to want to use several versions of the same package in different projects; and to avoid having to install and uninstall (since we cannot install a package twice on our OS or venv), we can create an environment with the specific objective of isolating these multiple versions of this or several packages; for that reason, in this space you will only find the packages you are going to use to develop your Python applications, whether native or with a framework like Django 6 or Flask.
In short, with virtual environments we can install a specific version of that package we need for a particular project or projects, as well as the rest of the dependencies that a project has.
The Problem of Dependencies and the Global Environment
When you install Django, you'll see that it has a lot of dependencies. That is, the installation includes not only Django but also other related packages. If you've worked a bit with the Python ecosystem, you know what I mean.
For example, when installing Django 5, you'll have three or four additional packages. This happens because Django, unlike micro-frameworks (like Flask), comes with many built-in features (templates, authentication, etc.). Flask, being a micro-framework (which includes the bare minimum), didn't even initially include the template manager (Jinja2), and you had to install it as an additional dependency.
The main idea is this: you install Django, and three or four more packages are installed.
The problem is that, in the real world, you're going to have many projects.
If we were to install Django globally (as with Python, a browser, or VS Code), you could only have one version of Django installed on your operating system unless you made complex configurations.
What is a Python virtual environment and what is it for
What is a Python virtual environment and what is it for
A virtual environment is, basically, an isolated space within your operating system where you can install Python packages without affecting the rest of the system.
This means you can have several projects with different versions of Django or any library without them interfering with each other.
In my case, I usually create a new environment for each project, especially when working with frameworks like Django or Flask, because this way I avoid dependency conflicts and can update or test versions without risk.
In summary, what do virtual environments allow us to do?
Instead of installing the packages globally to the operating system, a kind of "box" (a virtual environment) is created and everything is installed right there.
- Global Operating System: If we only use the operating system, we can only have one installation of a version.
- Virtual Environments: If we use virtual environments, we can have "n" virtual environments for all our projects.
Advantages of using virtual environments in Django
- They isolate your dependencies per project.
- They prevent conflicts between package versions.
- They allow you to easily share your requirements with other developers.
- They facilitate the installation of identical environments on different machines.
Difference between venv and virtualenv
- venv: comes integrated with Python 3, so you don't need to install anything extra.
- virtualenv: is an external package that offers more flexibility, especially if you use multiple Python versions.
- I use venv most of the time, but I still resort to virtualenv when I want more control over versions.
How to Install a virtual environment?
We can get the tool that allows us to create venvs or virtual environments on our machine; which, as you can see, is just a package that we can install using pip, which remember is already available in recent versions of Python:
pip3 install virtualenvPrerequisites before creating your environment
Before starting, make sure you have Python and pip installed correctly on your system.
Verify Python and pip installation
Open your terminal (or CMD on Windows) and type:
$ python --version $ pip --versionIf you get a version number, everything is fine.
If not, you can download Python from python.org/downloads
Install the virtualenv tool
If you prefer to use virtualenv instead of venv, install the package like this:
$ pip install virtualenvThis command will download and install the necessary tool to create virtual environments.
Create a Python virtual environment step by step
Now that we have this, we can create the virtual environments; for that, use the following command:
$ virtualenv <myproject>Where <myproject> is the name of your virtual environment; now; with the previous command, a folder with the name of the venv you defined in the previous command was created, and that folder is your virtual environment ready to use.
Now, to use the previous virtual environment, we simply have to navigate via our CMD or terminal into the Scripts folder (on Windows); which is where our Scripts are located to manage the virtual environment via the binary files contained therein; to activate or deactivate the virtual environment.
Or
$ python3 -m venv <myproject>Generated folder structure
Once the environment is created, you will see something like this:
myproject/
│
├── Scripts/ (on Windows)
├── bin/ (on Linux/macOS)
├── Lib/
└── pyvenv.cfg
Activate and deactivate the virtual environment
Being in the mentioned location, you will see that we have several files to work with our environment or virtual environment in Python, some called activate / deactivate that allow us to activate or deactivate the virtual environment.
The first thing we would want to do is activate our virtual environment:
On Windows
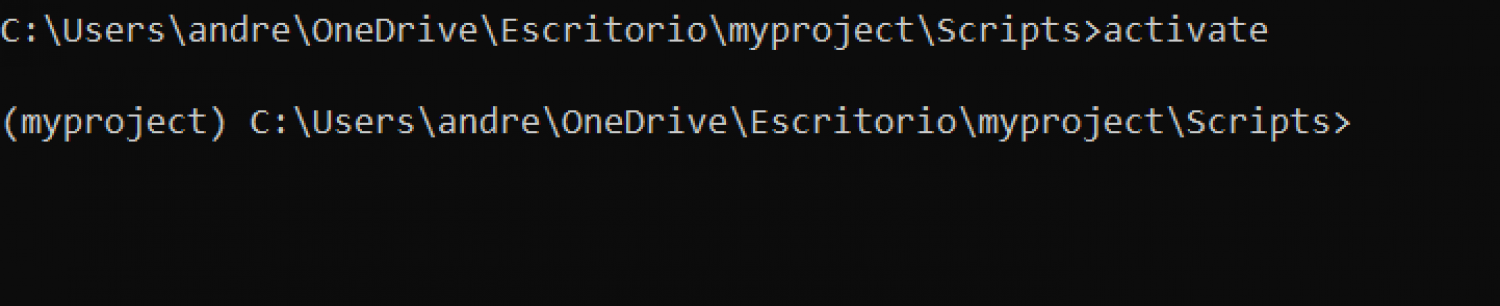
$ myproject\Scripts\activateYou will notice that the environment name appears at the beginning of your command line, for example:
(myproject) C:\Users\andre\Desktop>On Linux and macOS
source myproject/bin/activateOr if we want to deactivate the virtual environment:
deactivateThis would be our initial state before executing the activate command inside the Scripts folder:
C:\Users\andre\OneDrive\Desktop\myproject\Scripts>Now, let's deactivate the virtual environment with the command:
activateLet's remember what virtual environments are.
Virtual environments are, in a way, a small box isolated from the operating system.
Inside this box, we have all the packages and dependencies necessary for a specific project.Regardless of the terminology we use—whether in Django or another framework—each project or application (for example, an online store) is usually linked to a single virtual environment.
Why create a virtual environment per project?
If you want to create another Django project, it's best to create a new virtual environment.
This is because, most likely, these projects will work with different packages or versions.For example, in addition to Django, we often install other plugins, taking advantage of the Python ecosystem.
Each project may require different libraries, so keeping the environments separate ensures that dependencies are exclusive and prevents mixing configurations between projects.
Creating the Requirements File
Once you have your virtual environment set up, it's a good idea to create the requirements.txt file, which lists all the packages needed for your project.
This file will allow you to easily replicate your environment on another computer or server, ensuring that all components are exactly the same.
Exercise
For example, if we execute the following command:
$ python3 -m venv vtasksWhich will generate the virtual space, which is nothing more than a folder with several files and folders; to activate it, from the virtual space folder:
$ cd vtasksWe run on MacOS or Linux:
$ source vtasks/bin/activateOn Windows the command would be like:
$ vtasks\Scripts\activateThis folder called "tasks" (not the vtasks folder, which corresponds to the virtual environment) is the one I recommend you open in Visual Studio Code (or your preferred editor); from the VSC terminal, remember to activate the virtual environment:
Optional VS Code: Creating the Virtual Environment using VS Code
This is the option I recommend. It creates the virtual environment directly from a VS Code instance.
- Open Folder: Open a clean instance of VS Code (Ctrl + Shift + N). Drag or open your project folder (the one I named first_step).
- Create Environment: Press Ctrl + Shift + P.
- Search for: Python: Create Environment.
- Select the provider: Venv (or Virtualenv).
- Select your Python: The Python version you have installed at the operating system level.
Install Django, Flask, FastAPI inside the virtual environment
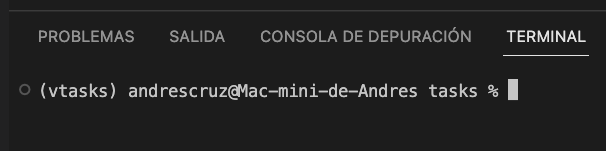
And now our terminal looks like this:
And with this, we can do whatever we want; for example, we can create a specific project in Flask or Django or simply the latest in the market
$ pip install djangoFlask:
$ pip install flaskFastAPI:
$ pip install fastapi uvicornUnicorn is an ASGI (Asynchronous Server Gateway Interface) HTTP web server that we can use in multiple asynchronous Python web frameworks such as Django, Flask and of course FastApi and to install the server we can do it as if it were a package more for Python with:
$ pip install uvicornOr we can install both with a single command:
$ pip install fastapi uvicorn
And this is it, we already have Django installed (or the framework that you installed) in our virtual space; but, we just install a package, and we don't have a project; but, with this package we can create projects in Django:
If we do a:
$ pip freezeYou'll see all the packages that make up the package we installed earlier; something like:
asgiref==3.11.0
Django==6.0
sqlparse==0.5.4
tzdata==2025.2
As we mentioned before, it is very common that when installing packages via the pip, these packages also need other packages to be able to work, and with this, the same ones are also installed, and these are known as dependencies.
In the example above, the asgiref, sqlparse, tzdata packages are dependencies of the Django package.
It is important to note that you will probably have some slightly newer versions and not exactly the same ones listed here (the version of each package is found after the ==).
As you can see, the previous command indicates all the packages installed at the virtual space level (if it is active) or at the operating system level (if the virtual space is deactivated or you are simply not using it).
Save and restore project dependencies
One of the practices I always follow is saving the exact dependencies I use in each project.
To do this, I run:
appdirs==1.4.3
asgiref==3.2.4
astroid==2.3.3
***
tablib==1.1.0
unicodecsv==0.14.1
urllib3==1.25.9
virtualenv==20.0.17
wrapt==1.11.2
xlrd==1.2.0
xlwt==1.3.0
You can get all the packages installed in your OS or virtual environment with the command:
pip freezeAnd you can save it to a file so you can specifically specify which are the exact versions for your project:
pip freeze > requirements.txtWhich you can then easily install via:
pip install -r requirements.txtTherefore, you can easily create an environment for a particular project or simply for the project you are working on by using virtual environments; as you can see, the enormous advantage we have is that we can install specific versions of our packages.
At this point we are ready and can start developing our Flask applications or start developing our Django applications.
You can also install specific versions using ==, for example:
$ pip install Django==6.0Final tips for keeping your environment clean and stable
Create a virtual environment for every project.
Avoid installing packages globally.
Use requirements.txt to control versions.
If an environment gets corrupted or throws errors, delete it and create it again: it's quick and safe!
Keep Python and pip updated to avoid incompatibilities.
In my experience, using virtual environments saves you headaches and gives you full control over your Django projects.
Optional: Select Interpreter with Visual Studio Code
Most of the time VSC will not recognize the Python interpreter that is configured when installing a virtual environment, otherwise it will take (the one installed at the global level of the OS) the system one, this brings the disadvantage that these warnings appear in the application imports:
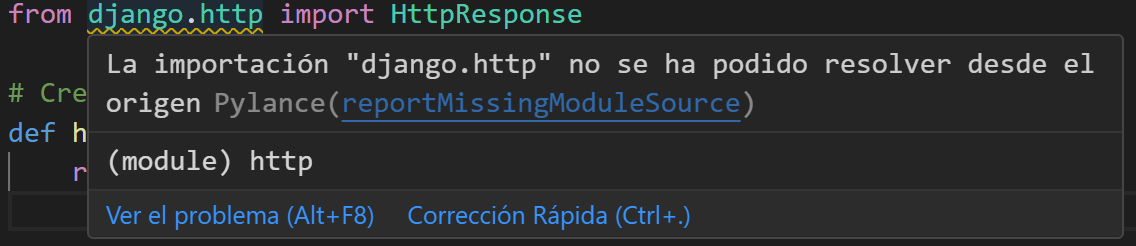
And therefore, it is not possible to access the details of the imported modules; to solve this, we must tell VSC that the interpreter it should use is that of the virtual environment, which is where we have installed the entire ecosystem of the Django project and not that of the Operating System.
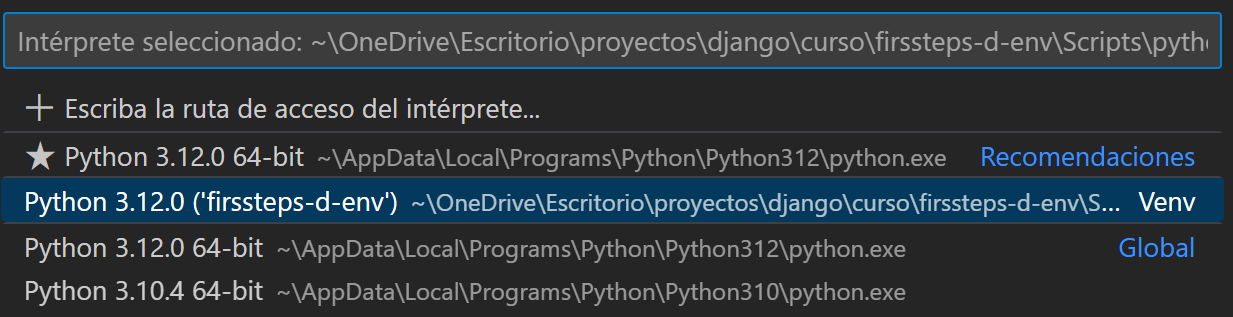
Press the key combination: Command/Control + Shift + P and search for "Select interpreter":

And select your virtual environment from the option "+ Enter the path of the interpreter":
In case, after selecting the interpreter, it still shows the warning:
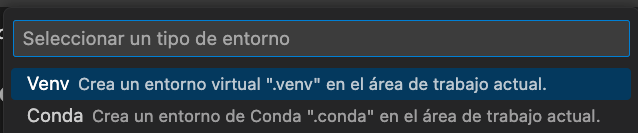
***Import could not be resolved "X"You can try creating a project from scratch using VSC; to do this, open a clean instance of VSC, then Command/Control + Shift + P and search for "Create environment":

You follow the steps indicated by the editor, which would be to select the environment, place "Venv":
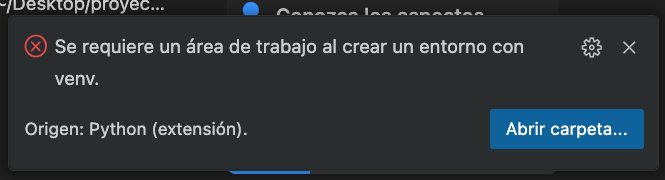
Then, it may prompt you to place the work area:
And you go back to step 1, which would be Command/Control + Shift + P and search for "Create environment"; On this occasion, it should ask you for the interpreter you want to use to create the work area:
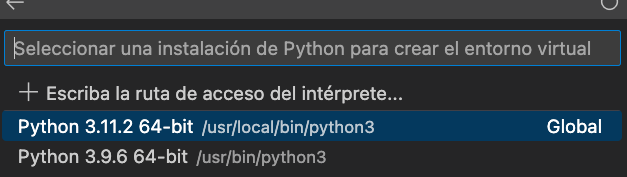
And with this, the packages installed at the virtual environment level should be recognized.
Frequently asked questions about virtual environments and Django
- What is a virtual environment in Python?
It's an isolated space where you can install dependencies without affecting the main system. - Why use a virtual environment with Django?
Because Django depends on many libraries whose versions can vary between projects. - What is the difference between venv and virtualenv?
venv comes with Python 3; virtualenv is an older but still useful external tool. - How do I activate my virtual environment?
On Windows: myenv\Scripts\activate
On Linux/macOS: source myenv/bin/activate - How do I save my dependencies?
With `pip freeze > requirements.txt` you can export them and reinstall them easily.
Conclusion
Creating a virtual environment in Python for Django is not complicated, and once you understand its purpose, it becomes a natural part of your workflow.
For me, it was a before-and-after moment in the organization of my projects.
I encourage you to try it yourself: in just a few minutes, you'll have your own environment ready to create any application in Django, Flask, or FastAPI.
The next step is to learn about what is Django framework.