Content Index
- #️⃣ What is a Bottom Sheet and when to use it
- #️⃣ Modal vs Persistent: real-world differences
- #️⃣ How to create a basic Bottom Sheet with showModalBottomSheet
- Scroll, size, and behavior on large screens
- Maintaining state inside the Bottom Sheet (StatefulBuilder explained)
- The Solution: StatefulBuilder
- Advanced Bottom Sheets: design, height, and controlled scroll
- #️⃣ DraggableScrollableSheet step-by-step
- #️⃣ Customization (borders, radii, colors, safe area)
- #️⃣ Internal Navigation inside the Bottom Sheet (Nested Navigation)
- #️⃣ Navigator with GlobalKey
- #️⃣ How to handle the back button inside the sheet
- #️⃣ Best practices, common errors, and how to avoid them
- Implementation Considerations for the Bottom Sheet
- 1. Deployment with showModalBottomSheet
- 2. Content and Structure
- #️⃣ Conclusion
- #️⃣ Frequently asked questions about Bottom Sheets in Flutter
If you work with Flutter, sooner or later you need a Bottom Sheet: that panel that slides up from the bottom to show options, filters, forms, or even full screens without leaving the current view.
The good news is that Flutter gives it to you practically "for free"... and the bad news is that if you don't configure it well, the scroll can break, it can lose state, or behave differently depending on the screen (yes, it happened to me more than once).
In this article, I'll tell you how to create basic, advanced, persistent, scrollable bottom sheets, with internal navigation, with state, and, incidentally, I'll explain a couple of behaviors I discovered day-to-day while implementing them in production.
When we start developing in Flutter, we quickly realize that our Scaffolds, as our main containers in a Flutter app, quickly become too small. This is the dilemma we face in mobile apps: we don't have much space, and therefore we have to use all kinds of techniques or structures such as pop-up windows, drawers, tabs, or in this case, a Bottom Sheet, to present the data that our user requests based on some action.
#️⃣ What is a Bottom Sheet and when to use it
A Bottom Sheet is a panel that appears from the bottom of the screen. It is used to display secondary content without navigating to a new route.
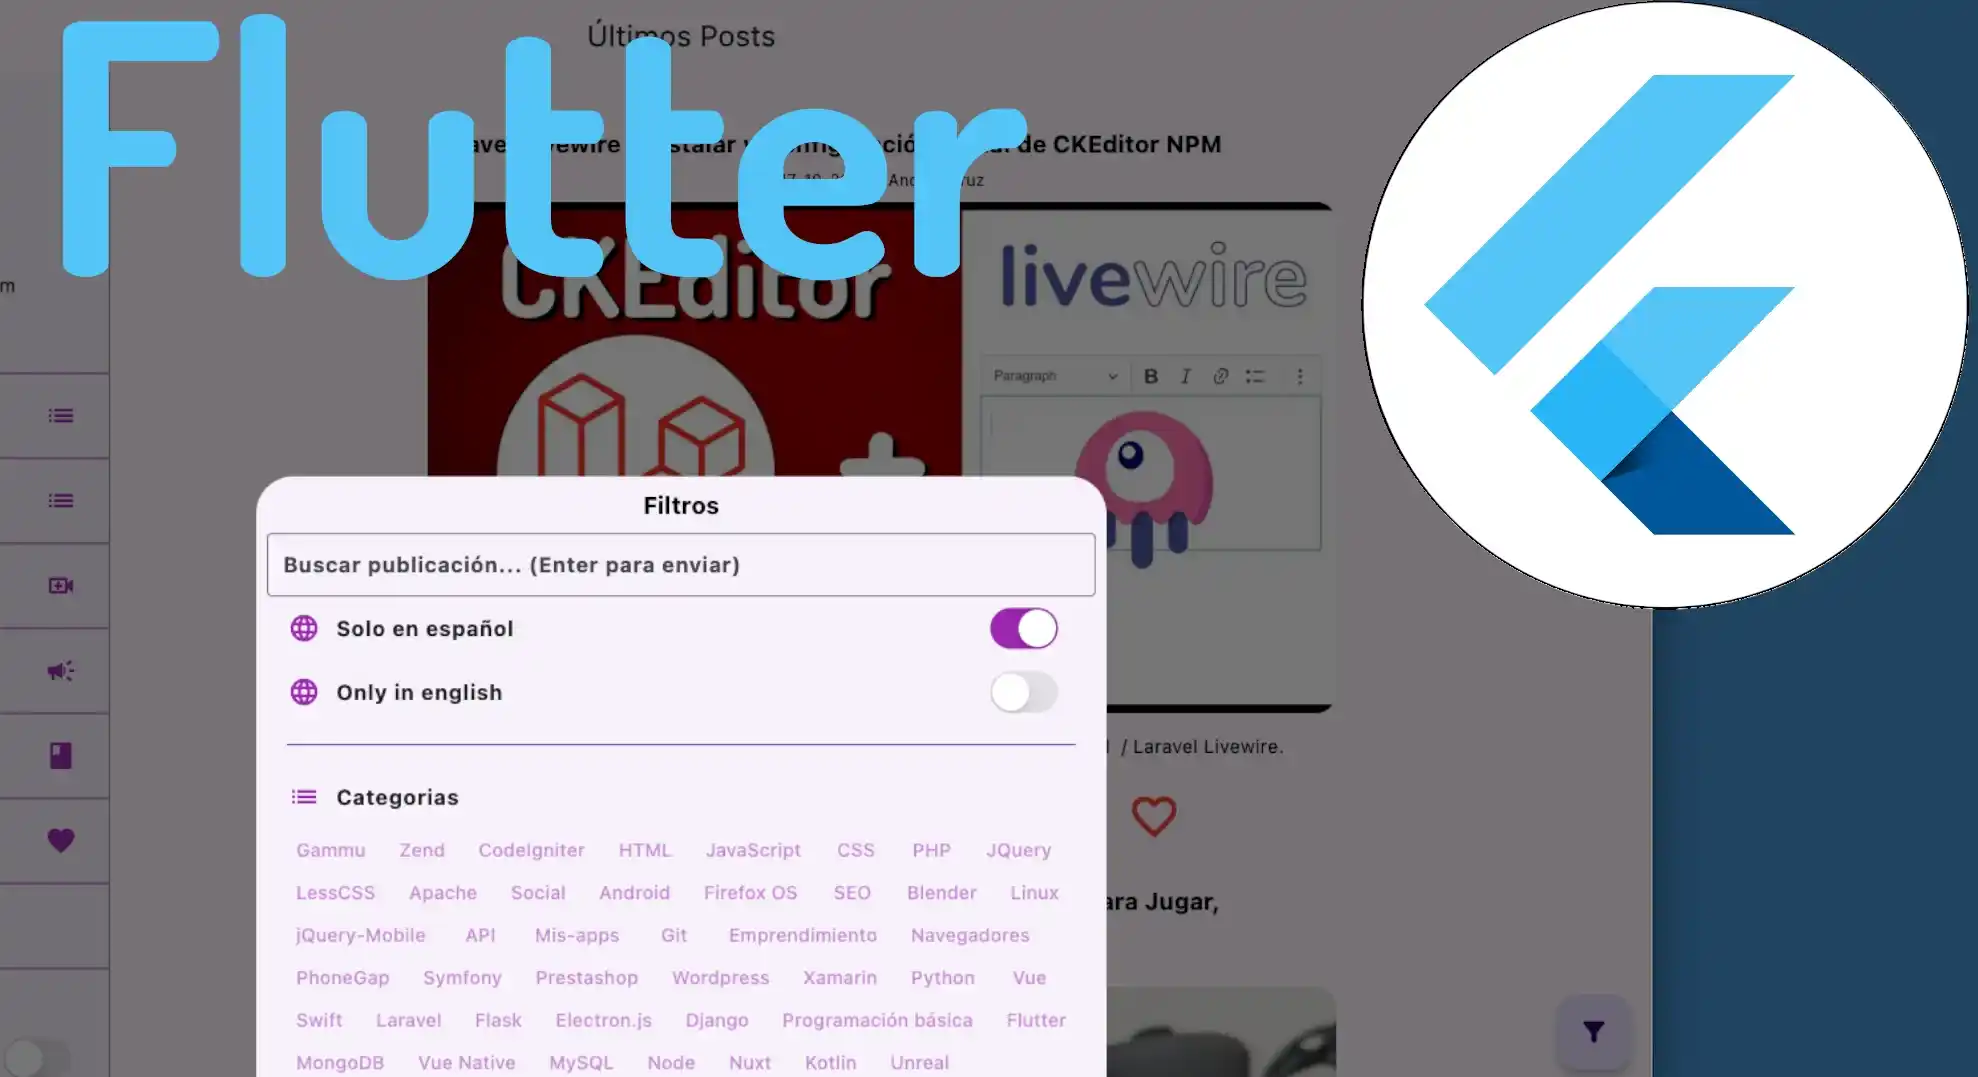
I use it a lot for filters, quick settings, or contextual actions. Something curious: when I don't have the emulator open, the bottom sheet tends to occupy the entire screen; but on large screens, it only occupies a part, which can be customized.
#️⃣ Modal vs Persistent: real-world differences
Modal Bottom Sheet
It blocks interaction with the rest of the interface and closes by tapping outside, swiping down, or using Navigator.pop. Ideal for important actions.
Persistent Bottom Sheet
It allows you to continue interacting with the main screen. It's perfect for menus, mini-players, or widgets that "accompany" the user.
#️⃣ How to create a basic Bottom Sheet with showModalBottomSheet
The most common way to open one is by using:
showModalBottomSheet(
 context: context,
 builder: (context) => TuWidget(),
);
And associating it with a FloatingActionButton or anything you can give a click or user event to:
FloatingActionButton(
 onPressed: () {
   showModalBottomSheet(
     context: context,
     builder: (_) => _bottomSheetFilter(),
   );
 },
 child: const Icon(Icons.filter_alt_rounded),
);
Scroll, size, and behavior on large screens
I had to wrap my content in a SingleChildScrollView because when inserting many categories, the panel could break the UI. Also, Flutter adjusts the height automatically, but if you want more control, you can use:
isScrollControlled: true,This allows the bottom sheet to take up more space, even almost the entire screen if you need it.
Maintaining state inside the Bottom Sheet (StatefulBuilder explained)
If you have a switch, textfield, or selectable category in the Bottom Sheet, that state is not automatically shared with the outside; you have to create a state inside the Bottom Sheet; the StatefulBuilder widget is used for this:
StatefulBuilder(
 builder: (context, setState) {
   return ...
 }
)
A complete example:
SingleChildScrollView _bottomSheetFilter() {
   return SingleChildScrollView(
     child: Padding(
       padding: const EdgeInsets.all(8.0),
       child: StatefulBuilder(
         // height: 200,
         // color: Colors.white,
         builder: (BuildContext context, setState) => Center(
           child: Column(
             mainAxisAlignment: MainAxisAlignment.center,
             children: <Widget>[
               Column(
                 children: [
                   const SizedBox(
                     height: 20,
                   ),
                   Text(LocaleKeys.filters.tr(),
                       style: Theme.of(context)
                           .textTheme
                           .displayMedium!
                           .copyWith(fontWeight: FontWeight.bold)),
                   const SizedBox(
                     height: 10,
                   ),
                   TextField(
                     controller: _searchController,
                     textInputAction: TextInputAction.search,
                     onSubmitted: (value) {
                       setState(() {
                         _dataList();
                         setState(() {});
                       });
                     },
                     decoration: InputDecoration(
                       labelText: LocaleKeys.searchPost.tr(),
                       // labelText:
                       //     'Buscar publicación... (Enter para enviar)',
                       border: const OutlineInputBorder(),
                     ),
                   ),
                   ListTile(
                     leading: const Icon(Icons.language, color: Colors.purple),
                     title: const Text('Solo en español'),
                     trailing: Switch.adaptive(
                         value: _postOnlyLang == 'spanish',
                         activeColor: Colors.purple,
                         onChanged: (value) {
                           _postOnlyLang = 'spanish';
                           _dataList();
                           setState(() {});
                         }),
                   ),
                   ListTile(
                     leading: const Icon(Icons.language, color: Colors.purple),
                     title: const Text('Only in english'),
                     trailing: Switch.adaptive(
                         value: _postOnlyLang == 'english',
                         activeColor: Colors.purple,
                         onChanged: (value) {
                           _postOnlyLang = 'english';
                           _dataList();
                           setState(() {});
                         }),
                   ),
                   Padding(
                     padding: const EdgeInsets.all(15.0),
                     child: Container(
                         height: 1, color: Theme.of(context).primaryColor),
                   ),
                   ListTile(
                     leading: const Icon(Icons.list, color: Colors.purple),
                     title: Text(LocaleKeys.categories.tr()),
                   ),
                   Wrap(
                     spacing: 1,
                     alignment: WrapAlignment.start,
                     crossAxisAlignment: WrapCrossAlignment.start,
                     children: categories
                         .map((c) => TextButton(
                               child: Text(
                                 c.title,
                                 style: TextStyle(
                                     color: _categoryId == c.id
                                         ? Colors.purple
                                         : Theme.of(context)
                                             .colorScheme
                                             .secondary,
                                     fontWeight: _categoryId == c.id
                                         ? FontWeight.bold
                                         : FontWeight.w500),
                               ),
                               onPressed: () {
                                 if (_categoryId == c.id) {
                                   _categoryId = 0;
                                 } else {
                                   _categoryId = c.id;
                                 }
                                 _dataList();
                                 setState(() {});
                               },
                             ))
                         .toList(),
                   ),
                 ],
               ),
               ElevatedButton(
                 onPressed: () {
                   Navigator.of(context).pop();
                 },
                 child: Text(LocaleKeys.close.tr()),
               ),
             ],
           ),
         ),
       ),
     ),
   );
 }
For example, when I change a language with a Switch.adaptive, I have to call setState() inside the StatefulBuilder because the bottom sheet is a "separate page."
It is a simple but essential technique if you don't want your filters to look frozen.
The Bottom Sheet behaves as if it were a separate page, and not as a dependency of the main screen, especially regarding state management.
This means that for internal operations (like changing a Switch or interacting with a TextField) to reflect visual changes, we must explicitly update its state.
The Solution: StatefulBuilder
To ensure changes are shown within the Bottom Sheet (for example, when changing the Switch value), we must:
- Trigger the Update: Execute the setState function every time an operation is performed (in your case, when changing the Switch value).
- Wrap in StatefulBuilder: For setState to work inside the Bottom Sheet and only update that area, you must use the StatefulBuilder widget at the root of the Bottom Sheet content.
This allows the Bottom Sheet to manage its own state locally, without forcing the entire containing page to update.
Advanced Bottom Sheets: design, height, and controlled scroll
When you need more subtle behavior (like dragging the panel upwards), Flutter offers:
#️⃣ DraggableScrollableSheet step-by-step
Example:
DraggableScrollableSheet(
 initialChildSize: 0.5,
 minChildSize: 0.2,
 maxChildSize: 0.9,
 builder: (_, controller) {
   return ListView(
     controller: controller,
     children: [...]
   );
 },
);
This allows you to create "semi-floating" sheets, similar to those in Google Maps.
#️⃣ Customization (borders, radii, colors, safe area)
You can adjust the shape with:
shape: RoundedRectangleBorder(
 borderRadius: BorderRadius.vertical(top: Radius.circular(20)),
),
clipBehavior: Clip.antiAliasWithSaveLayer,
A personal recommendation: when using a keyboard inside the sheet, enable:
useSafeArea: trueOr you'll see the keyboard "bite" the bottom part.
#️⃣ Internal Navigation inside the Bottom Sheet (Nested Navigation)
There are cases where the bottom sheet needs to have its own screens (for example, a list → detail).
This is completely possible thanks to an internal Navigator.
#️⃣ Navigator with GlobalKey
final navigatorKey = GlobalKey<NavigatorState>();Then:
Navigator(
 key: navigatorKey,
 onGenerateRoute: (_) => MaterialPageRoute(builder: (_) => Page1()),
)
#️⃣ How to handle the back button inside the sheet
Flutter doesn't perform magic here.
- You decide what happens when the user presses "Back":
- If the internal navigator can pop → you pop.
- If not → you close the bottom sheet.
This logic greatly improves the UX and prevents the user from exiting the sheet prematurely.
#️⃣ Best practices, common errors, and how to avoid them
Don't load too much content inside the sheet. It affects performance.
- Use StatefulBuilder when you only need local state.
- For complex UIs, create a dedicated StatefulWidget.
- Don't overuse full size; make it clear that the user is still on the same screen.
Test on various devices. It happened to me that the same bottom sheet took up "the whole screen" on some devices and only a small frame on others.
Implementation Considerations for the Bottom Sheet
Creating and deploying a Bottom Sheet is a very simple process in Flutter. In this case, I have associated it with the FloatingActionButton of our Scaffold.
1. Deployment with showModalBottomSheet
To display the Bottom Sheet, we use Flutter's native method: showModalBottomSheet.
- Availability: This method already comes "for free" in the Flutter API; you just have to invoke it.
- Arguments: It receives two main parameters:
- context: The current widget's context.
- builder: A function that must return the widget that will be the content of the Bottom Sheet.
2. Content and Structure
The builder can return any widget. In this case, the content has been modularized into a separate widget (CustomSwitch and Filter).
- SingleChildScrollView: It is a good practice to wrap the content inside a SingleChildScrollView. This guarantees that if the content exceeds the available space, scrolling will be enabled and the application will not break due to overflow.
- Customization: Inside this scroll, you can place any content you need, such as forms, option lists, or filters.
3. Nature of the Bottom Sheet
A crucial point is to understand how the Bottom Sheet behaves regarding the application state:
- Additional Page: The Bottom Sheet behaves as if it were an additional page or a widget completely attached to the parent Scaffold.
- Separate State: This implies that it has a completely different state. If you want the internal widgets (like a Switch) to update visually when interacting with them, you must manage their state explicitly (as explained in the previous section with the StatefulBuilder).
#️⃣ Conclusion
Bottom Sheets in Flutter are incredibly powerful.
From a simple panel with a filter to a full screen with internal navigation, you can build almost anything.
The key is to understand:
- Modal vs Persistent
- Internal state
- Scroll and height
- Nested navigation
- Visual customization
Once you master this, you can create truly fluid experiences without the need for additional routes.
#️⃣ Frequently asked questions about Bottom Sheets in Flutter
- How to prevent the bottom sheet from closing when tapping outside?
- isDismissible: false.
- How to maintain state inside the sheet?
- StatefulBuilder or a stateful widget.
- How to customize height and shape?
- isScrollControlled, RoundedRectangleBorder, clipBehavior.
- How to prevent the keyboard from covering the content?
- useSafeArea: true.
- Can I navigate inside the bottom sheet?
- Yes, with an internal Navigator + GlobalKey.
Learn how to send HTTP requests in Flutter.