When developing with Django, there comes a point where we not only need to delete data in Django, but we also need to receive data from the user such as: registrations, comments, searches, or file uploads. In my experience, understanding how to create forms in Django marks the jump from beginner to functional developer.
We are going to create a form in Django, which is a fundamental element once we know how to take the first steps in Django, know how to create a project, manage routes, and take the first steps with our MTV; before we begin, let's talk about forms.
🧱 What is a Django form and what is it used for?
Django provides a Form class that is used to create HTML forms, or rather, their fields, since with them we can describe what the fields are, what type (integers, floats, text fields, lists...) and how it works and appears. It is similar to the ModelForm class which creates a form using the model, but it does not require the model, therefore, they are more manual and flexible than the latter.
A Django form is a Python class that represents a data input structure, maps HTML fields (input, select, etc.), and applies automatic validations.
The Form class and its role in the framework
Django provides the base Form class within the django.forms module. With it, you can define the fields, their types, and validations.
For example:
from django import forms
class ContactForm(forms.Form):
   name = forms.CharField(max_length=100, required=True)
   email = forms.EmailField(required=True)
   message = forms.CharField(widget=forms.Textarea)
Differences between Form and ModelForm
Let's clarify what to use each type of form in Django for:
- Form is used when you define the fields manually.
- ModelForm is linked to an existing model and generates the fields automatically.
If you need total control, use Form. If your form is tied to a model (users, products, etc.), ModelForm saves you time.
Advantages of using native Django forms
In my case, I discovered that using native forms simplifies validation, avoids repeating logic, and improves security (CSRF, data sanitization, validation on both client and server).
In Django, there are primarily two types of forms for handling user interaction and data management. We are already familiar with one, but it is crucial to know the other for more complex use cases.
1. ⚙️ ModelForm (Model-Bound Forms)
ModelForms are forms that are directly tied to a database model.
Advantages:
- Automatic: They are perfect for creating simple CRUD (Create, Read, Update, Delete) processes, such as those we have used for comments, posts, or categories.
- Direct Relation: The field definition is automatically extracted from the model, which reduces code (you simply declare the fields tuple or __all__).
- Implicit Validations: They automatically inherit the validations defined in the model.
Disadvantages:
- Limitation: They are very tied to a single entity.
2. 📝 Form (Standard Forms)
Forms (normal Django forms) are forms that are not associated with any specific database model.
Advantages:
- Flexibility: They are more generic and give you 100% control over every field you wish to display.
- Complex Cases: Ideal for complex scenarios, such as filling two or three different entities on a single screen, or displaying fields that are not defined in any particular model.
What are forms used for in Django?
Forms are basically used to receive information from the user in some way and use that information for logical operations in databases. For example, registering a user by taking their name, email, password, etc., as input. Django maps the fields defined in Django forms to HTML input fields.
In this way, with a single definition (Django forms) we have both the HTML rendering of the fields and the handling in the views/controllers and, of course, validations on both sides.
How to create a form in Django?
Form data is stored in the file called forms.py by convention, meaning the file can have any other name, but we generally call it forms; this form is stored at the application level (within the application directory); therefore, each application can define its own forms according to the scheme you want to give it.
How does Django send form data?
In Django, the request object that is passed as a parameter to your view has an attribute called "method" where the request type is set and all data passed via POST can be accessed through the request in the form of a dictionary.
What are Django crispy forms?
This is also a common question, django-crispy-forms is nothing more than a | crispy filter and a {% crispy %} tag that will allow you to control the rendering behavior of your Django forms in a very elegant and DRY way. To have total control without writing custom form templates and with this, we can for example define classes that we want our form to have, for example, those from Bootstrap or Tailwind or our own.
Do I have to use Django forms?
Finally, the million-dollar question; The recommendation is that you use Django forms, since they are quite easy to use and handle all the validation for you (use required = True on each field, and you are ready for the simple 'not blank' check you mentioned), they are easy to get the data, sanitize it, check status and you would lose ALL this if you DO NOT use them.
🗂️ Basic project structure: where to define your forms
By convention, forms are defined within the forms.py file of each application. This keeps your project tidy and modular.
The forms.py file and its location
Each app in Django can have its own forms.py:
/my_project/
   /products/
       forms.py
       models.py
       views.py
Creating a form in Django
As we mentioned at the beginning of this block, we are going to create a form in Django, for that, as we commented, we create a file called forms.py in which we are going to define forms at the class level:
from django import forms
from .models import Category
class ProductsForm(forms.Form):
    title = forms.CharField(label="Name", required=True, max_length=255, min_length=3)
    description = forms.CharField(label="Description",widget=forms.Textarea(attrs={"rows":5, "cols":20}))
    price = forms.FloatField(required=True, min_value=0.1)
    category = forms.ModelChoiceField(label="Category", queryset=Category.objects.all())
Explanation of the previous code
As you can see, by defining a class that inherits from forms.Form (where forms is a module that we import from Django) we can define a form-based class, where each property of the class is a form field... it's that simple.
Form fields
We have ALL types of fields, text type, numbers, selectable, files... in this case we are using some text type (title and description) one number type (price) and another selectable type, indicating a model (category)
- In the same definition of the fields, we indicate some validations such as maximum size, minimum size, and if it is required.
- We also indicate the label, therefore, with a single property, we can define both label and field.
Let's create a creation function for the form, although you can perfectly adapt the form for the process of editing or updating records in Django:
def create(request):
    form = ProductsForm()
    return render(request, 'create.html', { 'form' : form })
As you can see, we create an instance of the form and pass it to a template:
Form Rendering
Each field defines its validation. With a single class you have control over labels, types, and visual behavior.
Displaying the form in a view
def create(request):
   form = ProductsForm()
   return render(request, 'create.html', {'form': form})
To render it in a view/template, we can use the form we passed as parameters from views.py:
{% csrf_token %}
{{ form }}
Including asking for specific fields:
{{form.price}}Or the Label
{{form.price.label}}If you want to build the fields one by one.
⚙️ Processing and validating data from the form
One of the parts that most helped me understand Django was its validation flow.
How Django handles POST and GET
When submitting a form, the data arrives at the view via request.POST.
To process them:
def create(request):
   if request.method == 'POST':
       form = ProductsForm(request.POST)
       if form.is_valid():
           print("Valid data")
Use of is_valid() and cleaned_data
form.is_valid() checks the validations defined in the fields. If everything is correct, you can access the sanitized data in form.cleaned_data.
Saving the data to the database
In my experience, the cleanest way is to create an instance of the model:
product = Product()
product.title = form.cleaned_data['title']
product.price = form.cleaned_data['price']
product.save()
Error handling
If the data is not valid, Django returns the form with error messages, without you having to rewrite anything.
Conclusions
Forms are a mechanism we have to work effectively with user data, we can use them for different purposes and Django gives us all the flexibility and simplicity that characterizes it to work with forms in an effective and extensible way.
GET and POST Requests and CSRF tokens
To explain what CSRF tokens are used for, let's do a small exercise.
We are going to create a function called add(), to add comments; for now, the section to draw a view:
def add(request):
    return render(request,'add.html')
We have to create a page:
comments/templates/add.html
<!DOCTYPE html>
<html lang="en">
<head>
    <meta charset="UTF-8">
    <meta http-equiv="X-UA-Compatible" content="IE=edge">
    <meta name="viewport" content="width=device-width, initial-scale=1.0">
    <title>Document</title>
</head>
  <body>
    <h1>Page to add</h1>
  </body>
</html>
We can create routes in each application that we then register in the project; let's create a file called urls.py with the following content:
comments/urls.py
from django.urls import path
from . import views
app_name='comments'
urlpatterns = [
    path('add', views.add, name='add')
]
Now, let's create an HTML form to create a comment:
templates/comments/add.html
<form method="post">
    <label for="id_text">Text:</label>
    <textarea name="text" cols="40" rows="10" class="form-input" required id="id_text">
</textarea>
    <input type="submit" value="Enviar">
</form>
It will look like:
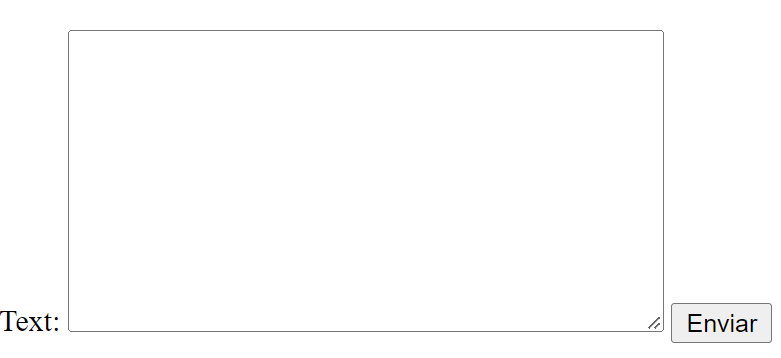
The form is really simple, we have a POST type form that points to the /comments/add route which is the add() view function call, which is the same one that is responsible for rendering this form.
When submitting the form we will see an error like the following:
CSRF Protection
The previous error occurs because Django, to prevent Cross-Site Request Forgery, uses a token it generates and injects into forms. So, to use this token, you just need to employ the following directive:
We indicate the token:
{% csrf_token %} * And with this, the request would now pass.
What is a CSRF attack?
Basically, an attacker could create an application or website (attacker.com) that points to a resource within our application (a production URL). Using a forged form, the attacker can send requests to our application, making them appear as if they originated from our own site. This represents a serious security risk.
Determining the Request Type from the View: GET and POST
Usually, when we want to change the project's data model, in this case, create an element, we use a POST request from the HTML forms:
- GET requests are used to query data.
- POST requests are used to change the data model, meaning to create, update, or delete.
Now, we have to receive this POST request from the view function. For this, we need to handle the user's request, which is the parameter we receive by default in view functions; for example:
def add(request): return render(request,'comments/add.html')By means of:
request.methodWhich returns the request type: GET or POST.
With this, we can get everything related to the request our user made from the web page via the form, such as headers, request type, and of course, the form data.
Since we will use the add() function to handle both types of requests:
- GET request, to render the HTML page using the template.
- POST request, to process the form data.
So, to determine the process we are going to execute based on a request type, we have:
request.method == 'POST'And the code looks like this:
def add(request): if request.method == 'POST': print("Estamos en el post") return return render(request,'comments/add.html')- If the request is GET, we render the form using the template.
- If the request is POST, we print a message to the terminal.
If you submit the form, you should see a ValueError exception in the browser, indicating that it's not a valid HTTP response because we're not returning anything; but, in the terminal, we will see the message:
Estamos en el post
For now, we managed to send data to our view function, which we are printing to the console; but, how can we create a record in the database? For that, we need to know how we can get this data from the request.
📥 Getting the Data from the request Object
As we have mentioned, the entire user request travels inside the request object. This includes the IP, the headers, and, most importantly for us now, the data sent by the form (POST) or the URL (GET).
Accessing POST and GET Data
In Django, to get the submitted data, we use the request.POST or request.GET properties. These properties behave like dictionaries, allowing us to access the values using the key (the name of the HTML field).
Method Purpose Data Travel
request.POST For data sent by forms (method="POST"). Travels in the body of the request (hidden).
request.GET For data sent by query parameters (the URL). Travels in the URL (e.g., ?field=value).
The syntax to get a field's value is:
data = request.<METHOD>['<FIELD_NAME>']That is, from the request, we can get the data with:
request.GET.get(<fieldName>)For GET type requests.
request.POST.get(<fieldName>)For POST type requests.
💾 Persistencia de Datos: Guardando con el Modelo
El método .save() es heredado de la clase base models.Model de Django, lo que nos da la funcionalidad necesaria para interactuar con la base de datos.
Para realizar las operaciones a la base de datos, tenemos que emplear los modelos; para ello, tenemos que tener la referencia en el registro que queremos operar en base a un objeto; por ejemplo, para guardar un nuevo registro, tenemos que crear una instancia de la clase modelo; por ejemplo:
comment = Comment()Y ya con esta, podemos acceder a sus atributos; por ejemplo:
comment.textCon esto, poder establecer valores o consumirlos; y luego, registrarlos en la base de datos; por ejemplo:
comment.save()🧩 Model-Based Forms: ModelForm
The models for forms are classes that define the structure based on a Python class with its corresponding attributes; these classes allow:
- Defining the form structure.
- Applying server-side and client-side validations.
- Easily reusing forms.
To use the forms, we can define them in a separate file at the application level, which by convention is called forms.py.
With this in mind, let's create the following class:
comments/forms.py
from django.forms import ModelForm, Textarea
from .models import Comment
class CommentForm(ModelForm):
    class Meta:
        model = Comment
        fields = ('text',)
Thanks to ModelForm, you can save many lines and keep the logic focused on the model.
Explanation of the previous code
ModelForm type forms offer a simple schema for defining form fields. As you can see, it is a Python class that inherits from the aforementioned class.
Then, we have to define a class called Meta inside this form class to define the structure of the forms, meaning which models this form is related to and what the fields are; the fields are just a Python tuple.
These classes are highly customizable, and you can define save processes, initialization at the class level, define attributes, customize form fields, validations, among others; although for now, we have a minimal example.
For model classes, the usual is to create an instance and, in this case, pass it to the template.
Let's go to the add() function, and pass the form as the second parameter:
from .forms import CommentForm
    // *
    form = CommentForm()
    return render(request,'comments/add.html',{'form':form})
From our template, we can print the complete form:
{{ form }}And with this, all the fields you have defined appear along with the LABEL:
Or by fields, independently:
{{ form.text }}Use the one that seems best and suits you.
Processing Forms
From the request, we can get the data from the form we are sending via POST or GET, just as we saw before. So, to set the data going via POST in the previous form:
form = Form(request.POST)We pass it to the form as initialization.
Practical Case
The add() function will look like this:
def add(request):
    if request.method == 'POST':
        form = CommentForm(request.POST)
        if form.is_valid():
            comment = form.save()
    else:
        form = CommentForm()
    return render(request,'comments/add.html',{'form':form})
As you can see in the previous code, from the same model, we can use the save() function to create a comment.
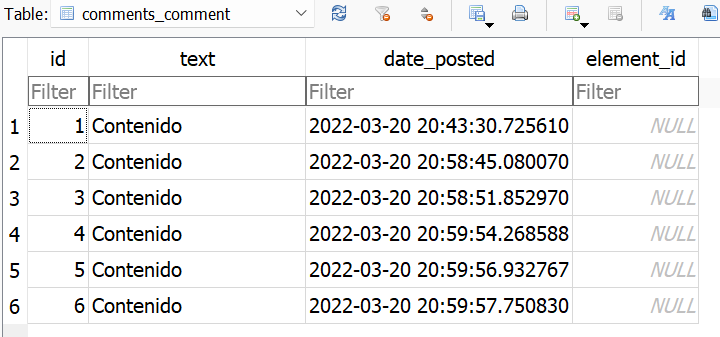
With this, you can run some tests and send data from the template form:
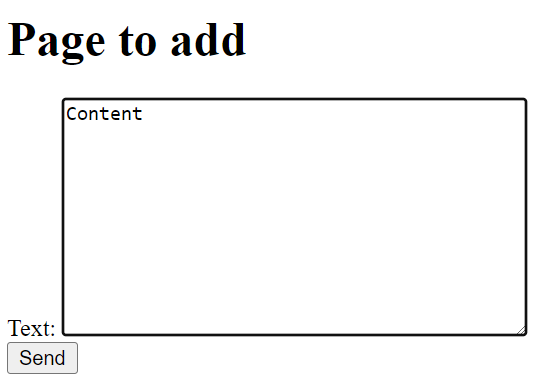
And you will see in your database:
If you enter invalid data, meaning a form without values, you will see a client-side validation pop up:
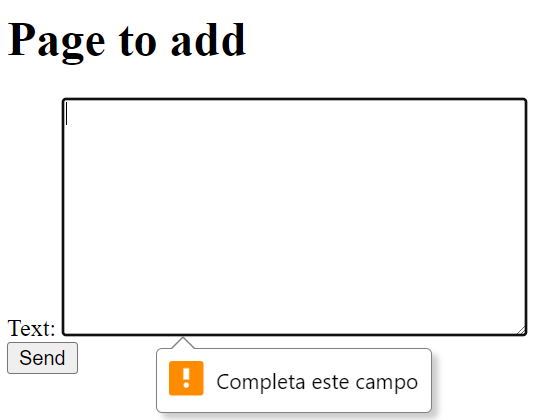
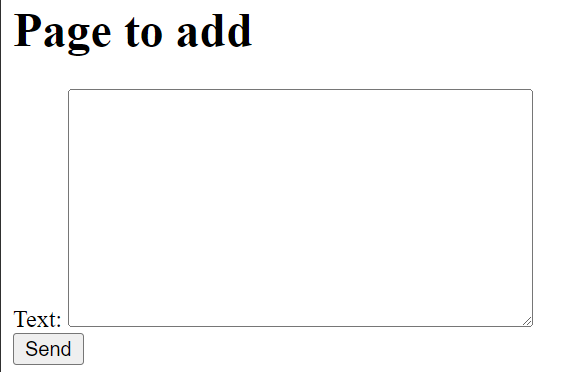
The template:
comments\templates\comments\add.html
    <form action="" method="post">
        {% csrf_token %}
        {{ form }}
        <button type="submit">Send</button>
    </form>
💅 Improve Design with django-crispy-forms
If you've ever tried to manually align fields, you know it can be tedious.
django-crispy-forms gives you elegant and clean visual control.
Installation and basic configuration
$ pip install django-crispy-formsAdd in settings.py:
INSTALLED_APPS = ['crispy_forms']Integration with Bootstrap or Tailwind
In your templates:
{% load crispy_forms_tags %} {% csrf_token %} {% crispy form %} Stylized Example
You can even apply Bootstrap classes without writing additional HTML.
How to create a Textarea in a Django form
How can we create a text area in Django?
The following code below can be used to create a text area in a Django form:
comment= forms.CharField(widget=forms.Textarea)We can also customize the attributes, such as in this case the rows and columns:
comment= forms.CharField(widget=forms.Textarea(attrs={"rows":8, "cols":10})In this example, we create a textarea with 8 rows and 10 columns.
🧠 Best Practices and Personal Recommendations
- Organize your forms: group them by module or model.
- Always validate on both sides: the client (HTML5) and the server (Django).
- Use crispy-forms or widgets: they improve the visual experience.
- Debug: if a form doesn't validate, print form.errors to find out why.
Working with ModelForm forms in Django, creating a record
In HTML, a form is a collection of elements within `<form>...</form>` that allows a user to enter text, select options, or perform other operations, and then return that information to the server—in this case, Django.
Some of these form interface elements (text input fields or checkboxes) are embedded directly in the HTML. Others are much more complex; an interface that displays a date picker or allows you to move a slider or manipulate controls will typically use JavaScript and CSS, as well as HTML form elements like `<input>`, to achieve these effects.
ProductForm(forms.ModelFo
Let's create a process for using a form to create records using the Form element in Django:
class ProductForm(forms.ModelForm):
    class Meta:
        model = Product
        fields = ('title','subtitle','slug','post', 'path','content','description','posted','product_type', 'date','image', 'user', 'price_offert', 'price')
        widgets = {
            'description': forms.Textarea(attrs={'rows': 10, 'cols': 80}),
        }
We are going to use a creation function that we will use both to display the form and to create the records.
def create(request):
   form = ProductForm()
   return render(request, 'create.html', { 'form' : form })
As you can see, we create an instance of our form, the class, and then pass this instance to a template that has the following definition:
<form method="post">
   {% csrf_token %}
   {{ form }}
   <button type="submit">Enviar</button>
</form>
As you can see, we print the form that we encapsulated inside an HTML form and define it as Post type, since POST requests are generally the ones we use to create or update records.
Get and Post type forms
Now, we want to use this form to create our records. For that, we must detect when we render the form (get) or when we process the data (post). To do this, we detect the method type, if it is Post type (request.method == "POST"). In this case, in addition to asking if the form is valid (if the validations performed were passed), we then generate a product instance, which is a model, and set its data:
product = Product()
product.title = form.cleaned_data['title']
product.price = form.cleaned_data['price']
product.description = form.cleaned_data['description']
product.category = form.cleaned_data['category']
And then we save:
product.save()cleaned_data allows us to work with the sanitized data.
Complete application code
def create(request):
    form = ProductForm()
    if request.method == "POST":
        #print(request.POST['title'])
        form = ProductForm(request.POST)
        if form.is_valid():
            print("Valido")
            #form.save()
            product = Product()
            product.title = form.cleaned_data['title']
            product.price = form.cleaned_data['price']
            product.description = form.cleaned_data['description']
            product.category = form.cleaned_data['category']
            product.save()
        else:
            print("Invalido")
    return render(request, 'create.html', { 'form' : form })

<form method="post">
    {% csrf_token %}
    {{ form }}
    <button type="submit">Enviar</button>
</form>
We will see how to create a textarea in a form in Django and with this, have a larger text area to write in instead of a text input, in which we can only write single-line texts, very often used to create comment blocks or to write a description, and like any HTML field, it is perfectly customizable at the style level.
Implement CRUD Operations in our Django 6 Application
Next, we will implement the missing CRUD operations (Listing, Update, and Delete) in the views, routes, and templates, using the knowledge we already have about the ORM and forms.
1. 📋 Listing Records (Read)
This operation requires retrieving all the comments and passing them to a listing template.
- View (views.py):
- We define the index(request) function.
- We use Comment.objects.all() to retrieve all records.
- We render the template and pass the QuerySet as context.
- Route (urls.py):
- We define the main route (e.g., path('', views.index, name='index')).
- Template (comments/index.html):
- We use the {% for ... in ... %} directive of the Django Template Language to iterate over the list of comments.
- We display the attributes (e.g., {{ comment.text }}, {{ comment.date_posted }}).
In views.py
def index(request):
   comments = Comment.objects.all()
   context = {'comments': comments}
   return render(request, 'comments/index.html', context)
2. ✏️ Update Record (Update)
Updating is the most complex operation, as it must handle GET (loading data) and POST (saving changes).
Route (urls.py):
The route must receive the unique identifier of the record to be updated (e.g., the primary key or PK).
path('update/<int:pk>/', views.update, name='update')View (views.py):
The update(request, pk) function must receive the pk as an argument.
- GET Logic: We use Comment.objects.get(pk=pk) to retrieve the comment (or ideally get_object_or_404). We create an instance of the CommentForm with that object: form = CommentForm(instance=comment).
- POST Logic: We create the instance with the request.POST data and the model instance: form = CommentForm(request.POST, instance=comment). If it is valid (.is_valid()), .save() updates the existing record.
Important: Using instance=comment in the form is what tells Django to update the existing object instead of creating a new one.
3. 🗑️ Deleting Record (Delete)
To follow good HTTP conventions, deletion is done via a POST request.
Route (urls.py):
path('delete/<int:pk>/', views.delete, name='delete')View (views.py):
- The delete(request, pk) function should only process the request if it is POST.
- We retrieve the comment using the pk.
- We call the ORM method: comment.delete().
- Final Action: After deleting, the user must be redirected (e.g., to the list).
4. 🔗 Links and Action Forms in index.html
Finally, in the listing template, we define the dynamic links using the {% url %} directive:
Update Link: Points to the update route using the comment's PK.
<a href="{% url 'update' c.id %}">Edit</a>Delete Form: To follow the POST convention, a mini-form with the CSRF token is used, pointing to the delete route.
<form method="POST" action="{% url 'delete' c.id %}"> {% csrf_token %} <button type="submit">Delete</button> </form>With these steps, we have completed the CRUD cycle, integrating models, views, routes, and forms.
Textareas are common for things like entering comments or other lengthy information.
🏁 Conclusions
Creating forms in Django is one of the most useful skills for any backend developer.
Django offers you:
- Automatic Validation
- Data Cleaning and Sanitization
- Built-in Security
- Seamless Integration with Models
In my case, after trying multiple ways to do it, I always go back to native Django forms: simple, secure, and flexible.
As you can see, using the form we created in the previous entry is simple for this type of operation. The creation function fulfills two unique steps: rendering the form and getting the data to register it in the model and then save it.
❓ Frequently Asked Questions (FAQs)
What is the difference between Form and ModelForm?
Form is manual, ModelForm is model-based. Use the second if the form saves data to the database.
Where is a form defined in Django?
Inside the forms.py file of each application.
How to validate a form?
With form.is_valid() and accessing the clean data with form.cleaned_data.
How to save form data?
In ModelForm, use form.save(). In Form, manually create and save the model instance.
What library helps improve the visual appearance?
django-crispy-forms, compatible with Bootstrap or Tailwind.
Why use Django's 'forms.py' instead of handling forms the normal way?
Because with Django forms, we save a lot of work both in validations and in processing them on the server.
The next step is to learn how we can upload files in Django.