
Content Index
- Why integrate PayPal into your Django project
- What advantages does PayPal offer over other gateways
- What you need before starting
- Generate access keys and test users
- ⚙️ Configure your Django environment and PayPal keys
- Create a modular class to handle payments in Django
- Generate the access token (get_access_token)
- Capture the order (capture_order)
- ️ Integrate PayPal with the client (JavaScript SDK)
- Complete example
- Process the order and display results
- Best practices and common errors when integrating PayPal
- Conclusion
- Frequently Asked Questions (FAQs)
Integrating PayPal into Django may seem complicated at first, but the reality is that it's simply a matter of making clean and well-structured HTTP requests.
In this guide, I show you how to do it without relying on external SDKs, using only the Python requests package, the same one you surely already use every day. And this is the beauty of what we have with PayPal, the first secret is that we can integrate PayPal web from ANY technology that allows making HTTP requests.
Why integrate PayPal into your Django project
PayPal is one of the most reliable and universal payment gateways. Integrating it into a Django project allows you to offer a secure, fast, and professional purchasing experience.
What advantages does PayPal offer over other gateways
You don't need to handle cards directly: the payment is managed by PayPal.
It offers a sandbox environment for testing without real money.
It supports single payments, subscriptions, and refunds.
Easy to implement with simple HTTP requests.
What you need before starting
A running Django project (you can check my blog, in the Django section, we show how to create a Django project there).
A PayPal Developer account.
Your Client ID and Secret.
And, of course, have the package we will use for HTTP requests installed:
$ pip install requestsGenerate access keys and test users
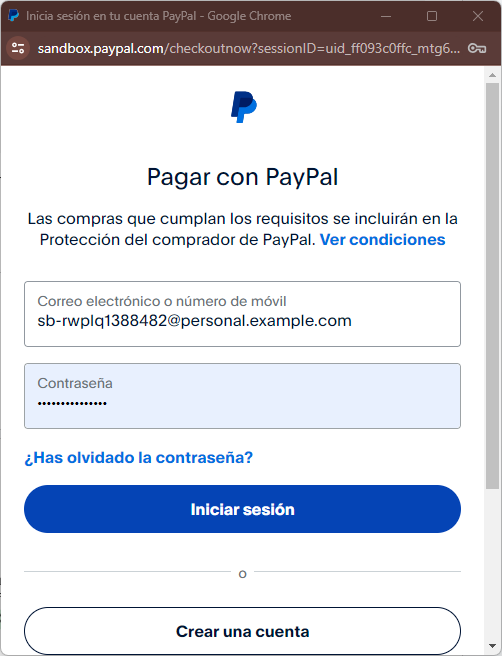
To integrate PayPal into our application, we must have a PayPal account; once obtained, if we go to the PayPal developer site:
https://developer.paypal.com/home
We click on the option that says "API Credentials" and create an application; to do this, we press the "Create App" button and a dialog like the following will appear:

You can leave the "Merchant" option and "Create App."
Once the credentials to use the PayPal API are created, they will appear listed at the bottom:
We have a secret key that we will use on the server and a public key that we will use on the client, therefore, it will be exposed to anyone who views the page's source code from their browser; in turn, we have access to some test keys, which we can use to make requests to a test or sandbox account.
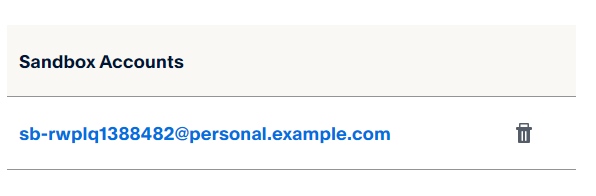
Apart from the keys, test users are generated that we will use to make connections to the PayPal testing API available in "Sandbox accounts":
⚙️ Configure your Django environment and PayPal keys
Create an application in the PayPal developer panel and copy your credentials:
# settings.py
PAYPAL_CLIENT_ID = '<YOUR_CLIENT_ID>'
PAYPAL_SECRET = '<YOUR_SECRET>'
PAYPAL_BASE_URL = 'https://api-m.sandbox.paypal.com'
Always use the sandbox environment for testing.
When you switch to production, change the base URL to https://api-m.paypal.com.
Create a modular class to handle payments in Django
The key is to modularize. Instead of filling the views with repeated code, we create a `PayPalPayment` class that handles all operations.
import requests
from django.conf import settings
class PayPalPayment:
   def __init__(self):
       self.client_id = settings.PAYPAL_CLIENT_ID
       self.secret = settings.PAYPAL_SECRET
       self.base_url = settings.PAYPAL_BASE_URL
Generate the access token (get_access_token)
PayPal requires a token to authenticate requests. We obtain it like this:
class PayPalPayment:
***
def get_access_token(self):
   url = f"{self.base_url}/v1/oauth2/token"
   headers = {
       "Accept": "application/json",
       "Content-Type": "application/x-www-form-urlencoded",
   }
   data = {"grant_type": "client_credentials"}
   response = requests.post(url, auth=(self.client_id, self.secret), data=data, headers=headers)
   return response.json().get("access_token") if response.status_code == 200 else None
To the server, PayPal is simply an HTTP API; you just need to properly set up the headers and the token.
Capture the order (capture_order)
Once the order is approved by the client, we process it:
def capture_order(self, order_id):
   access_token = self.get_access_token()
   if not access_token:
       return {"error": "No se pudo obtener el token"}
   url = f"{self.base_url}/v2/checkout/orders/{order_id}/capture"
   headers = {
       "Content-Type": "application/json",
       "Authorization": f"Bearer {access_token}",
   }
   response = requests.post(url, json={}, headers=headers)
   return response.json()
As important points we have that, we add the URL to which we must make the request:
url = f"{self.base_url}/v1/oauth2/token"The headers, to indicate that it should return a response in JSON format and that the request is sent NOT as a JSON request but as if it were a form:
headers = { "Accept": "application/json", "Content-Type": "application/x-www-form-urlencoded", }We indicate that the request is to generate the access token:
data = {"grant_type": "client_credentials"}We build the request which is of type POST and provide the previous data:
response = requests.post(url, auth=(self.client_id, self.secret), data=data, headers=headers)With:
return response.json()We get the entire response, which is in JSON format as we configured previously, we are only interested in the token which is registered in:
return response.json().get("access_token")Also, we verify that the request status is 200, which indicates that the token was successfully generated; any other status indicates that the token could NOT be generated:
response.status_codeThe token looks similar to:
A21AAJmqsBwihAFF236Y6pnisFJWK*hy3Qr6SsZNr0BsWPFIwEkXqu45bkJHlDgxkknDUkoSA
And it is the one we have to supply instead of the client and secret when approving the order; the entire data structure is as stipulated by PayPal.
️ Integrate PayPal with the client (JavaScript SDK)
Now that you know what we have to do to obtain the PayPal keys for Django, that is, the developer mode in PayPal just as I showed you in the previous video here, to continue in this class, you must have both the Client and the Secret, especially the Client right now, which is the one we are going to use; we will use the Secret later. So, to expand this integration, we are going to use a plugin, which is the one I will leave somewhere in the video.
https://www.npmjs.com/package/@paypal/paypal-js
It is possible to use it via Node or the CDN, which is what we are going to use
<script src="https://www.paypal.com/sdk/js?client-id=test"></script>Having clarified this a bit, let's start with what we are going to do first. To separate things, I'm going to put it here in the edit section; we are going to create a new template that I will name:
mystore\templates\partials\paypal.html
<div id="buttonPayPal"></div>

<script>
   paypal.Buttons().render('#buttonPayPal');
</script>
And on the detail page, we load the JS:
{% block content %}
<script src="https://www.paypal.com/sdk/js?client-id=<YOURCLIENTID>"></script>
***
<div class="card-body">
   {% include "partials/paypal.html" %}
***
Where it says <YOURCLIENTID> you could put your key provided by PayPal, but we are going to create a more modular scheme in the next section.
But, with the previous code, you should be able to see the PayPal buttons on your website.
Complete example
To display the payment buttons on the frontend, simply load the official PayPal SDK:
<script src="https://www.paypal.com/sdk/js?client-id={{paypal_client_id}}"></script>
<div id="buttonPayPal"></div>
<script>
   paypal.Buttons({
       createOrder: function(data, actions){
           return actions.order.create({
               purchase_units: [{ amount: { value: '{{ element.price }}' } }]
           });
       },
       onApprove: function(data, actions){
           console.log(data);
           window.location.href = '/store/capture-payment/' + data.orderID;
       }
   }).render('#buttonPayPal');
</script>
The redirection to another page using the window object prevents the user from reloading the page and processing the order twice.
You can include other options such as the payer, the item, among others.
Here it is also important that you enter into context; remember I told you there are two steps:
- On one hand, the client side, which is simply a kind of authorization, a kind of promise in which the client wants to buy that product.
- On the server, which is the integration we will see later, the purchase is not approved or finalized; that is, the amount for the product the client is buying is not charged from their PayPal. Here it is simply a kind of promise, so to speak, an intention that we will later authorize.
Process the order and display results
On the server, we receive the `orderID` and finalize the process:
from django.shortcuts import render
from .paypal import PayPalPayment
def capture_payment(request, order_id):
   paypal = PayPalPayment()
   res = paypal.capture_order(order_id)
   if res:
       return render(request, 'elements/capture_payment.html', {
           'res': res,
           'id': res['id'],
           'status': res['status'],
           'price': res['purchase_units'][0]['payments']['captures'][0]['amount']['value'],
       })
   return render(request, 'elements/error.html')
And in the template:
<ul>
 <li>ID: {{ id }}</li>
 <li>Status: {{ status }}</li>
 <li>Price: {{ price }}</li>
</ul>
<pre>{{ res }}</pre>
I recommend saving the complete trace of the response in the database to debug if something goes wrong.
These are the data that I recommend saving as a minimum; you can save others, but these are mandatory:
- The status is the first thing we will need; the response also comes as a JSON.
- Amount
- ID
Because with this, you can verify the successful payment at the system level.
Best practices and common errors when integrating PayPal
- Saving traces and responses
- Storing the complete PayPal JSON in a separate field can save you headaches if there are discrepancies or intermittent failures.
- Expired tokens or expired sandbox
- Tokens last a few minutes, and orders can expire after a day. If you get 401 or 404 errors, the token or the order is likely no longer valid.
- Testing environment vs. production
- Sandbox: ideal for development.
- Production: use the secure URL https://api-m.paypal.com.
- Keep your credentials out of the repository (use environment variables).
Conclusion
Integrating PayPal into Django does not require complex SDKs or external libraries.
With a modular class, a few HTTP requests, and the PayPal SDK on the frontend, you can implement a professional and secure payment flow.
In my experience, implementing PayPal in Django is basically about making clean and structured HTTP requests, nothing more.
Frequently Asked Questions (FAQs)
- Can Django Rest Framework be used with PayPal?
Yes, you can expose the order creation and capture endpoints via DRF for SPA or mobile integrations. - How to generate the access token from Django?
Use the `/v1/oauth2/token` endpoint with your client and secret, as in the `get_access_token()` method. - What should I save in the database?
Order ID, status, amount, and the complete payment JSON trace. - How to switch from sandbox to production?
Just change the base URL and credentials in your environment variables.