Content Index
- What is a list?
- Column and Row: when to use them and when not to
- The problem with Column and Row
- Scroll in Column: first sign of inefficiency
- forEach and full rendering
- LazyColumn and LazyRow: Efficient Lists
- Comparison with RecyclerView (classic Android)
- LazyVerticalGrid: lists in grid form
- Adaptation to screen densities
- Reusing components in lists
- Closing
- RecyclerViews and CardView the Legacy approach
- The CardView
- Creating a RecyclerView
- Specifying the positioning of the RecyclerView with Layout Manager
- Specifying the data and the model
- Defining the Adapter
- Invoking the previous Adapter
- Conclusions
- RecyclerView in Android with Kotlin: Same approach, events, classes but different syntax
- The model class of our adapter
- The main Activity: the one that implements the Adapter
- The adapter class: Defines the logic and behavior of the RecyclerView
- The layout of our activity
- Our list layout
- Conclusion
- Creating a filter for RecycleView in Android
Lists are a very interesting component, because they are actually components (Composables) made up of other components.
When I talk about components, I mean these classes/Composables that we are using: we have already seen text and button components, which are normally quite simple. A button, for example, is nothing more than text with a behavior, although internally it reuses other components to define that text:
Text(
   text = message
)
Here we begin to reuse what we already know. We did something similar earlier with cards when we created a Card as a container in Android Studio | Jetpack Compose; we not only created the card component itself, but we also reused text and buttons, which are like small LEGO pieces that allow us to build larger components.
In the case of lists, exactly the same thing happens.
A list, by definition, already has some built-in behavior (we'll talk about that in a moment), but it also allows us to reuse these small pieces, including more complex components like cards, to build a richer interface.
What is a list?
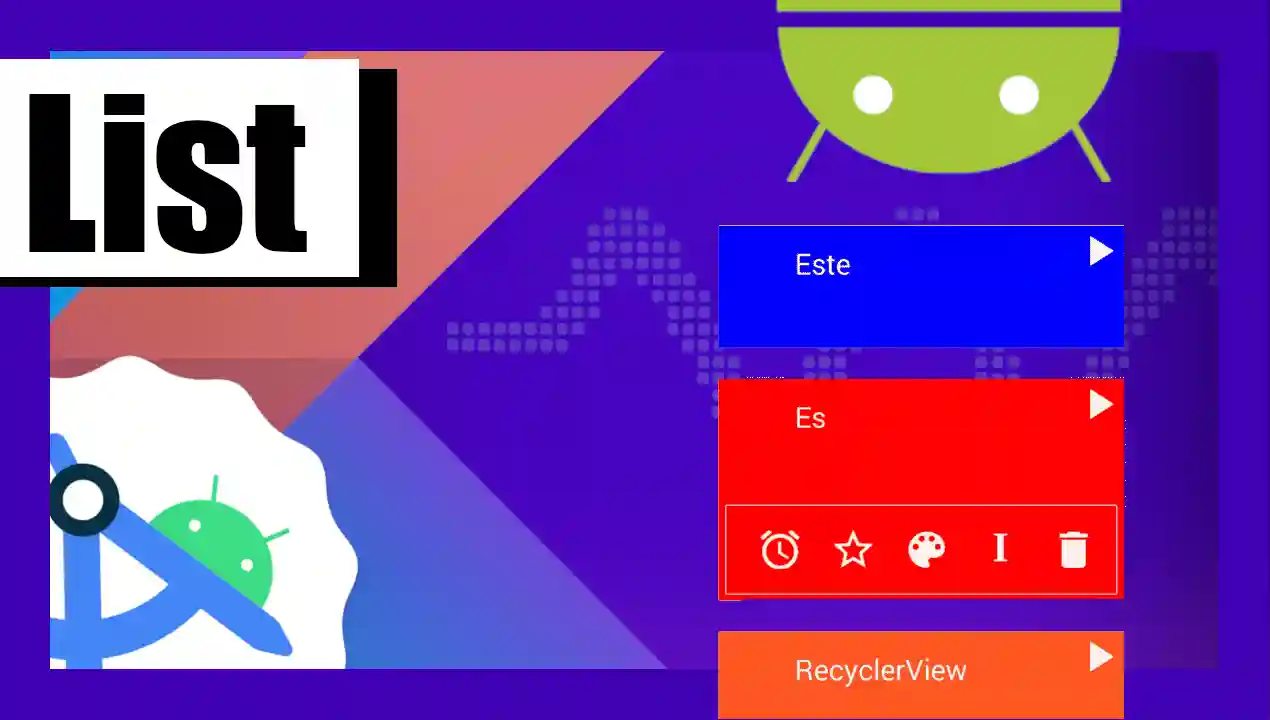
A list, in essence, is a set of elements displayed on the screen. Nothing more.
In this case it can be a list of texts, normally interactive to see details, although that is not the case now.
Keep in mind that this is just a basic introduction, because the topic has a lot of depth.
Here you can see the list in both the emulator and the preview.
Column and Row: when to use them and when not to
We are already familiar with the Column and Row components. We have used them before, for example, for buttons or for cards.
- Column stacks elements vertically, like a pile of books.
- Row places them next to each other, in a row.
Both work the same, the only difference is the orientation.
The problem with Column and Row
The problem arises when we try to use Column or Row for large lists.
For simple cases—like two buttons that will always be there—they work perfectly. But now imagine a list of posts:
5, 500 or even 5,000 items.
It is impossible to display all of that at once on the screen of a mobile device. Unlike buttons, which are few and fixed, a large list is not meant to be rendered completely.
Therefore, for these types of cases, Column and Row are not the best option.
Scroll in Column: first sign of inefficiency
If you want to scroll in a Column, you have to explicitly add the modifier:
@Composable
fun MessageInefficientList(messages: List<String>, modifier: Modifier = Modifier) {
    /*Row*/Column(modifier = Modifier
        .fillMaxSize()
        .verticalScroll(rememberScrollState())) {
        messages.forEach { message ->
            Text(
                text = message
            )
        }
    }
}
Once you do it, the scroll bar appears.
But here Android is already giving us an important clue: this component is not designed to handle large scrolls. It is for simple structures that fit on the screen.
This is the first evidence that it is not the right tool for extensive lists.
forEach and full rendering
Another important problem appears when we use forEach:
messages.forEach { message ->This forEach is executed completely when rendering the component, which means that all elements are built and rendered at once.
If you have 5,000 elements, all 5,000 are rendered, even if they are not visible on the screen.
This is clearly inefficient and affects performance, memory and battery.
LazyColumn and LazyRow: Efficient Lists
The correct and efficient way to handle lists is by using lazy components:
- LazyColumn
- LazyRow
The term lazy means that only what is visible on the screen is rendered.
For example:
- If only elements 1 to 23 are visible on the screen, only those are rendered.
- Element 24, if not visible, is not yet rendered.
- It is rendered only when necessary.
In addition, these components are already scrollable by default, you do not need to add anything extra.
Comparison with RecyclerView (classic Android)
If you come from the traditional Android world, this will be familiar to you (at the end of the post you have the implementation with RecyclerView).
- Column and Row are equivalent to an old ListView: they render everything.
- LazyColumn and LazyRow are equivalent to a RecyclerView.
The concept of recycle is literal:
When an element is no longer visible, it is recycled and reused to display a new one further down. Thousands of new views are not created, existing ones are reused.
This is much more efficient than rendering 5,000 elements at once.
@Composable
fun MessageList(messages: List<String>, modifier: Modifier = Modifier) {
    /*LazyRow*/LazyColumn(modifier = modifier) {
        items(messages) { message ->
            Text(
                text = message
            )
        }
    }
}
LazyVerticalGrid: lists in grid form
In addition to columns and rows, we have:
- LazyVerticalGrid
- LazyHorizontalGrid
These allow us to create adaptable grids.
For example, using GridCells.Adaptive, we indicate the minimum size that each cell will have (for example, 200 dp), and the system decides how many columns fit according to the size and density of the screen:
@Composable
fun MessageGrid(messages: List<String>, modifier: Modifier = Modifier) {
   LazyVerticalGrid(
       //modifier = Modifier.height(200.dp),
       columns = GridCells.Adaptive(minSize = 200.dp)
   ) {
       items(messages) { message ->
            Text(
                text = message
            )
       }
   }
}
This is extremely useful in Android, where there are many different screen sizes and densities.
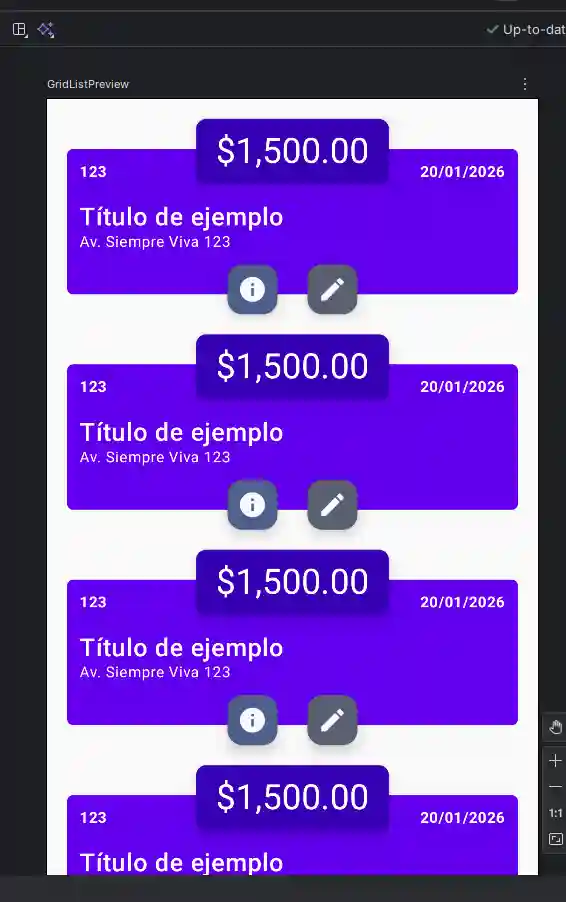
Adaptation to screen densities
- In the preview you can notice that, due to the low pixel density, only one element fits per row.
- In the emulator, which has a higher density, two or more columns may appear without changing the code.
This shows how the design adapts automatically without needing to ask if the device is in portrait, landscape or what size it is.
Reusing components in lists
Finally, something very important: lists are designed to reuse components:
@Composable
fun MessageGrid(messages: List<String>, modifier: Modifier = Modifier) {
    LazyVerticalGrid(
        //modifier = Modifier.height(200.dp),
        columns = GridCells.Adaptive(minSize = 200.dp)
    ) {
        items(messages) { message ->
//            Text(
//                text = message
//            )
            CardBonito()
        }
    }
}
In the example, we reuse CardBonito that we implemented in the previous entry and that is the most complete component we have created so far.
We simply call it within the list and that's it.
This is the true power of lists:
- They not only handle large amounts of data efficiently.
- They also allow reusing previously created components.
Closing
To close, remember:
- Use Column and Row only for small, fixed structures.
- Use LazyColumn, LazyRow or LazyGrid for large lists.
- Lazy components are efficient, recyclable and scrollable by default.
- Lists exist to compose interfaces by reusing other components.
RecyclerViews and CardView the Legacy approach
RecyclerViews, like GridViews and ListViews, allow you to create lists of items either through lists or cells; RecyclerViews can be seen as a more flexible, powerful and updated version than these and surely at some point they will be the definitive replacement for them; the way they work is the same as that used by their predecessors as you can see in this image:

Adapter that acts as a bridge between the data and the view.
The CardView
The RecyclerView and the CardViews are part of the support library; the CardViews inherit from the ViewGroups, more directly from the FrameLayouts and therefore it is an element that allows us to define many other elements within it, such as the following:
<androidx.cardview.widget.CardView xmlns:card_view="http://schemas.android.com/apk/res-auto"
   android:id="@+id/card_view"
   android:layout_width="match_parent"
   android:layout_height="wrap_content"
   android:layout_gravity="center"
   android:layout_margin="2dp"
   card_view:cardCornerRadius="1dp">
   <RelativeLayout
       android:id="@+id/parent_body_rl"
       android:layout_width="match_parent"
       android:layout_height="wrap_content"
       android:background="#FF5722"
       android:orientation="vertical"
       android:padding="2dp">
       <LinearLayout
           android:id="@+id/parent_body_ll"
           android:layout_width="match_parent"
           android:layout_height="wrap_content"
           android:orientation="horizontal"
           android:padding="2dp">
           <LinearLayout
               android:id="@+id/color_ll"
               android:layout_width="50dp"
               android:layout_height="50dp"
               android:layout_gravity="center"
               android:layout_margin="10dp"
               android:background="#FF0000"
               android:orientation="vertical" />
           <LinearLayout
               android:layout_width="0dp"
               android:layout_height="wrap_content"
               android:layout_weight="1"
               android:orientation="vertical"
               android:padding="2dp">
               <TextView
                   android:id="@+id/name_tv"
                   android:layout_width="match_parent"
                   android:layout_height="wrap_content"
                   android:padding="10dp"
                   android:text="text 1"
                   android:textColor="#FFFFFF"
                   android:textSize="25sp" />
               <TextView
                   android:id="@+id/description_tv"
                   android:layout_width="match_parent"
                   android:layout_height="wrap_content"
                   android:layout_below="@+id/info_text"
                   android:padding="10dp"
                   android:text="text 2"
                   android:textColor="#FFFFFF"
                   android:textSize="15sp" />
           </LinearLayout>
       </LinearLayout>
   </RelativeLayout>
</androidx.cardview.widget.CardView>
Obtaining the following result:

In other words, we can use CardViews in conjunction with RecyclerViews; where the CardView defines the items in the list.
Creating a RecyclerView
First of all, you need to add a RecyclerView element to the layout of our Activity or Fragment:
<androidx.recyclerview.widget.RecyclerView
    android:layout_width="match_parent"
    android:layout_height="match_parent"
    android:id="@+id/recycler_view"
    />
Like any other element, to reference the previous RecyclerView from our Activity we use the following Java code:
RecyclerView recyclerView = (RecyclerView)findViewById(R.id.recycler_view);Specifying the positioning of the RecyclerView with Layout Manager
From here we can appreciate some changes with respect to the moment of creating the ListViews and GridViews; to define the positioning in which we want our list of items to be rendered (in the form of lists or cells):

We use the following Java code so that the elements are positioned in the list through lists:
androidx.recyclerview.widget.LinearLayoutManager linearLayoutManager = new androidx.recyclerview.widget.LinearLayoutManager(context);
recyclerView.setLayoutManager(LinearLayoutManager);
Or the GridLayoutManager so that the elements are positioned in the list through cells:
androidx.recyclerview.widget.GridLayoutManager gridLayoutManager = new androidx.recyclerview.widget.GridLayoutManager(context);
recyclerView.setLayoutManager(gridLayoutManager);
Specifying the data and the model
For greater ease when manipulating the data, we will create a Person model to specify a list with our data that we will later pass to the Adapter.
public class Person {
   String name;
   String description;
   String color;
   Person(String name, String description,String color){
       this.name = name;
       this.description = description;
       this.color = color;
   }
   public String getName() {
       return name;
   }
   public void setName(String name) {
       this.name = name;
   }
   public String getDescription() {
       return description;
   }
   public void setDescription(String description) {
       this.description = description;
   }
   public String getColor() {
       return color;
   }
   public void setColor(String color) {
       this.color = color;
   }
}
Nothing out of the ordinary, the person consists of a name, a description (age, etc.) and a favorite color.
Defining the Adapter
The Adapter used by the RecyclerViews are very similar to those used by the ListViews and GridViews in terms of their structure and behavior; in addition to this, we will use the ViewHolders to more easily reference the elements that interest us in our list; the definition of the Adapter below:
public class ListAdapter extends androidx.recyclerview.widget.RecyclerView.Adapter<ListAdapter.ViewHolder>{
   private ArrayList<Person> persons;
   // Provides a reference to each item within a view and access them easily
   public static class ViewHolder extends androidx.recyclerview.widget.RecyclerView.ViewHolder {
       // Each of the elements of my view
       public TextView nameTextView,descriptionTextView;
       public CardView cardView;
       public LinearLayout colorLl;
       public RelativeLayout parentBodyRl;

       public ViewHolder(View v) {
           super(v);
           parentBodyRl = (RelativeLayout) v.findViewById(R.id.parent_body_rl);
           cardView = (CardView) v.findViewById(R.id.card_view);
           nameTextView = (TextView) v.findViewById(R.id.name_tv);
           descriptionTextView = (TextView) v.findViewById(R.id.description_tv);
           colorLl = (LinearLayout) v.findViewById(R.id.color_ll);
       }
   }
   // Constructor
   public ListAdapter(ArrayList<Person> persons) {
       this.persons = persons;
   }
   // Create new views (invoked by the layout manager)
   @Override
   public ListAdapter.ViewHolder onCreateViewHolder(ViewGroup parent,
                                                         int viewType) {
       // inflate the view (parent view)
       View v = LayoutInflater.from(parent.getContext()).inflate(R.layout.list_adapter, parent, false);
       // create the view group
       ViewHolder vh = new ViewHolder(v);
       return vh;
   }
   // Replaces the content of the view
   @Override
   public void onBindViewHolder(ViewHolder viewHolder, final int position) {
       viewHolder.nameTextView.setText(persons.get(position).getName());
       viewHolder.descriptionTextView.setText(persons.get(position).getDescription());
   }
   // Returns the size of our data
   @Override
   public int getItemCount() {
       return persons.size();
   }
}
As we see in the previous code, there are three methods that we must override:
The getItemCount() method that must return the size of the list, or what is the same, the size of our list of elements that will be displayed in the list.
The onCreateViewHolder() method allows you to initialize all the elements that make up our ViewHolder class defined above; we also define the layout (which can vary for each element) that each element uses. It is also possible to define the events in this function.
In the onBindViewHolder() method, the values of the different fields must be defined or linked.
Invoking the previous Adapter
From our Activity or Fragment, we create an object of the Adapter defined above:
ListAdapter listAdapter = new ListAdapter(persons);
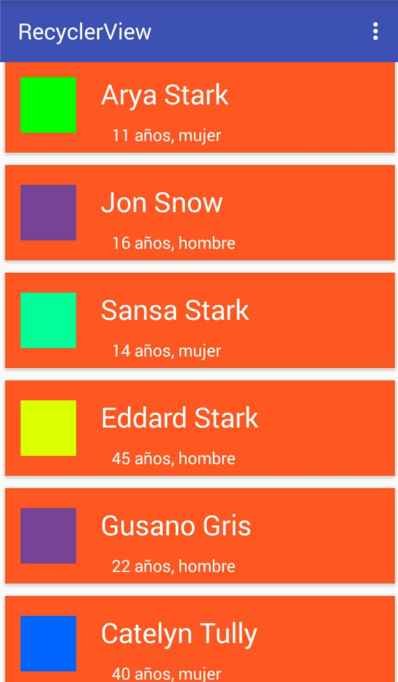
audioRv.setAdapter(listAdapter);And when running our application in the emulator or physical device:
Conclusions
In this entry we took the first steps with the RecyclerView and CardView available in the latest versions of Android and in later ones through the Support Library; we could see that the operation and implementation are very similar to what we are used to with the GridView and ListView; in subsequent entries we will see how simple it is to implement other functionalities to the RecyclerView and CardView such as swipe and some simple animations to hide sections of the CardView.
In a previous entry we talked a little about the future (and present) of Kotlin in the world of Android application development using this programming language that is gradually trying to replace Java as the primary and official language in the development of Android applications; one of the reasons that are exposed in that entry that you can consult, is the simplification of the different elements that we can develop, an example of this is the development of the RecyclerView of an adapter as we will see below.
To give continuity and support to some of the arguments made in the previous entry, today we will see how to make a simple list of elements using a RecyclerView using purely Kotlin as a programming language; that is, no Java.
RecyclerView in Android with Kotlin: Same approach, events, classes but different syntax
The classes to be used to create a list with RecyclerView with Kotlin will be the same ones used for the development of a Recyclerview using Java. the model class, adapter and of course the activity, we will also need a couple of layouts; one for the activity and another for the list that would be our RecyclerView.
The model class of our adapter
Here we must define the class or model that will define our object, if it is a person, if it is a car, if it is a computer or in this case we define an Item class that will have an identifier and a description that would be the simplest things we can define:
data class Item(val id: Long, val title: String, val description: String)The main Activity: the one that implements the Adapter
A novelty that Kotlin has with respect to Java is that by means of the name of the identifier of the element in the layout; (for example android:id="@+id/rv_item" to define the identifier of the RecyclerView in the layout of our activity) is enough to reference in the activity or class that establishes the content of said view, and therefore in Kotlin it is no longer necessary to establish the value of said variables as is done in Java-Android; this is achieved through a plugin/include that is imported at the time of making the reference and automatically by Android Studio (import kotlinx.android.synthetic.main.activity_main.*):
RecyclerView rv_item = (RecyclerView) findViewById(R.id.rv_item);Although we can also do the classic version that we use in Android with Java; finally the code of the Activity:
import android.content.Context
import android.os.Bundle
import androidx.appcompat.app.AppCompatActivity
import androidx.recyclerview.widget.LinearLayoutManager
import android.widget.Toast
import kotlinx.android.synthetic.main.activity_main.*
import mykotlin.dl.recyclerview.recyclerviewkotlin.adapter.ItemAdapter
import mykotlin.dl.recyclerview.recyclerviewkotlin.model.Item
import kotlin.dl.recyclerview.recyclerviewkotlin.R
class MainActivity : AppCompatActivity() {
   override fun onCreate(savedInstanceState: Bundle?) {
       super.onCreate(savedInstanceState)
       setContentView(R.layout.activity_main)
       val items =  getLists()
       rv_item.layoutManager = androidx.recyclerview.widget.LinearLayoutManager(this)
       rv_item.hasFixedSize()
       rv_item.adapter = ItemAdapter(items)
       rv_item.layoutManager = androidx.recyclerview.widget.LinearLayoutManager(this)
       rv_item.adapter = ItemAdapter(items)
   }
   fun getLists(): ArrayList<Item> {
       var lists = ArrayList<Item>()
       lists.add(Item(1, "Item 1", "Description 1"))
       lists.add(Item(1, "Item 2", "Description 2"))
       lists.add(Item(1, "Item 3", "Description 3"))
       lists.add(Item(1, "Item 4", "Description 4"))
       return lists;
   }
}
The previous activity is in charge of defining the type of layout (which in this case will be a ListView type list) and of populating (filling) an ArrayList of type Item with some test data and of course, creating an instance of the adapter that will create the list that we define in the following block within this entry.
The adapter class: Defines the logic and behavior of the RecyclerView
The adapter class, which is responsible for defining the behavior and style of each of the components of the list, as we can see, the same naming is used to override each of the functions inherited from the `RecyclerView.Adapter` class; again we use the name of the items of each element defined in the view without needing to reference them first (eg: `itemView.tv_description` with the auto-generated import from the IDE `import kotlinx.android.synthetic.main.adapter_item.view.*`):
import androidx.recyclerview.widget.RecyclerView
import android.view.LayoutInflater
import android.view.View
import android.view.ViewGroup
import kotlinx.android.synthetic.main.adapter_item.view.*
import kotlin.dl.recyclerview.recyclerviewkotlin.R
import mykotlin.dl.recyclerview.recyclerviewkotlin.model.Item
class ItemAdapter  (val userList: ArrayList<Item>) : androidx.recyclerview.widget.RecyclerView.Adapter<ItemAdapter.ViewHolder>() {

   override fun onCreateViewHolder(parent: ViewGroup, viewType: Int): ViewHolder {
       val v = LayoutInflater.from(parent.context).inflate(R.layout.adapter_item, parent, false)
       return ViewHolder(v)
   }

   override fun onBindViewHolder(holder: ViewHolder, position: Int) {
       holder.bindItems(userList[position])
   }

   override fun getItemCount(): Int {
       return userList.size
   }

   class ViewHolder(itemView: View) : androidx.recyclerview.widget.RecyclerView.ViewHolder(itemView) {
       fun bindItems(item: Item) {
           itemView.tv_title.text=item.title
           itemView.tv_description.text=item.description
       }
.
   }
}
We override the usual methods, onBindViewHolder to return the current item getItemCount to return the size of the collection of objects onCreateViewHolder to specify the layout of our list as well as compose the view and finally the `ViewHolder` class that allows you to define each of the composite elements in our layout and specify its content and of course the constructor method where we initialize the fundamental components or those that we require.
The layout of our activity
As for the layouts, they remain exactly the same as we use in Java-Android; more than that there is not much to say, from our activity we specify a RecyclerView element and the other layout is the one specified by our list:
<?xml version="1.0" encoding="utf-8"?>
<androidx.constraintlayout.widget.ConstraintLayout xmlns:android="http://schemas.android.com/apk/res/android"
   xmlns:app="http://schemas.android.com/apk/res-auto"
   xmlns:tools="http://schemas.android.com/tools"
   android:layout_width="match_parent"
   android:layout_height="match_parent"
   tools:context="mykotlin.dl.recyclerview.recyclerviewkotlin.MainActivity">
   <androidx.recyclerview.widget.RecyclerView
       android:layout_width="match_parent"
       android:id="@+id/rv_item"
       android:layout_height="wrap_content">
   </androidx.recyclerview.widget.RecyclerView>
</androidx.constraintlayout.widget.ConstraintLayout>
Our list layout
<?xml version="1.0" encoding="utf-8"?>
<LinearLayout xmlns:android="http://schemas.android.com/apk/res/android"
   android:layout_width="match_parent"
   android:layout_height="wrap_content"
   android:orientation="vertical">
   <TextView
       android:id="@+id/tv_title"
       android:layout_width="match_parent"
       android:layout_height="wrap_content" />
   <TextView
       android:id="@+id/tv_description"
       android:layout_width="match_parent"
       android:layout_height="wrap_content" />
</LinearLayout>
As we can see, the logic used is the same as we use with Java, I invite you to review some of the previous entries that are listed at the end of this entry and compare them with these to see the similarity that exists between them.
Finally, we get a list like this:
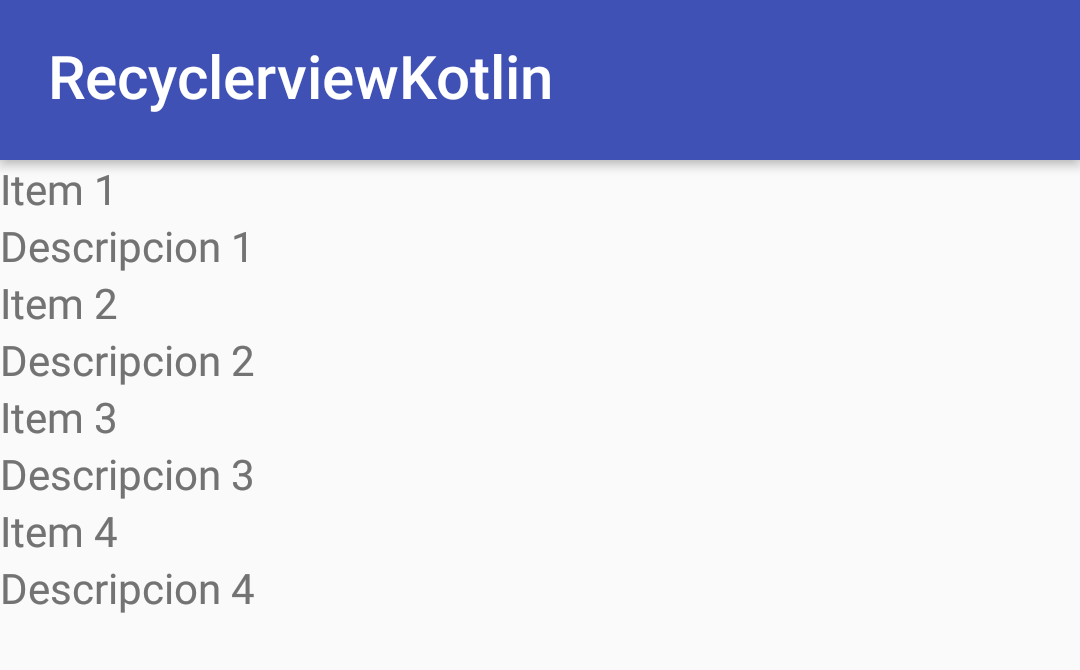
You can give it the style you want by modifying the layout or the style XML as you prefer, to give it the design to your liking; the idea in this entry was to show how to create a RecyclerView using purely Kotlin as a programming language and not focus on the design.
Conclusion
As we can see, Kotlin is a complete language that allows us to develop applications in Android more easily (at least in terms of syntax) than with Java.
Creating a filter for RecycleView in Android
In this entry we will see how to create a filter for our RecycleView; in a previous entry we saw how to create lists through lists and grids with the RecycleView, today we will see the same process but with an extra which consists of creating a filter for the previous list through (logically) a search field with a simple EditText.
In our adapter we will create an extra class that we will call CustomFilter that will look like this:
public class CustomFilter extends Filter {
        private ListAdapter listAdapter;
        private CustomFilter(ListAdapter listAdapter) {
            super();
            this.listAdapter = listAdapter;
        }
        @Override
        protected FilterResults performFiltering(CharSequence constraint) {
            personsFilter.clear();
            final FilterResults results = new FilterResults();
            if (constraint.length() == 0) {
                personsFilter.addAll(persons);
            } else {
                final String filterPattern = constraint.toString().toLowerCase().trim();
                for (final Person person : persons) {
                    if (person.getName().toLowerCase().contains(filterPattern)) {
                        personsFilter.add(person);
                    }
                }
            }
            results.values = personsFilter;
            results.count = personsFilter.size();
            return results;
        }
        @Override
        protected void publishResults(CharSequence constraint, FilterResults results) {
            this.listAdapter.notifyDataSetChanged();
        }
    }
In addition to adding an implements to implement the Filterable class in our Adapter:
public class ListAdapter extends androidx.recyclerview.widget.RecyclerView.Adapter<ListAdapter.ViewHolder> implements Filterable {
private ArrayList<Person> persons;
private ArrayList<Person> personsFilter;
private CustomFilter mFilter;
...
}
public ListAdapter(ArrayList<Person> persons) {
this.persons = persons;
this.personsFilter = new ArrayList<>();
this.personsFilter.addAll(persons);
this.mFilter = new CustomFilter(ListAdapter.this);
}In our adapter and the associated getFilter method that we override:
@Override
public Filter getFilter() {
    return mFilter;
}
A small detail that we have to do in our adapter is to create another list which contains the data filtered by the user and another list that contains the total of the data that makes up our list without applying any filter; taking this into account our constructor and as well as other control methods will be defined as follows:
// Constructor
public ListAdapter(ArrayList<Person> persons) {
	this.persons = persons;
	this.personsFilter = new ArrayList<>();
	this.personsFilter.addAll(persons);
	this.mFilter = new CustomFilter(ListAdapter.this);
}
...
@Override
public int getItemCount() {
	return personsFilter.size();
}
...
@Override
public void onBindViewHolder(ViewHolder viewHolder, final int position) {
	viewHolder.nameTextView.setText(personsFilter.get(position).getName());
	viewHolder.descriptionTextView.setText(personsFilter.get(position).getDescription());
	viewHolder.colorLl.setBackgroundColor(Color.parseColor(personsFilter.get(position).getColor()));
}
As you can see we use the filterable ArrayList instead of the complete ArrayList.
We have the adapter ready, now we need to configure the search field in our activity or fragment to be able to filter our list and the associated events; for this we will use an EditText as we commented previously:
etSearchBox = (EditText) findViewById(R.id.etSearchBox);And the listener event that is activated when entering/removing text on it:
etSearchBox.addTextChangedListener(new TextWatcher() {
    @Override
    public void beforeTextChanged(CharSequence s, int start, int count, int after) {
    }
    @Override
    public void onTextChanged(CharSequence s, int start, int before, int count) {
        listAdapter.getFilter().filter(s.toString());
    }
    @Override
    public void afterTextChanged(Editable s) {
    }
});
As you can see, when the text changes, the filter method is invoked, passing the text to be filtered as a parameter.
You can specify the functioning of the filter in the CustomFilter class of the adapter, defining the behavior at the time the personsFilter is filled by making the comparison:
if (person.getName().toLowerCase().contains(filterPattern))In our case, we are interested in it NOT being sensitive to upper/lower case and that it contains (contains) the keyword or section and in this way have a fairly flexible filter, but you can express it as you wish.
The next step: The Snackbar in Android Studio