
In Android development, the ability to create modular and reusable user interfaces has always been a fundamental pillar. For many years, Fragments were the main solution for this purpose. They allowed us to see them as an independent "piece of interface," with their own lifecycle, which we could reuse in different activities. However, the Android ecosystem has evolved significantly, and with the arrival of Jetpack Compose, the paradigm has completely changed.
This article, originally written in 2013, explained how to nest Fragments to solve problems of component persistence in the UI. Today, we update that knowledge to show how Jetpack Compose not only simplifies this challenge, but solves it in a more elegant and intuitive way, making the Fragments approach considered Legacy.
The Original Problem: A Persistent Component
Let's recall the original scenario: an application with an audio player. The goal is for this player to remain visible and functional while the user navigates through different screens of the application. If the user is listening to a song, it should not stop or restart when changing screens.
In the old approach based on Views and Fragments, this was complex. It required the player component to be in the main Activity and to carefully manage the lifecycle of the Fragments so as not to destroy the player's state. Communication between the player and the different fragments was verbose and prone to errors.
The Modern Solution: Jetpack Compose and State Hoisting
Jetpack Compose is a modern declarative toolkit for building native UI. Instead of manipulating views through XML and imperative code, you simply describe what your UI should look like at a given moment, and Compose takes care of updating it when the data changes.
The fundamental unit in Compose is a function annotated with @Composable. These functions are, by definition, modular and reusable. The concept of "nesting" UI components is intrinsic to Compose.
To solve our player problem, we use a pattern called state hoisting. Instead of each screen (or fragment, in the old world) managing its own state, we "hoist" the important state to a common ancestor. In modern architectures, this ancestor is typically a ViewModel.
// First, we define the state of our player
data class PlayerUiState(
    val currentSong: String? = null,
    val isPlaying: Boolean = false
)

// Then, a ViewModel to manage that state
class PlayerViewModel : ViewModel() {
    private val _uiState = MutableStateFlow(PlayerUiState())
    val uiState: StateFlow<PlayerUiState> = _uiState.asStateFlow()

    fun onPlayPause() {
        _uiState.update { it.copy(isPlaying = !it.isPlaying) }
    }

    fun onSongSelected(song: String) {
        _uiState.update { it.copy(currentSong = song, isPlaying = true) }
    }
}
Building the Modular UI with Composables
With the state centralized, our UI becomes a reflection of that state. The main structure of the application no longer needs FrameLayouts to swap Fragments. Instead, we use a Scaffold and a NavHost from Navigation Compose.
The key is to place the player's Composable outside the NavHost. This way, the player is not affected by navigation between screens.
@Composable
fun MainScreen(playerViewModel: PlayerViewModel = viewModel()) {
// We observe the state of the ViewModel
val playerState by playerViewModel.uiState.collectAsState()
val navController = rememberNavController()
Scaffold(
bottomBar = {
// The player is placed in the bottom bar and is only shown if there is a song
if (playerState.currentSong != null) {
PlayerUI(
songName = playerState.currentSong!!,
isPlaying = playerState.isPlaying,
onPlayPause = { playerViewModel.onPlayPause() }
)
}
}
) { paddingValues ->
// The NavHost manages the "screens" that are displayed in the content area
NavHost(
navController = navController,
startDestination = "home",
modifier = Modifier.padding(paddingValues)
) {
composable("home") {
HomeScreen(
onSongClicked = { song ->
playerViewModel.onSongSelected(song)
}
)
}
composable("profile") {
ProfileScreen()
}
// ... other screens
}
}
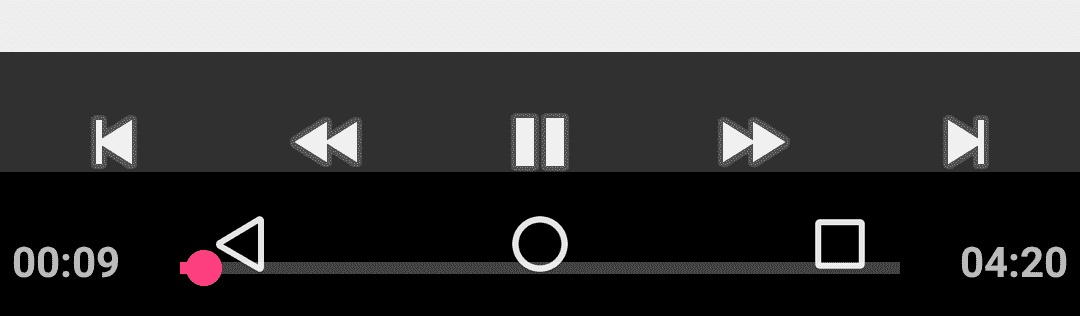
}The PlayerUI is a simple Composable that is only responsible for displaying the information and notifying of click events.
@Composable
fun PlayerUI(songName: String, isPlaying: Boolean, onPlayPause: () -> Unit) {
    Row(
        modifier = Modifier
            .fillMaxWidth()
            .background(MaterialTheme.colorScheme.primaryContainer)
            .padding(16.dp),
        verticalAlignment = Alignment.CenterVertically
    ) {
        Text(text = songName, modifier = Modifier.weight(1f))
        IconButton(onClick = onPlayPause) {
            Icon(
                imageVector = if (isPlaying) Icons.Default.Pause else Icons.Default.PlayArrow,
                contentDescription = "Play/Pause"
            )
        }
    }
}
From RecyclerView to LazyColumn
The original article used a RecyclerView to display lists. In Compose, the modern and much simpler equivalent is LazyColumn. For our main screen (HomeScreen), we can display a list of songs. When we click on one, we simply call the ViewModel's function.
@Composable
fun HomeScreen(onSongClicked: (String) -> Unit) {
    val songs = listOf("Song 1", "Song 2", "Song 3", "Song 4")

    LazyColumn(contentPadding = PaddingValues(16.dp)) {
        items(songs) { song ->
            Text(
                text = song,
                modifier = Modifier
                    .fillMaxWidth()
                    .clickable { onSongClicked(song) }
                    .padding(16.dp)
            )
        }
    }
}
As you can see, there are no adapters, no ViewHolders, and no FragmentTransactions. Clicking on a list item directly invokes the logic in the ViewModel, the state is updated, and the UI (both HomeScreen and PlayerUI) "reacts" to that change automatically.
Conclusion: The Simplicity of the Declarative
The approach has changed radically. We have gone from manually managing Fragment transactions and complex lifecycles to simply declaring what our UI should be based on a centralized state.
Although Fragment technology still exists and is necessary to interoperate with old views or in large projects undergoing migration (the Legacy approach), for any new development in Android, Jetpack Compose is the recommended and modern way to build interfaces. Modularity is no longer something that is achieved through a component like Fragment, but an inherent feature of the UI design system itself.
Fragments the - XML way (Legacy)
I leave you here, the legacy way that was replaced by what was initially commented on in the article.
Fragments in Android are a fundamental element that allows us to reuse components in Android with relative ease; we can see fragments as a piece of interface independent of other fragments and therefore they are highly recommended when we want to develop in Android.
What may not be so clear is that within fragments we can create or embed other fragments, taking this to a second level, and although at first it may sound crazy, this can actually solve some very specific problems that may arise.
Suppose we have a component that is tied to our activity, which is the first instance that embeds our fragments. Suppose that said component tied to our activity has to be visible throughout the application and that obviously the application has many screens like the ones presented in the following image:
As you can see, one of those screens corresponds to multiple fragments within it and depending on the user's dynamics, they will go from one screen to another at their own will.
Let's give our example component a name, suppose the component is an audio player:
Which is a component that we can embed within our activity, which if destroyed or recreated, the player will be affected by the same situation, which is not beneficial, since the idea would be for the user to continue listening to the same music without it stopping if they decide to move from one screen to another in the application, and here is a good opportunity to use fragments that include other fragments; for example, fragment 1 that we will call Container1Fragment includes other fragments as we can see below:
View v = inflater.inflate(R.layout.fragment_container1, container, false);
FragmentManager fragmentManager = getActivity().getSupportFragmentManager();
fragmentManager.beginTransaction().replace(R.id.flGeneros, new RecyclerViewGenerosFragmentView()).commit();
Bundle bundle = new Bundle();
bundle.putInt("fragment_id", 1);
RecyclerViewArtistasFragmentView recyclerViewArtistasFragmentView = new RecyclerViewArtistasFragmentView();
recyclerViewArtistasFragmentView.setArguments(bundle);
fragmentManager = getActivity().getSupportFragmentManager();
fragmentManager.beginTransaction().replace(R.id.flArtistas, recyclerViewArtistasFragmentView).commit();
bundle = new Bundle();
bundle.putInt("fragment_id", 2);
RecyclerViewArtistasFragmentView recyclerViewArtistasFragmentViewTop = new RecyclerViewArtistasFragmentView();
recyclerViewArtistasFragmentViewTop.setArguments(bundle);
fragmentManager = getActivity().getSupportFragmentManager();
fragmentManager.beginTransaction().replace(R.id.flArtistasTop, recyclerViewArtistasFragmentViewTop).commit();
bundle = new Bundle();
bundle.putInt("id", 13);
bundle.putString("nombre", "");
bundle.putInt("tipo", 3);
bundle.putString("imagen", "");
RecyclerViewCancionesFragmentView recyclerViewCancionesFragmentViewLista = new RecyclerViewCancionesFragmentView();
recyclerViewCancionesFragmentViewLista.setArguments(bundle);
fragmentManager = getActivity().getSupportFragmentManager();
fragmentManager.beginTransaction().replace(R.id.flCancionesLista, recyclerViewCancionesFragmentViewLista).commit();
Let's not worry too much about the Bundle parameters, the goal is to grasp the idea which is to embed one fragment inside another fragment; the view for this fragment is as follows:
<?xml version="1.0" encoding="utf-8"?>
<LinearLayout xmlns:android="http://schemas.android.com/apk/res/android"
   android:id="@+id/llContainer1"
   android:layout_width="match_parent"
   android:layout_height="wrap_content"
   android:background="#EEEEEE"
   android:orientation="vertical">
   <TextView
       style="@style/TextViewClasic"
       android:text="@string/tgeneros" />
   <FrameLayout
       android:id="@+id/flGeneros"
       android:layout_width="match_parent"
       android:layout_height="wrap_content"
       android:orientation="vertical"></FrameLayout>
   <TextView
       style="@style/TextViewClasic"
       android:text="@string/tartistas" />
   <FrameLayout
       android:id="@+id/flArtistas"
       android:layout_width="match_parent"
       android:layout_height="wrap_content"
       android:orientation="vertical"></FrameLayout>
   <LinearLayout
       android:layout_width="match_parent"
       android:layout_height="1dp"
       android:background="#CCCCCC"></LinearLayout>
   <TextView
       style="@style/TextViewClasic"
       android:text="@string/ttop" />
   <FrameLayout
       android:id="@+id/flArtistasTop"
       android:layout_width="match_parent"
       android:layout_height="wrap_content"
       android:orientation="vertical"></FrameLayout>
   <TextView
       style="@style/TextViewClasic"
       android:text="@string/cttop" />
   <FrameLayout
       android:id="@+id/flCancionesLista"
       android:layout_width="match_parent"
       android:layout_height="match_parent"
       android:orientation="vertical"></FrameLayout>
</LinearLayout>
As we can see, we have some guide tags and the main thing which are the FrameLayout tags to include the fragments shown above from the java code.
Now let's see the content of one of the fragments that we will include in Container1Fragment:
public class RecyclerViewCancionesFragmentView extends Fragment {
...
public View onCreateView(LayoutInflater inflater, ViewGroup container, Bundle savedInstanceState) {
    id = getArguments().getInt("id");
    tipo = getArguments().getInt("tipo");
    imagen = getArguments().getString("imagen");
    nombre = getArguments().getString("nombre");
    descripcion = getArguments().getString("descripcion");
    View v;
        v = inflater.inflate(R.layout.fragment_canciones, container, false);
    rvData = (RecyclerView) v.findViewById(R.id.rvData);
    tvIdentificador = (TextView) v.findViewById(R.id.tvIdentificador);
    init();
    return v;
}
...
}
As we can see, these last fragments or the last level (second level) of fragments, is the one we actually use to interact with the user, specifically (or for this example) we create a list through the RecyclerView but it can do any other thing like reading a QR code, a webview etc.
In our main activity, which is the one that will include our component (for example the player) among other things, we do the following:
...
FragmentManager fragmentManager = getSupportFragmentManager();
container1Fragment = new Container1Fragment();
fragmentManager.beginTransaction().replace(R.id.frameLayout, container1Fragment).commit();
...
Although we can include all the fragments we want here, in our case, to not complicate the experiment and the general idea of this post too much, we only include one, which is our Container1Fragment.
The view or layout of our activity is as follows:
<LinearLayout
   android:id="@+id/llParent"
   android:layout_width="match_parent"
   android:layout_height="wrap_content"
   android:layout_margin="0dp"
   android:background="#EEEEEE"
   android:orientation="vertical"
   android:padding="0dp">
   <FrameLayout
       android:id="@+id/frameLayout"
       android:layout_width="match_parent"
       android:layout_height="wrap_content"
       android:layout_marginBottom="200px"
       android:layout_marginLeft="10dp"
       android:layout_marginRight="10dp"
       android:orientation="vertical"></FrameLayout>
   <LinearLayout
       android:id="@+id/llContainerR"
       android:layout_width="match_parent"
       android:layout_height="wrap_content"
       android:layout_gravity="bottom"
       android:orientation="vertical"
       android:textAppearance="@style/TextAppearance.AppCompat.Body1" />
</LinearLayout>
Now, to vary the content of each fragment (first level) or replace some according to the action taken by the user for this experiment, in our case we use Adapters, that is, our experiment is composed of pure lists and when the user clicks (touches one of the list items) an event is executed which updates the entire screen (replaces the content of Container1Fragment for example) shows another fragment or set of embedded fragments or anything else we want depending on our needs; in this example, the click event replaces the content of the main fragment, that is Container1Fragment:
...
artistaViewHolder.llContainer.setOnClickListener(new View.OnClickListener() {
    @Override
    public void onClick(View v) {
        Bundle bundle = new Bundle();
        bundle.putInt("id", artista.getArtista_id());
        bundle.putInt("album_id", 0);
        bundle.putInt("tipo", 1);
        bundle.putString("imagen", artista.getImagen_url());
        bundle.putString("nombre", artista.getNombre());
        Container2Fragment container2Fragment = new Container2Fragment();
        container2Fragment.setArguments(bundle);
        FragmentManager fragmentManager = ((FragmentActivity) activity).getSupportFragmentManager();
        fragmentManager.beginTransaction().replace(R.id.frameLayout, container2Fragment).addToBackStack(NULL).commit();
    }
});
...
The rest of the adapter's code is traditional (initialization of variables and layouts and little else); as we can see, through the adapter's click method we replace the Container1Fragment with Container2Fragment, which in effect is to replace the entire content of a window with other content.
Therefore, we only maintain a single activity but we can easily vary the screens of the same with the fragments that the activity embeds and with the fragments embedded by other fragments, and in this way we guarantee that our activity will not be destroyed while the user navigates through the application and neither will our component or music player as the case may be.